centos7安装elasticsearch6.3.x集群并破解安装x-pack
一、环境信息及安装前准备
主机角色(内存不要小于1G):

软件及版本(百度网盘链接地址和密码:链接: https://pan.baidu.com/s/17bYc8MRw54GWCQCXR6pKjg 提取码: f6w8) #如果失效可以发送邮件到13693200275@163.com

部署前操作:
关闭防火墙,关闭selinux(生产环境按需关闭或打开)

同步服务器时间,选择公网ntpd服务器或者自建ntpd服务器
二、ES集群安装配置
1.安装jvm依赖环境(其他节点相同操作)
[root@es-node1 ~]# rpm -ivh jdk-8u25-x64.rpm

Preparing...                ########################################### [%]

   :jdk1..0_181           ########################################### [%]
设置Java环境
[root@es-node- ~]# cat /etc/profile.d/java.sh  #编辑java环境变量配置文件

export JAVA_HOME=/usr/java/latest

export CLASSPATH=$JAVA_HOME/lib/tools.jar

export PATH=$JAVA_HOME/bin:$PATH

[root@es-node- ~]# . /etc/profile.d/java.sh

[root@es-node- ~]# java -version  #检查版本

java version "1.8.0_181"

Java(TM) SE Runtime Environment (build 1.8.0_181-b13)

Java HotSpot(TM) -Bit Server VM (build 25.181-b13, mixed mode)
2.安装及配置elasticsearch
#关闭新邮件提示(重新登录生效),很烦..........

[root@es-node1 ~]# echo "unset MAILCHECK">> /etc/profile

#解压elastic到/usr/local下

[root@es-node1 ~]# tar xf elasticsearch-6.3..tar.gz -C /usr/local/

[root@es-node1 ~]# cd /usr/local/

[root@es-node1 local]# ln -sv elasticsearch-6.3./ elasticsearch

"elasticsearch" -> "elasticsearch-6.3.2/"

[root@es-node1 local]# cd elasticsearch/config/

#配置JVM参数,最大不要超过32G,并且留一半内存给操作系统

[root@es-node1 config]# vim jvm.options

-Xms400m

-Xmx400m

#配置elastic信息,其他节点需要修改node.name和network.host的值

[root@es-node1 config]# cp elasticsearch.yml elasticsearch.yml-bak

[root@es-node1 config]# vim elasticsearch.yml

[root@es-node1 config]# grep  "^[a-z]"  elasticsearch.yml

cluster.name: my-app

node.name: node-1.107

path.data: /Data/es/data

path.logs: /Data/es/logs

bootstrap.memory_lock: true

network.host: 192.168.1.107

http.port:

discovery.zen.ping.unicast.hosts: ["192.168.1.107", "192.168.1.108","192.168.1.109"]

discovery.zen.minimum_master_nodes:
设置打开文件描述符、进程数、内存限制
[root@es-node1 config]# vim /etc/security/limits.conf

* soft nofile

* hard nofile

* soft nproc

* hard nproc

* soft memlock unlimited

* hard memlock unlimited
配置内核参数
[root@es-node1 config]# vim /usr/lib/sysctl.d/-default.conf

vm.max_map_count=

net.ipv6.conf.all.disable_ipv6 =

net.ipv6.conf.default.disable_ipv6 =

[root@es-node1 config]# sysctl -p  #此命令可能不生效,可以重启使配置生效
创建elastic用户
[root@es-node1 ~]# useradd elastic

[root@es-node1 ~]# echo "" |passwd --stdin elastic
创建相关目录及授权
[root@es-node1 ~]# mkdir -pv /Data/es/

mkdir: 已创建目录 "/Data"

mkdir: 已创建目录 "/Data/es/"
[root@es-node1 ~]# chown -R elastic:elastic /Data/es/

[root@es-node1 ~]# chown -R elastic:elastic /usr/local/elasticsearch-6.3./

#退出,重新登录(可以的话最好重启服务器,发现有些参数不重启不生效)

[root@es-node1 config]# exit
切换用户并启动服务
[root@es-node1 ~]# su - elastic

[elastic@es-node1 ~]$ cd /usr/local/elasticsearch

[elastic@es-node1 elasticsearch]$ nohup ./bin/elasticsearch > /tmp/elastic.log & #或者添加 -d/--daemonize 参数后台运行,日志文件在path.logs指定的目录下

[]

[elastic@es-node1 elasticsearch]$ nohup: 忽略输入重定向错误到标准输出端

[elastic@es-node1 elasticsearch]$ tailf /tmp/elastic.log

通过屏幕输出可以看到服务启动并通过自动发现方式添加集群内其他节点,并且node-1.107被选举为master
检查服务是否正常
[elastic@es-node1 elasticsearch]$ netstat -tnlp

Proto Recv-Q Send-Q Local Address           Foreign Address         State       PID/Program name

tcp               192.168.1.107:      0.0.0.0:*               LISTEN      /java    #9200是http协议的RESTful接口

tcp               192.168.1.107:      0.0.0.0:*               LISTEN      /java    #9300是tcp通讯端口,集群间和TCPClient都走的它

tcp               0.0.0.0:              0.0.0.0:*               LISTEN      -

tcp6              :::                   :::*                    LISTEN      -
[elastic@es-node1 elasticsearch]$ curl http://192.168.1.107:9200

{

  "name" : "node-1.107",

  "cluster_name" : "my-app",

  "cluster_uuid" : "Zk1xQhbyRlS6r99uAfk51Q",

  "version" : {

    "number" : "6.3.2",

    "build_flavor" : "default",

    "build_type" : "tar",

    "build_hash" : "053779d",

    "build_date" : "2018-07-20T05:20:23.451332Z",

    "build_snapshot" : false,

    "lucene_version" : "7.3.1",

    "minimum_wire_compatibility_version" : "5.6.0",

    "minimum_index_compatibility_version" : "5.0.0"

  },

  "tagline" : "You Know, for Search"

}
三、安装配置kibana
[root@kb-node1 ~]# tar xf kibana-6.3.2-linux-x86_64.tar.gz -C /usr/local/
[root@kb-node1 ~]# cd /usr/local/
[root@kb-node1 local]# ln -sv kibana-6.3.2-linux-x86_64/ kibana
"kibana" -> "kibana-6.3.2-linux-x86_64/"
[root@kb-node1 local]# cd kibana
[root@kb-node1 kibana]# vim config/kibana.yml
[root@kb-node1 kibana]# grep "^[a-z]" config/kibana.yml
server.port: 5601 #监听的端口
server.host: "192.168.1.110" #监听的地址
elasticsearch.url: "http://192.168.1.107:9200" #elasticsearch访问的URL地址
[root@kb-node1 kibana]# ./bin/kibana & #启动服务

我们可以看到启动后服务监听的地址,访问这个URL
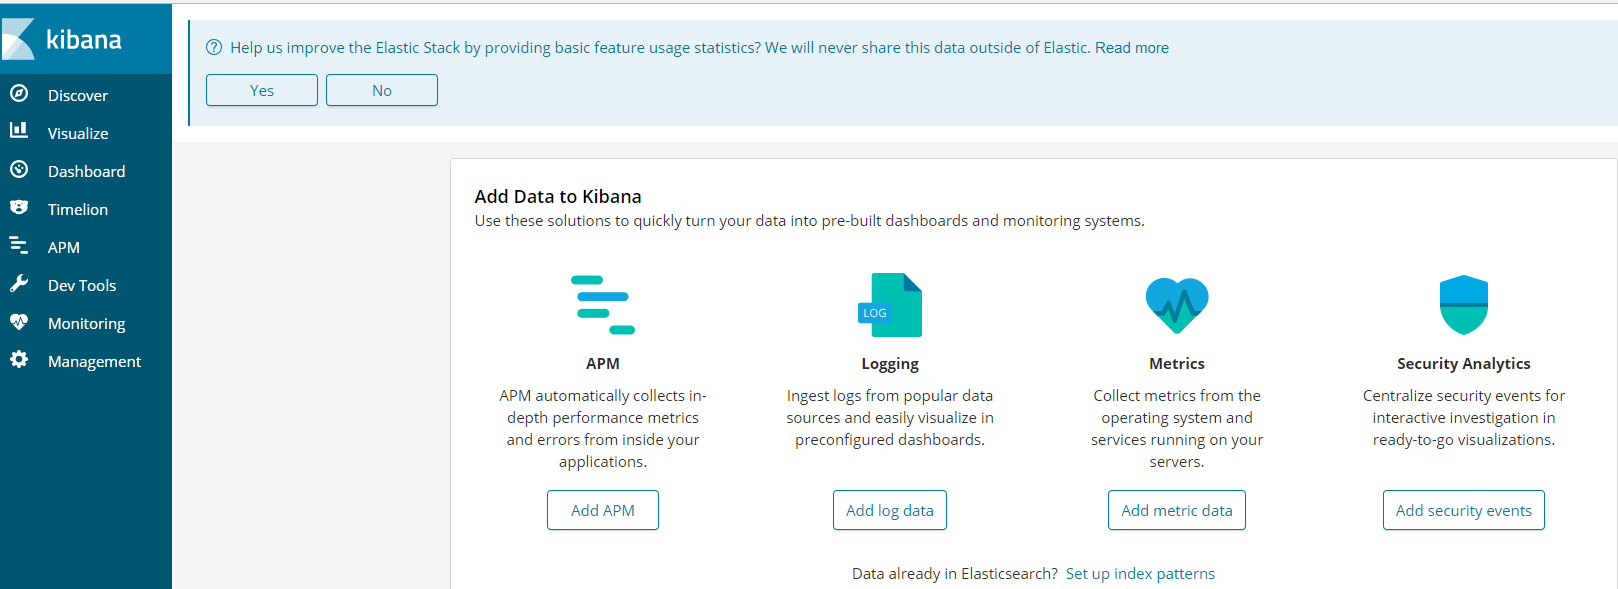
kibana主页面,大致意思就是告诉我们kibana可以做哪些事
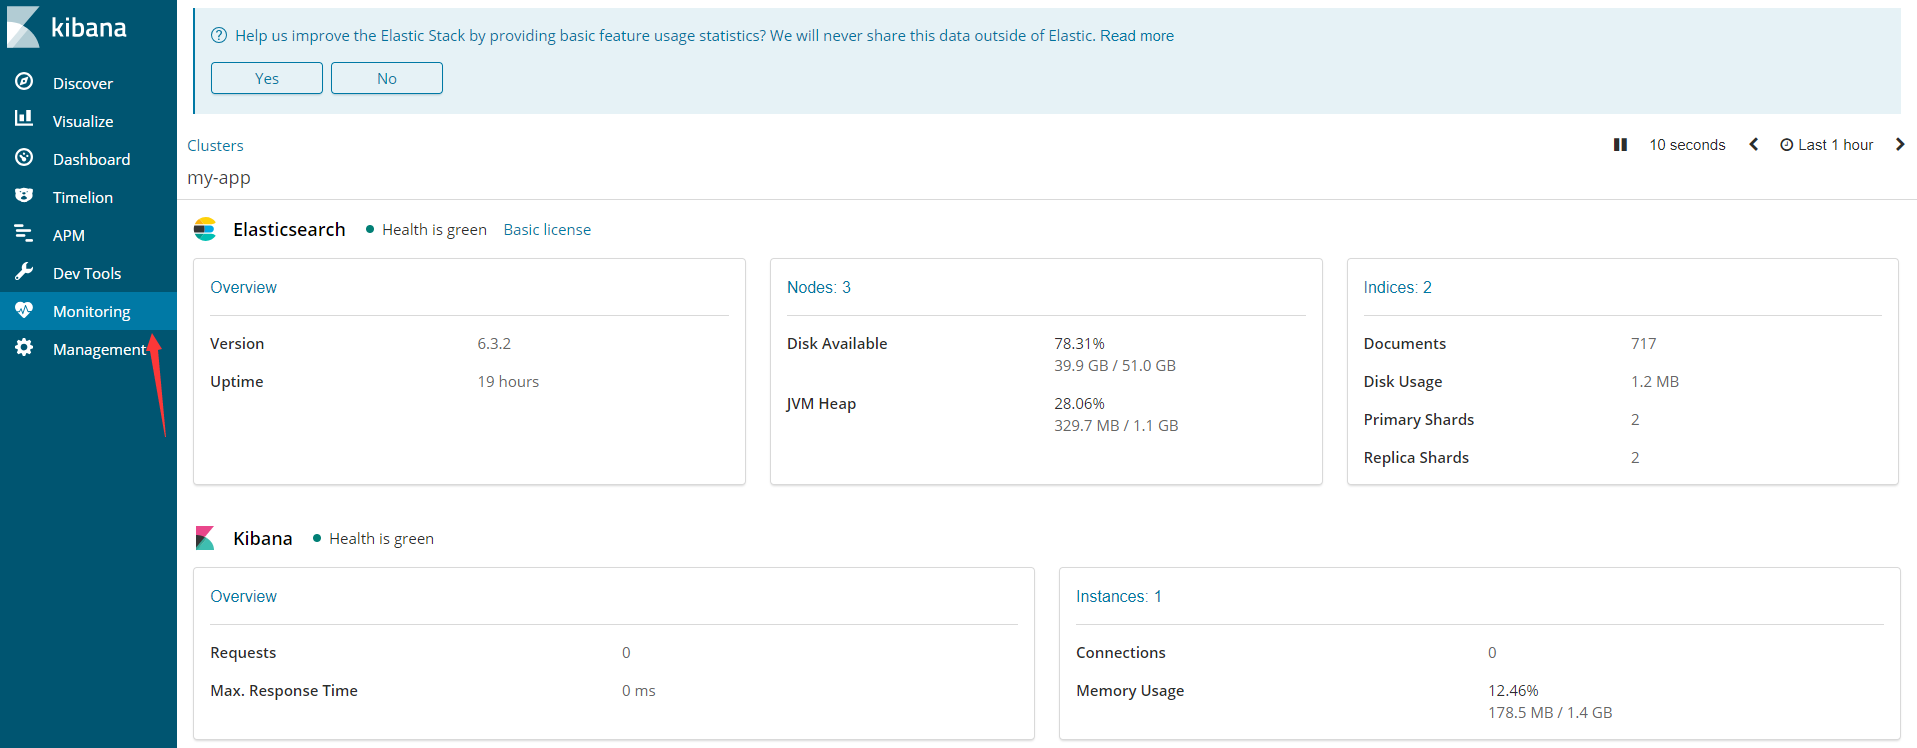
点击Monitoring标签可以开启监控设置,并且我们的license是basic版本的(即基础版)
四、安装破解版x-pack #本教程只供交流学习使用,切勿运用到商业用途。如有需要请购买官方正版授权
由于在elasticsearch在6.3版本之后x-pack是默认安装好的,所以不再需要用户自己去安装
1.替换x-pack包,并重启elasticsearch服务
[elastic@es-node1 elasticsearch]$ cd modules/x-pack/x-pack-core/
[elastic@es-node1 x-pack-core]$ ll x-pack-core-6.3.2.jar #用我们破解后的包进行替换
-rw-r--r-- 1 elastic elastic 1773114 8月 21 17:48 x-pack-core-6.3.2.jar
[elastic@es-node1 x-pack-core]$cd /usr/local/elasticsearch
[elastic@es-node1 elasticsearch]$ vim config/elasticsearch.yml
[elastic@es-node1 elasticsearch]$ tail -1 config/elasticsearch.yml
xpack.security.enabled: false #关闭x-pack
重启elasticsearch服务,并把license.json上传到服务器
[elastic@es-node1 elasticsearch]$ curl -XPUT -u elastic 'http://192.168.1.107:9200/_xpack/license' -H "Content-Type: application/json" -d @license.json

Enter host password for user 'elastic':    #密码为:change

{"acknowledged":true,"license_status":"valid"}
在kibana上查看license
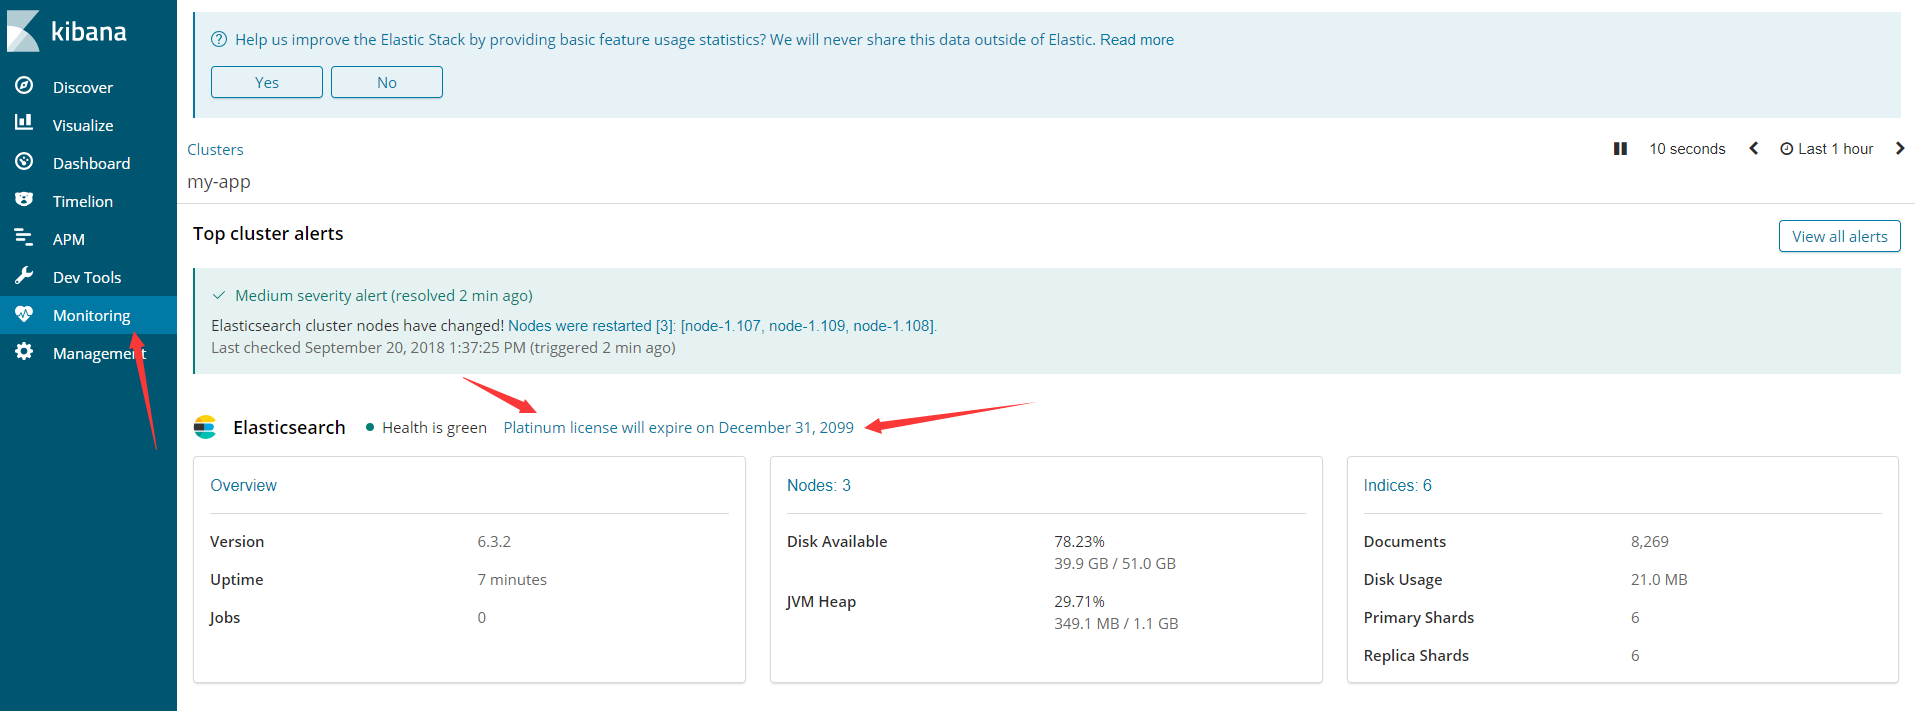
Platinum表示白金版 过期时间为2099 年12月31日,但是我们暂时还不能使用x-pack,因为白金版的x-pack需要SSL进行数据传输,所以我们需要先配置SSL
五、配置SSL并启用x-apck
1.创建证书
[elastic@es-node1 elasticsearch]$ cd /usr/local/elasticsearch/bin/

[elastic@es-node1 bin]$ ./elasticsearch-certgen

2.解压证书
[elastic@es-node1 bin]$ mkdir /tmp/cert

[elastic@es-node1 bin]$ mv cert.zip /tmp/cert/

[elastic@es-node1 bin]$ cd /tmp/cert/

[elastic@es-node1 cert]$ unzip cert.zip

Archive:  cert.zip

   creating: ca/

  inflating: ca/ca.crt

  inflating: ca/ca.key

   creating: elasticsearch/

  inflating: elasticsearch/elasticsearch.crt

  inflating: elasticsearch/elasticsearch.key

[elastic@es-node1 cert]$ ll

总用量

drwxrwxr-x  elastic elastic    9月   : ca

-rw-------  elastic elastic  9月   : cert.zip

drwxrwxr-x  elastic elastic    9月   : elasticsearch

[elastic@es-node1 cert]$ mv ca/* /usr/local/elasticsearch/config/

[elastic@es-node1 cert]$ mv elasticsearch/*  /usr/local/elasticsearch/config/

[elastic@es-node1 cert]$ cd /usr/local/elasticsearch/config/

[elastic@es-node1 config]$ ll -rct  #最后四个

总用量 48

-rw-rw---- 1 elastic elastic    0 9月  19 16:15 users_roles

-rw-rw---- 1 elastic elastic    0 9月  19 16:15 users

-rw-rw---- 1 elastic elastic  197 9月  19 16:15 roles.yml

-rw-rw---- 1 elastic elastic  473 9月  19 16:15 role_mapping.yml

-rw-rw---- 1 elastic elastic 6380 9月  19 16:15 log4j2.properties

-rw-rw---- 1 elastic elastic 2942 9月  19 16:15 jvm.options

-rw-r----- 1 elastic elastic 2853 9月  19 16:15 elasticsearch.yml-bak

-rw-rw---- 1 elastic elastic  207 9月  19 16:20 elasticsearch.keystore

-rw-rw---- 1 elastic elastic 2905 9月  20 13:27 elasticsearch.yml

-rw-rw-r-- 1 elastic elastic 1671 9月  20 13:57 ca.key

-rw-rw-r-- 1 elastic elastic 1200 9月  20 13:57 ca.crt

-rw-rw-r-- 1 elastic elastic 1675 9月  20 13:57 elasticsearch.key

-rw-rw-r-- 1 elastic elastic 1237 9月  20 13:57 elasticsearch.crt
将证书拷贝到其他节点,放入 usr/local/elasticsearch/config/ 目录下
[elastic@es-node1 config]$ scp *.crt  *.key  192.168.1.108:/usr/local/elasticsearch/config/

[elastic@es-node1 config]$ scp *.crt  *.key  192.168.1.109:/usr/local/elasticsearch/config/
3.配置SSL,其他节点相同配置
[elastic@es-node1 config]$ vim elasticsearch.yml
[elastic@es-node1 config]$ tail elasticsearch.yml
# ---------------------------------- Various -----------------------------------
#
# Require explicit names when deleting indices:
#
#action.destructive_requires_name: true
xpack.security.enabled: true #之前配置为false注意删除或者修改
xpack.security.transport.ssl.enabled: true
xpack.ssl.key: elasticsearch.key
xpack.ssl.certificate: elasticsearch.crt
xpack.ssl.certificate_authorities: ca.crt
重启elasticsearch服务

打开kibana web界面,发现无法登陆,并且无法使用用户名密码登录,下一步我们需要配置kibana使用用户名密码登录
4.创建elk集群相关用户
[elastic@es-node1 bin]$ ./elasticsearch-setup-passwords -h  #查看命令帮助

Sets the passwords for reserved users

Commands

--------

auto - Uses randomly generated passwords          #主要命令选项,表示系统将使用随机字符串设置密码

interactive - Uses passwords entered by a user    #主要命令选项,表示使用用户输入的字符串作为密码


Non-option arguments:

command

Option         Description

------         -----------

-h, --help     show help

-s, --silent   show minimal output

-v, --verbose  show verbose output

[elastic@es-node1 bin]$ ./elasticsearch-setup-passwords auto  #为了演示效果,这里我们使用系统自动创建

Initiating the setup of passwords for reserved users elastic,kibana,logstash_system,beats_system.

The passwords will be randomly generated and printed to the console.

Please confirm that you would like to continue [y/N]y     #选择y

Changed password for user kibana                   #kibana角色和密码

PASSWORD kibana = 4VXPRYIVibyAbjugK6Ok

Changed password for user logstash_system          #logstash角色和密码

PASSWORD logstash_system = 2m4uVdSzDzpt9OEmNin5

Changed password for user beats_system             #beast角色和密码

PASSWORD beats_system = O8VOzAaD3fO6bstCGDyQ

Changed password for user elastic                  #elasticsearch角色和密码

PASSWORD elastic = 1TWVMeN8tiBy917thUxq
#可以先将以上用户和密码保存下来,具体的用户介绍见最后
配置kibana添加elasticsearch用户认证
[root@kb-node1 ~]# vim /usr/local/kibana/config/kibana.yml

[root@kb-node1 ~]# grep "^elastic"  /usr/local/kibana/config/kibana.yml

elasticsearch.url: "http://192.168.1.107:9200"

elasticsearch.username: "elastic"

elasticsearch.password: "1TWVMeN8tiBy917thUxq"   #就是上一步创建的elastic的账号和密码
重启kibana,重启后打开kibana web页面

可以使用用户名和密码登录了(使用之前创建的用户名和密码登录即可),这里我们选择elastic用户登录

左下角可以看到我们的用户名,到此,我们所有的配置都已经完成了
#注:x-pack的内置用户

centos7安装elasticsearch6.3.x集群并破解安装x-pack的更多相关文章
- linux 搭建elk6.8.0集群并破解安装x-pack
一.环境信息以及安装前准备 1.组件介绍 *Filebeat是一个日志文件托运工具,在你的服务器上安装客户端后,filebeat会监控日志目录或者指定的日志文件,追踪读取这些文件(追踪文件的变化,不停 ...
- MongoDB ReplacaSet & Sharding集群安装 配置 和 非集群情况的安装 配置 -摘自网络
单台机器做sharding --单机配置集群服务(Sharding) --shard1_1 mongod --install --serviceName MongoDBServerShard1 --s ...
- websphere8 从安装到部署 测试集群应用程序 安装j2ee程序(非常详细)
目录1. 准备安装文件2. 安装Installation Manager3. 为Installation Manager指定安装资源库4. 创建部署管理器概要文件5. 创建定制概要文件并联合到部署管理 ...
- Spark新手入门——3.Spark集群(standalone模式)安装
主要包括以下三部分,本文为第三部分: 一. Scala环境准备 查看二. Hadoop集群(伪分布模式)安装 查看三. Spark集群(standalone模式)安装 Spark集群(standalo ...
- Hadoop集群搭建-04安装配置HDFS
Hadoop集群搭建-05安装配置YARN Hadoop集群搭建-04安装配置HDFS Hadoop集群搭建-03编译安装hadoop Hadoop集群搭建-02安装配置Zookeeper Hado ...
- Hadoop集群搭建-02安装配置Zookeeper
Hadoop集群搭建-05安装配置YARN Hadoop集群搭建-04安装配置HDFS Hadoop集群搭建-03编译安装hadoop Hadoop集群搭建-02安装配置Zookeeper Hado ...
- centos7安装redis-4.0.1集群
试验机操作系统:CentOS Linux release 7.2.1511 (Core) 本文的目的是教会大家快速搭建redis集群,完了再深入学习. 试问如果不上手试验,看的资料再多有个毛用? 下载 ...
- 大数据系列(5)——Hadoop集群MYSQL的安装
前言 有一段时间没写文章了,最近事情挺多的,现在咱们回归正题,经过前面四篇文章的介绍,已经通过VMware安装了Hadoop的集群环境,相关的两款软件VSFTP和SecureCRT也已经正常安装了. ...
- redis3.0 集群实战1 -- 安装和配置
本文主要是在centos7上安装和配置redis集群实战 参考: http://hot66hot.iteye.com/blog/2050676 集群教程: http://redisdoc.com/to ...
随机推荐
- UVa 10905 - Children's Game 排序,题目没有说输入是int 难度: 0
题目 https://uva.onlinejudge.org/index.php?option=com_onlinejudge&Itemid=8&page=show_problem&a ...
- day35-python 操作memcache二
Memcache常用命令 存储命令: set/add/replace/append/prepend/cas 获取命令: get/gets 其他命令: delete/stats.. add方法 添加一条 ...
- Python-接口自动化(一)
python基础知识(一) 一.python语言特点 1.易于学习:python有相对较少的关键字,结构简单,有一个明确定义的语法,学起来比较简单: 2.易于阅读:python代码定义的更清晰: 3. ...
- C语言与C++语言的强制类型转换格式区别
C语言:(类型)(表达式),其中类型的括号()必须带. C++语言:(类型)(表达式),其中类型的括号()跟进表达式选带.
- Android : 跟我学Binder --- (3) C程序示例
目录: Android : 跟我学Binder --- (1) 什么是Binder IPC?为何要使用Binder机制? Android : 跟我学Binder --- (2) AIDL分析及手动实现 ...
- linux 基础测试题
1. 什么是buffer和cache buffer (cpu→内存→磁盘,简称为写缓冲 ):当你网上观看视频且网络波动较大的时候,会发现弹出一个正在缓冲中,这个就是buffer. cache(磁盘→内 ...
- jmeter+jdk 环境搭建
1.安装jdk环境 https://jingyan.baidu.com/article/6dad5075d1dc40a123e36ea3.html 划上重点,,,如果发现java -version不 ...
- SharePoint REST API - 使用REST接口对列表设置自定义权限
博客地址:http://blog.csdn.net/FoxDave SharePoint网站.列表和列表项都属于SecurableObject类型.默认情况下,一个安全对象继承父级的权限.对一个对 ...
- 20165326 java实验四
20165326实验四-Android程序设计 一:Android Stuidio的安装测试 1.安装Android Stuidio 具体跟着教程走就行主要是配置的时候要选择下载SDK或手动配置,详细 ...
- C# 日志记录分级功能使用 按照日期,大小,或是单文件存储
本文将使用一个Nuget的一个组件库来实现一个简单强大的日志记录功能,包采用线程安全实现,所有的记录在后台完成,即使您在前台调用100万次方法,耗时也不过1000ms(具体时间依照电脑性能决定),支持 ...