WinSetupFromUSB – Install Windows XP from USB Flash Drive
http://myeeeguides.wordpress.com/2008/11/15/winsetupfromusb-install-windows-xp-from-usb-flash-drive/
This guide will show you, how to use WinSetupFromUSB to create a bootable USB Flash Drive including all Windows source files, plus the following installation of Windows XP. Compare to the different USB_Multiboot versions, WinSetupFromUSB comes with a Graphical User Interface (GUI) and is in my opinion easier to use.
Here you can get the latest version of the program and you will also find many detailed informations about WinSetupFromUSB.
I’ve tested this guide with a 32-bit version of Windows XP and a 64-bit version of Windows Vista and it worked flawlessly.
Prerequisites:
All you need is:
- a USB Flash Drive with at least 1GB of storage
- the original Windows XP Setup CD
- WinSetupFromUSB
If you use nLite to slim down your version of Windows XP, please keep the following in mind:
under Operating System Options!
I also recommend to integrate Service Pack 3 into your Windows XP source files.
1. Preparations
Download and install WinSetupFromUSB. Default installation path isC:\WinSetupFromUSB.
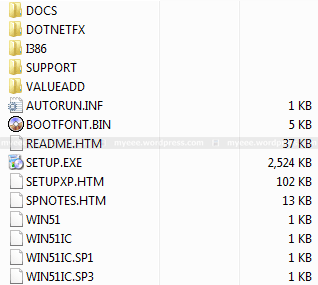
Create a new folder with the name WINXPCD in the root directory of drive C:\and copy all files from your Windows XP Setup CD into this folder. Depending on your version of Windows XP, the content of C:\WINXPCD should look approximately like this:
The following files will show you, which Service Pack is already integrated into your CD:
- WIN51IC.SP1, Sevice Pack 1
- WIN51IC.SP2, Sevice Pack 2
- WIN51IC.SP3, Sevice Pack 3
2. Start WinSetupFromUSB
Connect the USB Flash Drive to your PC and start WinSetupFromUSB. It should show up under USB Disk Selection :

3. Select your Source Path
Click on Browse under Windows 2000/XP/2003 Source and navigate to the folder with your Windows XP Source Files. It should be C:\WINXPCD:

Click OK and C:\WINXPCD should show up under Windows 2000/XP/2003 Source :

4. Format USB Flash Drive
PeToUSB or HP Format Tool are used to format the USB Flash Drive. There is no need to download these programs seperately as they are already included in WinSetupFromUSB.
USB Flash Drives up to 2GB should be formatted with PeToUSB in FAT16, USB Flash Drives with 4GB or more with HP Format Tool in FAT32.
I will use PeToUSB to format my Kingston Data Traveler with 2GB.
In the main window of WinSetupFromUSB click PeToUSB under Format target using to start the program. The USB Flash Drive should show up underDestination Drive. Check USB Removable, Enable Disk Format and Quick Format. Uncheck Enable File Copy under File Copy Options :

Click Start and answer the following two questions “Continue?” with Yes.
If everything goes well, the message “Operation Completed Successfully!” should appear. Click OK and close PeToUSB.
The process with HP Format Tool is similar.
5. Copy Windows XP Source Files
To start the process of copying the Windows XP source files to the USB Flash Drive, click GO in the main window of WinSetupFromUSB. Depending on the write speed of your USB Flash drive it may take a while to copy all files.

At the end the following notice about the Windows installation process should be displayed:

Click OK and close WinSetupFromUSB with EXIT.
6. Windows Installation – Part 1
Connect the USB Flash Drive to your PC and turn on the computer. Press ESCat the boot screen and you will be able to select the USB Flash Drive as your boot device from the boot menu.
Other manufacturers may use other keys, e.g. F8 or F12.
After booting from USB Flash Drive, the following menu should be displayed:
- Windows XP/2000/2003 Setup – First and Second parts
Press Enter or wait 10 seconds to get to the next menu:
- First part of Windows XP Home Edition setup
- Second part of XP Home Edition setup+Start Windows for first time
First part of Windows XP Home Edition setup is already selected. Press Enteror wait 10 seconds to start the Text mode part of setup. During this part you can create, delete and format partitions and finally the setup files are copied to your hard disk. At the end the system will restart automatically.
7. Windows Installation – Part 2
After restart, boot the PC again from your USB Flash Drive. The same menu should be displayed:
- Windows XP/2000/2003 Setup – First and Second parts
Press Enter or wait 10 seconds to get to the next menu:
- First part of Windows XP Home Edition setup
- Second part of XP Home Edition setup+Start Windows for first time
Second part of XP Home Edition setup+Start Windows for first time is already selected. Press Enter or wait 10 seconds to start the GUI mode part of setup. During this part you will be asked for your product key, timezone, usernames and other necessary informations. At the end the system will restart automatically.
8. Windows Installation – Part 3
After restart, boot the PC again from your USB Flash Drive. The same menu should be displayed:
- Windows XP/2000/2003 Setup – First and Second parts
Press Enter or wait 10 seconds to get to the next menu:
- First part of Windows XP Home Edition setup
- Second part of XP Home Edition setup+Start Windows for first time
Second part of XP Home Edition setup+Start Windows for first time is already selected. Press Enter or wait 10 seconds to Start Windows for the first time. The Windows installation process will be finished and finally the Windows Desktop will appear.
At next startup you can boot into Windows from your hard disk.
Notes:
After successsful installation, the following boot menu will always be displayed during startup:
- Microsoft Windows XP Home Edition
- USB Repair NOT to Start Microsoft Windows XP Home Edition
If you don’t plan to use the repair option and want to boot directly into windows, you have to do the following:
Open the file boot.ini in the root directory of drive C:\ with Notepad:
[Boot Loader]timeout=
Default=multi()disk()rdisk()partition()WINDOWS
[Operating Systems]
multi()disk()rdisk()partition()WINDOWS=”Microsoft Windows XP Home Edition” /noexecute=optin /fastdetect
multi()disk()rdisk()partition()WINDOWS=”USB Repair NOT to Start Microsoft Windows XP Home Edition” /noexecute=optin /fastdetect
Delete the following line:
multi()disk()rdisk()partition()WINDOWS=”USB Repair NOT to Start Microsoft Windows XP Home Edition” /noexecute=optin /fastdetect
Your computer may not boot the next time!
Save changes to the file.
At next startup the boot menu will not be displayed.
If you want to keep the repair option, you can reduce the time to display the operating system options from 30 to 5 seconds:
[Boot Loader]
timeout=
Save changes to the file.
At next startup the boot menu will be displayed only 5 seconds.
WinSetupFromUSB – Install Windows XP from USB Flash Drive的更多相关文章
- UEFI Bootable USB Flash Drive - Create in Windows(WIN7 WIN8)
How to Create a Bootable UEFI USB Flash Drive for Installing Windows 7, Windows 8, or Windows 8.1 In ...
- windows xp 连接USB网络打印机服务器(通用所有usb网络打印机服务器的安装)
usb网络打印机服务器是HP1101U 打印机是 hp1108 需要准备的其他东西:1.HP1108的驱动 首先,接好线,保证usb hp1101u能正常访问,这款USB一旦接入了网络,会分配一个ip ...
- How to install Windows 7 SP1 on Skylake
Download gigabyte windows usb installation tool http://www.gigabyte.cn/WebPage/-79/usb.html get Wind ...
- CF# Educational Codeforces Round 3 A. USB Flash Drives
A. USB Flash Drives time limit per test 2 seconds memory limit per test 256 megabytes input standard ...
- Codeforces Educational Codeforces Round 3 A. USB Flash Drives 水题
A. USB Flash Drives 题目连接: http://www.codeforces.com/contest/609/problem/A Description Sean is trying ...
- fedora 21下Virtual Box安装Windows XP SP3
Installing Virtual Box and Windows XP SP3 during Fedora 21 The first step:Download and Install Virtu ...
- busdog is a filter driver for MS Windows (XP and above) to sniff USB traffic.
https://code.google.com/p/busdog/ busdog is a filter driver for MS Windows (XP and above) to sniff U ...
- 初试 Windows XP Embedded 系统开发1
目前 Windows PE(Preinstallation Environment)和 Windows XP Embedded 是可以脱离主机里的硬盘独立运行的 Windows 操作系统,Window ...
- LPCScrypt, DFUSec : USB FLASH download, programming, and security tool, LPC-Link 2 Configuration tool, Firmware Programming
What does this tool do? The LPC18xx/43xx DFUSec utility is a Windows PC tool that provides support f ...
随机推荐
- VS2013关于“当前不会命中断点源代码与原始版本不同”的BUG
文件明明没有动过,竟然一直给我这种提示! 解决方法:将出问题的文件用notepad打开,然后另存为Unicode编码,覆盖原来的文件. 网上另外有一种办法是:通过重新格式化出问题的源文件亦可以解决,即 ...
- Hibernate学习之注解学习
转自:http://blog.sina.com.cn/s/blog_935ebb670101dnre.html 1.类级别注解 @Entity 映射实体类 @Table 映射数句库表 @En ...
- 学习使用Free RTOS ,移植最新的STM32 v3.5固件库
最近拿到了一块万利的EK-STM32F的学习板,打算先用它来熟悉下STM32的编程环境,不过在这过程中和一个同事聊的时候觉得如果只调用STM32的库写程序,可能在芯片资源的利用上面可能就会差一点,在这 ...
- offsetParent和parentNode区别
offsetParent用的最普遍的就是来计算元素在页面中的位置,前面的日志理讲了 通过getBoundingClientRect() 来获取页面中元素的位置,不过这只支持最新的浏览器,如果要兼容像O ...
- 很详细、很移动的Linux makefile教程:介绍,总述,书写规则,书写命令,使用变量,使用条件推断,使用函数,Make 的运行,隐含规则 使用make更新函数库文件 后序
很详细.很移动的Linux makefile 教程 内容如下: Makefile 介绍 Makefile 总述 书写规则 书写命令 使用变量 使用条件推断 使用函数 make 的运行 隐含规则 使用m ...
- 习题3.10 约瑟夫环 josephus问题
/* assume a header */ /* 双向循环链表 */ struct Node; typedef struct Node * PtrToNode; typedef PtrToNode L ...
- SQL分类取每一类第一项
实际应用中经常会碰到这样的需求,在给定的数据集中要求返回每一类型中最大的一条,抑或是最小的一条,抑或是按时间排序最近的一条等等.很多人面对这样的需求显得束手无策,其实这个需求实现有很多种方法,今天给大 ...
- 嵌入式OS入门笔记-以RTX为案例:六.RTX的任务调度
嵌入式OS入门笔记-以RTX为案例:六.RTX的任务调度 上一篇笔记介绍了一些绕开排程器(或调度程序,scheduler)来进行时间管理的一些小方法.这一篇详细介绍RTX的任务调度原理. RTX主要有 ...
- JSEL 表达式
JSTL标签库的使用是为类弥补html表的不足,规范自定义标签的使用而诞生的.在告别modle1模式开发应用程序后,人们开始注重软件的分层设计,不希望在jsp页面中出现java逻辑代码,同时也由于自定 ...
- 在WPF中将某张表中的数据显示到datagrid
a.在.xaml文件中拖入一个datagrid,然后添加列名,使用Binding="{Binding 数据库中的 列名称}",如下: <DataGrid AutoGenera ...