通过Docker启动Solace,并在Spring Boot通过JMS整合Solace
1 简介
Solace是一个强大的实时性的事件驱动消息队列。本文将介绍如何在Spring中使用,虽然代码使用的是Spring Boot,但并没有使用相关starter,跟Spring的整合一样,可通用。JMS是通过的消息处理框架,可以深入学习一下,不同的MQ在JMS的整合上都是类似的。
2 通过Docker启动Solace
有两种方式试用Solace,一种是通过Docker来启动,另一种是使用Cloud版本,但Cloud版本有试用期限,我们使用Docker来启动吧。
先下载镜像:
$ docker pull solace/solace-pubsub-standard:9.13.0.16
然后通过以下命令启动:
$ docker run -d -p 8080:8080 -p 55554:55555 -p 8008:8008 -p 1883:1883 -p 8000:8000 -p 5672:5672 -p 9000:9000 -p 2222:2222 --shm-size=2g --env username_admin_globalaccesslevel=admin --env username_admin_password=admin --name=solace solace/solace-pubsub-standard:9.13.0.16
这里端口改为55554,是因为Mac的原因。
然后便可以访问来登陆管理界面:http://localhost:8080/
用户名密码为:admin/admin
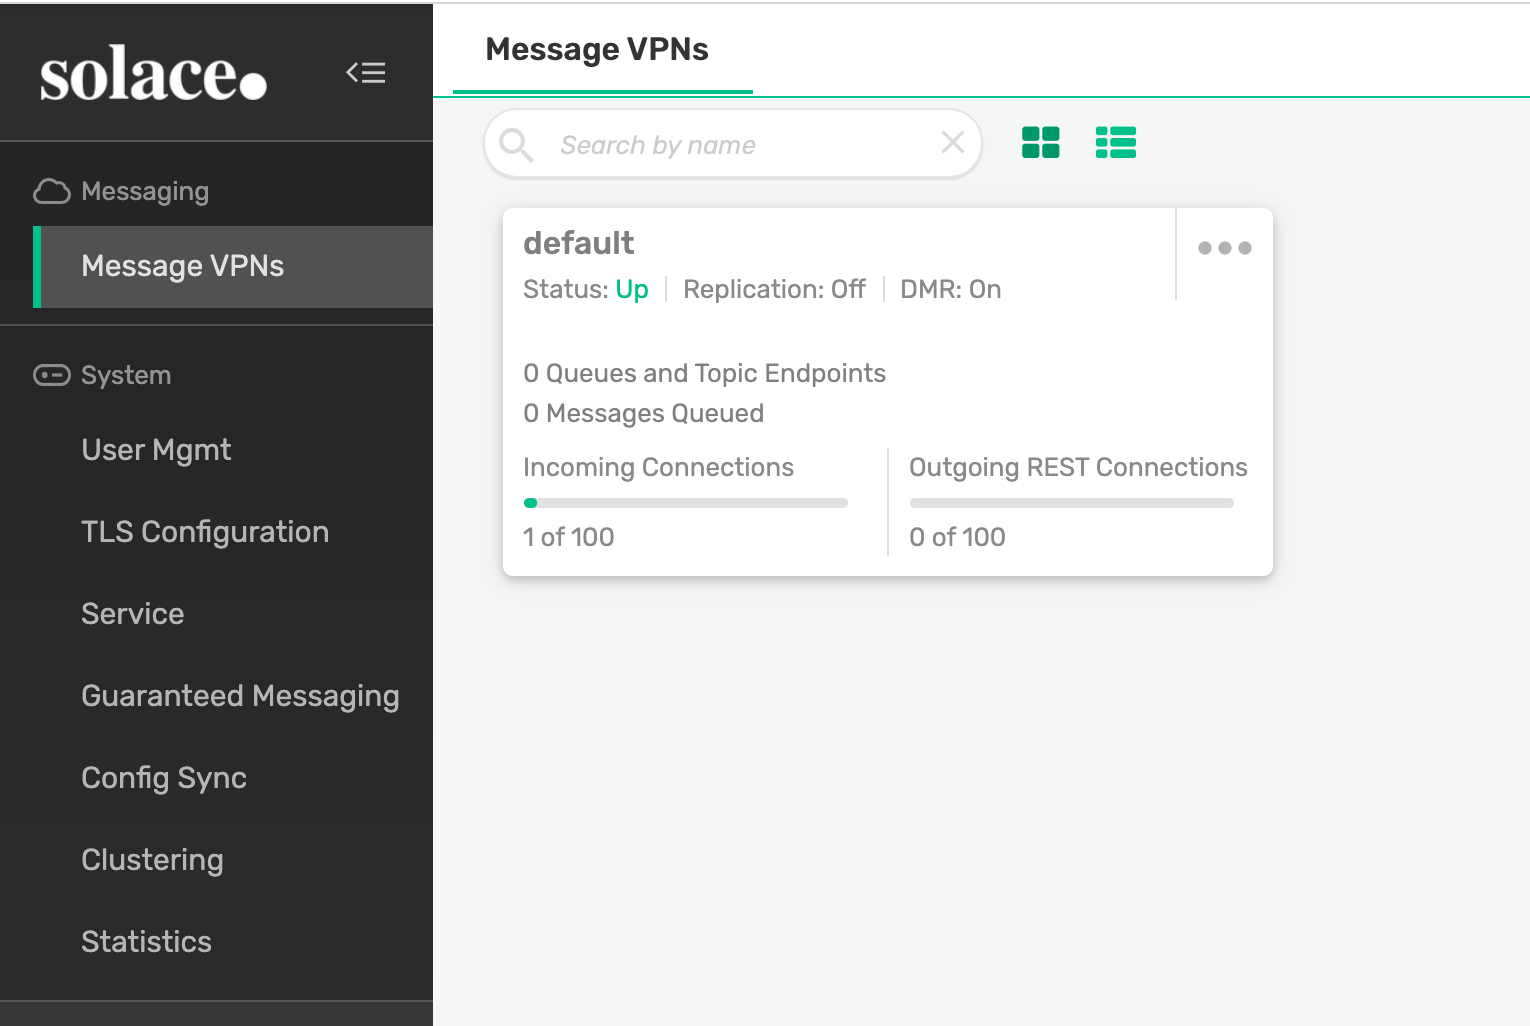
登陆后可以看到如下界面,Solace按VPN来管理队列,VPN有点像分组,比如某个业务线使用某个VPN。
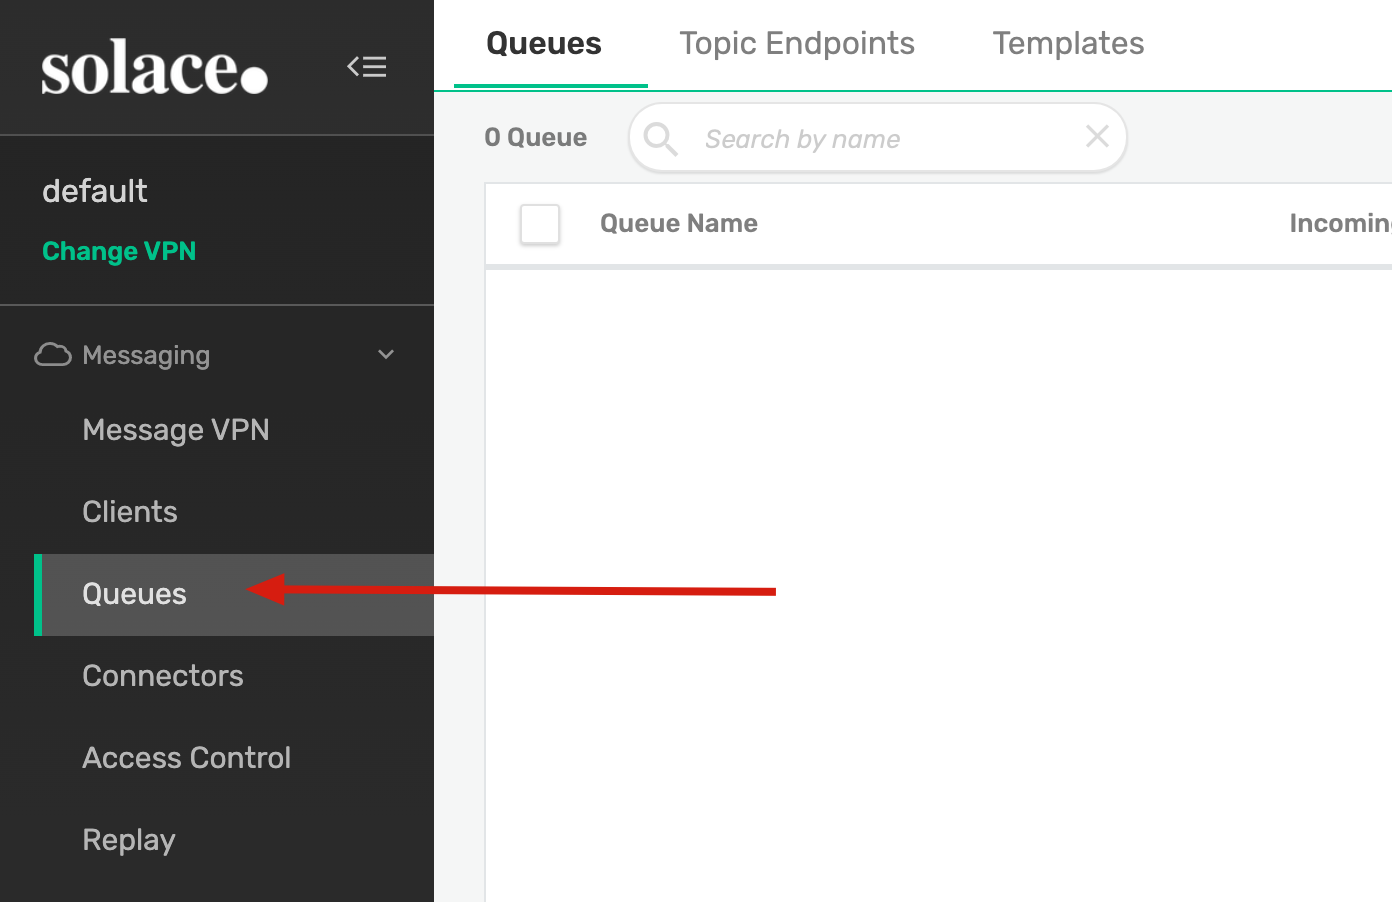
我们在default的VPN上创建一个Queue,名为pkslow-queue:
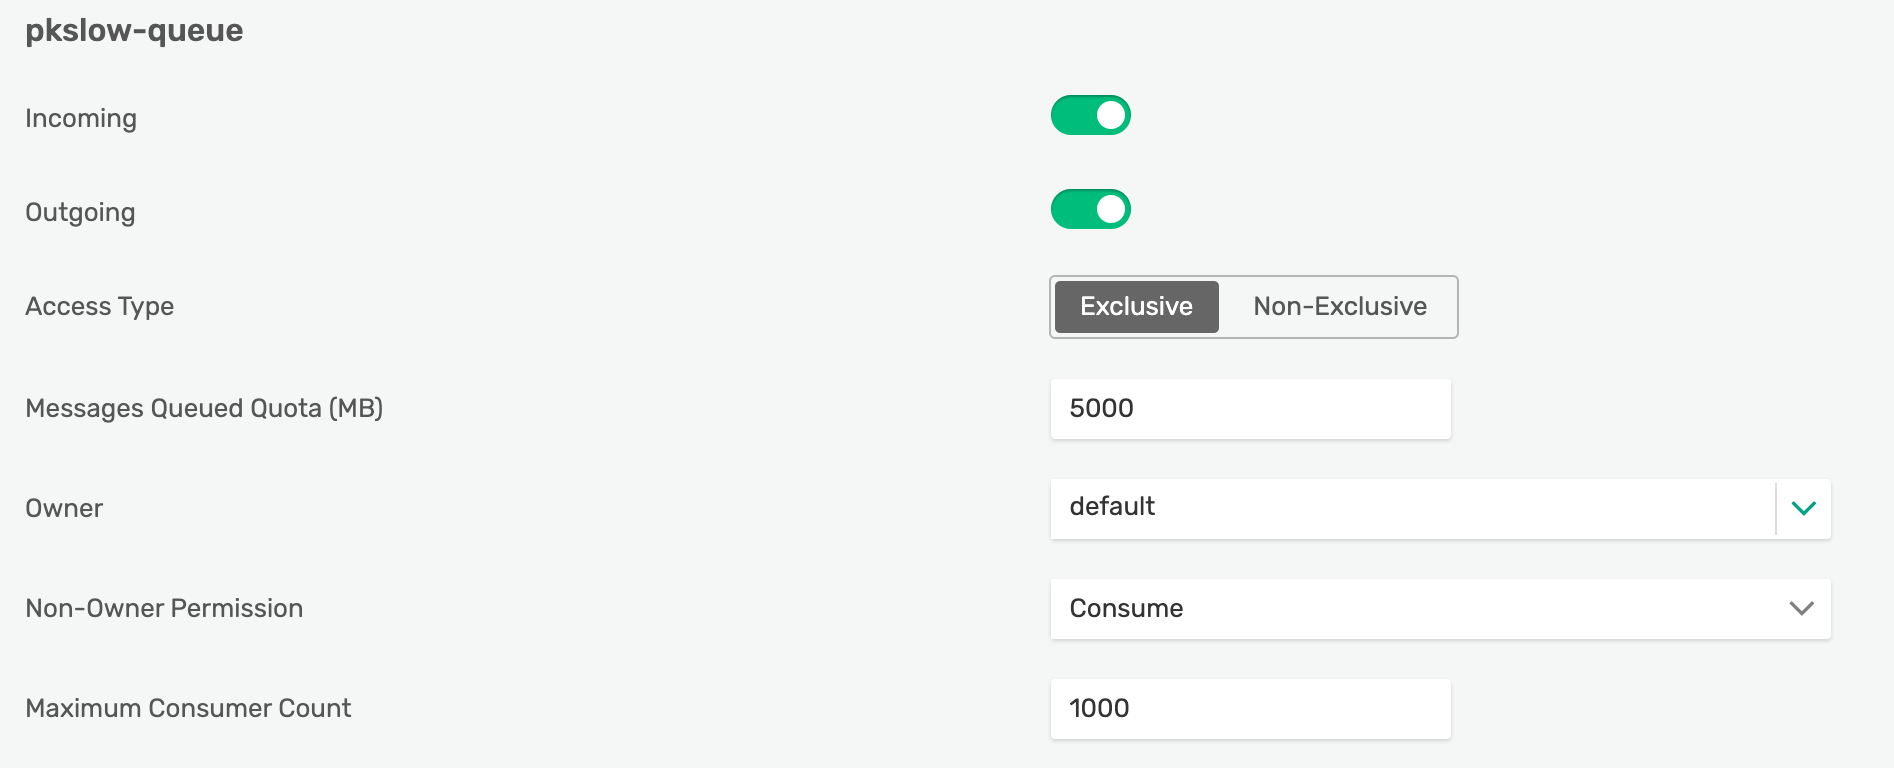
其它设置如下:
接着在该Queue上创建Topic:

创建完成后,我们可以直接测试一下:
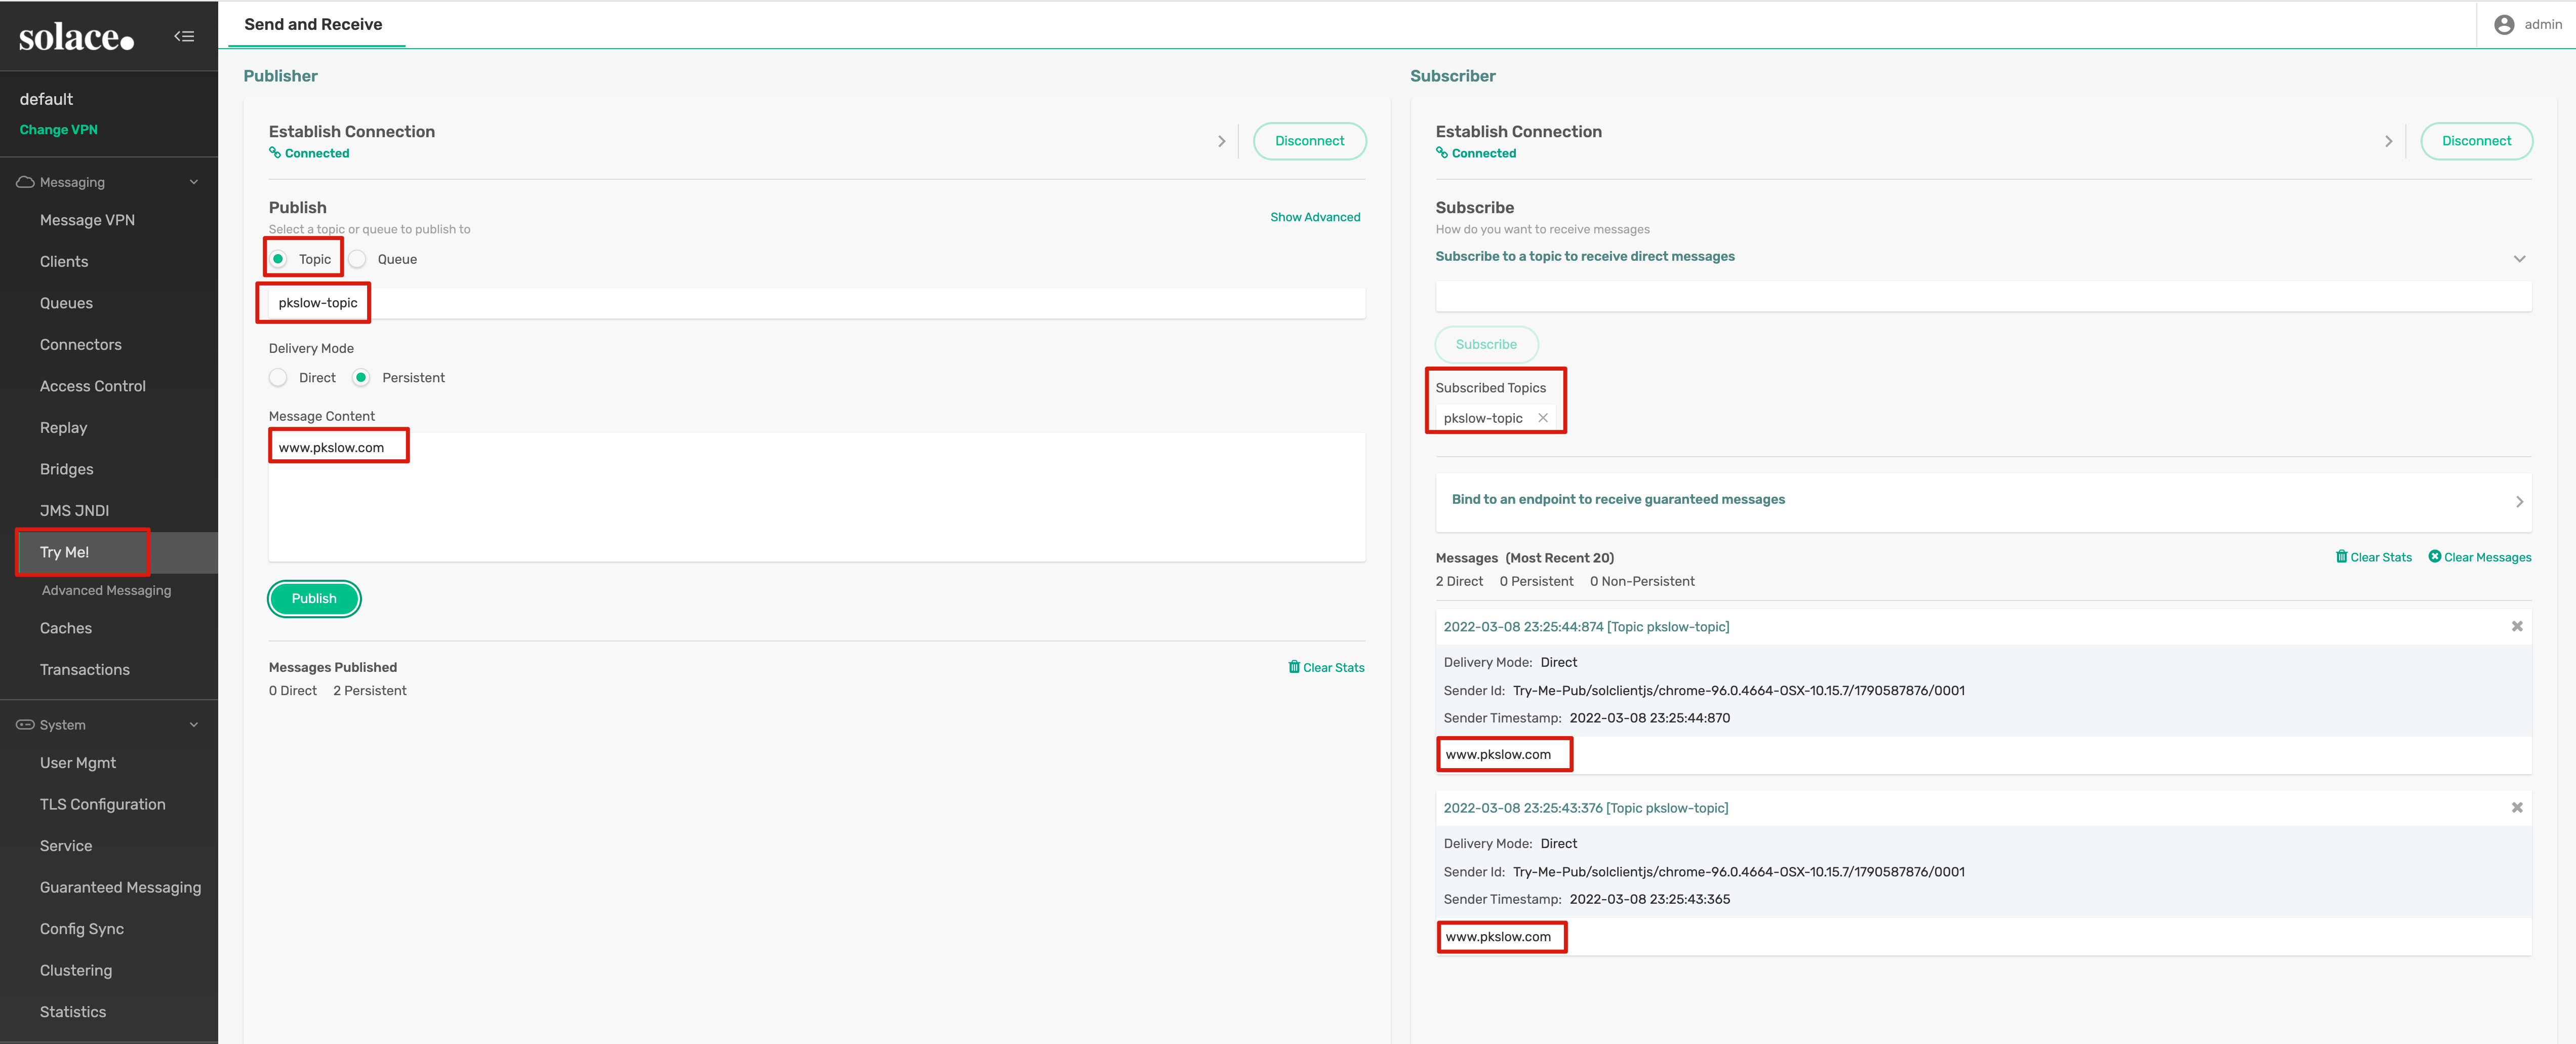
可以Publish到Topic或Queue,也可以从其中一个Subscribe。
完成以上设置后,我们就可以在Spring Boot中整合了。
3 Spring Boot JMS整合Solace
3.1 发送消息
我们是通过JmsTemplate来发送消息的,而JmsTemplate需要连接到MQ,就需要一个ConnectionFactory,这个Factory是带着MQ的一些连接信息。配置代码如下:
@Configuration

public class SolacePubConfig {

    private final SolaceProperties solaceProperties;

    public SolacePubConfig(SolaceProperties solaceProperties) {

        this.solaceProperties = solaceProperties;

    }

    @Bean("connectionFactory")

    public ConnectionFactory connectionFactory() throws Exception {

        Properties env = new Properties();

        env.put(InitialContext.INITIAL_CONTEXT_FACTORY, "com.solacesystems.jndi.SolJNDIInitialContextFactory");

        env.put(InitialContext.PROVIDER_URL, solaceProperties.getBrokerUrl());

        env.put(SupportedProperty.SOLACE_JMS_VPN, solaceProperties.getVpn());

        env.put(InitialContext.SECURITY_PRINCIPAL, solaceProperties.getUsername());

        env.put(InitialContext.SECURITY_CREDENTIALS, solaceProperties.getPassword());

        return SolJmsUtility.createConnectionFactory(env);

    }

    @Bean

    public CachingConnectionFactory cachingConnectionFactory(ConnectionFactory connectionFactory) {

        CachingConnectionFactory cachingConnectionFactory = new CachingConnectionFactory(connectionFactory);

        cachingConnectionFactory.setSessionCacheSize(10);

        return cachingConnectionFactory;

    }

    @Bean

    public JmsTemplate pubJmsTemplate(CachingConnectionFactory cachingConnectionFactory) {

        JmsTemplate jmsTemplate = new JmsTemplate(cachingConnectionFactory);

        jmsTemplate.setPubSubDomain(true);

        jmsTemplate.setExplicitQosEnabled(true);

        jmsTemplate.setDeliveryPersistent(true);

        jmsTemplate.setDefaultDestinationName(solaceProperties.getDefaultPubDestinationName());

        return jmsTemplate;

    }

}
生成JmsTemplate后,就可以引用并发送消息了:
@RestController

@RequestMapping("/solace")

public class SolaceTestController {

    private final JmsTemplate pubJmsTemplate;

    private final SolaceProperties solaceProperties;

    public SolaceTestController(JmsTemplate pubJmsTemplate, SolaceProperties solaceProperties) {

        this.pubJmsTemplate = pubJmsTemplate;

        this.solaceProperties = solaceProperties;

    }

    @GetMapping

    public String send() {

        pubJmsTemplate.send(solaceProperties.getDefaultPubDestinationName(), session -> session.createTextMessage("www.pkslow.com"));

        pubJmsTemplate.send(session -> session.createTextMessage("Larry Deng"));

        return "OK";

    }

}
用到的属性配置如下:
server.port=8083

pkslow.solace.brokerUrl=smf://127.0.0.1:55554

pkslow.solace.vpn=default

pkslow.solace.username=default

pkslow.solace.password=default

pkslow.solace.defaultPubDestinationName=pkslow-topic

pkslow.solace.defaultSubDestinationName=pkslow-queue
@Configuration

@ConfigurationProperties(prefix = "pkslow.solace")

@Setter

@Getter

public class SolaceProperties {

    private String brokerUrl;

    private String vpn;

    private String username;

    private String password;

    private String defaultPubDestinationName;

    private String defaultSubDestinationName;

}
3.2 接收消息
我们通过MessageListenerContainer来接收消息,MessageListenerContainer也需要一个ConnectionFactory,也有MQ的连接信息。还需要一个MessageListener,用来定义如何处理消息。我们的配置如下:
@Configuration

@Slf4j

public class SolaceSubConfig {

    private final SolaceProperties solaceProperties;

    public SolaceSubConfig(SolaceProperties solaceProperties) {

        this.solaceProperties = solaceProperties;

    }

    @Bean

    public SingleConnectionFactory singleConnectionFactory(@Qualifier("connectionFactory") ConnectionFactory targetConnectionFactory) {

        return new SingleConnectionFactory(targetConnectionFactory);

    }

    @Bean

    public MessageListener messageListener() {

        return message -> {

            try {

                log.info("Received message " + ((TextMessage) message).getText() + " on destination: " +

                        message.getJMSDestination().toString());

            } catch (JMSException ex) {

                throw new RuntimeException(ex);

            }

        };

    }

    @Bean

    public MessageListenerContainer messageListenerContainer(SingleConnectionFactory singleConnectionFactory, MessageListener messageListener) {

        DefaultMessageListenerContainer container = new DefaultMessageListenerContainer();

        container.setConnectionFactory(singleConnectionFactory);

        container.setDestinationName(solaceProperties.getDefaultSubDestinationName());

        container.setMessageListener(messageListener);

        return container;

    }

}
这里@Qualifier("connectionFactory") ConnectionFactory targetConnectionFactory复用了在SolacePubConfig创建的对象。
3.3 测试
发送GET请求就可以触发发送了:
GET http://localhost:8083/solace
我发了三次,结果日志如下:

4 代码
代码请看GitHub: https://github.com/LarryDpk/pkslow-samples
References:
通过Docker启动Solace,并在Spring Boot通过JMS整合Solace的更多相关文章
- 右击main 方法运行正常,启动tomcat 后,spring boot 项目 出现参数字符串是乱码的情况
PrintWriter out = new PrintWriter(new OutputStreamWriter(conn.getOutputStream(), "utf-8")) ...
- Spring Boot入门 and Spring Boot与ActiveMQ整合
1.Spring Boot入门 1.1什么是Spring Boot Spring 诞生时是 Java 企业版(Java Enterprise Edition,JEE,也称 J2EE)的轻量级代替品.无 ...
- Spring Boot和Dubbo整合
provider端 POM依赖 <dependencies> <dependency> <groupId>org.springframework.boot</ ...
- RabbitMQ入门:在Spring Boot 应用中整合RabbitMQ
在上一篇随笔中我们认识并安装了RabbitMQ,接下来我们来看下怎么在Spring Boot 应用中整合RabbitMQ. 先给出最终目录结构: 搭建步骤如下: 新建maven工程amqp 修改pom ...
- Spring Boot与ActiveMQ整合
Spring Boot与ActiveMQ整合 1使用内嵌服务 (1)在pom.xml中引入ActiveMQ起步依赖 <dependency> <groupId>org.spri ...
- Spring Boot 2.X整合Spring-cache,让你的网站速度飞起来
计算机领域有人说过一句名言:“计算机科学领域的任何问题都可以通过增加一个中间层来解决”,今天我们就用Spring-cache给网站添加一层缓存,让你的网站速度飞起来. 本文目录 一.Spring Ca ...
- Spring Boot 2.0 整合携程Apollo配置中心
原文:https://www.jianshu.com/p/23d695af7e80 Apollo(阿波罗)是携程框架部门研发的分布式配置中心,能够集中化管理应用不同环境.不同集群的配置,配置修改后能够 ...
- Spring Boot 2.x整合Redis
最近在学习Spring Boot 2.x整合Redis,在这里和大家分享一下,希望对大家有帮助. Redis是什么 Redis 是开源免费高性能的key-value数据库.有以下的优势(源于Redis ...
- spring boot 2.0 整合 elasticsearch6.5.3,spring boot 2.0 整合 elasticsearch NoNodeAvailableException
原文地址:spring boot 2.0 整合 elasticsearch NoNodeAvailableException 原文说的有点问题,下面贴出我的配置: 原码云项目地址:https://gi ...
- 转-Hive/Phoenix + Druid + JdbcTemplate 在 Spring Boot 下的整合
Hive/Phoenix + Druid + JdbcTemplate 在 Spring Boot 下的整合 http://blog.csdn.net/balabalayi/article/detai ...
随机推荐
- Tensorflow Lite从入门到精通
TensorFlow Lite 是 TensorFlow 在移动和 IoT 等边缘设备端的解决方案,提供了 Java.Python 和 C++ API 库,可以运行在 Android.iOS 和 Ra ...
- MinGW配置C语言编译器gcc和g++
首先,在 https://sourceforge.net/projects/mingw/files/latest/download 下载安装MinGW,如下图所示: 点Installation-> ...
- 推广TrustAI可信分析:通过提升数据质量来增强在ERNIE模型下性能
项目链接:https://aistudio.baidu.com/aistudio/projectdetail/4622139?contributionType=1 fork一下,由于内容过多这里就不全 ...
- Java安全之Tomcat6 Filter内存马
Java安全之Tomcat6 Filter内存马 回顾Tomcat8打法 先回顾下之前Tomcat789的打法 这里先抛开 7 8之间的区别, 在8中,最后add到filterchain的都是一个fi ...
- PMM实现监控Mysql-MGR
一.docker安装PMM服务端 1.安装yum配置单元 # 如果已安装,略过此步 yum install -y yum-utils #yum配置单元 2.配置docker阿里云yum源 #配置doc ...
- 这是不是你想要了解SQL的艺术,基础语法等等
一.基础sql语句: 模块定义 基础语句 基础功能 数据定义 create table 创建数据库表 drop table 删除数据表 alter table 修改表结构 create view 创建 ...
- windows安装nodejs
安装nodejs 1.官网地址: http://nodejs.cn/download 2.选择下载路径 直接无脑下一步安装 3.安装成功之后 node -v 显示nodejs版本 npm -v 显示安 ...
- go工具pprof部署
在做内存分析时,用到了pprof,这里做一下部署介绍和入门级别的使用. pprof是golang的性能工具,有两种交互方式:命令行交互和web交互,同时还支持性能分析数据的图形化展示. 部署pprof ...
- Go语言核心36讲34
我们在上篇文章中讲到了sync.WaitGroup类型:一个可以帮我们实现一对多goroutine协作流程的同步工具. 在使用WaitGroup值的时候,我们最好用"先统一Add,再并发Do ...
- Windows自带管理工具
exe类notepad 记事本 control 控制面板 mstsc 远程桌面连接explorer 资源管理器 taskmgr 任务管理器resmon 资源监视器 perfmon 性能监视器reged ...