Rust: 如何用bevy写一个贪吃蛇(上)
bevy社区有一篇不错的入门教程:Creating a Snake Clone in Rust, with Bevy,详细讲解了贪吃蛇的开发过程,我加了一些个人理解,记录于此:
一、先搭一个"空"架子
1.1 Cargo.toml依赖项
[dependencies]

bevy = { version = "0.5.0", features = ["dynamic"] }

rand = "0.7.3"

bevy_prototype_debug_lines = "0.3.2"
贪吃蛇游戏过程中,要在随机位置生成食物,所以用到了rand,至于bevy_prototype_debug_lines这是1个画线的辅助plugin,后面在讲grid坐标转换时,可以辅助画线,更容易理解坐标系统
1.2 main.rs
use bevy::prelude::*;

fn setup(mut commands: Commands, mut materials: ResMut<Assets<ColorMaterial>>) {

    //这是1个2d游戏,所以放了一个2d"摄像机"

    let mut camera = OrthographicCameraBundle::new_2d();

    camera.transform = Transform::from_translation(Vec3::new(0.0, 0.0, 5.0));

    commands.spawn_bundle(camera);

}

fn main() {

    App::build()

        .insert_resource(WindowDescriptor {

            //窗口标题

            title: "snake".to_string(),

            //窗口大小

            width: 300.,

            height: 200.,

            //不允许改变窗口尺寸

            resizable: false,

            ..Default::default()

        })

        //窗口背景色

        .insert_resource(ClearColor(Color::rgb(0.04, 0.04, 0.04)))

        .add_startup_system(setup.system())

        //默认插件

        .add_plugins(DefaultPlugins)

        .run();

}
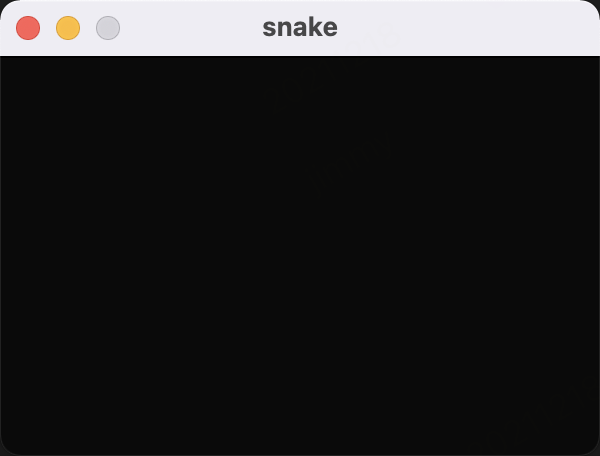
运行起来,就得到了1个黑背景的窗口应用程序。
二、加入蛇头&理解bevy的坐标系
use bevy::prelude::*;

use bevy_prototype_debug_lines::*; //<--

struct SnakeHead; //<--

struct Materials { //<--

    head_material: Handle<ColorMaterial>, //<--

}

fn setup(mut commands: Commands, mut materials: ResMut<Assets<ColorMaterial>>) {

    let mut camera = OrthographicCameraBundle::new_2d();

    camera.transform = Transform::from_translation(Vec3::new(0.0, 0.0, 5.0));

    commands.spawn_bundle(camera);

    commands.insert_resource(Materials { //<--

        head_material: materials.add(Color::rgb(0.7, 0.7, 0.7).into()),

    });

}

fn spawn_snake(mut commands: Commands, materials: Res<Materials>) { //<--

    commands

        .spawn_bundle(SpriteBundle {

            material: materials.head_material.clone(),

            //生成1个30*30px大小的2d方块

            sprite: Sprite::new(Vec2::new(30.0, 30.0)),

            ..Default::default()

        })

        .insert(SnakeHead);

}

fn draw_center_cross(windows: Res<Windows>, mut lines: ResMut<DebugLines>) { //<--

    let window = windows.get_primary().unwrap();

    let half_win_width = 0.5 * window.width();

    let half_win_height = 0.5 * window.height();

    //画横线

    lines.line(

        Vec3::new(-1. * half_win_width, 0., 0.0),

        Vec3::new(half_win_width, 0., 0.0),

        0.0,

    );

    //画竖线

    lines.line(

        Vec3::new(0., -1. * half_win_height, 0.0),

        Vec3::new(0., half_win_height, 0.0),

        0.0,

    );

}

fn main() {

    App::build()

        .insert_resource(WindowDescriptor {

            title: "snake".to_string(),

            width: 300.,

            height: 200.,

            resizable: false,

            ..Default::default()

        })

        .insert_resource(ClearColor(Color::rgb(0.04, 0.04, 0.04)))

        .add_startup_system(setup.system())

        .add_startup_stage("game_setup", SystemStage::single(spawn_snake.system())) // <--

        .add_system(draw_center_cross.system())// <--

        .add_plugins(DefaultPlugins)

        .add_plugin(DebugLinesPlugin)// <--

        .run();

}
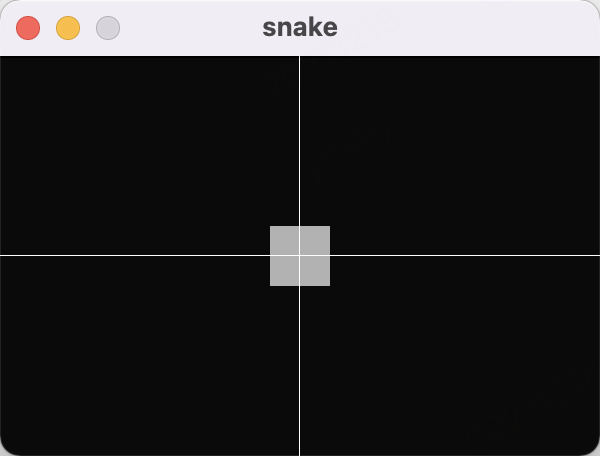
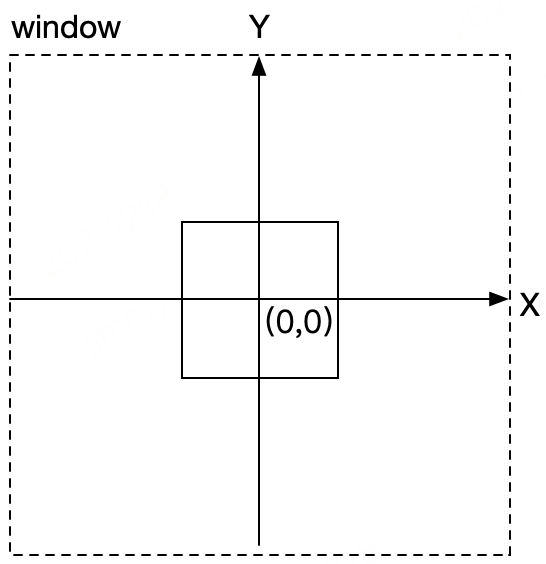
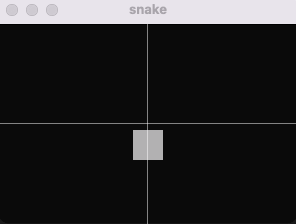
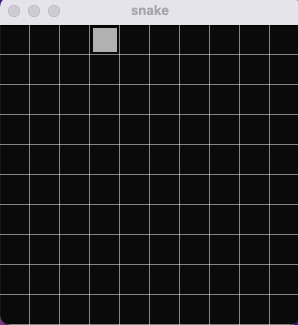
带<--的为新增部分,代码虽然看上去加了不少,但并不难理解,主要就是定义了1个方块充分蛇头,然后画了2根辅助线。从运行结果来看,屏幕中心就是bevy 坐标系的中心。
再加点运动效果:
fn snake_movement(windows: Res<Windows>, mut head_positions: Query<(&SnakeHead, &mut Transform)>) {

    for (_head, mut transform) in head_positions.iter_mut() {

        transform.translation.y += 1.;

        let window = windows.get_primary().unwrap();

        let half_win_height = 0.5 * window.height();

        if (transform.translation.y > half_win_height + 15.) {

            transform.translation.y = -1. * half_win_height - 15.;

        }

    }

}

...

        .add_system(draw_center_cross.system())

        .add_system(snake_movement.system()) // <--

        .add_plugins(DefaultPlugins)
三、自定义网格坐标
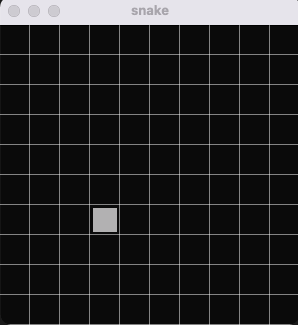
贪吃蛇的游戏中,蛇头的移动往往是按一格格跳的,即相当于整个屏幕看成一个网络,蛇头每次移动一格。 先加一些相关定义:
//格子的数量(横向10等分,纵向10等分,即10*10的网格)

const CELL_X_COUNT: u32 = 10;

const CELL_Y_COUNT: u32 = 10;

/**

 * 网格中的位置

 */

#[derive(Default, Copy, Clone, Eq, PartialEq, Hash)]

struct Position {

    x: i32,

    y: i32,

}

/**

 * 蛇头在网格中的大小

 */

struct Size {

    width: f32,

    height: f32,

}

impl Size {

    //贪吃蛇都是用方块,所以width/height均设置成x

    pub fn square(x: f32) -> Self {

        Self {

            width: x,

            height: x,

        }

    }

}
为了方便观察,在背景上画上网格线:
//画网格辅助线

fn draw_grid(windows: Res<Windows>, mut lines: ResMut<DebugLines>) {

    let window = windows.get_primary().unwrap();

    let half_win_width = 0.5 * window.width();

    let half_win_height = 0.5 * window.height();

    let x_space = window.width() / CELL_X_COUNT as f32;

    let y_space = window.height() / CELL_Y_COUNT as f32;

    let mut i = -1. * half_win_height;

    while i < half_win_height {

        lines.line(

            Vec3::new(-1. * half_win_width, i, 0.0),

            Vec3::new(half_win_width, i, 0.0),

            0.0,

        );

        i += y_space;

    }

    i = -1. * half_win_width;

    while i < half_win_width {

        lines.line(

            Vec3::new(i, -1. * half_win_height, 0.0),

            Vec3::new(i, half_win_height, 0.0),

            0.0,

        );

        i += x_space;

    }

    //画竖线

    lines.line(

        Vec3::new(0., -1. * half_win_height, 0.0),

        Vec3::new(0., half_win_height, 0.0),

        0.0,

    );

}
蛇头初始化的地方,相应的调整一下:
fn spawn_snake(mut commands: Commands, materials: Res<Materials>) {

    commands

        .spawn_bundle(SpriteBundle {

            material: materials.head_material.clone(),

            //注:后面会根据网格大小,对方块进行缩放,所以这里的尺寸其实无效了,设置成0都行

            sprite: Sprite::new(Vec2::new(30.0, 30.0)), // <--

            ..Default::default()

        })

        .insert(SnakeHead)

        //放在第4行,第4列的位置

        .insert(Position { x: 3, y: 3 }) // <--

        //大小为网格的80%

        .insert(Size::square(0.8)); // <--

}
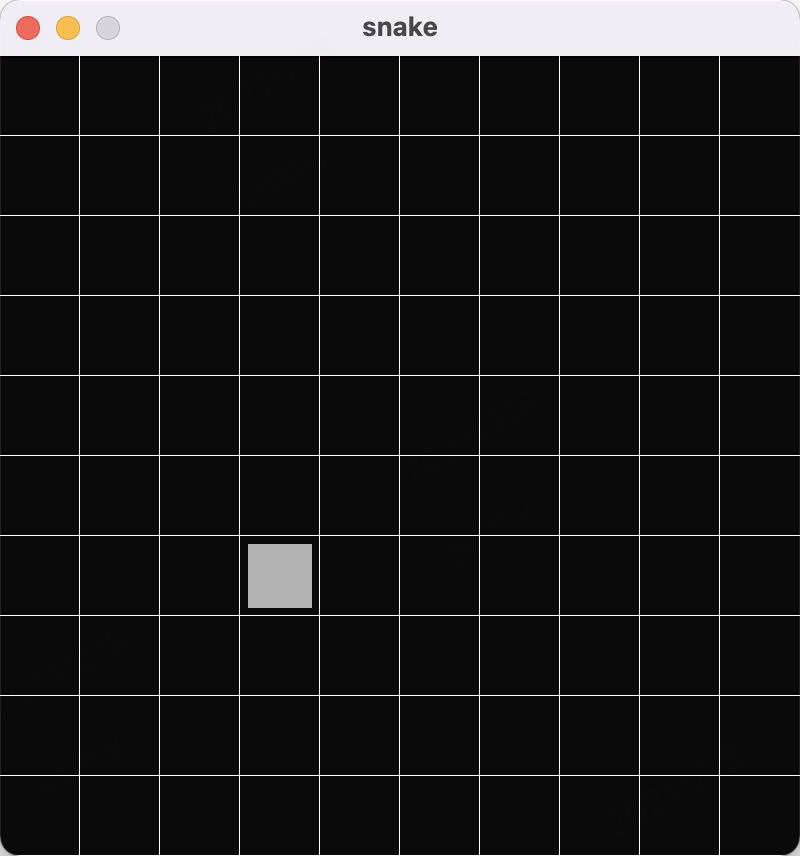
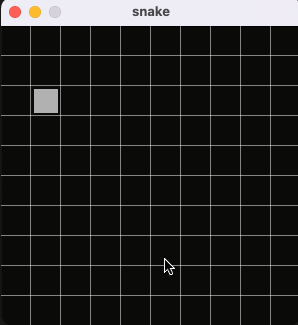
另外把窗口大小调整成400*400 ,同时先注释掉方块运动相关的代码,跑一下看看网格线显示是否正常:
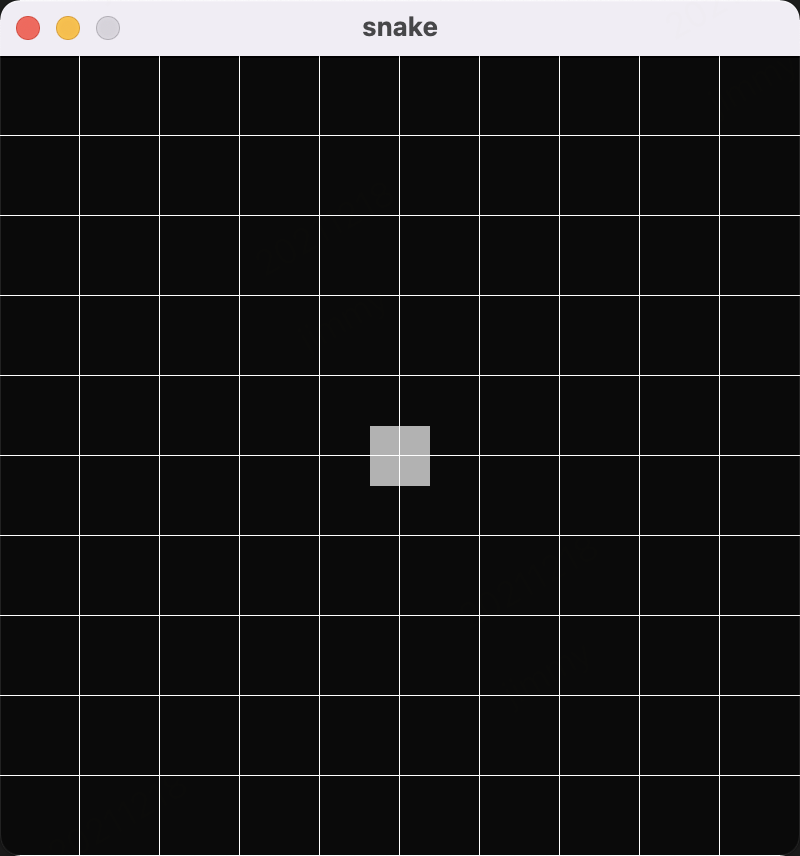
网络线是ok了,但是方块的大小和位置并无任何变化,接下来再写2个函数,来应用网格系统:
//根据网格大小,对方块尺寸进行缩放

fn size_scaling(windows: Res<Windows>, mut q: Query<(&Size, &mut Sprite)>) {

    // <--

    let window = windows.get_primary().unwrap();

    for (sprite_size, mut sprite) in q.iter_mut() {

        sprite.size = Vec2::new(

            sprite_size.width * (window.width() as f32 / CELL_X_COUNT as f32),

            sprite_size.height * (window.height() as f32 / CELL_Y_COUNT as f32),

        );

    }

}

/**

 * 根据方块的position,将其放入适合的网格中

 */

fn position_translation(windows: Res<Windows>, mut q: Query<(&Position, &mut Transform)>) {

    // <--

    fn convert(pos: f32, window_size: f32, cell_count: f32) -> f32 {

        //算出每1格的大小

        let tile_size = window_size / cell_count;

        //计算最终坐标值

        pos * tile_size - 0.5 * window_size + 0.5 * tile_size

    }

    let window = windows.get_primary().unwrap();

    for (pos, mut transform) in q.iter_mut() {

        transform.translation = Vec3::new(

            convert(pos.x as f32, window.width() as f32, CELL_X_COUNT as f32),

            convert(pos.y as f32, window.height() as f32, CELL_Y_COUNT as f32),

            0.0,

        );

    }

}
在main函数里,把这2个函数加进去
        .add_system_set_to_stage( //<--

            CoreStage::PostUpdate,

            SystemSet::new()

                .with_system(position_translation.system())

                .with_system(size_scaling.system()),

        )

        .add_plugins(DefaultPlugins)
移动方块时,就不能再按像素来移动了,而是按单元格来移动
fn snake_movement(mut head_positions: Query<&mut Position, With<SnakeHead>>) {

    for mut pos in head_positions.iter_mut() {

        //每次向上移动1格

        pos.y += 1;

        if pos.y >= CELL_Y_COUNT as i32 {

            pos.y = 0;

        }

    }

}
大多数游戏引擎,都有所谓帧数的概念,在我的mac上,1秒大概是60帧,窗口刷新非常快(注:因为gif录制软件的原因,实际运行起来比图片中还要快。)

可以利用 FixedTimestep 把指定函数的执行速度调慢一些。
        .add_system_set(// <--

            SystemSet::new()

                .with_run_criteria(FixedTimestep::step(1.0))

                .with_system(snake_movement.system()),

        )
现在看上去好多了,最后再加入按键控制:
fn snake_movement( //<--

    keyboard_input: Res<Input<KeyCode>>,

    mut head_positions: Query<&mut Position, With<SnakeHead>>,

) {

    for mut pos in head_positions.iter_mut() {

        if keyboard_input.pressed(KeyCode::Left) {

            if pos.x > 0 {

                pos.x -= 1;

            }

        }

        if keyboard_input.pressed(KeyCode::Right) {

            if pos.x < CELL_X_COUNT as i32 - 1 {

                pos.x += 1;

            }

        }

        if keyboard_input.pressed(KeyCode::Down) {

            if pos.y > 0 {

                pos.y -= 1;

            }

        }

        if keyboard_input.pressed(KeyCode::Up) {

            if pos.y < CELL_Y_COUNT as i32 - 1 {

                pos.y += 1;

            }

        }

    }

}
至此,main.rs的完整代码如下:
use bevy::core::FixedTimestep;

use bevy::prelude::*;

use bevy_prototype_debug_lines::*;

//格子的数量(横向10等分,纵向10等分,即10*10的网格)

const CELL_X_COUNT: u32 = 10;

const CELL_Y_COUNT: u32 = 10;

/**

 * 网格中的位置

 */

#[derive(Default, Copy, Clone, Eq, PartialEq, Hash)]

struct Position {

    x: i32,

    y: i32,

}

/**

 * 蛇头在网格中的大小

 */

struct Size {

    width: f32,

    height: f32,

}

impl Size {

    //贪吃蛇都是用方块,所以width/height均设置成x

    pub fn square(x: f32) -> Self {

        Self {

            width: x,

            height: x,

        }

    }

}

struct SnakeHead;

struct Materials {

    head_material: Handle<ColorMaterial>,

}

fn setup(mut commands: Commands, mut materials: ResMut<Assets<ColorMaterial>>) {

    let mut camera = OrthographicCameraBundle::new_2d();

    camera.transform = Transform::from_translation(Vec3::new(0.0, 0.0, 5.0));

    commands.spawn_bundle(camera);

    commands.insert_resource(Materials {

        head_material: materials.add(Color::rgb(0.7, 0.7, 0.7).into()),

    });

}

fn spawn_snake(mut commands: Commands, materials: Res<Materials>) {

    commands

        .spawn_bundle(SpriteBundle {

            material: materials.head_material.clone(),

            //注:后面会根据网格大小,对方块进行缩放,所以这里的尺寸其实无效了,设置成0都行

            sprite: Sprite::new(Vec2::new(30.0, 30.0)), // <--

            ..Default::default()

        })

        .insert(SnakeHead)

        //放在第4行,第4列的位置

        .insert(Position { x: 3, y: 3 }) // <--

        //大小为网格的80%

        .insert(Size::square(0.8)); // <--

}

//根据网格大小,对方块尺寸进行缩放

fn size_scaling(windows: Res<Windows>, mut q: Query<(&Size, &mut Sprite)>) {

    // <--

    let window = windows.get_primary().unwrap();

    for (sprite_size, mut sprite) in q.iter_mut() {

        sprite.size = Vec2::new(

            sprite_size.width * (window.width() as f32 / CELL_X_COUNT as f32),

            sprite_size.height * (window.height() as f32 / CELL_Y_COUNT as f32),

        );

    }

}

/**

 * 根据方块的position,将其放入适合的网格中

 */

fn position_translation(windows: Res<Windows>, mut q: Query<(&Position, &mut Transform)>) {

    // <--

    fn convert(pos: f32, window_size: f32, cell_count: f32) -> f32 {

        //算出每1格的大小

        let tile_size = window_size / cell_count;

        //返回最终的坐标位置

        pos * tile_size - 0.5 * window_size + 0.5 * tile_size

    }

    let window = windows.get_primary().unwrap();

    for (pos, mut transform) in q.iter_mut() {

        transform.translation = Vec3::new(

            convert(pos.x as f32, window.width() as f32, CELL_X_COUNT as f32),

            convert(pos.y as f32, window.height() as f32, CELL_Y_COUNT as f32),

            0.0,

        );

    }

}

//画网格辅助线

fn draw_grid(windows: Res<Windows>, mut lines: ResMut<DebugLines>) {

    // <--

    let window = windows.get_primary().unwrap();

    let half_win_width = 0.5 * window.width();

    let half_win_height = 0.5 * window.height();

    let x_space = window.width() / CELL_X_COUNT as f32;

    let y_space = window.height() / CELL_Y_COUNT as f32;

    let mut i = -1. * half_win_height;

    while i < half_win_height {

        lines.line(

            Vec3::new(-1. * half_win_width, i, 0.0),

            Vec3::new(half_win_width, i, 0.0),

            0.0,

        );

        i += y_space;

    }

    i = -1. * half_win_width;

    while i < half_win_width {

        lines.line(

            Vec3::new(i, -1. * half_win_height, 0.0),

            Vec3::new(i, half_win_height, 0.0),

            0.0,

        );

        i += x_space;

    }

    //画竖线

    lines.line(

        Vec3::new(0., -1. * half_win_height, 0.0),

        Vec3::new(0., half_win_height, 0.0),

        0.0,

    );

}

fn snake_movement( //<--

    keyboard_input: Res<Input<KeyCode>>,

    mut head_positions: Query<&mut Position, With<SnakeHead>>,

) {

    for mut pos in head_positions.iter_mut() {

        if keyboard_input.pressed(KeyCode::Left) {

            if pos.x > 0 {

                pos.x -= 1;

            }

        }

        if keyboard_input.pressed(KeyCode::Right) {

            if pos.x < CELL_X_COUNT as i32 - 1 {

                pos.x += 1;

            }

        }

        if keyboard_input.pressed(KeyCode::Down) {

            if pos.y > 0 {

                pos.y -= 1;

            }

        }

        if keyboard_input.pressed(KeyCode::Up) {

            if pos.y < CELL_Y_COUNT as i32 - 1 {

                pos.y += 1;

            }

        }

    }

}

fn main() {

    App::build()

        .insert_resource(WindowDescriptor {

            title: "snake".to_string(),

            width: 300.,

            height: 300.,

            resizable: false,

            ..Default::default()

        })

        .insert_resource(ClearColor(Color::rgb(0.04, 0.04, 0.04)))

        .add_startup_system(setup.system())

        .add_startup_stage("game_setup", SystemStage::single(spawn_snake.system()))

        .add_system(draw_grid.system())

        .add_system_set(

            // <--

            SystemSet::new()

                .with_run_criteria(FixedTimestep::step(0.1))

                .with_system(snake_movement.system()),

        )

        .add_system_set_to_stage(

            // <--

            CoreStage::PostUpdate,

            SystemSet::new()

                .with_system(position_translation.system())

                .with_system(size_scaling.system()),

        )

        .add_plugins(DefaultPlugins)

        .add_plugin(DebugLinesPlugin)

        .run();

}
下一篇,我们将继续实现贪吃蛇的其它功能...
参考文章:
https://bevyengine.org/learn/book/getting-started/
https://mbuffett.com/posts/bevy-snake-tutorial/
https://bevy-cheatbook.github.io/
Rust: 如何用bevy写一个贪吃蛇(上)的更多相关文章
- 如何用Python写一个贪吃蛇AI
前言 这两天在网上看到一张让人涨姿势的图片,图片中展示的是贪吃蛇游戏, 估计大部分人都玩过.但如果仅仅是贪吃蛇游戏,那么它就没有什么让人涨姿势的地方了. 问题的关键在于,图片中的贪吃蛇真的很贪吃XD, ...
- 使用Python写一个贪吃蛇
参考代码http://blog.csdn.net/leepwang/article/details/7640880 我在程序中加入了分数显示,三种特殊食物,将贪吃蛇的游戏逻辑写到了SnakeGame的 ...
- 一步一步用Canvas写一个贪吃蛇
之前在慕课网看了几集Canvas的视频,一直想着写点东西练练手.感觉贪吃蛇算是比较简单的了,当年大学的时候还写过C语言字符版的,没想到还是遇到了很多问题. 最终效果如下(图太大的话 时间太长 录制gi ...
- 【C/C++】10分钟教你用C++写一个贪吃蛇附带AI功能(附源代码详解和下载)
C++编写贪吃蛇小游戏快速入门 刚学完C++.一时兴起,就花几天时间手动做了个贪吃蛇,后来觉得不过瘾,于是又加入了AI功能.希望大家Enjoy It. 效果图示 AI模式演示 imageimage 整 ...
- pygame试水,写一个贪吃蛇
最近学完python基础知识,就想着做一个游戏玩玩,于是就在https://www.pygame.org/docs/学着做了个贪吃蛇游戏. 首先要导入模块. import pygame import ...
- 用Python写一个贪吃蛇
最近在学Python,想做点什么来练练手,命令行的贪吃蛇一般是C的练手项目,但是一时之间找不到别的,就先做个贪吃蛇来练练简单的语法. 由于Python监听键盘很麻烦,没有C语言的kbhit(),所以这 ...
- 用js写一个贪吃蛇小游戏
<!DOCTYPE html> <html lang="en"> <head> <meta charset="UTF-8&quo ...
- Java 用java GUI写一个贪吃蛇小游戏
目录 主要用到 swing 包下的一些类 上代码 游戏启动类 游戏数据类 游戏面板类 代码地址 主要用到 swing 包下的一些类 JFrame 窗口类 JPanel 面板类 KeyListener ...
- react 写一个贪吃蛇
示例: 全部代码如下: snake.jsx import React, { Component } from 'react'; import PropTypes from 'prop-types'; ...
- python 写一个贪吃蛇游戏
#!usr/bin/python #-*- coding:utf-8 -*- import random import curses s = curses.initscr() curses.curs_ ...
随机推荐
- Mybatis 框架课程第四天
目录 1 Mybatis 延迟加载策略 1.1 何为延迟加载 1.2 实现需求 1.3 使用 assocation 实现延迟加载 1.3.1 账户的持久层 DAO 接口 1.3.2 账户的持久层映射文 ...
- 【记录】Truenas Scale|中危漏洞,需要SMB签名
部分内容参考:等保测试问题--需要SMB签名(SMB Signing not Required) 以及 ChatGPT. Truenas常用SMB服务,但默认并不开启SMB签名.这样具有中间人攻击的风 ...
- 【工具】Vscode翻译插件推荐(不用谷歌翻译api、支持短句英汉互译、支持查词、支持自动补全、不需要浏览器)
2024/04/24说明:这篇暂时修改为粉丝可见,因为正在冲粉丝量,等到我弄完了粉丝量的要求,我就改回来!不方便看到全文的小伙伴不好意思!! 需求: 1)偶尔需要查英文生词: 2)有时候想不起来中文对 ...
- CTP报单业务介绍
程序化登录信息 客户如果需要调用API介入柜台进行程序化交易,登录时需要一些基本信息,如下: 1.BrokerID 简称期货编码,是在该期货公司在CTP系统上的编码,为四位数,例如海通期货是8000 ...
- 一个基于 C# 编写的事件驱动、具备专业水准的算法交易平台(量化交易引擎)
前言 今天大姚给大家分享一个基于 C# 编写的事件驱动.采用模块化设计.具备专业水准的算法交易平台(量化交易引擎):Lean. 项目介绍 Lean 是由 QuantConnect 提供的一个基于 C# ...
- Win32汇编学习笔记10.OD插件
原文链接:https://www.bpsend.net/thread-223-1-1.html 筛选器异常插件 被调试程序: TestUnh.zip 我们用OD条试试发现,无法断下 筛选器异常 异常产 ...
- 第9.1讲、Tiny Encoder Transformer:极简文本分类与注意力可视化实战
Tiny Encoder Transformer:极简文本分类与注意力可视化实战 项目简介 本项目实现了一个极简版的 Transformer Encoder 文本分类器,并通过 Streamlit 提 ...
- Libnetwork底层原理以及Docker网络实现
1.CNM CNM (Container Network Model) 是 Docker 发布的容器网络标准,意在规范和指定容器网络发展标准,CNM 抽象了容器的网络接口 ,使得只要满足 CNM 接口 ...
- 国内用什么邮箱比较正式 个人邮箱对比qq邮箱网易新浪搜狐阿里云
本文永久链接:https://forum.piwind.com/d/19-guo-nei-yong-shi-yao-you-xiang-bi-jiao-zheng-shi-ge-ren-you-xia ...
- Containerd的架构简单学习
简单说明 这里,我们介绍一下containerd架构,以便于更好了理解containerd容器. 服务端子系统(Bundle和Runtime)和组件 下图是containerd的架构示意图: cont ...