SPA项目开发--表单验证、增删改
1. 表单验证
Form组件提供了表单验证的功能,只需要通过 rules 属性传入约定的验证规则,
并将Form-Item的prop属性设置为需校验的字段名即可
<el-form-item label="活动名称" prop="name">
<el-form :model="ruleForm" :rules="rules" ref="ruleForm"
1、
 <el-dialog :title="title" :visible.sync="editFormVisible" width="30%" @click="closeDialog">

       <el-form label-width="120px" :model="editForm" :rules="rules" ref="editForm">

         <el-form-item label="文章标题" prop="title">

           <el-input size="small" v-model="editForm.title" auto-complete="off" placeholder="请输入文章标题"></el-input>

         </el-form-item>

         <el-form-item label="文章内容" prop="body">

           <el-input size="small" v-model="editForm.body" auto-complete="off" placeholder="请输入文章内容"></el-input>

         </el-form-item>

       </el-form>

       <div slot="footer" class="dialog-footer">

         <el-button size="small" @click="closeDialog">取消</el-button>

         <el-button size="small" type="primary" class="title" @click="submitForm('editForm')">保存</el-button>

       </div>

     </el-dialog>
2、
 rules: {

           title: [{

               required: true,

               message: '请输入文章标题',

               trigger: 'blur'

             },

             {

               min: 3,

               max: 5,

               message: '标题长度在 3 到 5 个字符',

               trigger: 'blur'

             }

           ],

           body: [{

             required: true,

             message: '请输入文章内容',

             trigger: 'change'

           }]

         }
2、数据增删改
 <template>

   <div>

     <!-- 搜索筛选 -->

     <el-form :inline="true" :model="formInline" class="user-search">

       <el-form-item label="搜索:">

         <el-input size="small" v-model="formInline.title" placeholder="输入文章标题"></el-input>

       </el-form-item>

       <el-form-item>

         <el-button size="small" type="primary" icon="el-icon-search" @click="search">搜索</el-button>

         <el-button size="small" type="primary" icon="el-icon-plus" @click="handleAdd()">添加</el-button>

       </el-form-item>

     </el-form>

     <!--列表-->

     <el-table size="small" :data="listData" border element-loading-text="拼命加载中" style="min-width: 1;">

       <el-table-column align="center" type="selection" min-width="1">

       </el-table-column>

       <el-table-column sortable prop="id" label="文章的ID" min-width="1">

       </el-table-column>

       <el-table-column sortable prop="title" label="文章的标题" min-width="2">

       </el-table-column>

       <el-table-column sortable prop="body" label="文章的内容" min-width="4">

       </el-table-column>

       <el-table-column align="center" label="操作" min-width="2">

         <template slot-scope="scope">

           <el-button size="mini" @click="handleEdit(scope.$index, scope.row)">编辑</el-button>

           <el-button size="mini" type="danger" @click="deleteUser(scope.$index, scope.row)">删除</el-button>

         </template>

       </el-table-column>

     </el-table>

     <!-- 分页条 -->

             <el-pagination style="margin-top: 20px;" @size-change="handleSizeChange" @current-change="handleCurrentChange"

             :current-page="formInline.page" :page-sizes="[10, 20, 30, 50]" :page-size="100" layout="total, sizes, prev, pager, next, jumper"

             :total="total">

             </el-pagination>

     <!-- 编辑界面 -->

     <el-dialog :title="title" :visible.sync="editFormVisible" width="30%" @click="closeDialog">

       <el-form label-width="120px" :model="editForm" :rules="rules" ref="editForm">

         <el-form-item label="文章标题" prop="title">

           <el-input size="small" v-model="editForm.title" auto-complete="off" placeholder="请输入文章标题"></el-input>

         </el-form-item>

         <el-form-item label="文章内容" prop="body">

           <el-input size="small" v-model="editForm.body" auto-complete="off" placeholder="请输入文章内容"></el-input>

         </el-form-item>

       </el-form>

       <div slot="footer" class="dialog-footer">

         <el-button size="small" @click="closeDialog">取消</el-button>

         <el-button size="small" type="primary" class="title" @click="submitForm('editForm')">保存</el-button>

       </div>

     </el-dialog>

   </div>

 </template>

 <script>

   export default {

     data() {

       return {

         listData: [],

         formInline: {

           page: 1,

           rows: 10,

           title: ''

         },

         total:0,

         editForm: {

           id: 0,

           title: '',

           body: ''

         },

         editFormVisible: false,

         title: '',

         rules: {

           title: [{

               required: true,

               message: '请输入文章标题',

               trigger: 'blur'

             },

             {

               min: 3,

               max: 5,

               message: '标题长度在 3 到 5 个字符',

               trigger: 'blur'

             }

           ],

           body: [{

             required: true,

             message: '请输入文章内容',

             trigger: 'change'

           }]

         }

       };

     },

     methods: {

       doSearch(params) {

         let url = this.axios.urls.SYSTEM_ARTICLE_LIST;

         this.axios.post(url, params).then((response) => {

           console.log(response);

           this.listData = response.data.result;

           this.total = response.data.pageBean.total;

         }).catch((response) => {

           console.log(response);

         });

       },

       handleSizeChange(rows) {

         console.log('页码大小发生改变的时候触发');

         this.formInline.page = 1;

         this.formInline.rows = rows;

         this.search();

       },

       handleCurrentChange(page) {

         console.log('当前页页码发生改变的时候触发');

         this.formInline.page = page;

         this.search();

       },

       search() {

         this.doSearch(this.formInline);

       },

       closeDialog() {

       },

       submitForm(formName) {

         this.$refs[formName].validate((valid) => {

           if (valid) {

             let url;

             if (this.editForm.id == 0) {

               url = this.axios.urls.SYSTEM_ARTICLE_ADD;

             } else {

               url = this.axios.urls.SYSTEM_ARTICLE_EDIT;

             }

             // let url = 'http://localhost:8080/T216_SSH/vue/userAction_login.action';

             this.axios.post(url, this.editForm).then((response) => {

               console.log(response);

               this.clearData();

               this.search();

             }).catch(function(error) {

               console.log(error);

             });

           } else {

             console.log('error submit!!');

             return false;

           }

         });

       },

       //新增文章

       handleAdd() {

         this.clearData(); //清除弹出窗体中残留的信息

         this.editFormVisible = true;

         this.title = '新增文章';

       },

       //编辑文章

       handleEdit(index, row) {

         this.editFormVisible = true;

         this.title = '编辑文章';

         this.editForm.id = row.id;

         this.editForm.title = row.title;

         this.editForm.body = row.body;

       },

       //删除文章

       deleteUser(index, row) {

         let url = this.axios.urls.SYSTEM_ARTICLE_DEL;

         this.axios.post(url, {id:row.id}).then((response) => {

           console.log(response);

           this.clearData();

           this.search();

         }).catch(function(error) {

           console.log(error);

         });

       },

       //清除弹出窗体中残留的信息

       clearData() {

         this.editFormVisible = false;

         this.title = '';

         this.editForm.id = 0;

         this.editForm.title = '';

         this.editForm.body = '';

       }

     },

     created() {

       this.doSearch({});

     }

   }

 </script>

 <style>

 </style>
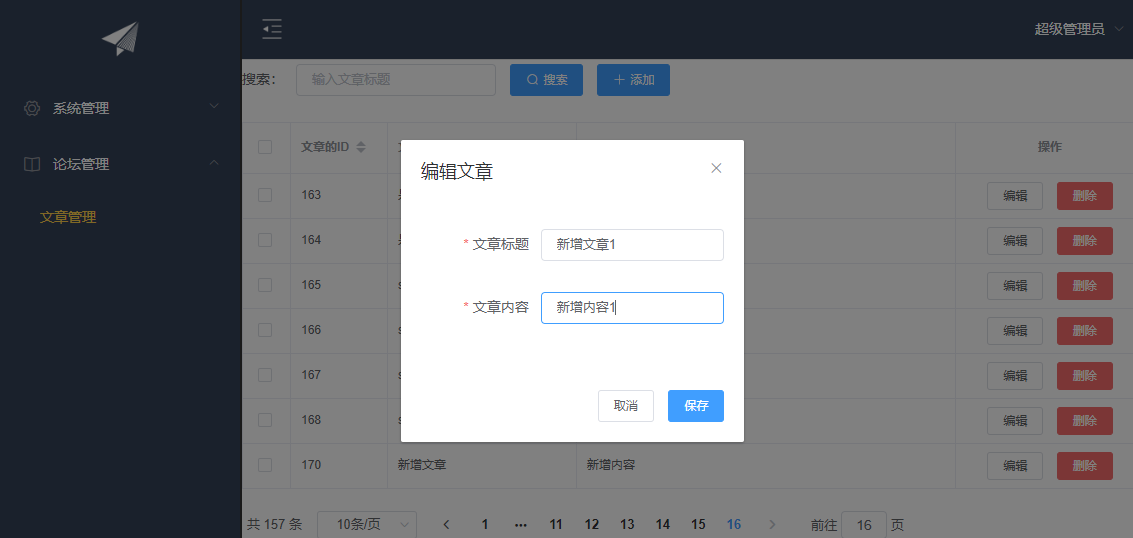
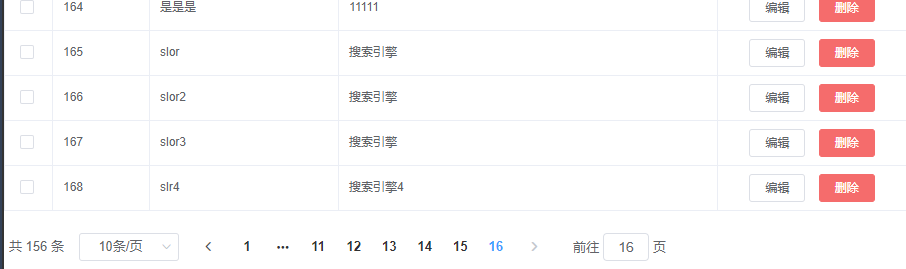
3、展示效果
表单验证
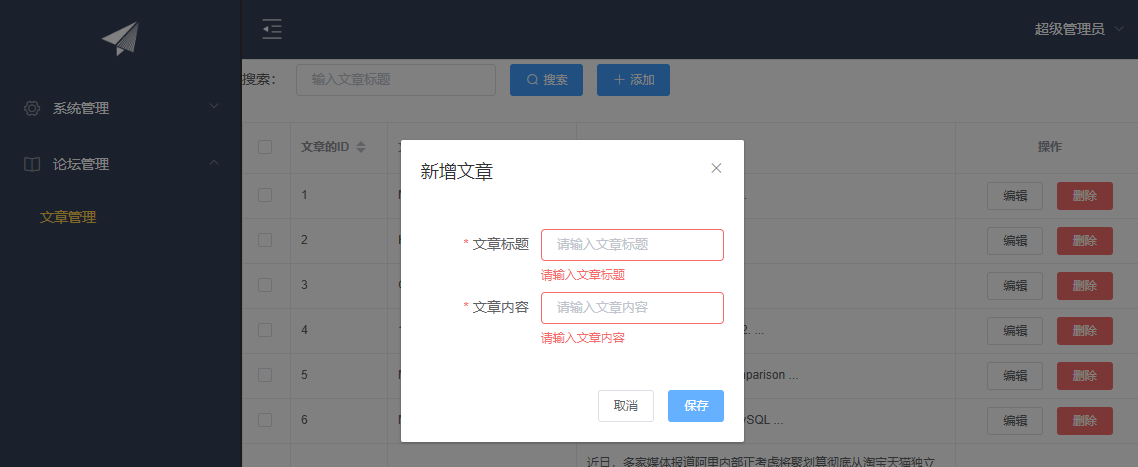
新增

修改

删除后
谢谢观看!!!
SPA项目开发--表单验证、增删改的更多相关文章
- vue.js带复选框表单的增删改查
近段时间由于公司项目要求,前端开始使用VUE框架进行开发,最近刚开始学习,做了一个表单的增删改查,和大家分享一下. 页面模型代码设计如下 <template> <div id=&qu ...
- django-orm框架表单的增删改查
08.14自我总结 django-orm框架 一.orm基本配置 1.创建django项目 命令行:cmd先去到django创建目录,然后输入django-admin startproject dja ...
- Web开发-表单验证
表单验证是Web开发中必不可少的一个环节,用来限制用户输入数据的规范和一致性.那么如何能够简化这一任务,让开发人员通过简单的属性设置就能达到目的呢? FineUI在这一点上也是下足了功夫,比Asp.N ...
- AppBox实战: 如何实现一对多表单的增删改查
本篇通过完整示例介绍如何实现一对多关系表单的相应服务及视图. 一.准备数据结构 示例所采用的数据结构为"物资需求"一对多"物资清单",通过IDE的实体设 ...
- angularjs 表单验证(不完整版)
针对项目实践表单验证总结: angular 的 form表单验证:form内需要novalidate取消默认验证,用ng自己的验证,form的名字是非常必要的 栗子:以注册为栗子,下面是注册的部分: ...
- SPA项目之CRUD+表单验证
1. 表单验证 Form组件提供了表单验证的功能,只需要通过 rules 属性传入约定的验证规则, 并将Form-Item的prop属性设置为需校验的字段名即可 <el-dialog :titl ...
- SPA项目开发之CRUD+表单验证
表单验证 Form组件提供了表单验证的功能,只需要通过 rules 属性传入约定的验证规则, 并将Form-Item的prop属性设置为需校验的字段名即可 <el-form-item label ...
- 测试开发【提测平台】分享10-Element UI抽屉和表单校验&增改接口合并实现应用管理
微信搜索[大奇测试开],关注这个坚持分享测试开发干货的家伙. 开篇说个小讨论,一个群里聊天聊到关于更新篇章的长度,是小篇幅多次,还是每次按照一个小完整的功能,我个人的是按照后种来的,主要的思考就是希望 ...
- Online Coding开发模式 (通过在线配置实现一个表模型的增删改查功能,无需写任何代码)
JEECG 智能开发平台. 开发模式由代码生成器转变为Online Coding模式 (通过在线配置实现一个表模型的增删改查功能,无需一行代码,支持用户自定义 ...
随机推荐
- c++模板使用及常见问题
一.为什么使用模板?? 使用模板的目的是为了避免重复声明和定义一系列基本功能相同的函数或者类,其区别因传入参数的不同而产生不同类型的数据,其基本工作过程都是一致的! 二.调用模板函数产生不明确问题 ( ...
- json.decoder.JSONDecodeError: Expecting property name enclosed in double quotes: line 1 column 2 (ch
阐述 想要把一个字符串转化成字典对象,在使用json的过程出现如此报错 解决方法 将字符串里面的单引号改为双引号
- python 之网络编程(基于TCP协议Socket通信的粘包问题及解决)
8.4 粘包问题 粘包问题发生的原因: 1.发送端需要等缓冲区满才发送出去,造成粘包(发送数据时间间隔很短,数据了很小,会合到一起,产生粘包),这样接收端,就难于分辨出来了,必须提供科学的拆包机制. ...
- localhost-startStop-1启动失败
背景:在IDEA调试程序的时候,应用起不来,看日志是从main线程切换到localhost-startStop-1线程就开始卡住了 方法一 原因 这个问题和jvm上的熵池策略有关 解决 将$JAVA_ ...
- quartz2.3.0(十)xml配置方式定义quartz定时任务
1.新增pom依赖 除了按照<quartz2.3.0系列目录——带您由浅入深全面掌握quartz2.3.0>添加依赖之外,pom.xml里新增加依赖: <dependency> ...
- HDU6037 Expectation Division 期望、高维前缀和
传送门 设\(f_x\)表示答案,那么\(f_x = \frac{\sum\limits_{d \mid x} f_d}{\sigma_0(x)} + 1 = \frac{\sigma_0(x) + ...
- ADO.NET 一般操作(c#)
ADO.NET五大对象:SqlConnection.SqlCommand.SqlDataReader.SqlDataAdapter .DataSet ,其中SqlDataAdapter 不建议使用 一 ...
- [高清] Excel函数速记手册
------ 郑重声明 --------- 资源来自网络,纯粹共享交流, 如果喜欢,请您务必支持正版!! --------------------------------------------- 下 ...
- java之struts2之类型转换
在使用servlet开发中,表单中提交的数据到servlet后都是字符串类型,需要程序员手动进行类型转换. 但是到struts2后,基本数据类型struts2都可以转换.但是如果是自定义类型,stru ...
- ②将SVN迁移到GitLab-多分支多标签迁移
之前我们介绍了<①将SVN迁移到GitLab-单分支迁移>,文中研究了svn迁移到git单分支的操作过程,本文针对实际开发过程中svn使用到的trunk.branches.tags情况进行 ...