jumpserver安装与部署
1.简介
Jumpserver 是一款由Python编写开源的跳板机(堡垒机)系统,实现了跳板机应有的功能。基于ssh协议来管理,客户端无需安装agent。
特点:
完全开源,GPL授权
Python编写,容易再次开发
实现了跳板机基本功能,认证、授权、审计
集成了Ansible,批量命令等
支持WebTerminal
Bootstrap编写,界面美观
自动收集硬件信息
录像回放
命令搜索
实时监控
批量上传下载
2.部署环境
系统:centos7
ip:192.168.199.218

关闭selinux 和防火墙

CentOS

setenforce  # 可以设置配置文件永久关闭

systemctl stop iptables.service

systemctl stop firewalld.service

修改字符集,否则可能报 input/output error的问题,因为日志里打印了中文

localedef -c -f UTF- -i zh_CN zh_CN.UTF-

export LC_ALL=zh_CN.UTF-echo 'LANG=zh_CN.UTF-8' > /etc/locale.conf

CentOS6

setenforce

service iptables stop
2.1准备Python环境和Python虚拟环境
2.1.1安装依赖包
yum -y install wget sqlite-devel xz gcc automake zlib-devel openssl-devel epel-release git
2.1.2编译安装
wget https://www.python.org/ftp/python/3.6.1/Python-3.6.1.tar.xz

tar xvf Python-3.6..tar.xz && cd Python-3.6.

./configure && make && make install
# 这里必须执行编译安装,否则在安装 Python 库依赖时会有麻烦...
2.1.3建立Python虚拟环境
centos 7 自带的是 Python2,而 Yum 等工具依赖原来的 Python,为了不扰乱原来的环境我们来使用 Python 虚拟环境
cd /opt

python3 -m venv py3

source /opt/py3/bin/activate
# 看到下面的提示符代表成功,以后运行 Jumpserver 都要先运行以上 source 命令,以下所有命令均在该虚拟环境中运行
(py3) [root@localhost py3
2.2安装Jumpserver 1.0.0
2.2.1下载或 Clone 项目
#项目提交较多 git clone 时较大,你可以选择去 Github 项目页面直接下载zip包。直接下载unzip 修改文件名会更快(推荐)
cd /opt/

git clone --depth= https://github.com/jumpserver/jumpserver.git && cd jumpserver && git checkout master
2.2.2安装依赖 RPM
cd /opt/jumpserver/requirements

yum -y install $(cat rpm_requirements.txt) # 如果没有任何报错请继续
2.2.3安装Python库依赖
pip install -r requirements.txt # 不要指定-i参数,因为镜像上可能没有最新的包,如果没有任何报错请继续
2.2.4安装redis,jumpserver使用redis做cache和celery broke
yum -y install redis

systemctl start redis

# centos6

service redis start
2.2.5安装 MySQL
#本教程使用 Mysql 作为数据库,如果不使用 Mysql 可以跳过相关 Mysql 安装和配置
# centos7

yum -y install mariadb mariadb-devel mariadb-server # centos7下安装的是mariadb

systemctl enable mariadb

systemctl start mariadb # 报错使用service mysqld start

# centos6

yum -y install mysql mysql-devel mysql-server

chkconfig mysqld on

service mysqld start
2.2.6创建数据库jumpserver 并且授权
mysql

create database jumpserver default charset 'utf8';

grant all on jumpserver.* to 'jumpserver'@'127.0.0.1' identified by 'somepassword';
2.2.7修改jumpserver 配置文件
cd /opt/jumpserver

cp config_example.py config.py

vi config.py

# 我们计划修改 DevelopmentConfig 中的配置,因为默认 Jumpserver 使用该配置,它继承自 Config

注意: 配置文件是 Python 格式,不要用 TAB,而要用空格

class DevelopmentConfig(Config):

DEBUG = True

DB_ENGINE = 'mysql'

DB_HOST = '127.0.0.1'

DB_PORT =

DB_USER = 'jumpserver'

DB_PASSWORD = 'somepassword'

DB_NAME = 'jumpserver'

...

config = DevelopmentConfig() # 确保使用的是刚才设置的配置文件
2.2.8 生成数据库表结构和初始化数据
cd /opt/jumpserver/utils

bash make_migrations.sh
2.2.9运行jumpserver
cd /opt/jumpserver

./jms start all # 后台运行使用 -d 参数./jms start all -d
# 新版本更新了运行脚本,使用方式./jms start|stop|status|restart all 后台运行请添加 -d 参数
账号密码:admin
附上重启的方法(这里待优化)
ps axu | egrep '(gunicorn|celery|beat)'
ps axu | egrep '(gunicorn|celery|beat)' | awk '{ print $2 }' | xargs kill -9
2.3安装 ssh server 和websocket server:Coco
2.3.1下载或者克隆项目
新建终端,连接测试机 别忘了 source /opt/py3/bin/activate
cd /opt

source /opt/py3/bin/activate

git clone https://github.com/jumpserver/coco.git && cd coco && git checkout master
2.3.2安装依赖
cd /opt/coco/requirements

yum -y install $(cat rpm_requirements.txt)

pip install -r requirements.txt
2.3.3 查看配置文件并运行
cd /opt/coco

cp conf_example.py conf.py

./cocod start # 后台运行使用 -d 参数./cocod start -d
# 新版本更新了运行脚本,使用方式./cocod start|stop|status|restart 后台运行请添加 -d 参数
这时需要去 Jumpserver 管理后台-会话管理-终端管理(http://192.168.199.218:8080/terminal/terminal/)接受 Coco 的注册
Coco version 1.0.0, more see https://www.jumpserver.org
Starting ssh server at 0.0.0.0:2222
Quit the server with CONTROL-C.
2.3.4测试连接(本IP是192.168.199.218)
ssh -p2222 admin@192.168.244.144
密码: admin
如果是用在 Windows 下,Xshell Terminal 登录语法如下
ssh admin@192.168.244.144 2222
密码: admin
如果能登陆代表部署成功
2.4安装 Web Terminal 前端: Luna
Luna 已改为纯前端,需要 Nginx 来运行访问
访问(https://github.com/jumpserver/luna/releases)下载对应版本的 release 包,直接解压,不需要编译
2.4.1 解压 Luna
pwd

/opt/

wget https://github.com/jumpserver/luna/releases/download/v1.0.0/luna.tar.gz

tar xvf luna.tar.gz

ls /opt/luna
2.5.安装windows支持组件
因为手动安装 guacamole 组件比较复杂,这里提供打包好的 docker 使用, 启动 guacamole
2.5.1 Docker安装 (仅针对CentOS7,CentOS6安装Docker相对比较复杂)
yum remove docker-latest-logrotate docker-logrotate docker-selinux dockdocker-engine

yum install docker.x86

yum install -y yum-utils device-mapper-persistent-data lvm2

yum-config-manager --add-repo https://download.docker.com/linux/centos/docker-ce.repo

yum-config-manager --enable docker-ce-edge

yum-config-manager --enable docker-ce-test

yum-config-manager --disable docker-ce-edge

yum install docker-ce

systemctl status docker

systemctl start docker

systemctl status docker
2.5.2 启动 Guacamole
这里所需要注意的是 guacamole 暴露出来的端口是 8081,若与主机上其他端口冲突请自定义
修改 JUMPSERVER_SERVER 环境变量的配置,填上 Jumpserver 的内网地址, 启动成功后去 Jumpserver 会话管理-终端管理
(http://192.168.199.218:8080/terminal/terminal/)接受[Gua]开头的一个注册
# 注意:这里一定要改写一下本机的IP地址, 否则会出错, 带宽有限, 下载时间可能有点长,可以喝杯咖啡,撩撩对面的妹子
docker run --name jms_guacamole -d \

-p : -v /opt/guacamole/key:/config/guacamole/key \

-e JUMPSERVER_KEY_DIR=/config/guacamole/key \

-e JUMPSERVER_SERVER=http://<填写本机的IP地址>:8080 \

registry.jumpserver.org/public/guacamole:1.0.
2.6.配置 Nginx 整合各组件
2.6.1 安装 Nginx 根据喜好选择安装方式和版本
yum -y install nginx
2.6.2 准备配置文件 修改 /etc/nginx/conf.d/jumpserver.conf
vim /etc/nginx/nginx.conf

... 省略

# 把默认server配置块改成这样

server {

listen ;

proxy_set_header X-Real-IP $remote_addr;

proxy_set_header Host $host;

proxy_set_header X-Forwarded-For $proxy_add_x_forwarded_for;

location /luna/ {

try_files $uri / /index.html;

alias /opt/luna/;

}

location /media/ {

add_header Content-Encoding gzip;

root /opt/jumpserver/data/;

}

location /static/ {

root /opt/jumpserver/data/;

}

location /socket.io/ {

proxy_pass http://localhost:5000/socket.io/; # 如果coco安装在别的服务器,请填写它的ip

proxy_buffering off;

proxy_http_version 1.1;

proxy_set_header Upgrade $http_upgrade;

proxy_set_header Connection "upgrade";

}

location /guacamole/ {

proxy_pass http://localhost:8081/; # 如果guacamole安装在别的服务器,请填写它的ip

proxy_buffering off;

proxy_http_version 1.1;

proxy_set_header X-Forwarded-For $proxy_add_x_forwarded_for;

proxy_set_header Upgrade $http_upgrade;

proxy_set_header Connection $http_connection;

access_log off;

}

location / {

proxy_pass http://localhost:8080; # 如果jumpserver安装在别的服务器,请填写它的ip

}

}
2.6.3 运行 Nginx
nginx -t # 确保配置没有问题, 有问题请先解决

# CentOS 7

systemctl start nginx

systemctl enable nginx

#CentOS

service nginx start

chkconfig nginx on
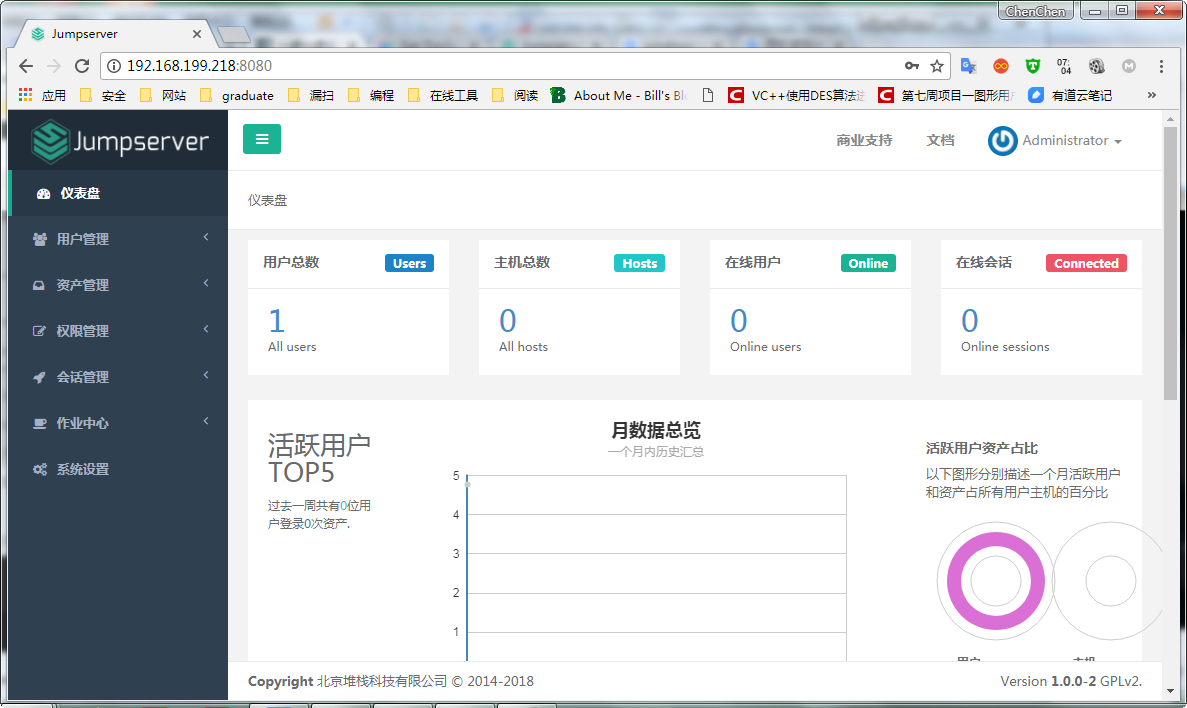
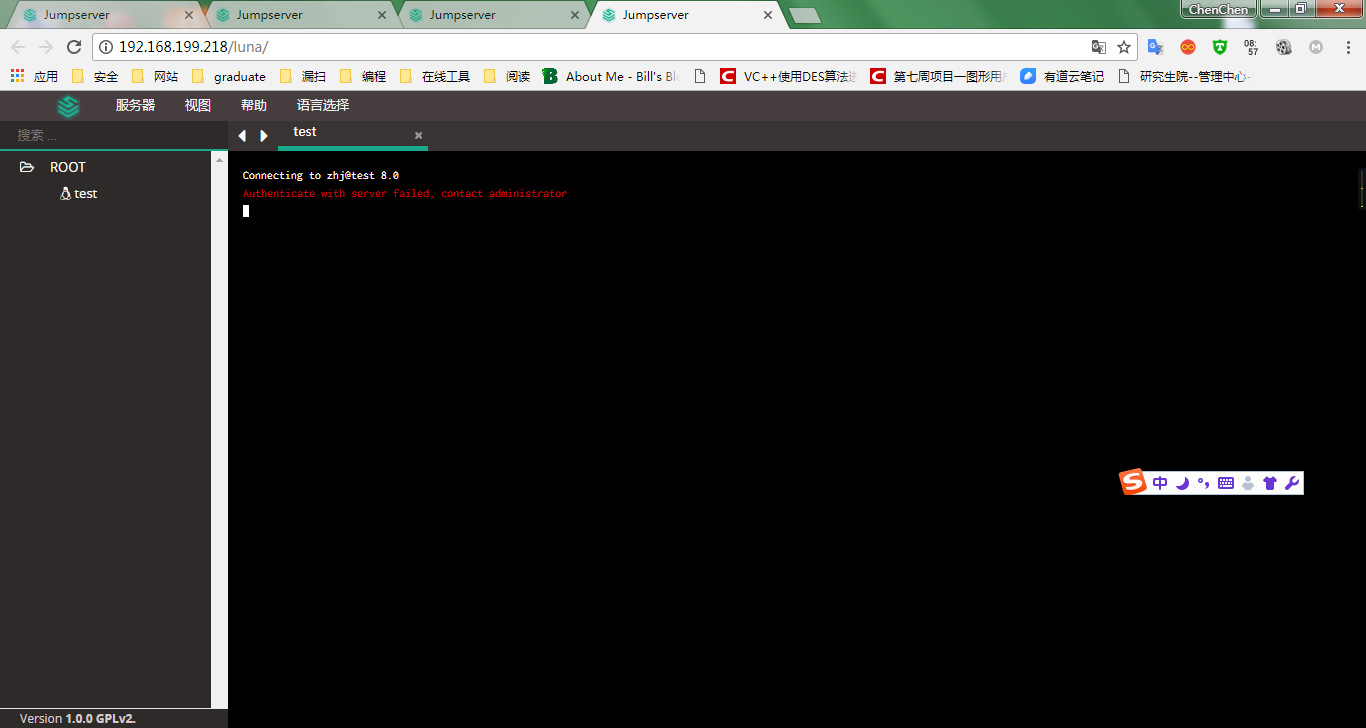
3.访问效果
tips:
0. git太慢的时候选择直接下载
unzip 解压
1.没有可用软件包 Redis.
yum添加epel源:yum install epel-release
2.Command "python setup.py egg_info" failed with error code 1 in /tmp/pip-build-8ew7s0ye/mysqlclient/
pip install --upgrade pip
3.Job for mariadb.service failed because the control process exited with error code. See "systemctl status mariadb.service" and "journalctl -xe" for details.
service mysqld start
4.Can't connect to local MySQL server through socket '/var/lib/mysql/mysql.sock'
mysql -h 127.0.0.1
5.Command "python setup.py egg_info" failed with error code 1
python -m pip install --upgrade --force pip

pip install setuptools==33.1.
6.最好用 163 的yum
7.没有可用软件包 docker-ce。
错误:无须任何处理
8.一定设置好或关闭防火墙等等
参考
把有道笔记分享
1.centos7 安装jumpserver3.0跳板机
2.官方文档
未来工作
详细学习使用jumpserver介绍
jumpserver安装与部署的更多相关文章
- Jumpserver 5.2版本安装与部署
组件说明 Jumpserver 为管理后台, 管理员可以通过 Web 页面进行资产管理.用户管理.资产授权等操作, 用户可以通过 Web 页面进行资产登录, 文件管理等操作 koko 为 SSH Se ...
- jumpserver堡垒机部署
初稿(后面我有时间再整理一下,看能不能弄成自动化脚本安装): systemctl stop firewalld #关闭防火墙setenforce 0 #关闭selinuxyum install htt ...
- JumpServer 安装配置
环境 系统:Centos 7.4 阿里云ECS,单独绑定弹性公网IP 关闭selinux,防火墙对本机公司IP全开 #CentOS 7 $ setenforce 0 # 临时关闭,重启后失效 #修改字 ...
- jumpserver安装
一. 准备 Python3 和 Python 虚拟环境 1.1 安装依赖包 yum -y install wget sqlite-devel xz gcc automake zlib-devel o ...
- CentOS 7下JumpServer安装及配置
环境 系统 # cat /etc/redhat-release CentOS Linux release 7.4.1708 (Core) # uname -r 3.10.0-693.21.1.el7. ...
- Windows Server 2012 虚拟化实战:SCVMM的安装和部署
本篇大概介绍一下在Windows Server 2012 R2上安装和部署SCVMM的过程及其注意事项.下图是我们数据中心SCVMM的基本架构,其中 SCVMM Database 是用于存储了所有配置 ...
- Linux下Redis的安装和部署
一.Redis介绍 Redis是当前比较热门的NOSQL系统之一,它是一个key-value存储系统.和Memcache类似,但很大程度补偿了Memcache的不足,它支持存储的value类型相对更多 ...
- 他山之石——vs2013 安装与部署及程序打包
C#打包需要这个:InstallShield 2013 Limited Edition for Visual Studio .下载地址: InstallShield 2013 Limited Edi ...
- 阿里云服务器Linux CentOS安装配置(六)resin多端口配置、安装、部署
阿里云服务器Linux CentOS安装配置(六)resin多端口配置.安装.部署 1.下载resin包 http://125.39.66.162/files/2183000003E08525/cau ...
随机推荐
- Day11 Java内部类
什么是内部类? 内部类是指在一个外部类的内部再定义一个类.内部类作为外部类的一个成员,并且依附于外部类而存在的.内部类可为静态,可用protected和private修饰(而外部类只能使用public ...
- nodejs实现mysql数据库的简单例子
在MySQLWorkbench中创建table存储用户的tokenId信息: use token; SET FOREIGN_KEY_CHECKS = ; DROP TABLE IF EXISTS `a ...
- node-webkit,nwjs 系统托盘【Tray】实践
参照自:https://www.cnblogs.com/xuanhun/p/3678943.html Tray包含title.tooltip.icon.menu.alticon五个属性. title属 ...
- Docker实战(四)之Docker数据管理
在生产环境中使用Docker的过程中,往往需要对数据进行持久化,或者需要在多个容器之间进行数据共享,这必然涉及到容器的数据管理操作. 容器中管理数据主要有两种形式: 数据卷:容器内数据直接映射到本地主 ...
- 【转】Android:No implementation found for native
解决方法: 1.检查native c code的定义: JNIEXPORT void Java_com_example_something_MyClass_getMyString(JNIEnv * e ...
- PAT乙级1007
1007 素数对猜想 (20 分) 让我们定义dn为:dn=pn+1−pn,其中pi是第i个素数.显然有d1=1,且对于n>1有dn是偶数.“素数对猜想 ...
- 解决JS在url中传递参数时参数包含中文乱码的问题
1.传参页面JavaScript代码: function go_mark(id,jobname,headimgurl,nickname){ window.location.href = "m ...
- 逻辑卷管理-LVM(Logical Volume Manager)
一. 概念与由来 LVM:逻辑卷管理(Logical Volume Manager) 普通的磁盘分区管理方式在逻辑分区划分好之后就无法改变其大小,当一个逻辑分区存放不下某文件时,这个文件因为受上层文件 ...
- 基于STM32F103ZET6 HC_SR04超声波测距模块
这是最后的实验现象,改变不同的角度即可测得距离 板子 PZ6806L 超声波模块 HC_SR04 HC_SR04模块讲解 通过该超声波模块说明书,可明白供电需VCC 5V 还需GND ECHO(回 ...
- 后台生成excel前端下载
后台生成Excel时前端获取下载 Controller控制器: package com.example.test.controller; import com.example.test.common. ...