Android + Eclipse + PhoneGap 2.9.0 安卓最新环境配置,部分资料整合网上资料,已成功安装.
前言:最近心血来潮做了一个以品牌为中心的网站,打算推出本地服务o2o应用。快速开发手机应用,最后选择了phonegap,这里我只是讲述我安装的过程,仅供大家参考。
我开发的一个模型http://www.w30.cn 可以看下。看看有多差。
如果有什么问题也可以到小组留言,可以的话,贡献一个ip:)
phonegap小组 http://www.w30.cn/group/4
如果有什么问题也可以加入我们的QQ群:64674997
ok 不多说了,下面是我的安装过程
环境搭建首先要去下载一些安装包:
(下载前注意一下,电脑是32位还是64位的请注意选择安装包)
java环境的JDK:http://www.oracle.com/technetwork/java/javase/downloads/index.html
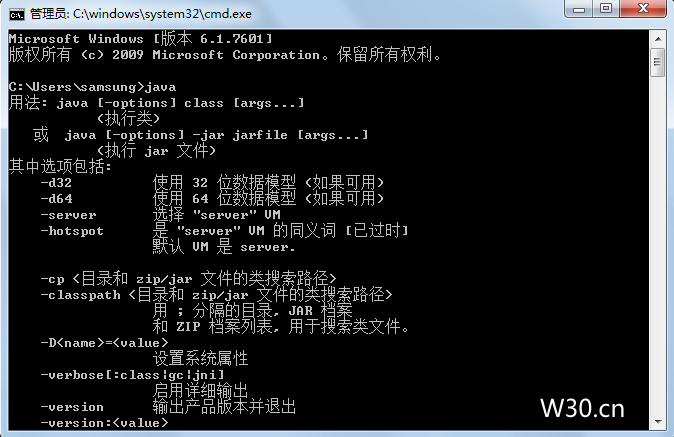
我安装的是64位,下载自己系统环境需要的版本,下载后默认安装,完成后 在 开始 - 输入cmd- 输入java 显示出java版本信息表示安装已经成功
接着安装
一、下载安装ADT。http://developer.android.com/sdk/index.html
二、Android的压缩包为:adt-bundle-windows-x86_64。
解压后,进入eclipse目录,运行eclipse.exe。
1)先更新Android包:选择 Window -------->Android SDK Manager
全部勾选后,点击 Install packages,将所有包全部打上。

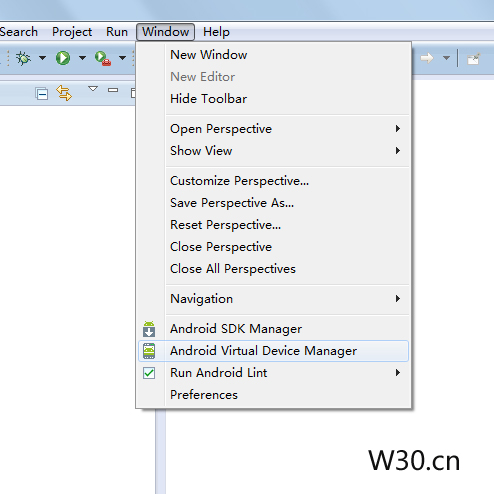
2)配置AVD环境
配置该环境有两种方法:
1、使用界面进行配置,进入方式如图所示:
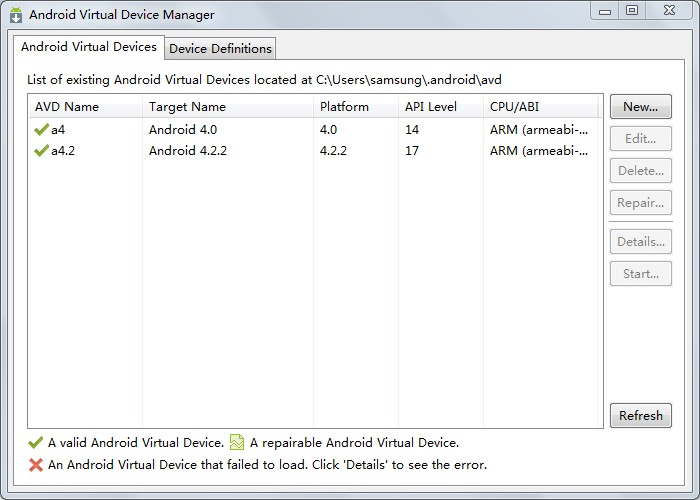
打开之后,如图所示,点击New新建。
三、配置PhoneGap(这个比较麻烦)
1)先新建一个新的工程。
具体详细可以查看:
http://developer.android.com/intl/zh-CN/training/basics/firstapp/creating-project.html
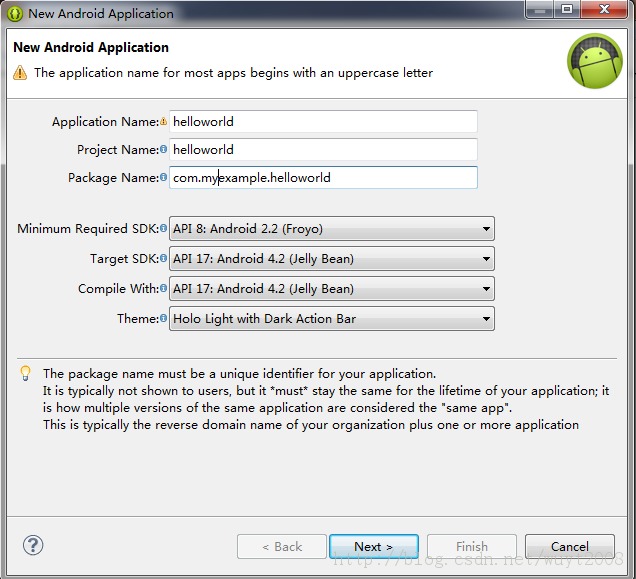
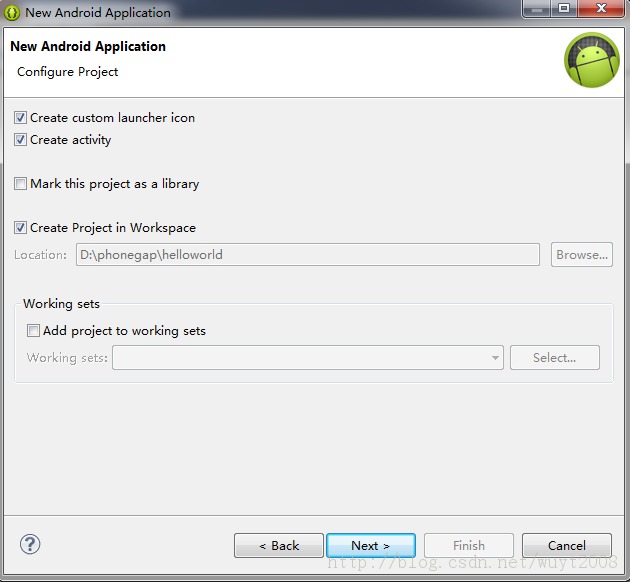
打开ADT,新建一个安卓应用项目

输入名称,然后下一步
可以选择下项目位置,我的是默认的。
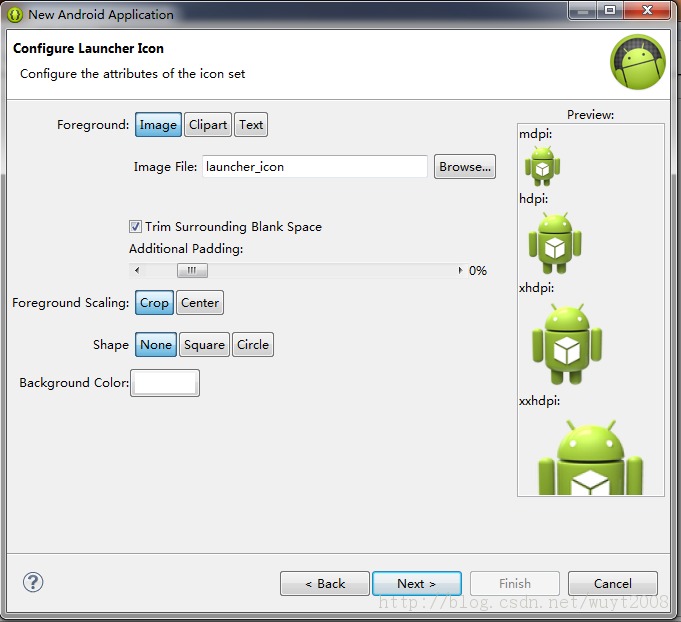
这里可以选择图标。
选择第一个
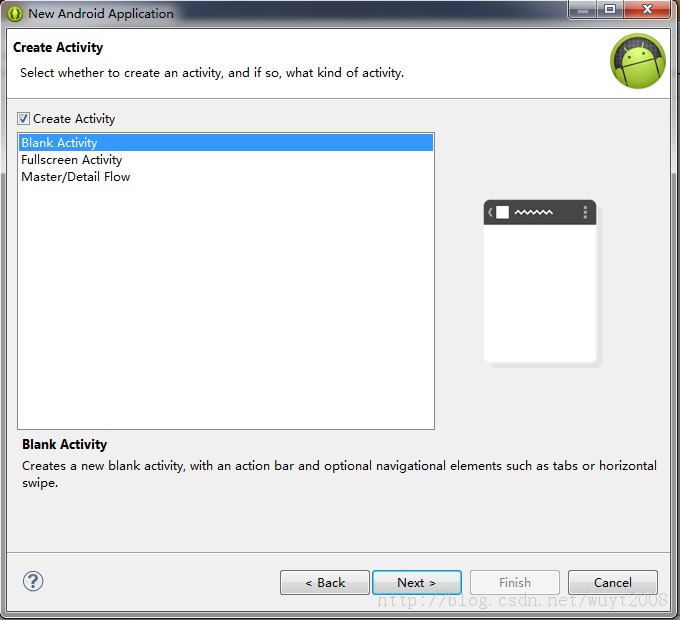
这个时候,一个安卓项目就建好了。
phonegap下载地址:http://phonegap.com/install/
将PhoneGap目录下的android目录下的jar文件拷贝到项目的libs目录下

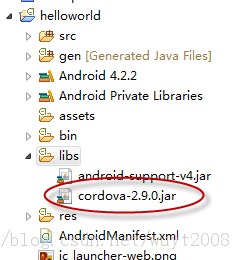
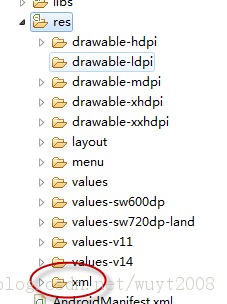
将xml目录拷贝到项目的res目录下

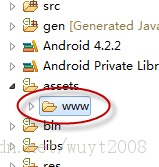
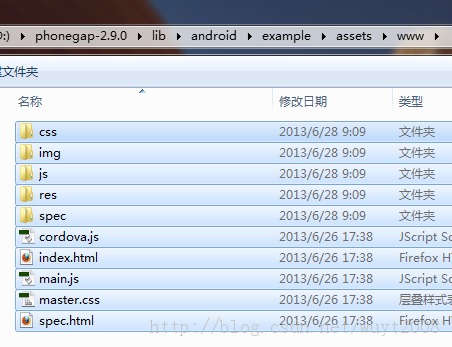
在assetc目录下,建立一个www目录,下面放html内容。为了偷懒,我把phonegap例子里面的内容拷贝过来了。
修改Java代码:
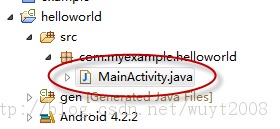
package com.myexample.helloworld;

import android.os.Bundle;

import org.apache.cordova.*;

public class MainActivity extends DroidGap

{

    @Override

    public void onCreate(Bundle savedInstanceState)

    {

        super.onCreate(savedInstanceState);

        // Set by <content src="index.html" /> in config.xml

        super.loadUrl(Config.getStartUrl());

        //super.loadUrl("file:///android_asset/www/index.html")

    }

}

/*

 * 下面是adt生成的代码,注释掉

import android.os.Bundle;

import android.app.Activity;

import android.view.Menu;

public class MainActivity extends Activity {

    @Override

    protected void onCreate(Bundle savedInstanceState) {

        super.onCreate(savedInstanceState);

        setContentView(R.layout.activity_main);

    }

    @Override

    public boolean onCreateOptionsMenu(Menu menu) {

        // Inflate the menu; this adds items to the action bar if it is present.

        getMenuInflater().inflate(R.menu.main, menu);

        return true;

    }

}*/
修改一下项目根目录下的AndroidManifest.xml和res/xml目录下的config.xml文件
AndroidManifest.xml
<?xml version="1.0" encoding="utf-8"?>

<!--

       Licensed to the Apache Software Foundation (ASF) under one

       or more contributor license agreements.  See the NOTICE file

       distributed with this work for additional information

       regarding copyright ownership.  The ASF licenses this file

       to you under the Apache License, Version 2.0 (the

       "License"); you may not use this file except in compliance

       with the License.  You may obtain a copy of the License at

         http://www.apache.org/licenses/LICENSE-2.0

       Unless required by applicable law or agreed to in writing,

       software distributed under the License is distributed on an

       "AS IS" BASIS, WITHOUT WARRANTIES OR CONDITIONS OF ANY

       KIND, either express or implied.  See the License for the

       specific language governing permissions and limitations

       under the License.

-->

<manifest xmlns:android="http://schemas.android.com/apk/res/android"

    package="com.myexample.helloworld"

    android:hardwareAccelerated="true"

    android:versionCode="1"

    android:versionName="1.0"

    android:windowSoftInputMode="adjustPan" >

    <supports-screens

        android:anyDensity="true"

        android:largeScreens="true"

        android:normalScreens="true"

        android:resizeable="true"

        android:smallScreens="true"

        android:xlargeScreens="true" />

    <uses-permission android:name="android.permission.CAMERA" />

    <uses-permission android:name="android.permission.VIBRATE" />

    <uses-permission android:name="android.permission.ACCESS_COARSE_LOCATION" />

    <uses-permission android:name="android.permission.ACCESS_FINE_LOCATION" />

    <uses-permission android:name="android.permission.ACCESS_LOCATION_EXTRA_COMMANDS" />

    <uses-permission android:name="android.permission.INTERNET" />

    <uses-permission android:name="android.permission.RECEIVE_SMS" />

    <uses-permission android:name="android.permission.RECORD_AUDIO" />

    <uses-permission android:name="android.permission.RECORD_VIDEO" />

    <uses-permission android:name="android.permission.MODIFY_AUDIO_SETTINGS" />

    <uses-permission android:name="android.permission.READ_CONTACTS" />

    <uses-permission android:name="android.permission.WRITE_CONTACTS" />

    <uses-permission android:name="android.permission.WRITE_EXTERNAL_STORAGE" />

    <uses-permission android:name="android.permission.ACCESS_NETWORK_STATE" />

    <uses-permission android:name="android.permission.GET_ACCOUNTS" />

    <uses-permission android:name="android.permission.BROADCAST_STICKY" />

    <application

        android:debuggable="true"

        android:hardwareAccelerated="true"

        android:icon="@drawable/ic_launcher"

        android:label="@string/app_name" >

        <activity

            android:name="com.myexample.helloworld.MainActivity"

            android:configChanges="orientation|keyboardHidden|keyboard|screenSize|locale"

            android:label="@string/app_name"

            android:theme="@android:style/Theme.Black.NoTitleBar" >

            <intent-filter>

                <action android:name="android.intent.action.MAIN" />

                <category android:name="android.intent.category.LAUNCHER" />

            </intent-filter>

        </activity>

    </application>

    <uses-sdk

        android:minSdkVersion="7"

        android:targetSdkVersion="17" />

</manifest>
config.xml
<?xml version="1.0" encoding="UTF-8"?>

<!--

 Licensed to the Apache Software Foundation (ASF) under one

 or more contributor license agreements.  See the NOTICE file

 distributed with this work for additional information

 regarding copyright ownership.  The ASF licenses this file

 to you under the Apache License, Version 2.0 (the

 "License"); you may not use this file except in compliance

 with the License.  You may obtain a copy of the License at

 http://www.apache.org/licenses/LICENSE-2.0

 Unless required by applicable law or agreed to in writing,

 software distributed under the License is distributed on an

 "AS IS" BASIS, WITHOUT WARRANTIES OR CONDITIONS OF ANY

 KIND, either express or implied.  See the License for the

 specific language governing permissions and limitations

 under the License.

-->

<widget

    id="com.myexample.helloworld"

    version="2.0.0"

    xmlns="http://www.w3.org/ns/widgets" >

    <name>

helloworld

    </name>

    <description>

        A sample Apache Cordova application that responds to the deviceready event.

    </description>

    <author

        email="dev@cordova.apache.org"

        href="http://cordova.io" >

        Apache Cordova Team

    </author>

    <access origin="*" />

    <!-- <content src="http://mysite.com/myapp.html" /> for external pages -->

    <content src="index.html" />

    <preference

        name="loglevel"

        value="DEBUG" />

    <!--

      <preference name="splashscreen" value="resourceName" />

      <preference name="backgroundColor" value="0xFFF" />

      <preference name="loadUrlTimeoutValue" value="20000" />

      <preference name="InAppBrowserStorageEnabled" value="true" />

      <preference name="disallowOverscroll" value="true" />

    -->

    <feature name="App" >

        <param

            name="android-package"

            value="org.apache.cordova.App" />

    </feature>

    <feature name="Geolocation" >

        <param

            name="android-package"

            value="org.apache.cordova.GeoBroker" />

    </feature>

    <feature name="Device" >

        <param

            name="android-package"

            value="org.apache.cordova.Device" />

    </feature>

    <feature name="Accelerometer" >

        <param

            name="android-package"

            value="org.apache.cordova.AccelListener" />

    </feature>

    <feature name="Compass" >

        <param

            name="android-package"

            value="org.apache.cordova.CompassListener" />

    </feature>

    <feature name="Media" >

        <param

            name="android-package"

            value="org.apache.cordova.AudioHandler" />

    </feature>

    <feature name="Camera" >

        <param

            name="android-package"

            value="org.apache.cordova.CameraLauncher" />

    </feature>

    <feature name="Contacts" >

        <param

            name="android-package"

            value="org.apache.cordova.ContactManager" />

    </feature>

    <feature name="File" >

        <param

            name="android-package"

            value="org.apache.cordova.FileUtils" />

    </feature>

    <feature name="NetworkStatus" >

        <param

            name="android-package"

            value="org.apache.cordova.NetworkManager" />

    </feature>

    <feature name="Notification" >

        <param

            name="android-package"

            value="org.apache.cordova.Notification" />

    </feature>

    <feature name="Storage" >

        <param

            name="android-package"

            value="org.apache.cordova.Storage" />

    </feature>

    <feature name="FileTransfer" >

        <param

            name="android-package"

            value="org.apache.cordova.FileTransfer" />

    </feature>

    <feature name="Capture" >

        <param

            name="android-package"

            value="org.apache.cordova.Capture" />

    </feature>

    <feature name="Battery" >

        <param

            name="android-package"

            value="org.apache.cordova.BatteryListener" />

    </feature>

    <feature name="SplashScreen" >

        <param

            name="android-package"

            value="org.apache.cordova.SplashScreen" />

    </feature>

    <feature name="Echo" >

        <param

            name="android-package"

            value="org.apache.cordova.Echo" />

    </feature>

    <feature name="Globalization" >

        <param

            name="android-package"

            value="org.apache.cordova.Globalization" />

    </feature>

    <feature name="InAppBrowser" >

        <param

            name="android-package"

            value="org.apache.cordova.InAppBrowser" />

    </feature>

    <!-- Deprecated plugins element. Remove in 3.0 -->

    <plugins>

    </plugins>

</widget>
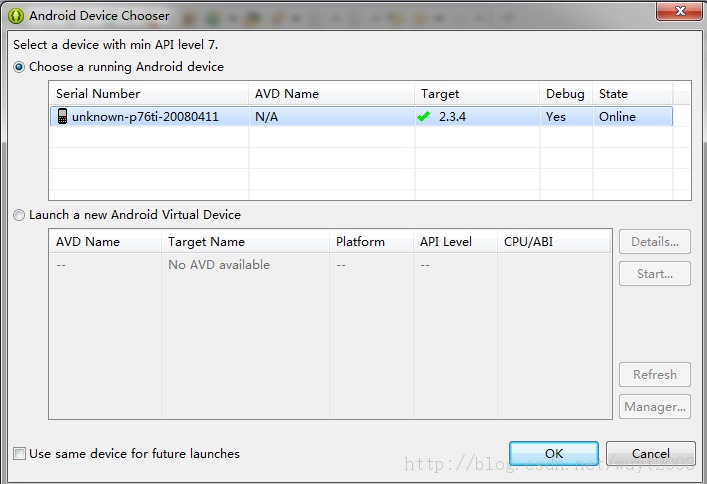
然后,就可以运行了

PhoneGap的官方方法不是这样的,是用命令行生成默认包的。但是要装好几个东西。具体可以看PhoneGap包里面的readme文档。
转:http://www.cnblogs.com/kingofpop/articles/3249845.html
Android + Eclipse + PhoneGap 2.9.0 安卓最新环境配置,部分资料整合网上资料,已成功安装.的更多相关文章
- Android + Eclipse + PhoneGap 3.4 安卓最新环境配置,部分资料整合网上资料,已成功安装.
前言:广州花都论坛,打算推出本地服务o2o应用.快速开发手机应用,phonegap 我的小站,http://www.w30.cn/ 如果有什么问题也可以到小组留言,可以的话,贡献一个ip:) phon ...
- Android + Eclipse + PhoneGap 环境配置
用了3天的时间,终于把环境搭建完毕,郁闷了N天,终于完成了.这里我只是讲述我安装的过程,仅供大家参考. 环境搭建首先要去下载一些安装包: (下载前注意一下,电脑是32位还是64位的请注意选择安装包) ...
- Android SDK 4.0.3 开发环境配置及运行
最近又装了一次最新版本的ADK环境 目前最新版是Android SDK 4.0.3 本文的插图和文本虽然是Android2.2的 步骤都是一样的,如果安装的过程中遇到什么问题,可以留言,我会尽快回复! ...
- 安卓开发环境配置之Windows+ADT+eclipse
安卓环境搭建之Windows+ADT+eclipse 要点: 1.安装JDK 2.安装Android SDK 3.安装eclipse 4.安装ADT 5.安装调试环境 正文: 1.安装JDK 1.1准 ...
- Android Studio1.4.x JNI开发基础-基本环境配置
从Eclipse时代到Android Studio普及,开发工具越来越好用.早些时候还需要安装Cygwin工具,从Android Studio1.3以后,在Android 环境开发JNI程序搭建开发环 ...
- windows eclipse直接访问远程linux hadoop开发环境配置(符合实际开发的做法)
CDH 5.x搭建请参考CentOS 7离线安装CDH 5.16.1完全指南(含各种错误处理). 如果使用的是cloudera quickstart vm,则只能在linux服务器中使用eclipse ...
- AMP+EPP3.0的开发环境配置
经过摸索,总结出下列Apache.MySQL.PHP.EPP.ZendDebugger的开发环境配置方法: 版本: Apache: Apache-httpd-2.2.25-win32-x86-no_s ...
- SpringBoot2.0之六 多环境配置
开发过程中面对不同的环境,例如数据库.redis服务器等的不同,可能会面临一直需要修改配置的麻烦中,在以前的项目中,曾通过Tomcat的配置来实现,有的项目甚至需要手动修改相关配置,这种方式费时费力, ...
- Appium安卓与环境配置
下载与安装: Appium-desktop项目地址:https://github.com/appium/appium-desktop 下载地址:https://github.com/appium/ap ...
随机推荐
- python 全栈开发,Day64(视图,触发器,函数,存储过程,事务)
昨日内容回顾 pymysql:属于python的一个模块 pip3 install pymysql conn = pymysql.connect(...,charset = 'uft8') 创建游标 ...
- python 全栈开发,Day20(object类,继承与派生,super方法,钻石继承)
先来讲一个例子 老师有生日,怎么组合呢? class Birthday: # 生日 def __init__(self,year,month,day): self.year = year self.m ...
- Js引擎解析执行 阅读笔记
Js引擎解析执行 阅读笔记 一篇阅读笔记 http://km.oa.com/group/2178/articles/show/145691?kmref=search&from_page=1&a ...
- ElasticSearch - How to search for a part of a word with ElasticSearch
Search a part of word with ElasticSearch 来自stackoverflow https://stackoverflow.com/questions/6467067 ...
- 设置JAVA环境变量
export JAVA_HOME=/usr/local/jdkexport JRE_HOME=/usr/local/jdk/jreexport CLASSPATH=.:$JAVA_HOME/lib/d ...
- Codeforces 286B Shifting (看题解)
Shifting 感觉这题被智力打击了.. 刚开始我想的是对于每个位置我们可以暴力找出最后的位置在哪里. 因为对于当前位置p, 在进行第x步操作时, 如果p % x == 1 则 p = p + x ...
- BZOJ1819 [JSOI]Word Query电子字典 Trie
欢迎访问~原文出处——博客园-zhouzhendong 去博客园看该题解 题目传送门 - BZOJ1819 题意概括 字符串a与字符串b的编辑距离是指:允许对a或b串进行下列“编辑”操作,将a变为b或 ...
- jstl标签比较格式化后的时间
c:set 里面不支持任何标签,这样写不好讲格式化的值放到bdateVar里面 <c:set var="bdateVar" value="<fmt:forma ...
- MySQL中查询获取每个班级成绩前三名的学生信息
CREATE TABLE t_testscore( pk_id INT PRIMARY KEY, c_name VARCHAR(50) , c_score INT, c_class INT )DEFA ...
- BZOJ.4530.[BJOI2014]大融合(LCT)
题目链接 BZOJ 洛谷 详见这 很明显题目是要求去掉一条边后两边子树sz[]的乘积. LCT维护的是链的信息,那么子树呢? 我们用s_i[x]来记录轻边连向x的子树的和(记作虚儿子),那么sum[x ...