
【vuex】vue2-happyfri
我发现我对使用vuex并不擅长,现在跟我一起多多研究项目,好好补补vuex吧
这个开源项目地址为:https://github.com/bailicangdu/vue2-happyfri
这是一个答题的h5小项目,点击答案会保持状态,最后记录分数,还可以分享朋友圈
页面运行如下

我们接下来分析代码
在index.html中加了router-view入口
<!DOCTYPE html>

<html>

  <head>

    <meta charset="utf-8">

    <meta name="viewport" content="width=device-width, initial-scale=1.0, maximum-scale=1.0, minimum-scale=1.0, user-scalable=no, minimal-ui">

    <meta name="screen-orientation" content="portrait"/>

    <meta name="apple-mobile-web-app-capable" content="yes">

    <meta name="format-detection" content="telephone=no">

    <meta name="full-screen" content="yes">

    <meta name="x5-fullscreen" content="true">

    <title>vue2-happyfri</title>

  </head>

  <body>

    <div id="app">

    	<router-view></router-view>

    </div>

  </body>

</html>
//app.vue

<template>

	<div>

    	<router-view></router-view>

    </div>

</template>

<script>

  	export default {

  	}

</script>

<style>

</style>
//main.js

import Vue from 'vue'

import VueRouter from 'vue-router'

// 引入router 懒加载

import routes from './router/router'

// 引入状态管理

import store from './store/'

// 引入ajax方法

import ajax from './config/ajax'

import './style/common'

import './config/rem'

Vue.use(VueRouter)

const router = new VueRouter({

	routes

})

new Vue({

	router,

	store,

}).$mount('#app')
先看router.js中的懒加载路由怎么写的
//src\router\router.js

import App from '../App'

export default [{

    path: '/',

    component: App,

    children: [{

        path: '',

        component: r => require.ensure([], () => r(require('../page/home')), 'home')

    }, {

        path: '/item',

        component: r => require.ensure([], () => r(require('../page/item')), 'item')

    }, {

        path: '/score',

        component: r => require.ensure([], () => r(require('../page/score')), 'score')

    }]

}]
接下来看ajax.js是怎么封装的
我们看下代码,其实是把ajax封装成了promise,不过真的超级优雅,有眼前一亮的感觉
//ajax.js

export default (type='GET', url='', data={}, async=true) => {

	return new Promise((resolve, reject) => { //定义一个promise

		type = type.toUpperCase();

		let requestObj;

		if (window.XMLHttpRequest) {

			requestObj = new XMLHttpRequest();

		} else {

			requestObj = new ActiveXObject;

		}

		if (type == 'GET') {

			let dataStr = ''; //数据拼接字符串

			Object.keys(data).forEach(key => {

				dataStr += key + '=' + data[key] + '&';

			})

			dataStr = dataStr.substr(0, dataStr.lastIndexOf('&'));

			url = url + '?' + dataStr;

			requestObj.open(type, url, async);

			requestObj.setRequestHeader("Content-type", "application/x-www-form-urlencoded");

			requestObj.send();

		}else if (type == 'POST') {

			requestObj.open(type, url, async);

			requestObj.setRequestHeader("Content-type", "application/json");

			requestObj.send(JSON.stringify(data));

		}else {

			reject('error type');

		}

		requestObj.onreadystatechange = () => {

			if (requestObj.readyState == 4) {

				if (requestObj.status == 200) {

					let obj = requestObj.response

					if (typeof obj !== 'object') {

						obj = JSON.parse(obj);

					}

					resolve(obj);

				}else {

					reject(requestObj);

				}

			}

		}

	})

}
我们来看下config.js里面的rem是怎么封装的
//rem.js

(function(doc, win) {

    var docEl = doc.documentElement,

        resizeEvt = 'orientationchange' in window ? 'orientationchange' : 'resize',

        recalc = function() {

            var clientWidth = docEl.clientWidth;

            if (!clientWidth) return;

            docEl.style.fontSize = 20 * (clientWidth / 320) + 'px';

        };

    if (!doc.addEventListener) return;

    win.addEventListener(resizeEvt, recalc, false);

    doc.addEventListener('DOMContentLoaded', recalc, false);

})(document, window);
接下来我们就是分析我不会的东西了store,这个里面的内容我们结合页面来看
这个store里面只有action.js,index.js,mutation.js可以想到的是在页面中定义的state具体内容没有抽出来
还有监听state的属性getters(getters定义:你也可以通过让 getter 返回一个函数,来实现给 getter 传参。)
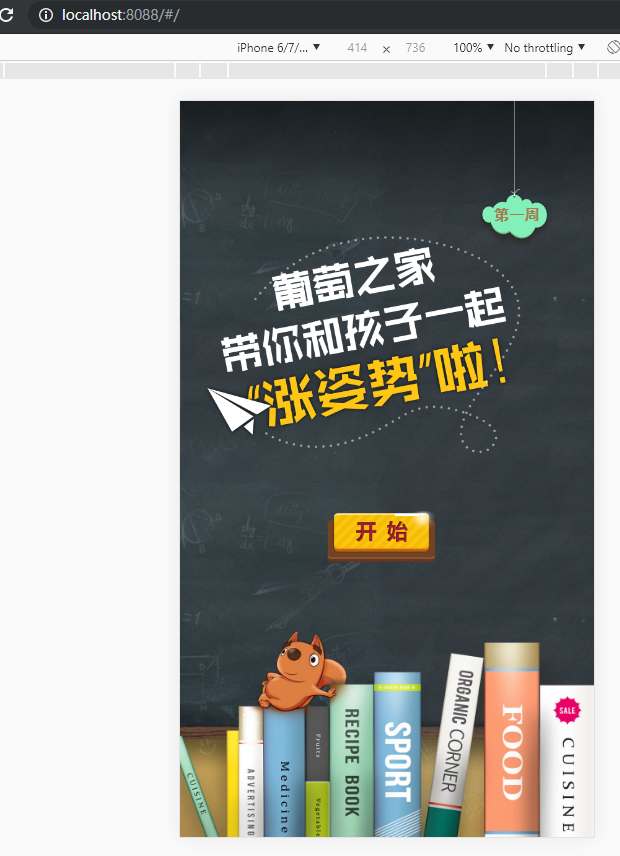
我们看第一个页面,其实处理的很巧妙,按照我的来,就是一个.vue文件了,可是博主不是那样写的
他是写在生命周期中的
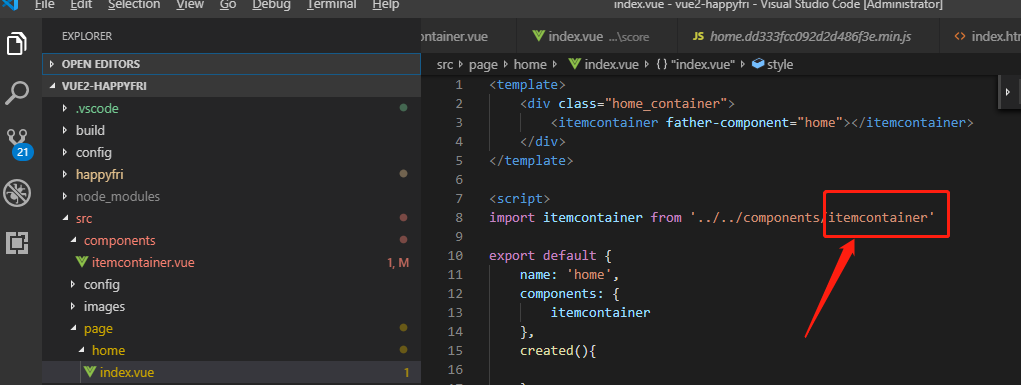
在初始化的过程中挂载的图片
看一下this.initializeData的调用

看一下initializeData的内容
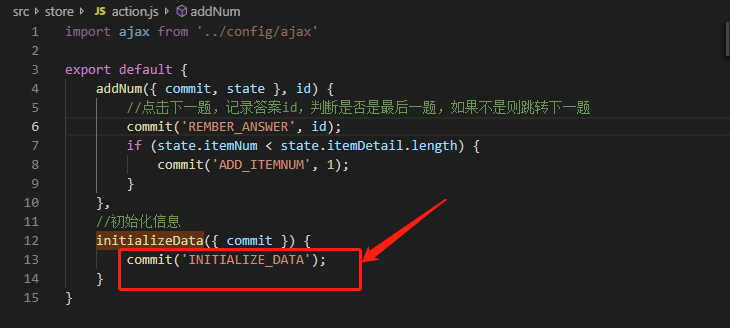
他通过commit暴露出一个叫做INITIALIZE_DATA的方法,
更改 Vuex 的 store 中的状态的唯一方法是提交 mutation。Vuex 中的 mutation 非常类似于事件:
每个 mutation 都有一个字符串的 事件类型 (type) 和 一个 回调函数 (handler)。
我们在mutation.js中可以看到这个INITIALIZE_DATA方法,按理说它是一个function()
//mutation.js

	[INITIALIZE_DATA](state) {

		state.itemNum = 1;

		state.allTime = 0;

		state.answerid = [];

	},

}
我们看点击开始进入的页面,再结合代码看,也许发现乾坤
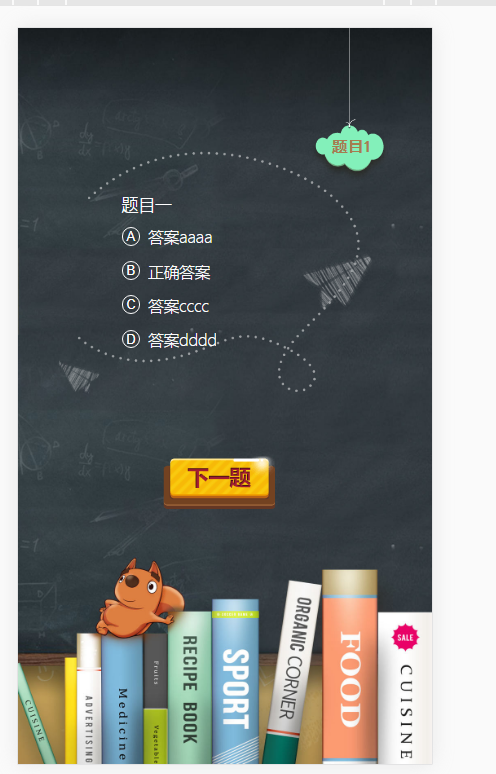
我们可以看到只是数据变化了,背景图片的之类的都没有变化,其实代码也是写在一起的,只是用了v-if
将首页和题目区分开来了。
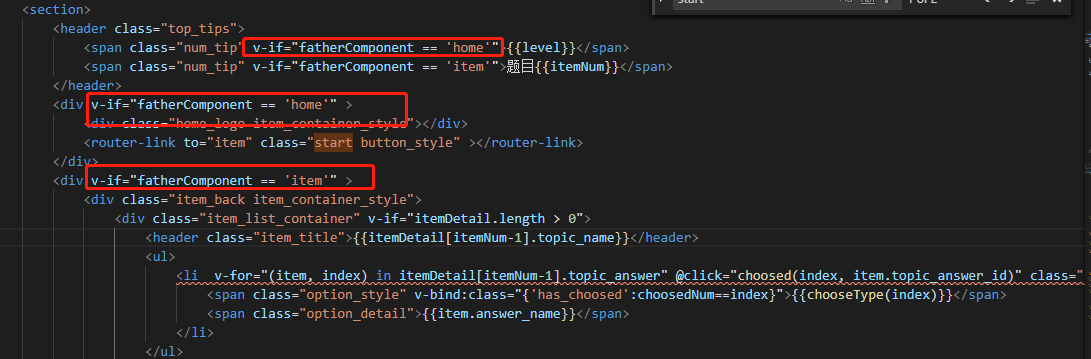
我们接下来看一下关于题目的吧
在vue中我们知道data是占的大头,是比重最大的,也是最核心的部分,所有的东西围绕着data来的。
我们会选中一个题目,这个题目会有一个序号还有答案,我们会进行的操作是
点击下一题,每一题会有每一题的答案,选中答案的信息,到最后一题,我们交卷子,会跳到分数页面
这几个实现的方法如下
	//点击下一题

  		nextItem(){

  			if (this.choosedNum !== null) {

	  			this.choosedNum = null;

	  			//保存答案, 题目索引加一,跳到下一题

	  			this.addNum(this.choosedId)

  			}else{

  				alert('您还没有选择答案哦')

  			}

  		},

		//索引0-3对应答案A-B

	  	chooseType: type => {

	  		switch(type){

	  			case 0: return 'A';

	  			case 1: return 'B';

	  			case 2: return 'C';

	  			case 3: return 'D';

	  		}

	  	},

 	//选中的答案信息

	  	choosed(type,id){

	  		this.choosedNum = type;

	  		this.choosedId = id;

	  	},

	  	//到达最后一题,交卷,请空定时器,跳转分数页面

	  	submitAnswer(){

	  		if (this.choosedNum !== null) {

	  			this.addNum(this.choosedId)

	  			clearInterval(this.timer)

	  			this.$router.push('score')

  			}else{

  				alert('您还没有选择答案哦')

  			}

	  	},
看这些,我其实想象不到这个在store中的公共数据会怎么处理的,什么东西会放在action,mutation里面
看代码会发现把这些放在了mapState中,让其局部监听更新?
	computed: mapState([

	  	'itemNum', //第几题

  		'level', //第几周

  		'itemDetail', //题目详情

  		'timer', //计时器

	]),
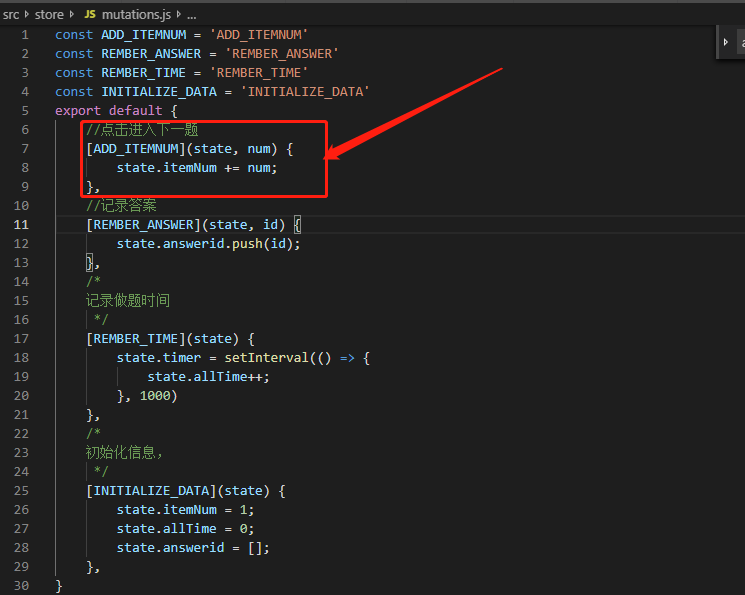
分析所有的代码我们发现这个addNum就是从大的状态中取出来的
mtation里面的addNum
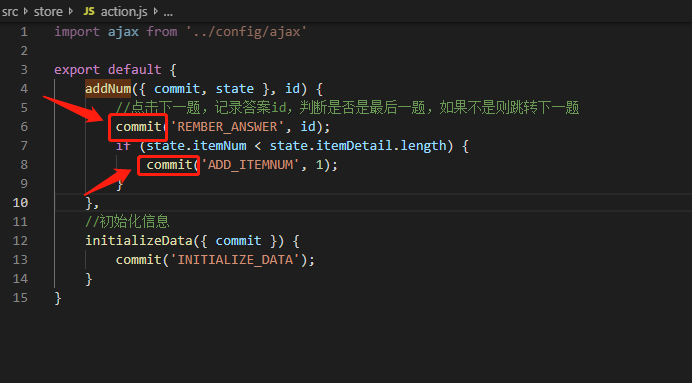
在action里面通过commit暴露了两个方法
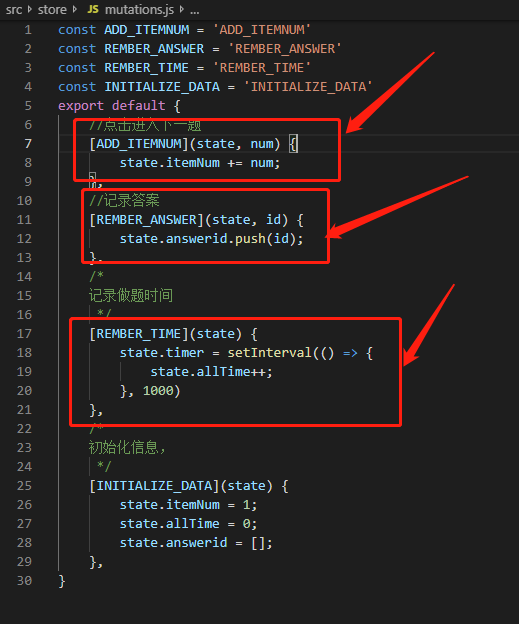
可以在mutation中进行一个更加细致的数据方法处理
itemcontainer全部代码如下
//src\components\itemcontainer.vue

//itemcontainer.vue

<template>

  	<section>

    	<header class="top_tips">

    		<span class="num_tip" v-if="fatherComponent == 'home'">{{level}}</span>

    		<span class="num_tip" v-if="fatherComponent == 'item'">题目{{itemNum}}</span>

    	</header>

    	<div v-if="fatherComponent == 'home'" >

    		<div class="home_logo item_container_style"></div>

    		<router-link to="item" class="start button_style" ></router-link>

    	</div>

    	<div v-if="fatherComponent == 'item'" >

    		<div class="item_back item_container_style">

    			<div class="item_list_container" v-if="itemDetail.length > 0">

    				<header class="item_title">{{itemDetail[itemNum-1].topic_name}}</header>

    				<ul>

    					<li  v-for="(item, index) in itemDetail[itemNum-1].topic_answer" @click="choosed(index, item.topic_answer_id)" class="item_list">

    						<span class="option_style" v-bind:class="{'has_choosed':choosedNum==index}">{{chooseType(index)}}</span>

    						<span class="option_detail">{{item.answer_name}}</span>

    					</li>

    				</ul>

    			</div>

    		</div>

    		<span class="next_item button_style" @click="nextItem" v-if="itemNum < itemDetail.length"></span>

    		<span class="submit_item button_style" v-else @click="submitAnswer"></span>

    	</div>

  	</section>

</template>

<script>

import { mapState, mapActions } from 'vuex'

export default {

	name: 'itemcontainer',

	data() {

		return {

			itemId: null, //题目ID

			choosedNum: null, //选中答案索引

			choosedId:null //选中答案id

		}

	},

  	props:['fatherComponent'],

  	computed: mapState([

	  	'itemNum', //第几题

  		'level', //第几周

  		'itemDetail', //题目详情

  		'timer', //计时器

	]),

  	methods: {

  		...mapActions([

  			'addNum', 'initializeData',

  		]),

  		//点击下一题

  		nextItem(){

  			if (this.choosedNum !== null) {

	  			this.choosedNum = null;

	  			//保存答案, 题目索引加一,跳到下一题

	  			this.addNum(this.choosedId)

  			}else{

  				alert('您还没有选择答案哦')

  			}

  		},

  		//索引0-3对应答案A-B

	  	chooseType: type => {

	  		switch(type){

	  			case 0: return 'A';

	  			case 1: return 'B';

	  			case 2: return 'C';

	  			case 3: return 'D';

	  		}

	  	},

	  	//选中的答案信息

	  	choosed(type,id){

	  		this.choosedNum = type;

	  		this.choosedId = id;

	  	},

	  	//到达最后一题,交卷,请空定时器,跳转分数页面

	  	submitAnswer(){

	  		if (this.choosedNum !== null) {

	  			this.addNum(this.choosedId)

	  			clearInterval(this.timer)

	  			this.$router.push('score')

  			}else{

  				alert('您还没有选择答案哦')

  			}

	  	},

	},

	created(){

		//初始化信息

		if(this.fatherComponent == 'home') {

			this.initializeData();

			document.body.style.backgroundImage = 'url(./static/img/1-1.jpg)';

		}

	}

}

</script>

<style lang="less">

	.top_tips{

		position: absolute;

		height: 7.35rem;

		width: 3.25rem;

		top: -1.3rem;

		right: 1.6rem;

		background: url(../images/WechatIMG2.png) no-repeat;

		background-size: 100% 100%;

		z-index: 10;

		.num_tip{

			position: absolute;

			left: 0.48rem;

			bottom: 1.1rem;

			height: 0.7rem;

			width: 2.5rem;

			font-size: 0.6rem;

			font-family: '黑体';

			font-weight: 600;

			color: #a57c50;

			text-align: center;

		}

	}

	.item_container_style{

		height: 11.625rem;

		width: 13.15rem;

		background-repeat: no-repeat;

		position: absolute;

		top: 4.1rem;

		left: 1rem;

	}

	.home_logo{

		background-image: url(../images/1-2.png);

		background-size: 13.142rem 100%;

		background-position: right center;

	}

	.item_back{

		background-image: url(../images/2-1.png);

		background-size: 100% 100%;

	}

	.button_style{

        display: block;

        height: 2.1rem;

        width: 4.35rem;

        background-size: 100% 100%;

        position: absolute;

        top: 16.5rem;

        left: 50%;

        margin-left: -2.4rem;

        background-repeat: no-repeat;

	}

	.start{

        background-image: url(../images/1-4.png);

    }

    .next_item{

    	background-image: url(../images/2-2.png);

    }

    .submit_item{

    	background-image: url(../images/3-1.png);

    }

    .item_list_container{

    	position: absolute;

    	height: 7.0rem;

    	width: 8.0rem;

    	top: 2.4rem;

    	left: 3rem;

		-webkit-font-smoothing: antialiased;

    }

	.item_title{

		font-size: 0.65rem;

		color: #fff;

		line-height: 0.7rem;

	}

	.item_list{

		font-size: 0;

		margin-top: 0.4rem;

		width: 10rem;

		span{

			display: inline-block;

			font-size: 0.6rem;

			color: #fff;

			vertical-align: middle;

		}

		.option_style{

			height: 0.725rem;

			width: 0.725rem;

			border: 1px solid #fff;

			border-radius: 50%;

			line-height: 0.725rem;

			text-align: center;

			margin-right: 0.3rem;

			font-size: 0.5rem;

			font-family: 'Arial';

		}

		.has_choosed{

			background-color: #ffd400;

			color: #575757;

			border-color: #ffd400;

		}

		.option_detail{

			width: 7.5rem;

			padding-top: 0.11rem;

		}

	}

</style>
关于分数页面

代码如下
//index.vue

<template>

  	<div>

    	<div class="your_scores_container">

            <header class="your_scores"><span class="score_num">{{score}}</span><span class="fenshu">分!</span></header>

            <div class="result_tip">{{scoreTips}}</div>

        </div>

        <div class="share_button" @click="showCover"></div>

        <div class="share_code">

            <header class="share_header">关注葡萄之家,获取答案。</header>

            <img src="../../images/4-4.png" height="212" width="212" class="code_img">

        </div>

        <div class="share_cover" v-show="showHide" @click="showCover">

            <img src="../../images/5-2.png" class="share_img">

        </div>

  	</div>

</template>

<script>

import {mapState} from 'vuex';

export default {

	name: 'score',

    data(){

        return {

            showHide: false, //是否显示提示

            score: 0, //分数

            scoreTips:'', //分数提示

            rightAnswer: [2, 7, 12, 13, 18], //正确答案

            scoreTipsArr:['你说,是不是把知识都还给小学老师了?','还不错,但还需要继续加油哦!','不要嘚瑟还有进步的空间!','智商离爆表只差一步了!','你也太聪明啦,葡萄之家欢迎你!'],

        }

    },

    computed: mapState(['answerid']),

	created(){

        this.computedScore();

        this.getScoreTip();

        document.body.style.backgroundImage = 'url(./static/img/4-1.jpg)';

    },

    methods: {

        //计算分数

        computedScore(){

            this.answerid.forEach((item, index) => {

                if (item == this.rightAnswer[index]) {

                    this.score += 20;

                }

            })

        },

        //是否显示分享提示

        showCover: function (){

            this.showHide = !this.showHide;

        },

        //根据分数显示提示

        getScoreTip: function (){

          let index = Math.ceil(this.score/20)-1;

          this.scoreTips = this.scoreTipsArr[index];

        }

    },

}

</script>

<style lang="less">

    body{

        background-image: url(../../images/4-1.jpg);

        padding-top: 1.2rem;

    }

    .your_scores_container{

        width: 9.7rem;

        height: 9.1rem;

        background: url(../../images/4-2.png) no-repeat;

        background-size: 100% 100%;

        margin: 0 auto 0;

        position: relative;

        .your_scores{

            position: absolute;

            width: 100%;

            text-indent: 3.3rem;

            top: 4.7rem;

            font-size: 1.4rem;

            font-weight: 900;

            -webkit-text-stroke: 0.05rem #412318;

            font-family: 'Microsoft YaHei';

            .score_num{

                font-family: Tahoma,Helvetica,Arial;

                color: #a51d31;

            }

            .fenshu{

                color: #a51d31;

            }

        }

        .result_tip{

            position: absolute;

            top: 7rem;

            width: 9rem;

            left: 0.6rem;

            color: #3e2415;

            font-size: 0.65rem;

            text-align: center;

        }

    }

    .share_button{

        width: 6.025rem;

        height: 2.4rem;

        margin: 0.8rem auto 0;

        background: url(../../images/4-3.png) no-repeat 0.4rem 0;

        background-size: 5.825rem 100%;

    }

    .share_code{

        width: 5.3rem;

        margin: 1.5rem auto 0;

        .share_header{

            color: #664718;

            font-size: 0.475rem;

            font-family: 'Microsoft YaHei';

            width: 7rem;

            font-weight: 500;

        }

        .code_img{

            height: 5.3rem;

            width: 5.3rem;

            margin-top: 0.5rem;

        }

    }

    .share_cover{

        position: fixed;

        bottom: 0;

        right: 0;

        top: 0;

        left: 0;

        background: url(../../images/5-1.png) no-repeat;

        background-size: 100% 100%;

        opacity: 0.92;

    }

    .share_img{

        height: 10.975rem;

        width: 11.95rem;

        position: fixed;

        top: 0.5rem;

        left: 50%;

        margin-left: -5.975rem;

    }

</style>
【vuex】vue2-happyfri的更多相关文章
- vue从入门到精通之【vuex】(七)
vue从入门到精通之[vuex](七) vuex一个公用的大仓库,Vuex 可以帮助我们管理共享状态,并附带了更多的概念和框架. Vuex 实现了一个单向数据流,在全局拥有一个 state 存放数据, ...
- 【Vuex】vuex基本介绍与使用
Vuex是什么? 官方解释: Vuex 是一个专为 Vue.js 应用程序开发的状态管理模式.它采用集中式存储管理应用的所有组件的状态,并以相应的规则保证状态以一种可预测的方式发生变化.Vuex 也集 ...
- 【前端】Vue2全家桶案例《看漫画》之三、引入vuex
转载请注明出处:http://www.cnblogs.com/shamoyuu/p/vue_vux_app_3.html 项目github地址:https://github.com/shamoyuu/ ...
- 【前端】Vue2全家桶案例《看漫画》之四、漫画页
转载请注明出处:http://www.cnblogs.com/shamoyuu/p/vue_vux_app_4.html 项目github地址:https://github.com/shamoyuu/ ...
- 【Vuex】mapGetters 辅助函数
mapGetters 辅助函数仅仅是将 store 中的 getter 映射到局部计算属性: import { mapGetters } from 'vuex' export default { // ...
- 【vuex】mutation和action的区别
const store = new Vuex.Store({ state: { count: 0 }, mutations: { increment (state) { state.count++ } ...
- 【前端】Vue2全家桶案例《看漫画》之七、webpack插件开发——自动替换服务器API-URL
转载请注明出处:http://www.cnblogs.com/shamoyuu/p/vue_vux_app_7.html 项目github地址:https://github.com/shamoyuu/ ...
- 【前端】Vue2全家桶案例《看漫画》之六、图片阅读页
转载请注明出处:http://www.cnblogs.com/shamoyuu/p/vue_vux_app_6.html 项目github地址:https://github.com/shamoyuu/ ...
- 【前端】Vue2全家桶案例《看漫画》之五、引入axios
转载请注明出处:http://www.cnblogs.com/shamoyuu/p/vue_vux_app_5.html 项目github地址:https://github.com/shamoyuu/ ...
随机推荐
- Requests+Excel接口自动化测试(Python)
一.框架结构: 工程目录 二.Case文件设计 三.基础包 base 3.1 封装get/post请求(runmethon.py) import requests import json class ...
- Entity Framework Code First 模式-建立多对多联系
Entity Framework 在建立多对多的联系时,会生成一个中间表,用来表示这个多对多的关系.这和数据库设计时从概念模型到逻辑模型转化时,多对多的关系不能和任何一端的实体合并,需要将关系也转化为 ...
- 试做Chrome插件——whatweb的chrome插件(从老博客转)
引子 最近一个月每天早上在学Javascript,刚学完基础语法和一点点jQuery,今天忍不住写个Chrome玩玩看看自己对JavaScript的掌握怎么样了. 目标 考虑了一下,打算做个小东西,但 ...
- Gym - 100941G
Gym - 100941G https://vjudge.net/problem/Gym-100941G比赛的时候真的是不会啊,那就没办法了.结论:每x周减一次头发,第k次剪发时的头发长度为x^k.x ...
- WebService Exceptions
一. Exception in thread "main" java.lang.ExceptionInInitializerError at com.sun.xml.interna ...
- iPhoneX适配随笔
1.安全区域 2.NavigationBar 和 TabBar的xib示意图 两个View要相同的效果,坐标不同 UIButton *btn = [UIButton buttonWithType:UI ...
- spss-数据抽取-拆分与合并
spss-数据抽取-拆分与合并 数据抽取也成为数据拆分,是指保留.抽取原数据表中某些字段.记录的部分信息,形成一个新字段.新纪录.分为:字段拆分和随机抽样两种方法. 一:字段拆分 如何提取" ...
- H-ui 前端框架
H-ui 前端框架 架起设计与后端的桥梁轻量级前端框架,简单免费,兼容性好,服务中国网站. 首个付费版产品 H-ui.admin.Pro,盘他!
- Maven编译资源文件拷贝
<build> <finalName>op-balance-job-service</finalName> <plugins> <plugin&g ...
- Ubuntu 16.04下apt安装ssh及卸载(含FileZilla 使用过程)
前言:文件发布测试过程中需要使用Windows和Ubuntu实现文件共享. 以下内容转载自:http://blog.csdn.net/jiang13479/article/details/535014 ...