spring 5.x 系列第17篇 —— 整合websocket (xml配置方式)
源码Gitub地址:https://github.com/heibaiying/spring-samples-for-all
一、说明
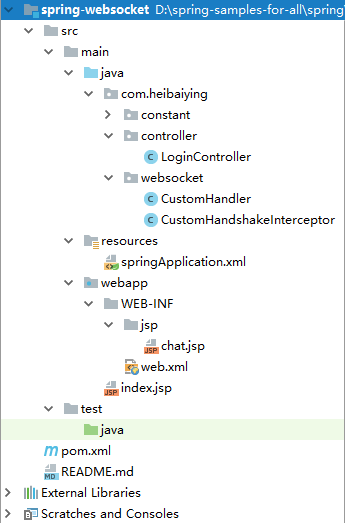
1.1 项目结构说明
- 项目模拟一个简单的群聊功能,为区分不同的聊天客户端,登录时候将临时用户名存储在session当中;
- CustomHander为消息的自定义处理器;
- CustomHandershakerInterceptor为自定义的 websocket 的握手拦截器;
- 项目以web的方式构建。
1.2 依赖说明
除了基本的spring 依赖外,还需要导入webSocket的依赖包
 <!--spring webSocket 的依赖包 -->
<dependency>
    <groupId>org.springframework</groupId>
    <artifactId>spring-websocket</artifactId>
    <version>5.1.3.RELEASE</version>
</dependency>
二、spring websocket
2.1 创建消息处理类,继承自TextWebSocketHandler
/**
 * @author : heibaiying
 * @description : 自定义消息处理类
 */
public class CustomHandler extends TextWebSocketHandler {

    private Map<String, WebSocketSession> nameAndSession = new ConcurrentHashMap<>();

    // 建立连接时候触发
    @Override
    public void afterConnectionEstablished(WebSocketSession session)  {
        String username = getNameFromSession(session);
        nameAndSession.putIfAbsent(username, session);
    }

    // 关闭连接时候触发
    @Override
    public void afterConnectionClosed(WebSocketSession session, CloseStatus status) {
        String username = getNameFromSession(session);
        nameAndSession.remove(username);
    }

    // 处理消息
    @Override
    protected void handleTextMessage(WebSocketSession session, TextMessage message) throws Exception {
        // 防止中文乱码
        String msg = URLDecoder.decode(message.getPayload(), "utf-8");
        String username = getNameFromSession(session);
        // 简单模拟群发消息
        TextMessage reply = new TextMessage(username + " : " + msg);
        nameAndSession.forEach((s, webSocketSession)
                -> {
            try {
                webSocketSession.sendMessage(reply);
            } catch (IOException e) {
                e.printStackTrace();
            }
        });
    }

    private String getNameFromSession(WebSocketSession session) {
        Map<String, Object> attributes = session.getAttributes();
        return (String) attributes.get(Constant.USER_NAME);
    }
}
2.2 创建websocket 握手拦截器(如果没有权限拦截等需求,这一步不是必须的)
/**
 * @author : heibaiying
 * @description : 可以按照需求实现权限拦截等功能
 */
public class CustomHandshakeInterceptor extends HttpSessionHandshakeInterceptor {

    @Override
    public boolean beforeHandshake(ServerHttpRequest request, ServerHttpResponse response, WebSocketHandler wsHandler, Map<String, Object> attributes) throws Exception {
        InetSocketAddress remoteAddress = request.getRemoteAddress();
        InetAddress address = remoteAddress.getAddress();
        System.out.println(address);
        /*
         * 最后需要要显示调用父类方法,父类的beforeHandshake方法
         * 把ServerHttpRequest 中session中对应的值拷贝到WebSocketSession中。
         * 如果我们没有实现这个方法,我们在最后的handler处理中 是拿不到 session中的值
         * 作为测试 可以注释掉下面这一行 可以发现自定义处理器中session的username总是为空
         */
        return super.beforeHandshake(request, response, wsHandler, attributes);
    }
}
2.3 配置websocket
<?xml version="1.0" encoding="UTF-8"?>
<beans xmlns="http://www.springframework.org/schema/beans"
       xmlns:xsi="http://www.w3.org/2001/XMLSchema-instance"
       xmlns:context="http://www.springframework.org/schema/context"
       xmlns:mvc="http://www.springframework.org/schema/mvc"
       xmlns:websocket="http://www.springframework.org/schema/websocket"
       xsi:schemaLocation="http://www.springframework.org/schema/beans
        http://www.springframework.org/schema/beans/spring-beans.xsd
        http://www.springframework.org/schema/context
        http://www.springframework.org/schema/context/spring-context-4.1.xsd
        http://www.springframework.org/schema/mvc
        http://www.springframework.org/schema/mvc/spring-mvc-4.1.xsd
        http://www.springframework.org/schema/websocket
        http://www.springframework.org/schema/websocket/spring-websocket.xsd">

    <!-- 开启注解包扫描-->
    <context:component-scan base-package="com.heibaiying.*"/>

    <!--使用默认的Servlet来响应静态文件 -->
    <mvc:default-servlet-handler/>

    <!-- 开启注解驱动 -->
    <mvc:annotation-driven/>

    <!-- 配置视图解析器 -->
    <bean class="org.springframework.web.servlet.view.InternalResourceViewResolver"
          id="internalResourceViewResolver">
        <!-- 前缀 -->
        <property name="prefix" value="/WEB-INF/jsp/"/>
        <!-- 后缀 -->
        <property name="suffix" value=".jsp"/>
    </bean>

    <!--配置webSocket-->
    <bean id="customHandler" class="com.heibaiying.websocket.CustomHandler"/>
    <websocket:handlers>
        <!--指定webSocket 地址-->
        <websocket:mapping path="/socket" handler="customHandler"/>
        <!--webSocket握手-->
        <websocket:handshake-interceptors>
            <bean class="com.heibaiying.websocket.CustomHandshakeInterceptor"/>
        </websocket:handshake-interceptors>
    </websocket:handlers>

</beans>
2.4 前端 websocket 的实现
<%@ page contentType="text/html;charset=UTF-8" language="java" %>
<html>
<head>
    <title>${sessionScope.get("username")}您好!欢迎进入群聊大厅!</title>
</head>
<body>
<input id="message" type="text">
<button id="btn">发送消息</button>
<div id="show">

</div>
<script>
    let btn = document.getElementById("btn");
    let message = document.getElementById("message");
    let show = document.getElementById("show");
    let ws = new WebSocket("ws://localhost:8080/socket");
    ws.onmessage = function (evt) {
        let node = document.createElement("div");
        node.innerHTML = "<h5>" + evt.data + "</h5>";
        show.appendChild(node);
    };
    btn.addEventListener("click", function () {
        let data = message.value;
        console.log(data);
        if (data) {
            ws.send(encodeURI(data));
        } else {
            alert("请输入消息后发送");
        }
        message.value = "";
    });
    // 关闭页面时候关闭ws
    window.addEventListener("beforeunload", function(event) {
        ws.close();
    });
</script>
</body>
</html>
2.5 简单登录的实现
<%@ page contentType="text/html;charset=UTF-8" language="java" %>
<html>
<head>
    <title>Title</title>
</head>
<body>
<form action="${pageContext.request.contextPath}/login" method="post">
    <input name="username" type="text">
    <button id="btn">输入临时用户名后登录!</button>
</form>
</body>
</html>
@Controller
public class LoginController {

    @PostMapping("login")
    public String login(String username, HttpSession session){
        session.setAttribute(Constant.USER_NAME,username);
        return "chat";
    }
}
附:源码Gitub地址:https://github.com/heibaiying/spring-samples-for-all
spring 5.x 系列第17篇 —— 整合websocket (xml配置方式)的更多相关文章
- spring 5.x 系列第18篇 —— 整合websocket (代码配置方式)
源码Gitub地址:https://github.com/heibaiying/spring-samples-for-all 一.说明 1.1 项目结构说明 项目模拟一个简单的群聊功能,为区分不同的聊 ...
- spring 5.x 系列第13篇 —— 整合RabbitMQ (xml配置方式)
源码Gitub地址:https://github.com/heibaiying/spring-samples-for-all 一.说明 1.1 项目结构说明 本用例关于rabbitmq的整合提供简单消 ...
- spring 5.x 系列第11篇 —— 整合memcached (xml配置方式)
文章目录 一.说明 1.1 XMemcached客户端说明 1.2 项目结构说明 1.3 依赖说明 二.spring 整合 memcached 2.1 单机配置 2.2 集群配置 2.3 存储基本类型 ...
- spring 5.x 系列第9篇 —— 整合mongodb (xml配置方式)
源码Gitub地址:https://github.com/heibaiying/spring-samples-for-all 一.说明 1.1 项目结构说明 配置文件位于resources下,项目以单 ...
- spring 5.x 系列第15篇 —— 整合dubbo (xml配置方式)
文章目录 一. 项目结构说明 二.项目依赖 三.公共模块(dubbo-common) 四. 服务提供者(dubbo-provider) 4.1 productService是服务的提供者( 商品数据用 ...
- spring 5.x 系列第1篇 —— springmvc基础 (xml配置方式)
文章目录 一.搭建hello spring工程 1.1 项目搭建 1.2 相关配置讲解 二.配置自定义拦截器 三.全局异常处理 四.参数绑定 4.1 参数绑定 4.2 关于日期格式转换的三种方法 五. ...
- spring 5.x 系列第14篇 —— 整合RabbitMQ (代码配置方式)
源码Gitub地址:https://github.com/heibaiying/spring-samples-for-all 一.说明 1.1 项目结构说明 本用例关于rabbitmq的整合提供简单消 ...
- spring 5.x 系列第12篇 —— 整合memcached (代码配置方式)
文章目录 一.说明 1.1 XMemcached客户端说明 1.2 项目结构说明 1.3 依赖说明 二.spring 整合 memcached 2.1 单机配置 2.2 集群配置 2.3 存储基本类型 ...
- spring 5.x 系列第10篇 —— 整合mongodb (代码配置方式)
源码Gitub地址:https://github.com/heibaiying/spring-samples-for-all 一.说明 1.1 项目结构说明 配置文件位于com.heibaiying. ...
随机推荐
- 创建asp.net core 的静态网站
这个名字听起来很怪 既然是静态网站 为什么要是asp.net core的呢? 1.在vs上面好像不能创建纯静态的网站,所以我们就想创建一个asp.net core的空网站 然后在里面使用静态的html ...
- 1-5设定NetCore监听端口
问题的起源:启动一个.netCore项目,默认使用的是5000端口,当我们有很多个项目的时候(集群),不可能都使用5000端口. 方法1:set ASPNETCORE_URLS=http://127. ...
- 批处理文件的工具(java+shell为了实现)
批处理文件的工具(java+shell为了实现) 有一堆语料须要处理一下才干使用,本来应该能够直接用shell脚本直接处理的. 可是对shell脚本不熟,仅仅会简单的一些命令. 因此就利用java+s ...
- Robot Framework安装指南
安装软件下载列表: 2012年5月15日更新 1.python 2.7http://www.python.org/download/http://www.python.org/ftp/python/2 ...
- latex 矩阵分块(block matrix)
Lesson 12: Making Block Matrices in LATEX 按列分块: [AAb⋯An−1b] $$ \left[ \begin{array}{c|c|c|c} A & ...
- spring boot 使用 pageHelper插件
按照github上的教程集成到spring boot pom文件引用需要改一下,教程的pom文件引用: 工程中要用以下方式 <!--分页--> <dependency> < ...
- php_Ubuntu Linux下为PHP5安装cURL,mysql
如果你在用PHP, 你可能需要用到cURL, 这是其中最流行的插件. PHP CURL插件需要通过libcurl来实现, Daniel Stenberg创建的一个库, 能够和许多不同类型协议的web服 ...
- 在Windows系统上以C++打印出当前活动用户的环境变量
在Windows系统上以C++打印出当前活动用户的环境变量,代码如下(QT环境): void getEnvironmentVariables() { DWORD sessionId = WTSGetA ...
- 通通WPF随笔(2)——自己制作轻量级asp.net网站服务
原文:通通WPF随笔(2)--自己制作轻量级asp.net网站服务 大学玩asp.net时就发现VS在Debug时会起一个web服务,这东西也太神奇了服务起得这么快,而相对于IIS又这么渺小. 前几个 ...
- linux 用蓝牙和手机通信
加载模块: # modprobe hci_usb # modprobe rfcomm # hciconfig hci0 up # hciconfig hci0 up 查看状况: # hci ...