Spring(二)装配Spring Bean
控制反转的概念:控制反转是一种通过描述(在Java中或者是XML或者注解)并通过第三方去产生或获取特定对象的方式。
在Spring中实现控制反转的是IoC容器,其实现方法是依赖注入(Dependency Injection, DI)。
在Spring中,对象无需自己查找或者创建与其所关联的其他对象。相反,容器负责把需要相互协作的对象引用赋予各个对象。
创建应用对象之间协作关系的行为通常称为装配(wiring),这也是依赖注入(DI)的本质。
依赖注入的3种方式:
- 构造器注入:构造器注入依赖于构造方法实现,而构造方法可以是有参数或者无参数的。在大部分情况下,都是通过类的构造方法来创建类对象,Spring也可以采用反射的方式,通过使用构造方法来完成注入,这就是构造器注入的原理。使用<constructor-arg index="0" value="参数值"/>来对构造器中第一个参数赋值,其他同理。
- setter注入:是Spring中最主流的注入方式,它利用Java Bean规范所定义的setter方法来完成注入,灵活且可读性高。它消除了使用构造器注入时出现多个参数的可能性,首先可以把构造方法声明为无参数的,然后使用setter注入为其设置对应的值,其实也是通过Java反射技术实现的。
- 接口注入:有些时候资源并非来自于自身系统,而是来自于外界,比如数据库链接资源完全可以在Tomcat下配置,然后通过JNDI的形式去获取它,这样数据库连接资源是属于开发工程外的资源,这个时候可以采取接口注入的形式类获取它。
一、Spring配置的可选方案。
Spring容器负责创建应用程序中的bean并通过DI来协调这些对象之间的关系,当描述bean如何进行装配时,Spring具有非常大的灵活性,它提供了三种主要的装配机制:
- 在XML中进行显式配置
- 在Java中进行显式配置
- 隐式Bean的发现机制和自动装配
原则上,有三条准则:
- 尽可能地使用自动装配的机制,显式配置越少越好。
- 当你必须要显式配置bean的时候(有些源码不是由你来维护的,而当你需要为这些代码配置bean的时候),推荐使用类型安全并且比XML更加强大的JavaConfig。
- 只有当你想要使用便利的XML命名空间,并且在JavaConfig中没有同样的实现时,才应该使用XML。
二、自动化装配bean
在便利性方面,最强大的还是Spring的自动化配置。
Spring从两个角度来实现自动化装配:
- 组件扫描(component scanning):Spring会自动发现应用上下文中所创建的bean。
- 自动装配(autowiring):Spring自动满足bean之间的依赖。
组件扫描和自动装配组合在一起就能发挥出强大的威力,它们能够将你的显示配置降低到最少。
利用带有注释的代码来解释这种装配方式:
- 第一种方式是通过Java代码定义了Spring的装配规则:
代码结构为:
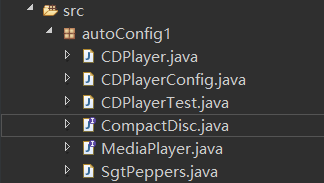
示例程序为:
CompactDisc接口:
 package autoConfig1;

 /**

  * 如果你不将CD插入(注入)到CD播放器中,那么CD播放器其实没有太大用处的。

  * 所以可以这样说,CD播放器依赖于CD才能完成它的使命。

  * CompactDisc接口定义了CD播放器对一盘CD所能进行的操作。

  * 它将CD播放器的任意实现与CD本身的耦合降低到了最小的程度。

  */

 public interface CompactDisc {

     void play();

 }
MediaPlayer接口:
 package autoConfig1;

 /**

  * MediaPlayer接口作为CD播放器的接口。

  */

 public interface MediaPlayer {

     void play();

 }
CDPlayerConfig类用于开启Spring的组件扫描:
 package autoConfig1;

 import org.springframework.context.annotation.ComponentScan;

 import org.springframework.context.annotation.Configuration;

 /**

  * @Configuration用于定义配置类,可替换XML文件。

  * @ComponentScan注解能够在Spring中启用组件扫描:

  * 1.如果没有其他配置的话,@ComponentScan默认会扫描与配置类相同的包。

  * 2.因此Spring将会扫描autoConfig1包以及这个包下的所有子包,寻找带有@Component注解的类。

  * 3.由于SgtPeppers类带有@Component注解,所以被发现了,并且会在Spring中自动为其创建一个bean。

  */

 @Configuration

 @ComponentScan

 // 类CDPlayerConfig通过Java代码定义了Spring的装配规则,并没有显式地声明任何bean。

 public class CDPlayerConfig {

 }
实现了CompactDisc接口的组件类SgtPeppers类:
 package autoConfig1;

 import org.springframework.stereotype.Component;

 /**

  * 《Sgt. Pepper's Lonely Hearts Club Band》 是英国摇滚乐队The Beatles发行的第8张录音室专辑。

  * 在SgtPeppers类上使用了@Component注解。

  * 组件扫描默认是不启用的,还需要命令Spring去寻找带有@Component注解的类,并为其创建bean。

  */

 @Component // 这个注解表明该类会作为组件类,并告知Spring要为这个类创建bean。

 public class SgtPeppers implements CompactDisc {

     private String title = "Sgt. Pepper's Lonely Hearts Club Band";

     private String artist = "The Beatles";

     public void play() {

         System.out.println("Playing " + title + " by " + artist);

     }

 }
实现了MediaPlayer接口,并且自动装配CompactDisc bean,同时本身也是一个组件类的CDPlayer类:
 package autoConfig1;

 import org.springframework.beans.factory.annotation.Autowired;

 import org.springframework.stereotype.Component;

 /**

  * 声明CDPlayer类作为组件类,并且添加注解实现自动装配。

  * 自动装配就是让Spring自动满足bean依赖的一种方法。

  * 在满足依赖的过程中,会在Spring应用上下文中寻找匹配某个bean需求的其他bean。

  * 如果没有匹配的bean,那么在应用上下文创建的时候,Spring会抛出一个异常。

  * 为了避免异常的出现,可以使用@Autowired(required=false),让没有匹配的bean处于为匹配状态。

  * 但是,这种情况如果没有进行null检查的话,这个处于为装配状态的属性有可能会出现空指针异常。

  */

 @Component // 这个注解表明该类会作为组件类,并告知Spring要为这个类创建bean。

 public class CDPlayer implements MediaPlayer {

     private CompactDisc cd;

     // 1.在CDPlayer类的构造器上添加@Autowired注解。

     // 2.这表明当Spring创建CDPlayer bean的时候,会通过这个构造器来进行实例化,

     // 3.并且会传入一个可设置给CompactDisc类型的bean。

     @Autowired

     public CDPlayer(CompactDisc cd) {

         this.cd = cd;

     }

     public void play() {

         cd.play();

     }

 }
测试类CDPlayerTest,包括两部分的测试:
 package autoConfig1;

 import static org.junit.Assert.*;

 import org.junit.Rule;

 import org.junit.Test;

 import org.junit.contrib.java.lang.system.SystemOutRule;

 import org.junit.runner.RunWith;

 import org.springframework.beans.factory.annotation.Autowired;

 import org.springframework.test.context.ContextConfiguration;

 import org.springframework.test.context.junit4.SpringJUnit4ClassRunner;

 // 声明测试套件运行器,为了让测试在Spring容器环境下执行,以便在测试开始的时候自动创建Spring的上下文。

 @RunWith(SpringJUnit4ClassRunner.class)

 // 1.告诉Spring要在CDPlayerConfig中加载配置,因为CDPlayerConfig类中包含了@ComponentScan,启动了Spring的组件扫描。

 // 2.由于Spring启动了组件扫描,因此可以扫描出所有带有@Component注解的类,即SgtPeppers类和CDPlayer类,并且在Spring中为其创建一个bean。

 @ContextConfiguration(classes = CDPlayerConfig.class)

 public class CDPlayerTest {

     @Rule // 这个注解是为了在执行case的时候加入测试者特有的操作,而不影响原有的case代码:减小了特有操作和case原逻辑的耦合。

     public final SystemOutRule systemOutRule = new SystemOutRule().enableLog();

     // 将MediaPlayer bean注入到测试代码之中。

     @Autowired

     private MediaPlayer player;

     // 将CompactDisc bean注入到测试代码之中。

     @Autowired

     private CompactDisc cd;

     // 简单的测试断言cd属性不为null。

     // 如果它不为null,就意味着Spring能够发现CompactDisc类,自动在Spring上下文中将其创建为bean并将其注入到测试代码之中。

     @Test

     public void cdShouldNotBeNull() {

         assertNotNull(cd);

     }

     // 简单的测试断言player属性不为null。

     // 如果它不为null,就意味着Spring能够发现CompactDisc类,自动在Spring上下文中将其创建为bean并将其注入到测试代码之中。

     @Test

     public void playerShouldNotBeNull() {

         assertNotNull(player);

     }

     // systemOutRule规则可以基于控制台的输出编写断言,这里断言play()方法的输出被发送到了控制台。

     @Test

     public void play() {

         player.play();

         assertEquals("Playing Sgt. Pepper's Lonely Hearts Club Band by The Beatles\r\n", systemOutRule.getLog());

     }

 }
- 第二种方式是通过XML配置文件定义了Spring的装配规则:
代码结构为:
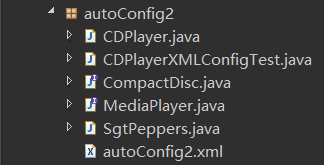
XML配置文件,用于开启Spring的组件扫描:
 <?xml version="1.0" encoding="UTF-8"?>

 <beans     xmlns="http://www.springframework.org/schema/beans"

         xmlns:xsi="http://www.w3.org/2001/XMLSchema-instance"

         xmlns:context="http://www.springframework.org/schema/context"

         xmlns:c="http://www.springframework.org/schema/c"

         xmlns:p="http://www.springframework.org/schema/p"

         xsi:schemaLocation="http://www.springframework.org/schema/beans

                             http://www.springframework.org/schema/beans/spring-beans.xsd

                             http://www.springframework.org/schema/context

                             http://www.springframework.org/schema/context/spring-context.xsd">

     <!-- 使用XML来启用组件扫描 -->

     <context:component-scan base-package="autoConfig2" />

 </beans>
用于测试XML自动装配的测试类,通过定义配置文件的路径加载配置信息,同样包括两部分的测试。
 package autoConfig2;

 import static org.junit.Assert.*;

 import org.junit.Rule;

 import org.junit.Test;

 import org.junit.contrib.java.lang.system.SystemOutRule;

 import org.junit.runner.RunWith;

 import org.springframework.beans.factory.annotation.Autowired;

 import org.springframework.test.context.ContextConfiguration;

 import org.springframework.test.context.junit4.SpringJUnit4ClassRunner;

 @RunWith(SpringJUnit4ClassRunner.class)

 // 设置配置文件xml文件的路径,Spring回去这个路径下面去寻找配置文件中的相关配置。

 @ContextConfiguration(locations = "classpath:autoConfig2/autoConfig2.xml")

 public class CDPlayerXMLConfigTest {

     @Rule

     public final SystemOutRule log = new SystemOutRule().enableLog();

     @Autowired

     private MediaPlayer player;

     @Autowired

     private CompactDisc cd;

     @Test

     public void cdShouldNotBeNull() {

         assertNotNull(cd);

     }

     @Test

     public void play() {

         player.play();

         assertEquals("Playing Sgt. Pepper's Lonely Hearts Club Band by The Beatles\r\n", log.getLog());

     }

 }
·三、通过Java代码装配bean
如果你想要将第三方库中的组件装配到你的应用中,在这种情况下,是没有办法在它的类上添加@Component和@Autowired注解的,因此就不能使用自动化装配的方案了。在这种情况下,必须要采用显式装配的方式。
在进行显式配置的时候,有两种方案可以选择:
- Java
- XML
在进行显式装配的时候,JavaConfig是更好的方案,因为它更为强大,类型安全并且对重构友好。因为它就是Java代码,就像应用程序中其他Java代码一样。
尽管它与其他的组件一样都使用相同的语言进行表述,但是JavaConfig是配置代码,这意味着它不应该包含任何业务逻辑,JavaConfig也不应该侵入到业务逻辑代码之中。
尽管不是必须的,但通常会将JavaConfig放到单独的包中,使他与其他的应用程序逻辑分离开,这样对于它的意图就不会产生困惑了。
代码结构为:
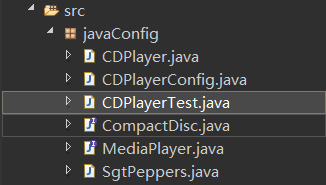
CompactDisc接口,和之前一样没有变化。
 package javaConfig;

 /**

  * 如果你不将CD插入(注入)到CD播放器中,那么CD播放器其实没有太大用处的。

  * 所以可以这样说,CD播放器依赖于CD才能完成它的使命。

  * CompactDisc接口定义了CD播放器对一盘CD所能进行的操作。

  * 它将CD播放器的任意实现与CD本身的耦合降低到了最小的程度。

  */

 public interface CompactDisc {

     void play();

 }
MediaPlayer接口,和之前一样也没有变化。
 package javaConfig;

 /**

  * MediaPlayer接口作为CD播放器的接口。

  */

 public interface MediaPlayer {

     void play();

 }
SgtPeppers类,和之前的不一样,少了@Component注解:
 package javaConfig;

 public class SgtPeppers implements CompactDisc {

     private String title = "Sgt. Pepper's Lonely Hearts Club Band";

     private String artist = "The Beatles";

     public void play() {

         System.out.println("Playing " + title + " by " + artist);

     }

 }
CDPlayer类,和之前不一样,同样少了@Component注解:
 package javaConfig;

 import org.springframework.beans.factory.annotation.Autowired;

 public class CDPlayer implements MediaPlayer {

     private CompactDisc cd;

     @Autowired

     public CDPlayer(CompactDisc cd) {

         this.cd = cd;

     }

     public void play() {

         cd.play();

     }

 }
在这之前的例子中,都是通过@Component装配Bean,但是@Component只能注解在类上,不能注解到方法上。对于Java而言,大部分的开发都需要引入第三方的包(jar文件),而且往往并没有这些包的源码,这时候将无法为这些包的类加入@Component注解,让它们变为开发环境的Bean。但可以使用新类扩展(extends)其包的类,然后在新类上使用@Component注解,这样显得不伦不类。
为了解决这个问题,Spring的@Bean注解可以在方法上使用,并且将方法返回的对象作为Spring的Bean。
最主要的类,CDPlayerConfig配置类:
 package javaConfig;

 import org.springframework.context.annotation.Bean;

 import org.springframework.context.annotation.Configuration;

 /**

  * 创建JavaConfig类的关键在于为其添加@Configuration注解

  * 在没有@ComponentScan注解的情况下,即不开启组件扫描时,会出现BeanCreationException异常。

  * 要在JavaConfig中声明bean,需要编写一个方法,这个方法会创建所需类型的实例,然后给这个方法添加@Bean注解。

  * 构造器和Setter方法,是支持@Bean方法的两个简单的例子,可以采用任何必要的Java功能来产生bean实例。

  */

 @Configuration // 这个注解表明这个类是一个配置类,该类包含在Spring应用上下文中如何创建bean的细节。

 public class CDPlayerConfig {

     //第一种情况是:CompactDisc bean是非常简单的,它自身没有其他的依赖。

     //@Bean注解会告诉Spring的是compactDisc方法将会返回一个SgtPeppers对象,该对象要注册为Spring应用上下文中的bean。

     @Bean

     public CompactDisc sgtPeppers() {

         return new SgtPeppers();

     }

     // 第二种情况是:CDPlayer bean依赖于CompactDisc bean

     // @Bean注解会告诉Spring的是cdPlayer方法将会返回一个CDPlayer对象,该对象要注册为Spring应用上下文中的bean。

     // 1.当Spring调用cdPlayer方法创建CDPlayer bean的时候,它会自动装配一个CompactDisc bean到配置方法中。

     // 2.然后,方法体就可以按照合适的方式来使用它。

     // 3.cdPlayer方法也能够将CompactDisc注入到CDPlayer的构造器中,而且不用明确引用CompactDisc的@Bean方法。

     // 4.不管CompactDisc bean是通过什么方式创建出来的,Spring都会将其传入到配置方法中,并用来创建CDPlayer bean。

     @Bean

     public CDPlayer cdPlayer(CompactDisc compactDisc) {

         return new CDPlayer(compactDisc);

     }

 }
测试类CDPlayerTest类:
 package javaConfig;

 import static org.junit.Assert.*;

 import org.junit.Rule;

 import org.junit.Test;

 import org.junit.contrib.java.lang.system.SystemOutRule;

 import org.junit.runner.RunWith;

 import org.springframework.beans.factory.annotation.Autowired;

 import org.springframework.test.context.ContextConfiguration;

 import org.springframework.test.context.junit4.SpringJUnit4ClassRunner;

 @RunWith(SpringJUnit4ClassRunner.class)

 @ContextConfiguration(classes = CDPlayerConfig.class)

 public class CDPlayerTest {

     @Rule

     public final SystemOutRule log = new SystemOutRule().enableLog();

     @Autowired

     private MediaPlayer player;

     @Test

     public void play() {

         player.play();

         assertEquals("Playing Sgt. Pepper's Lonely Hearts Club Band by The Beatles\r\n", log.getLog());

     }

 }
另外,由于@Bean不能在类上使用,只能使用在方法上,因此要想在注解中实现自定义的初始化方法和销毁方法,也可以通过@Bean的配置项来实现,@Bean的配置项包含4个配置:
- name:是一个字符串数组,允许配置多个BeanName
- autowire:标识是否是一个引用的Bean对象,默认值是Autowire.NO
- initMethod:自定义初始化方法
- destroyMethod:自定义销毁方法
例如:
@Bean(name="juiceMaker2", initMethod="init", destroyMethod="myDestroy")

public JuiceMaker2 initJuiceMaker2(){

    JuiceMaker2 juiceMaker2 = new JuiceMaker2();

    juiceMaker2.setBeverageShop("贡茶")

    Source source = new Source();

    source.setFruit("橙子");

    source.setSize("大杯");

    source.setSugar("少糖");

    juiceMaker2.setSource(source);

    return juiceMaker2;

}
四、通过XML装配bean
在Spring刚刚出现的时候,XML是描述配置的主要方式。但是,Spring现在有了强大的自动化配置和基于Java的配置,XML不应该再是第一选择了。
在基于XML的Spring配置中声明一个bean,要使用 <bean></bean>标签,相当于JavaConfig中的@Bean注解。
在没有明确给定ID的情况下,需要通过class属性指定“包名+类名”来指定bean类,创建的bean将会根据全限定类名类命名:
<bean class="soundsystem.BlankDisc" />
尽管自动化的bean命名方式非常方便,但如果稍后引用的话,自动产生的名字就没有多大的用处了,因此,通常更好的方法是借助id属性,为每个bean设置一个你自己选择的名字:
<bean id="compactDisc" class="soundsystem.BlankDisc" />
同样 x1,在JavaConfig中,也可以给bean命名:
    @Bean(name="lonelyHeartsClubBand")

    public CompactDisc sgtPeppers() {

        return new SgtPeppers();

    }
同样 x2,在自动装配中,也可以给bean命名:
@Component("lonelyHeartClubBand")

public class SgtPeppers implements CompactDisc {

    private String title = "Sgt. Pepper's Lonely Hearts Club Band";

    private String artist = "The Beatles";

    public void play() {

        System.out.println("Playing " + title + " by " + artist);

    }

}
那么再来分析一下XML方式配置bean的一些特征:
<bean id="compactDisc" class="soundsystem.BlankDisc" />
- 在基于JavaConfig的配置中,已经知道了通过@Bean注解,可以不用再创建BlankDisc的实例了。同样,当Spring发现这个<bean>元素时,它将会调用BlankDisc的默认构造器来创建bean
- 在这个简单的<bean>声明中,将bean的类型以字符串的形式设置在了class属性中,但是,如何保证给class属性的值是真正的类呢?万一对类进行重命名就用不了了,这是XML配置的一个重大的缺点。
下面通过几个典型的分类举例说明XML配置方式可以实现哪些功能。
1.使用<constructor-arg>元素实现依赖注入。
代码结构为:

CompactDisc接口:
 package xmlConfigTest1;

 public interface CompactDisc {

     void play();

 }
MediaPlayer接口:
 package xmlConfigTest1;

 public interface MediaPlayer {

     void play();

 }
实现了CompactDisc 接口的SgtPeppers类(正常Java代码,没有任何注解):
 package xmlConfigTest1;

 public class SgtPeppers implements CompactDisc {

     private String title = "Sgt. Pepper's Lonely Hearts Club Band";

     private String artist = "The Beatles";

     public void play() {

         System.out.println("Playing " + title + " by " + artist);

     }

 }
实现了MediaPlayer接口的CDPlayer类(正常Java代码,没有任何注解):
 package xmlConfigTest1;

 public class CDPlayer implements MediaPlayer {

     private CompactDisc cd;

     public CDPlayer(CompactDisc cd) {

         this.cd = cd;

     }

     public void play() {

         cd.play();

     }

 }
ConstructorArgReferenceTest-context.xml配置文件:
 <?xml version="1.0" encoding="UTF-8"?>

 <beans xmlns="http://www.springframework.org/schema/beans"

        xmlns:xsi="http://www.w3.org/2001/XMLSchema-instance"

        xsi:schemaLocation="http://www.springframework.org/schema/beans

                               http://www.springframework.org/schema/beans/spring-beans.xsd">

     <!-- 声明SgtPeppers bean,并且SgtPeppers类实现了CompacDisc接口,所以实际上已经有了一个可以注入到CDPlayer bean中的bean -->

     <bean id="compactDisc" class="xmlConfigTest1.SgtPeppers" />

     <!-- 1.当Spring遇到这个标签时,会创建一个CDPlayer实例。 -->

     <!-- 2.<constructor-arg>元素会告知Spring要将一个ID为compactDisc的bean引用传递到CDPlayer的构造器中。 -->

     <bean id="cdPlayer" class="xmlConfigTest1.CDPlayer">

         <constructor-arg ref="compactDisc" />

     </bean>

 </beans>
测试类ConstructorArgReferenceTest类(这里有一个疑问:测试类中没有指明xml配置文件的路径,那么是不是默认读取对应的“类名-context.xml”配置文件呢?通过通知台可以发现,是的!):
 package xmlConfigTest1;

 import static org.junit.Assert.*;

 import org.junit.Rule;

 import org.junit.Test;

 import org.junit.contrib.java.lang.system.SystemOutRule;

 import org.junit.runner.RunWith;

 import org.springframework.beans.factory.annotation.Autowired;

 import org.springframework.test.context.ContextConfiguration;

 import org.springframework.test.context.junit4.SpringJUnit4ClassRunner;

 @RunWith(SpringJUnit4ClassRunner.class)

 @ContextConfiguration

 public class ConstructorArgReferenceTest {

   @Rule

   public final SystemOutRule log = new SystemOutRule().enableLog();

   @Autowired

   private MediaPlayer player;

   @Test

   public void play() {

     player.play();

     assertEquals("Playing Sgt. Pepper's Lonely Hearts Club Band by The Beatles\r\n", log.getLog());

   }

 }
2.使用Spring的c-命名空间实现依赖注入。
代码结构为(其中4个基础类不变):
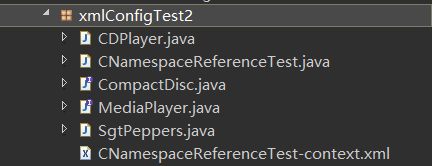
CNamespaceReferenceTest-context.xml配置文件类:
 <?xml version="1.0" encoding="UTF-8"?>

 <beans xmlns="http://www.springframework.org/schema/beans"

        xmlns:xsi="http://www.w3.org/2001/XMLSchema-instance"

        xmlns:c="http://www.springframework.org/schema/c"

        xsi:schemaLocation="http://www.springframework.org/schema/beans

                            http://www.springframework.org/schema/beans/spring-beans.xsd">

     <bean id="compactDisc" class="xmlConfigTest2.SgtPeppers" />

     <!-- 1.使用c-命名空间来声明构造器参数 -->

     <!-- 2.使用c-命名空间属性要比使用<constructor-arg>元素简练得多-->

     <!-- 3.这里要注意的是“c:cd-ref”中cd是CDPlayer类的构造器中指明的CompactDisc类型的字段。 -->

     <!-- 4.可以将参数名称替换为索引,即“c:_0-ref”表示的是第一个构造器参数 -->

     <!-- 5.在只有一个构造器参数的情况下,根本不用去标示参数。 -->

     <bean id="cdPlayer" class="xmlConfigTest2.CDPlayer" c:cd-ref="compactDisc" />

 </beans>
测试类CNamespaceReferenceTest类(也没有写xml文件路径,但是可以自动发现):
 package xmlConfigTest2;

 import static org.junit.Assert.*;

 import org.junit.Rule;

 import org.junit.Test;

 import org.junit.contrib.java.lang.system.SystemOutRule;

 import org.junit.runner.RunWith;

 import org.springframework.beans.factory.annotation.Autowired;

 import org.springframework.test.context.ContextConfiguration;

 import org.springframework.test.context.junit4.SpringJUnit4ClassRunner;

 @RunWith(SpringJUnit4ClassRunner.class)

 @ContextConfiguration

 public class CNamespaceReferenceTest {

     @Rule

     public final SystemOutRule log = new SystemOutRule().enableLog();

     @Autowired

     private MediaPlayer player;

     @Test

     public void play() {

         player.play();

         assertEquals("Playing Sgt. Pepper's Lonely Hearts Club Band by The Beatles\r\n", log.getLog());

     }

 }
目前所做的DI通常指的都是类型的装配-也就是将对象的引用装配到依赖于它们的其他对象之中--而有时候,需要做的只是用一个字面量值来配置对象。
因此,需要增加一个实现了CompactDisc接口的新的唱片类,即BlankDisc类,这个类像空磁盘一样,可以设置成任意想要的艺术家和唱片名:
 public class BlankDisc implements CompactDisc {

     private String title;

     private String artist;

     public BlankDisc(String title, String artist) {

         this.title = title;

         this.artist = artist;

     }

     public void play() {

         System.out.println("Playing " + title + " by " + artist);

     }

 }
接下来,需要做的就是,如何设置title和artist这两个属性,即将给定的值以字面量的形式注入到构造器之中。
3.使用<constructor-arg>元素进行构造器参数的注入
代码结构为:
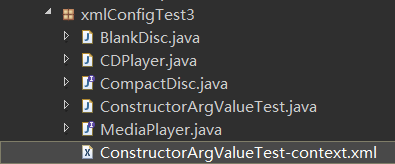
ConstructorArgValueTest-context.xml配置xml文件:
 <?xml version="1.0" encoding="UTF-8"?>

 <beans xmlns="http://www.springframework.org/schema/beans"

        xmlns:xsi="http://www.w3.org/2001/XMLSchema-instance"

        xsi:schemaLocation="http://www.springframework.org/schema/beans

                            http://www.springframework.org/schema/beans/spring-beans.xsd">

     <!-- 使用value属性,通过该属性表明给定的值要以字面量的形式注入到构造器之中。-->

     <bean id="compactDisc" class="xmlConfigTest3.BlankDisc">

         <constructor-arg value="You Don't Love Me, LaDao" />

         <constructor-arg value="Jay Chou" />

     </bean>

     <bean id="cdPlayer" class="xmlConfigTest3.CDPlayer">

         <constructor-arg ref="compactDisc" />

     </bean>

 </beans>
测试类ConstructorArgValueTest:
 package xmlConfigTest3;

 import static org.junit.Assert.*;

 import org.junit.Rule;

 import org.junit.Test;

 import org.junit.contrib.java.lang.system.SystemOutRule;

 import org.junit.runner.RunWith;

 import org.springframework.beans.factory.annotation.Autowired;

 import org.springframework.test.context.ContextConfiguration;

 import org.springframework.test.context.junit4.SpringJUnit4ClassRunner;

 @RunWith(SpringJUnit4ClassRunner.class)

 @ContextConfiguration

 public class ConstructorArgValueTest {

   @Rule

   public final SystemOutRule log = new SystemOutRule().enableLog();

   @Autowired

   private MediaPlayer player;

   @Test

   public void play() {

     player.play();

     assertEquals("Playing You Don't Love Me, LaDao by Jay Chou\r\n", log.getLog());

   }

 }
4.使用c-命名空间进行构造器参数的注入
代码结构为:
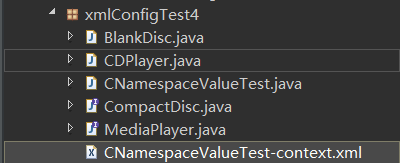
配置xml文件CNamespaceValueTest-context.xml:
 <?xml version="1.0" encoding="UTF-8"?>

 <beans xmlns="http://www.springframework.org/schema/beans"

        xmlns:xsi="http://www.w3.org/2001/XMLSchema-instance"

        xmlns:c="http://www.springframework.org/schema/c"

        xsi:schemaLocation="http://www.springframework.org/schema/beans

                            http://www.springframework.org/schema/beans/spring-beans.xsd">

     <bean id="compactDisc" class="xmlConfigTest4.BlankDisc"

           c:_0="You Don't Love Me, LaDao"

           c:_1="Jay Chou" />

     <bean id="cdPlayer" class="xmlConfigTest4.CDPlayer" c:_-ref="compactDisc" />

 </beans>
配置xml文件CNamespaceValueTest-context.xml中还可以换一种方案来写:
     <bean id="compactDisc" class="xmlConfigTest4.BlankDisc"

           c:_title="You Don't Love Me, LaDao"

           c:_artist="Jay Chou" />
在装配bean引用和字面量值方面,<constructor-arg>元素和c-命名空间的功能是相同的。但是,有一种情况是<constructor-arg>元素能够实现,而c-命名空间却无法做到的,那就是将结合装配到构造器参数中。
5.使用<constructor-arg>将集合装配到构造器参数中
修改BlankDisc类为ListDisc类,增加CD中包含的所有歌曲列表,播放的时候,将每首歌都播放出来:
 package xmlConfigTest5;

 import java.util.List;

 public class ListDisc implements CompactDisc {

     private String title;

     private String artist;

     private List<String> tracks;

     public ListDisc(String title, String artist, List<String> tracks) {

         this.title = title;

         this.artist = artist;

         this.tracks = tracks;

     }

     public void play() {

         System.out.println("Playing " + title + " by " + artist);

         for (String track : tracks) {

             System.out.println("-Track: " + track);

         }

     }

 }
代码结构为:
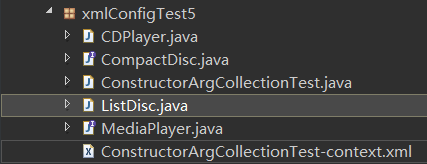
配置xml文件ConstructorArgCollectionTest-context.xml(使用<list>元素表明一个包含值的列表将会传递到构造器中,<value>用来指定列表中的每个元素。也可以按照同样的方式使用<set>元素,但是要把ListDisc中引用import java.util.Set,使用Set的时候,所有重复的值都会被忽略掉,存放顺序也不会得以保证。):
 <?xml version="1.0" encoding="UTF-8"?>

 <beans xmlns="http://www.springframework.org/schema/beans"

        xmlns:xsi="http://www.w3.org/2001/XMLSchema-instance"

        xsi:schemaLocation="http://www.springframework.org/schema/beans

                            http://www.springframework.org/schema/beans/spring-beans.xsd">

     <bean id="compactDisc" class="xmlConfigTest5.ListDisc">

         <constructor-arg value="Sgt. Pepper's Lonely Hearts Club Band" />

         <constructor-arg value="The Beatles" />

         <constructor-arg>

             <list>

                 <value>Sgt. Pepper's Lonely Hearts Club Band</value>

                 <value>With a Little Help from My Friends</value>

                 <value>Lucy in the Sky with Diamonds</value>

                 <value>Getting Better</value>

                 <value>Fixing a Hole</value>

                 <value>She's Leaving Home</value>

                 <value>Being for the Benefit of Mr. Kite!</value>

                 <value>Within You Without You</value>

                 <value>When I'm Sixty-Four</value>

                 <value>Lovely Rita</value>

                 <value>Good Morning Good Morning</value>

                 <value>Sgt. Pepper's Lonely Hearts Club Band (Reprise)</value>

                 <value>A Day in the Life</value>

             </list>

         </constructor-arg>

     </bean>

     <bean id="cdPlayer" class="xmlConfigTest5.CDPlayer">

         <constructor-arg ref="compactDisc" />

     </bean>

 </beans>
测试类ConstructorArgCollectionTest:
 package xmlConfigTest5;

 import static org.junit.Assert.*;

 import org.junit.Rule;

 import org.junit.Test;

 import org.junit.contrib.java.lang.system.SystemOutRule;

 import org.junit.runner.RunWith;

 import org.springframework.beans.factory.annotation.Autowired;

 import org.springframework.test.context.ContextConfiguration;

 import org.springframework.test.context.junit4.SpringJUnit4ClassRunner;

 @RunWith(SpringJUnit4ClassRunner.class)

 @ContextConfiguration

 public class ConstructorArgCollectionTest {

   @Rule

   public final SystemOutRule log = new SystemOutRule().enableLog();

   @Autowired

   private MediaPlayer player;

   @Test

   public void play() {

     player.play();

     assertEquals(

         "Playing Sgt. Pepper's Lonely Hearts Club Band by The Beatles\r\n" +

         "-Track: Sgt. Pepper's Lonely Hearts Club Band\r\n" +

         "-Track: With a Little Help from My Friends\r\n" +

         "-Track: Lucy in the Sky with Diamonds\r\n" +

         "-Track: Getting Better\r\n" +

         "-Track: Fixing a Hole\r\n" +

         "-Track: She's Leaving Home\r\n" +

         "-Track: Being for the Benefit of Mr. Kite!\r\n" +

         "-Track: Within You Without You\r\n" +

         "-Track: When I'm Sixty-Four\r\n" +

         "-Track: Lovely Rita\r\n" +

         "-Track: Good Morning Good Morning\r\n" +

         "-Track: Sgt. Pepper's Lonely Hearts Club Band (Reprise)\r\n" +

         "-Track: A Day in the Life\r\n",

         log.getLog());

   }

 }
到目前为止,CDPlayer和BlankDisc(ListDisc)类完全是通过构造器注入的,没有使用属性的Setter方法。继续研究如何使用Spring XML实现属性注入。
首先有一个问题,那就是该选择构造器还是属性注入呢?通用的规则是,对强依赖使用构造器注入,而对可选性的依赖使用属性注入。
修改CDPlayer类,为CompactDisc属性值增加Setter类并去掉CDPlayer类的构造器,现在CDPlayer没有任何的构造器(除了隐含的默认构造器),同时也没有任何的强依赖:
 package xmlConfigTest6;

 public class CDPlayer implements MediaPlayer {

   private CompactDisc compactDisc;

   public void setCompactDisc(CompactDisc compactDisc) {

     this.compactDisc = compactDisc;

   }

   public void play() {

     compactDisc.play();

   }

 }
修改BlankDisc类成reallyBlankDisc类,reallyBlankDisc完全通过属性注入进行配置,而不是构造器注入:
 package xmlConfigTest6;

 import java.util.List;

 public class reallyBlankDisc implements CompactDisc {

     private String title;

     private String artist;

     private List<String> tracks;

     public void setTitle(String title) {

         this.title = title;

     }

     public void setArtist(String artist) {

         this.artist = artist;

     }

     public void setTracks(List<String> tracks) {

         this.tracks = tracks;

     }

     public void play() {

         System.out.println("Playing " + title + " by " + artist);

         for (String track : tracks) {

             System.out.println("-Track: " + track);

         }

     }

 }
6.使用<property>元素装配bean引用与装配字面量(唯一的区别是是否带有“-ref”后缀,如果没有“-ref”后缀的话,所装配的就是字面量)
代码结构为:
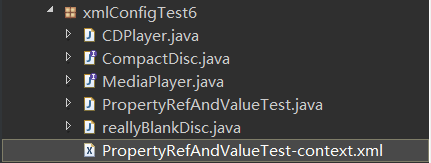
PropertyRefTest-context.xml配置xml文件:
 <?xml version="1.0" encoding="UTF-8"?>

 <beans xmlns="http://www.springframework.org/schema/beans"

        xmlns:xsi="http://www.w3.org/2001/XMLSchema-instance"

        xmlns:p="http://www.springframework.org/schema/p"

        xsi:schemaLocation="http://www.springframework.org/schema/beans

                            http://www.springframework.org/schema/beans/spring-beans.xsd">

     <!-- 通过 <property> 元素的value属性来设置title、artist和tracks属性-->

     <bean id="compactDisc" class="xmlConfigTest6.reallyBlankDisc">

         <property name="title" value="Sgt. Pepper's Lonely Hearts Club Band" />

         <property name="artist" value="The Beatles" />

         <property name="tracks">

             <list>

                 <value>Sgt. Pepper's Lonely Hearts Club Band</value>

                 <value>With a Little Help from My Friends</value>

                 <value>Lucy in the Sky with Diamonds</value>

                 <value>Getting Better</value>

                 <value>Fixing a Hole</value>

                 <value>She's Leaving Home</value>

                 <value>Being for the Benefit of Mr. Kite!</value>

                 <value>Within You Without You</value>

                 <value>When I'm Sixty-Four</value>

                 <value>Lovely Rita</value>

                 <value>Good Morning Good Morning</value>

                 <value>Sgt. Pepper's Lonely Hearts Club Band (Reprise)</value>

                 <value>A Day in the Life</value>

             </list>

         </property>

     </bean>

     <!-- 1.<property>元素为属性的Setter方法所提供的功能与<contructor-arg>元素为构造器所提供的功能是一样的  -->

     <!-- 2.通过ref属性引用了ID为compactDisc的bean,并将其通过setCompactDisc()方法注入到compactDisc属性中 -->

     <bean id="cdPlayer" class="xmlConfigTest6.CDPlayer">

         <property name="compactDisc" ref="compactDisc" />

     </bean>

 </beans>
测试类PropertyRefAndValueTest(和之前的测试类并没有什么变化):
 package xmlConfigTest6;

 import static org.junit.Assert.*;

 import org.junit.Rule;

 import org.junit.Test;

 import org.junit.contrib.java.lang.system.SystemOutRule;

 import org.junit.runner.RunWith;

 import org.springframework.beans.factory.annotation.Autowired;

 import org.springframework.test.context.ContextConfiguration;

 import org.springframework.test.context.junit4.SpringJUnit4ClassRunner;

 @RunWith(SpringJUnit4ClassRunner.class)

 @ContextConfiguration

 public class PropertyRefAndValueTest {

   @Rule

   public final SystemOutRule log = new SystemOutRule().enableLog();

   @Autowired

   private MediaPlayer player;

   @Test

   public void play() {

     player.play();

     assertEquals(

         "Playing Sgt. Pepper's Lonely Hearts Club Band by The Beatles\r\n" +

         "-Track: Sgt. Pepper's Lonely Hearts Club Band\r\n" +

         "-Track: With a Little Help from My Friends\r\n" +

         "-Track: Lucy in the Sky with Diamonds\r\n" +

         "-Track: Getting Better\r\n" +

         "-Track: Fixing a Hole\r\n" +

         "-Track: She's Leaving Home\r\n" +

         "-Track: Being for the Benefit of Mr. Kite!\r\n" +

         "-Track: Within You Without You\r\n" +

         "-Track: When I'm Sixty-Four\r\n" +

         "-Track: Lovely Rita\r\n" +

         "-Track: Good Morning Good Morning\r\n" +

         "-Track: Sgt. Pepper's Lonely Hearts Club Band (Reprise)\r\n" +

         "-Track: A Day in the Life\r\n",

         log.getLog());

   }

 }
7.使用p-命名空间装配bean引用与装配字面量
代码结构为:
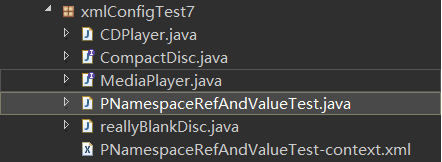
配置xml文件PNamespaceRefAndValueTest-context.xml:
 <?xml version="1.0" encoding="UTF-8"?>

 <beans xmlns="http://www.springframework.org/schema/beans"

        xmlns:xsi="http://www.w3.org/2001/XMLSchema-instance"

        xmlns:p="http://www.springframework.org/schema/p"

        xsi:schemaLocation="http://www.springframework.org/schema/beans

                            http://www.springframework.org/schema/beans/spring-beans.xsd">

     <!-- 使用p-命令空间来设置属性值,与c-命名空间一样, 不能使用p-命名空间来装配集合 -->

     <bean id="compactDisc" class="xmlConfigTest7.reallyBlankDisc"

           p:title="Sgt. Pepper's Lonely Hearts Club Band"

           p:artist="The Beatles">

         <property name="tracks">

             <list>

                 <value>Sgt. Pepper's Lonely Hearts Club Band</value>

                 <value>With a Little Help from My Friends</value>

                 <value>Lucy in the Sky with Diamonds</value>

                 <value>Getting Better</value>

                 <value>Fixing a Hole</value>

                 <value>She's Leaving Home</value>

                 <value>Being for the Benefit of Mr. Kite!</value>

                 <value>Within You Without You</value>

                 <value>When I'm Sixty-Four</value>

                 <value>Lovely Rita</value>

                 <value>Good Morning Good Morning</value>

                 <value>Sgt. Pepper's Lonely Hearts Club Band (Reprise)</value>

                 <value>A Day in the Life</value>

             </list>

         </property>

     </bean>

     <!-- 1.使用p-命名空间装配compactDisc属性-->

     <!-- 2.通常的格式是p:属性名-ref="所注入bean的ID"-->

     <bean id="cdPlayer" class="xmlConfigTest7.CDPlayer"

         p:compactDisc-ref="compactDisc" />

 </beans>
8.虽然不能使用p-命名空间来装配集合,但是可以使用Spring util-命名空间来简化reallyBlankDisc bean
代码结构为:
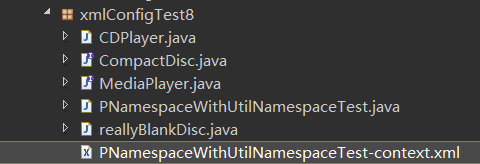
配置xml文件PNamespaceWithUtilNamespaceTest-context.xml:
 <?xml version="1.0" encoding="UTF-8"?>

 <beans xmlns="http://www.springframework.org/schema/beans"

     xmlns:xsi="http://www.w3.org/2001/XMLSchema-instance" xmlns:p="http://www.springframework.org/schema/p"

     xmlns:util="http://www.springframework.org/schema/util"

     xsi:schemaLocation="http://www.springframework.org/schema/beans

                            http://www.springframework.org/schema/beans/spring-beans.xsd

                            http://www.springframework.org/schema/util

                            http://www.springframework.org/schema/util/spring-util.xsd">

     <!-- 3.这样就能向使用其他的bean那样,将磁道列表bean注入到reallyBlankDisc bean中的tracks属性中 -->

     <bean id="compactDisc" class="xmlConfigTest8.reallyBlankDisc"

           p:title="Sgt. Pepper's Lonely Hearts Club Band"

           p:artist="The Beatles"

           p:tracks-ref="trackList" />

     <!-- 1.util-命名空间的<util:list>元素,会创建一个列表的bean -->

     <!-- 2.借助<util:list>元素,可以将磁道列表转移到reallyBlankDisc bean之外,并将其声明到单独的bean之中 -->

     <util:list id="trackList">

         <value>Sgt. Pepper's Lonely Hearts Club Band</value>

         <value>With a Little Help from My Friends</value>

         <value>Lucy in the Sky with Diamonds</value>

         <value>Getting Better</value>

         <value>Fixing a Hole</value>

         <value>She's Leaving Home</value>

         <value>Being for the Benefit of Mr. Kite!</value>

         <value>Within You Without You</value>

         <value>When I'm Sixty-Four</value>

         <value>Lovely Rita</value>

         <value>Good Morning Good Morning</value>

         <value>Sgt. Pepper's Lonely Hearts Club Band (Reprise)</value>

         <value>A Day in the Life</value>

     </util:list>

     <bean id="cdPlayer" class="xmlConfigTest8.CDPlayer"

         p:compactDisc-ref="compactDisc" />

 </beans>
五、导入和混合配置
混合配置的原理就是,Spring在自动装配时,并不在意要装配的bean来自哪里。自动装配的时候会考虑到Spring容器中所有的bean,不管它是在JavaConfig或XML中声明的还是通过组件扫描获取到的。
没有任何变化的几个类:
CompactDisc接口:
 package mixedConfig1;

 public interface CompactDisc {

     void play();

 }
MediaPlayer接口:
 package mixedConfig1;

 public interface MediaPlayer {

     void play();

 }
实现了MediaPlayer接口的CDPlayer类:
 package mixedConfig1;

 public class CDPlayer implements MediaPlayer {

     private CompactDisc cd;

     public CDPlayer(CompactDisc cd) {

         this.cd = cd;

     }

     public void play() {

         cd.play();

     }

 }
实现了CompactDisc接口的第一个唱片类SgtPeppers 类:
 package mixedConfig1;

 public class SgtPeppers implements CompactDisc {

     private String title = "Sgt. Pepper's Lonely Hearts Club Band";

     private String artist = "The Beatles";

     public void play() {

         System.out.println("Playing " + title + " by " + artist);

     }

 }
实现了CompactDisc接口,使用构造器来进行属性注入,并且拥有歌曲磁道列表的第二个唱片类ListBlankDisc类:
 package mixedConfig2;

 import java.util.List;

 public class ListBlankDisc implements CompactDisc {

     private String title;

     private String artist;

     private List<String> tracks;

     public ListBlankDisc(String title, String artist, List<String> tracks) {

         this.title = title;

         this.artist = artist;

         this.tracks = tracks;

     }

     public void play() {

         System.out.println("Playing " + title + " by " + artist);

         for (String track : tracks) {

             System.out.println("-Track: " + track);

         }

     }

 }
接着,梳理一下混合配置常见的几种情况:
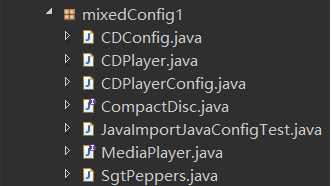
1.使用@Import注解,将其中一个JavaConfig导入到另一个JavaConfig当中的第一种方法
代码结构为:
在之前的CDPlayConfig配置类中已经定义了两个bean,就姑且认为它很复杂,所以将其中的SgtPeppers bean分开独立到它自己的配置类CDConfig类中:
 package mixedConfig1;

 import org.springframework.context.annotation.Bean;

 import org.springframework.context.annotation.Configuration;

 @Configuration

 public class CDConfig {

     @Bean

     public CompactDisc compactDisc() {

         return new SgtPeppers();

     }

 }
由于已经移除了CompactDisc()方法,因此需要有一种方法将这两个类组合到一起,因此就在CDPlayerConfig类中使用@Import(CDConfig.class)来导入CDConfig配置类:
 package mixedConfig1;

 import org.springframework.context.annotation.Bean;

 import org.springframework.context.annotation.Configuration;

 import org.springframework.context.annotation.Import;

 @Configuration

 @Import(CDConfig.class)

 public class CDPlayerConfig {

     @Bean

     public CDPlayer cdPlayer(CompactDisc compactDisc) {

         return new CDPlayer(compactDisc);

     }

 }
测试类JavaImportJavaConfigTest 中,需要通过@ContextConfiguration(classes = CDPlayerConfig.class)来指明被导入CDConfig的CDPlayerConfig配置类:
 package mixedConfig1;

 import static org.junit.Assert.assertEquals;

 import org.junit.Rule;

 import org.junit.Test;

 import org.junit.contrib.java.lang.system.SystemOutRule;

 import org.junit.runner.RunWith;

 import org.springframework.beans.factory.annotation.Autowired;

 import org.springframework.test.context.ContextConfiguration;

 import org.springframework.test.context.junit4.SpringJUnit4ClassRunner;

 @RunWith(SpringJUnit4ClassRunner.class)

 @ContextConfiguration(classes = CDPlayerConfig.class)

 public class JavaImportJavaConfigTest {

     @Rule

     public final SystemOutRule log = new SystemOutRule().enableLog();

     @Autowired

     private MediaPlayer player;

     @Test

     public void play() {

         player.play();

         assertEquals("Playing Sgt. Pepper's Lonely Hearts Club Band by The Beatles\r\n", log.getLog());

     }

 }
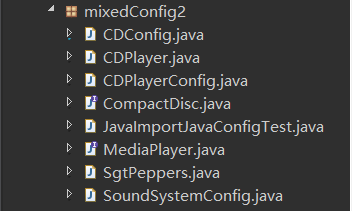
2.不在其中一个配置类当中使用@Import注解,创建一个更高级别的配置类SoundSystemConfig类,在这个类中使用@Import将两个配置类组合在一起
代码结构为:
CDConfig配置类:
 package mixedConfig2;

 import org.springframework.context.annotation.Bean;

 import org.springframework.context.annotation.Configuration;

 @Configuration

 public class CDConfig {

     @Bean

     public CompactDisc compactDisc() {

         return new SgtPeppers();

     }

 }
没有加@Import注解的CDPlayerConfig配置类:
 package mixedConfig2;

 import org.springframework.context.annotation.Bean;

 import org.springframework.context.annotation.Configuration;

 @Configuration

 public class CDPlayerConfig {

     @Bean

     public CDPlayer cdPlayer(CompactDisc compactDisc) {

         return new CDPlayer(compactDisc);

     }

 }
将两个配置类组合在一起的更高级别的配置类SoundSystemConfig类:
 package mixedConfig2;

 import org.springframework.context.annotation.Configuration;

 import org.springframework.context.annotation.Import;

 @Configuration

 @Import({CDPlayerConfig.class, CDConfig.class})

 public class SoundSystemConfig {

 }
测试类JavaImportJavaConfigTest类,通过@ContextConfiguration(classes = SoundSystemConfig.class)将读取最高级别的配置类SoundSystemConfig类:
 package mixedConfig2;

 import static org.junit.Assert.assertEquals;

 import org.junit.Rule;

 import org.junit.Test;

 import org.junit.contrib.java.lang.system.SystemOutRule;

 import org.junit.runner.RunWith;

 import org.springframework.beans.factory.annotation.Autowired;

 import org.springframework.test.context.ContextConfiguration;

 import org.springframework.test.context.junit4.SpringJUnit4ClassRunner;

 @RunWith(SpringJUnit4ClassRunner.class)

 @ContextConfiguration(classes = SoundSystemConfig.class)

 public class JavaImportJavaConfigTest {

     @Rule

     public final SystemOutRule log = new SystemOutRule().enableLog();

     @Autowired

     private MediaPlayer player;

     @Test

     public void play() {

         player.play();

         assertEquals("Playing Sgt. Pepper's Lonely Hearts Club Band by The Beatles\r\n", log.getLog());

     }

 }
3.使用@ImportResource注解,将配置在XML中的ListBlankDisc bean注入到配置在JavaConfig中的CDPlayer bean中
代码结构为:
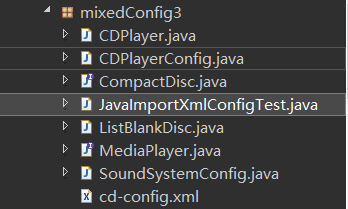
配置类CDPlayerConfig类:
 package mixedConfig3;

 import org.springframework.context.annotation.Bean;

 import org.springframework.context.annotation.Configuration;

 @Configuration

 public class CDPlayerConfig {

     @Bean

     public CDPlayer cdPlayer(CompactDisc compactDisc) {

         return new CDPlayer(compactDisc);

     }

 }
配置xml文件cd-config.xml:
 <?xml version="1.0" encoding="UTF-8"?>

 <beans xmlns="http://www.springframework.org/schema/beans"

     xmlns:xsi="http://www.w3.org/2001/XMLSchema-instance" xmlns:c="http://www.springframework.org/schema/c"

     xsi:schemaLocation="http://www.springframework.org/schema/beans

                            http://www.springframework.org/schema/beans/spring-beans.xsd">

     <bean id="compactDisc" class="mixedConfig3.ListBlankDisc"

         c:_0="Sgt. Pepper's Lonely Hearts Club Band" c:_1="The Beatles">

         <constructor-arg>

             <list>

                 <value>Sgt. Pepper's Lonely Hearts Club Band</value>

                 <value>With a Little Help from My Friends</value>

                 <value>Lucy in the Sky with Diamonds</value>

                 <value>Getting Better</value>

                 <value>Fixing a Hole</value>

             </list>

         </constructor-arg>

     </bean>

 </beans>
最高级别的配置类SoundSystemConfig类:
 package mixedConfig3;

 import org.springframework.context.annotation.Configuration;

 import org.springframework.context.annotation.Import;

 import org.springframework.context.annotation.ImportResource;

 @Configuration

 @Import(CDPlayerConfig.class)

 @ImportResource("classpath:/mixedConfig3/cd-config.xml")

 public class SoundSystemConfig {

 }
测试类JavaImportXmlConfigTest类,指明SoundSystemConfig为读取的配置类(这里遇到了一个问题,就是如果直接copy xml文档不注意去掉空格的话,可能会报错,所以要先对xml文件format一下):
 package mixedConfig3;

 import static org.junit.Assert.assertEquals;

 import org.junit.Rule;

 import org.junit.Test;

 import org.junit.contrib.java.lang.system.SystemOutRule;

 import org.junit.runner.RunWith;

 import org.springframework.beans.factory.annotation.Autowired;

 import org.springframework.test.context.ContextConfiguration;

 import org.springframework.test.context.junit4.SpringJUnit4ClassRunner;

 @RunWith(SpringJUnit4ClassRunner.class)

 @ContextConfiguration(classes = SoundSystemConfig.class)

 public class JavaImportXmlConfigTest {

     @Rule

     public final SystemOutRule log = new SystemOutRule().enableLog();

     @Autowired

     private MediaPlayer player;

     @Test

     public void play() {

         player.play();

         assertEquals("Playing Sgt. Pepper's Lonely Hearts Club Band by The Beatles\r\n"

                    + "-Track: Sgt. Pepper's Lonely Hearts Club Band\r\n"

                    + "-Track: With a Little Help from My Friends\r\n"

                    + "-Track: Lucy in the Sky with Diamonds\r\n" + "-Track: Getting Better\r\n"

                    + "-Track: Fixing a Hole\r\n", log.getLog());

     }

 }
4.使用<import>元素在XML配置文件中进行配置拆分,在其中一个XML中引用另一个XML
代码结构为:
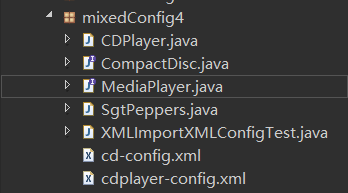
配置xml文件cd-config.xml:
<?xml version="1.0" encoding="UTF-8"?>

<beans xmlns="http://www.springframework.org/schema/beans"

       xmlns:xsi="http://www.w3.org/2001/XMLSchema-instance"

       xmlns:c="http://www.springframework.org/schema/c"

       xsi:schemaLocation="http://www.springframework.org/schema/beans

                           http://www.springframework.org/schema/beans/spring-beans.xsd">

    <bean id="compactDisc" class="mixedConfig4.SgtPeppers" />

</beans>
使用<import>元素导入其中一个配置文件到配置xml文件cdplayer-config.xml中:
 <?xml version="1.0" encoding="UTF-8"?>

 <beans xmlns="http://www.springframework.org/schema/beans"

        xmlns:xsi="http://www.w3.org/2001/XMLSchema-instance"

        xmlns:c="http://www.springframework.org/schema/c"

        xsi:schemaLocation="http://www.springframework.org/schema/beans

                            http://www.springframework.org/schema/beans/spring-beans.xsd">

     <import resource="cd-config.xml" />

     <bean id="cdPlayer" class="mixedConfig4.CDPlayer" c:cd-ref="compactDisc" />

 </beans>
测试类XMLImportXMLConfigTest类,给定最高级别的配置文件路径“/mixedConfig4/cdplayer-config.xml”
 package mixedConfig4;

 import static org.junit.Assert.assertEquals;

 import org.junit.Rule;

 import org.junit.Test;

 import org.junit.contrib.java.lang.system.SystemOutRule;

 import org.junit.runner.RunWith;

 import org.springframework.beans.factory.annotation.Autowired;

 import org.springframework.test.context.ContextConfiguration;

 import org.springframework.test.context.junit4.SpringJUnit4ClassRunner;

 @RunWith(SpringJUnit4ClassRunner.class)

 @ContextConfiguration("classpath:/mixedConfig4/cdplayer-config.xml")

 public class XMLImportXMLConfigTest {

     @Rule

     public final SystemOutRule log = new SystemOutRule().enableLog();

     @Autowired

     private MediaPlayer player;

     @Test

     public void play() {

         player.play();

         assertEquals("Playing Sgt. Pepper's Lonely Hearts Club Band by The Beatles\r\n", log.getLog());

     }

 }
5.<bean>元素能够用来将JavaConfig配置导入到XML配置中
代码结构为:
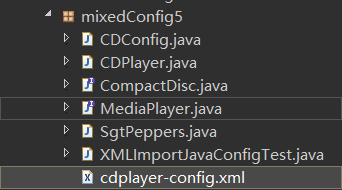
使用JavaConfig配置的配置类CDConfig类:
 package mixedConfig5;

 import org.springframework.context.annotation.Bean;

 import org.springframework.context.annotation.Configuration;

 @Configuration

 public class CDConfig {

     @Bean

     public CompactDisc compactDisc() {

         return new SgtPeppers();

     }

 }
使用<bean>元素将CDConfig配置类导入到XML中:
 <?xml version="1.0" encoding="UTF-8"?>

 <beans xmlns="http://www.springframework.org/schema/beans"

     xmlns:xsi="http://www.w3.org/2001/XMLSchema-instance" xmlns:c="http://www.springframework.org/schema/c"

     xsi:schemaLocation="http://www.springframework.org/schema/beans http://www.springframework.org/schema/beans/spring-beans.xsd">

     <bean class="mixedConfig5.CDConfig" />

     <bean id="cdPlayer" class="mixedConfig5.CDPlayer" c:cd-ref="compactDisc" />

 </beans>
测试类XMLImportJavaConfigTest类,指明xml配置文件路径为/mixedConfig5/cdplayer-config.xml:
 package mixedConfig5;

 import static org.junit.Assert.assertEquals;

 import org.junit.Rule;

 import org.junit.Test;

 import org.junit.contrib.java.lang.system.SystemOutRule;

 import org.junit.runner.RunWith;

 import org.springframework.beans.factory.annotation.Autowired;

 import org.springframework.test.context.ContextConfiguration;

 import org.springframework.test.context.junit4.SpringJUnit4ClassRunner;

 @RunWith(SpringJUnit4ClassRunner.class)

 @ContextConfiguration("classpath:/mixedConfig5/cdplayer-config.xml")

 public class XMLImportJavaConfigTest {

     @Rule

     public final SystemOutRule log = new SystemOutRule().enableLog();

     @Autowired

     private MediaPlayer player;

     @Test

     public void play() {

         player.play();

         assertEquals("Playing Sgt. Pepper's Lonely Hearts Club Band by The Beatles\r\n", log.getLog());

     }

 }
6.比较合理的做法是,创建一个更高层次的配置文件,这个文件不包含任何的bean,只是负责将两个或者更多的配置组合起来
代码结构为:
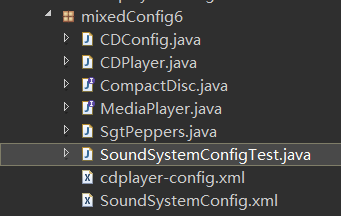
配置类CDConfig类:
 package mixedConfig6;

 import org.springframework.context.annotation.Bean;

 import org.springframework.context.annotation.Configuration;

 @Configuration

 public class CDConfig {

     @Bean

     public CompactDisc compactDisc() {

         return new SgtPeppers();

     }

 }
配置xml文件cdplayer-config.xml:
 <?xml version="1.0" encoding="UTF-8"?>

 <beans xmlns="http://www.springframework.org/schema/beans"

        xmlns:xsi="http://www.w3.org/2001/XMLSchema-instance"

        xmlns:c="http://www.springframework.org/schema/c"

        xsi:schemaLocation="http://www.springframework.org/schema/beans

                            http://www.springframework.org/schema/beans/spring-beans.xsd">

     <bean id="cdPlayer" class="mixedConfig6.CDPlayer" c:cd-ref="compactDisc" />

 </beans>
最高级别配置文件SoundSystemConfig.xml:
 <?xml version="1.0" encoding="UTF-8"?>

 <beans xmlns="http://www.springframework.org/schema/beans"

     xmlns:xsi="http://www.w3.org/2001/XMLSchema-instance" xmlns:c="http://www.springframework.org/schema/c"

     xsi:schemaLocation="http://www.springframework.org/schema/beans http://www.springframework.org/schema/beans/spring-beans.xsd">

     <bean class="mixedConfig6.CDConfig" />

     <import resource="cdplayer-config.xml" />

 </beans>
指明最高级别配置文件路径的测试类SoundSystemConfigTest类:
 package mixedConfig6;

 import static org.junit.Assert.assertEquals;

 import org.junit.Rule;

 import org.junit.Test;

 import org.junit.contrib.java.lang.system.SystemOutRule;

 import org.junit.runner.RunWith;

 import org.springframework.beans.factory.annotation.Autowired;

 import org.springframework.test.context.ContextConfiguration;

 import org.springframework.test.context.junit4.SpringJUnit4ClassRunner;

 @RunWith(SpringJUnit4ClassRunner.class)

 @ContextConfiguration("classpath:/mixedConfig6/SoundSystemConfig.xml")

 public class SoundSystemConfigTest {

     @Rule

     public final SystemOutRule log = new SystemOutRule().enableLog();

     @Autowired

     private MediaPlayer player;

     @Test

     public void play() {

         player.play();

         assertEquals("Playing Sgt. Pepper's Lonely Hearts Club Band by The Beatles\r\n", log.getLog());

     }

 }
六、其他问题
1.自动装配--@Autowired
接口类:
package com.ssm.chapter10.annotation.service;

public interface RoleService2 {

    public void printRoleInfo();

}
实现类:
package com.ssm.chapter10.annotation.service.impl;

import org.springframework.beans.factory.annotation.Autowired;

import org.springframework.stereotype.Component;

import com.ssm.chapter10.annotation.pojo.Role;

import com.ssm.chapter10.annotation.service.RoleService2;

@Component("RoleService2")

public class RoleServiceImpl2 implements RoleService2 {

    @Autowired

    private Role role = null;

    public Role getRole() {

        return role;

    }

//    @Autowired

    public void setRole(Role role) {

        this.role = role;

    }

    @Override

    public void printRoleInfo() {

        System.out.println("id =" + role.getId());

        System.out.println("roleName =" + role.getRoleName());

        System.out.println("note =" + role.getNote());

    }

}
(1)第一种方式:在字段上注入。
这里的@Autowired表示在Spring IoC定位所有的Bean后,这个字段需要按类型注入,这样IoC容器就会寻找资源,然后将其注入。
    @Autowired

    private Role role = null;
(2)@Autowired除了可以配置在属性之外,还允许方法配置,常见的Bean的setter方法也可以使用它来完成注入。
    @Autowired

    public void setRole(Role role) {

        this.role = role;

    }
2.自动装配的歧义性(@Primary和@Qualifier)
自动装配在有些时候并不能使用,原因在于按类型的注入方式。按照Spring的建议,在大部分情况下会使用接口编程,但是定义一个接口,并不一定只有一个与之对应的实现类。也就是说,一个接口可以有多个实现类,例如:
有一个接口:RoleService
package com.ssm.chapter10.annotation.service;

import com.ssm.chapter10.annotation.pojo.Role;

public interface RoleService {

    public void printRoleInfo(Role role);

}
接口
和两个实现类:RoleServiceImpl和RoleServiceImpl3
package com.ssm.chapter10.annotation.service.impl;

import org.springframework.stereotype.Component;

import com.ssm.chapter10.annotation.pojo.Role;

import com.ssm.chapter10.annotation.service.RoleService;

@Component

public class RoleServiceImpl implements RoleService {

    @Override

    public void printRoleInfo(Role role) {

        System.out.println("id =" + role.getId());

        System.out.println("roleName =" + role.getRoleName());

        System.out.println("note =" + role.getNote());

    }

}
实现类1
package com.ssm.chapter10.annotation.service.impl;

import org.springframework.context.annotation.Primary;

import org.springframework.stereotype.Component;

import com.ssm.chapter10.annotation.pojo.Role;

import com.ssm.chapter10.annotation.service.RoleService;

@Component("roleService3")

public class RoleServiceImpl3 implements RoleService {

    @Override

    public void printRoleInfo(Role role) {

        System.out.print("{id =" + role.getId());

        System.out.print(", roleName =" + role.getRoleName());

        System.out.println(", note =" + role.getNote() + "}");

    }

}
实现类2
有一个RoleController类,它有一个字段是RoleService接口类型,由于RoleService有两个实现类,因此Spring IoC容器无法判断要把哪个对象注入进来,于是就会抛出异常,这样@Autowired就会注入失败。产生这样的状况是因为它采用的是按类型来注入对象,而在Java中接口可以有多个实现类,同样的抽象类也可以有多个实例化的类,这样就会造成通过类型(by type)获取Bean的不唯一,从而导致Spirng IoC容器类似于按类型的方法无法获得唯一的实例化类。
package com.ssm.chapter10.annotation.controller;

@Component

public class RoleController {

    @Autowired

    private RoleService roleService = null;

    public void printRole(Role role) {

        roleService.printRoleInfo(role);

    }

}
(1)使用@Primary解决
注解@Primary代表首要的,当Spring IoC通过一个接口或者抽象类注入对象时,@Primary注解的Bean会被优先注入。
package com.ssm.chapter10.annotation.service.impl;

@Component("roleService3")

@Primary

public class RoleServiceImpl3 implements RoleService {

    @Override

    public void printRoleInfo(Role role) {

        System.out.print("{id =" + role.getId());

        System.out.print(", roleName =" + role.getRoleName());

        System.out.println(", note =" + role.getNote() + "}");

    }

}
(2)使用@Qualifier解决
除了按类型查找Bean,Spring IoC容器的最底层接口BeanFactory也定义了按名称查找的方法,如果采用名称查找而不是按类型查找的方法,就可以消除歧义性了。
首先把RoleServiceImpl3定义成别名@Component("roleService3")
然后在装配时就可以使用@Qualifier("roleService3")来注入这个指定的类了。
package com.ssm.chapter10.annotation.controller;

@Component

public class RoleController {

    @Autowired

    @Qualifier("roleService3")

    private RoleService roleService = null;

    public void printRole(Role role) {

        roleService.printRoleInfo(role);

    }

}
3.装载带有参数的构造方法类
对于一些带有参数的构造方法,也允许我们通过注解进行注入。
例如,可以在构造方法中使用@Autowired和@Qualifier注解对参数进行注入。
package com.ssm.chapter10.annotation.controller;

@Component

public class RoleController2 {

    private RoleService roleService = null;

    public RoleController2(@Autowired @Qualifier("roleService3") RoleService roleService) {

        this.roleService = roleService;

    }

    public RoleService getRoleService() {

        return roleService;

    }

    public void setRoleService( RoleService roleService) {

        this.roleService = roleService;

    }

    public void printRole(Role role) {

        roleService.printRoleInfo(role);

    }

}
4.使用Profile
为了在不同的环境下装载不同的Bean,Spring提供了Profile进行支持。
应用场景:开发人员使用开发数据库,而测试人员使用测试数据库。
(1)定义Profile有两种方式,使用Java代码中的@Profile注解或者是XML中的profile元素
使用@Profile注解:
package com.spring.profile

@Component

public class ProdileDataSOurce {

    @Bean(name="devDataSource")

    @Profile("dev")

    public DataSource getDevDataSource(){

        ...

        return dataSource;

    }

    @Bean(name="testDataSource")

    @Profile("test")

    public DataSource getDevDataSource(){

        ...

        return dataSource;

    }

}
使用XML中的profile元素:
<beans profile = "test">

    <bean .../>

</beans>

<beans profile = "dev">

    <bean .../>

</beans>
(2)激活Profile的方式
- 在使用SpringMVC的情况下可以配置Web上下文参数,或者DispatchServlet参数
- 作为JNDI条目
- 配置环境变量
- 配置JVM启动参数
- 在集成测试环境中使用@ActiveProfiles
例如:
package com.spring.test

@RunWith(SpringJUnit4ClassRunner.class)

@ContextConfiguration(classes=ProfileConfig.class)

@ActiveProfiles("dev")

public class ProfileTest {

    @Autowired

    private DataSource dataSource;

    @Test

    public void test() {

        System.out.println(dataSource.getClass().getName());

    }

}
5.加载属性(properties)文件
使用属性文件可以有效地减少硬编码,很多时候修改环境只需要修改配置文件就可以了,这样能够有效地提高运维人员的操作便利性。
给定属性文件database-config.properties
jdbc.database.driver=com.mysql.jdbc.Driver

jdbc.database.url=jdbc:mysql://localhost:3306/chapter10

jdbc.database.username=root

jdbc.database.password=123456
(1)使用注解方式加载属性文件
Spring提供了@PropertySource来加载属性文件,有一些配置项:
- name:字符串,配置这次属性配置的名称
- value:字符串数组,可以配置多个属性文件
- ignoreResourcesNotFound:boolean值,默认为false,表示如果找不到对应的属性文件是否进行忽略处理,false表示如果找不到就抛出异常
- encoding:编码,默认为“”
定义Java配置类:ApplicationConfig.java
@Configuration
@PropertySource(value={"classpath:database-config.properties"}, ignoreResourceNotFound=true)

public class ApplicationConfig {
}
在Spirng中使用属性文件中的内容:
    private static void test9() {

        ApplicationContext context = new AnnotationConfigApplicationContext(ApplicationConfig.class);

            String url = context.getEnvironment().getProperty("jdbc.database.url");

            System.out.println(url);

    }
如果仅仅是这样,在Spring中没有解析属性占位符的能力,Spring推荐使用一个属性文件解析类进行处理,它就是PropertySourcesPlaceholderConfigurer,使用它就意味着允许Spring解析对应的属性文件,通过占位符去引用对应的配置。
加载数据库属性文件,定义了一个PropertySourcesPlaceholderConfigurer类的Bean,作用是为了让Spring能够解析属性占位符。
@Configuration
@ComponentScan
@PropertySource(value={"classpath:database-config.properties"}, ignoreResourceNotFound=true)

public class ApplicationConfig {

    @Bean

    public PropertySourcesPlaceholderConfigurer propertySourcesPlaceholderConfigurer() {

        return new PropertySourcesPlaceholderConfigurer();

    }
通过占位符引用加载进来的属性:
package com.ssm.chapter10.annotation.config;

@Component

public class DataSourceBean {

    @Value("${jdbc.database.driver}")

    private String driver = null;

    @Value("${jdbc.database.url}")

    private String url = null;

    @Value("${jdbc.database.username}")

    private String username = null;

    @Value("${jdbc.database.password}")

    private String password = null;

    /**getter and setter**/

    @Bean(name = "dataSource1")

    public DataSource getDataSource() {

        Properties props = new Properties();

        props.setProperty("driver", driver);

        props.setProperty("url", url);

        props.setProperty("username", username);

        props.setProperty("password", password);

        DataSource dataSource = null;

        try {

            dataSource = BasicDataSourceFactory.createDataSource(props);

        } catch (Exception e) {

            e.printStackTrace();

        }

        return dataSource;

    }

}
(2)使用XML方式加载属性文件
通过<context:property-placeholder>元素也可以加载一个属性文件或者是多个属性文件。
    <context:component-scan base-package="com.ssm.chapter10.annotation" />

    <!--

    <context:property-placeholder

        ignore-resource-not-found="false" location="classpath:database-config.properties" />

      -->

     <!--字符串数组,可配置多个属性文件 -->

    <bean

        class="org.springframework.beans.factory.config.PropertyPlaceholderConfigurer">

        <property name="locations">

            <array>

                <value>classpath:database-config.properties</value>

                <value>classpath:log4j.properties</value>

            </array>

        </property>

        <property name="ignoreResourceNotFound" value="false" />

    </bean>

</beans>
6.条件化装配Bean
在某些条件下不需要去装配Bean,比如当属性文件中没有属性配置时,就不要去创建数据源,这时候,需要通过条件化去判断。
Spring提供了注解@Conditional可以配置一个或多个类
首先定义一个实现了Condition接口的类,需要实现matches方法,首先获取运行上下文环境,然后判断在环境中属性文件是否配置了数据库的相关参数,如果参数全部配置了就返回true。
package com.ssm.chapter10.annotation.condition;

public class DataSourceCondition implements Condition {

    @Override

    public boolean matches(ConditionContext context, AnnotatedTypeMetadata metadata) {

        //获取上下文环境

        Environment env = context.getEnvironment();

        //判断是否存在关于数据源的基础配置

        return env.containsProperty("jdbc.database.driver")

                && env.containsProperty("jdbc.database.url")

                && env.containsProperty("jdbc.database.username")

                && env.containsProperty("jdbc.database.password");

    }

}
然后通过@Conditional({DataSourceCondition.class})去配置,如果所有参数在配置文件中都已经配置了,则返回为true,那么Spring会去创建对应的Bean,否则是不会创建的。
    @Bean(name = "dataSource")

    @Conditional({DataSourceCondition.class})

    public DataSource getDataSource(

            @Value("${jdbc.database.driver}") String driver,

            @Value("${jdbc.database.url}") String url,

            @Value("${jdbc.database.username}") String username,

            @Value("${jdbc.database.password}") String password) {

        Properties props = new Properties();

        props.setProperty("driver", driver);

        props.setProperty("url", url);

        props.setProperty("username", username);

        props.setProperty("password", password);

        DataSource dataSource = null;

        try {

            dataSource = BasicDataSourceFactory.createDataSource(props);

        } catch (Exception e) {

            e.printStackTrace();

        }

        return dataSource;

    }
7.Bean的作用域
在默认的情况下,Spring IoC容器只会对一个Bean创建一个实例,而不是多个。
Spring提供了4种作用域,它会根据情况来决定是否生成新的对象:
- 单例(singleton):默认的选项,在整个应用中,Spring只为其生成一个Bean的实例。
- 原型(prototype):当每次注入,或者通过Spring IoC容器获取Bean时,Spring都会为它创建一个新的实例。
- 会话(session):在Web应用中使用,就是在会话过程中Spring只创建一个实例
- 请求(request):在Web应用中使用,就是在一次请求中Spring会创建一个实例,但是不同的请求会创建不同的实例。
可以通过@Scope声明作用域为原型,这样两次分别从Spirng IoC容器中就会获得不同的对象,
@Component

//@Scope(ConfigurableBeanFactory.SCOPE_PROTOTYPE)

public class RoleDataSourceServiceImpl implements RoleDataSourceService {

    ...

}
代码已上传至GitHub:https://github.com/BigJunOba/SpringDI
Spring(二)装配Spring Bean的更多相关文章
- Spring(3)——装配 Spring Bean 详解
装配 Bean 的概述 前面已经介绍了 Spring IoC 的理念和设计,这一篇文章将介绍的是如何将自己开发的 Bean 装配到 Spring IoC 容器中. 大部分场景下,我们都会使用 Appl ...
- spring IOC 装配一个bean
1.0属性注入 新建一个people类 package com.java.test3; /** * @author nidegui * @create 2019-06-22 14:45 */ publ ...
- Spring学习(二)--装配Bean
一.Spring装配机制 Spring提供了三种主要的装配机制: 1.在XML中进行显示配置 2.在Java中进行显示配置 3.隐式的bean发现机制和自动装配--自动化装配bean Spring可以 ...
- 二、Spring装配Bean
内容 声明bean 构造器注入和Setter方法注入 装配Bean 控制bean的创建和销毁 关键词 装配(wiring) 组件扫描(component scanning) 自动装配(AutoWiri ...
- Spring框架系列(二)--装配和注入Bean
企业日常开发中,几乎都是Spring系的框架,无论是SSM.还是现在大火的SpringBoot+JPA/MyBatis,使用最大的目的就是简化开发 基本模块: 核心容器:Beans.Core.Cont ...
- Spring基础学习(二)—详解Bean(上)
在Spring配置文件中,用户不但可以将String.int等字面值注入Bean中,还可以将集合.Map等类型注入Bean中,此外还可以注入配置文件中其他定义的Bean. 一.字面值 ...
- Spring高级装配bean
目录 spring profile 条件化的bean声明 自动装配与歧义性 bean的作用域 Spring表达式语言 一.环境与profile 配置profile bean 在软件开发的时候,有一个 ...
- spring(二、bean生命周期、用到的设计模式、常用注解)
spring(二.bean生命周期.用到的设计模式.常用注解) Spring作为当前Java最流行.最强大的轻量级框架,受到了程序员的热烈欢迎.准确的了解Spring Bean的生命周期是非常必要的. ...
- 品Spring:SpringBoot发起bean定义注册的“二次攻坚战”
上一篇文章整体非常轻松,因为在容器启动前,只注册了一个bean定义,就是SpringBoot的主类. OK,今天接着从容器的启动入手,找出剩余所有的bean定义的注册过程. 具体细节肯定会颇为复杂,同 ...
随机推荐
- Guava的常用方法示例
Guava Maven Dependency <dependency> <groupId>com.google.guava</groupId> <artifa ...
- 浅谈Spring的事务隔离级别与传播性
浅谈Spring的事务隔离级别与传播性 这篇文章以一个问题开始,如果你知道答案的话就可以跳过不看啦@(o・ェ・)@ Q:在一个批量任务执行的过程中,调用多个子任务时,如果有一些子任务发生异常,只是回滚 ...
- .NetCore技术研究-一套代码同时支持.NET Framework和.NET Core
在.NET Core的迁移过程中,我们将原有的.NET Framework代码迁移到.NET Core.如果线上只有一个小型的应用还好,迁移升级完成后,只需要维护.NET Core这个版本的代码. 但 ...
- Docker系列(二):通过Docker安装使用 Kubernetes (K8s)
Docker社区版从17.12版本开始已经提供了对Kubernetes的支持.但是由于其安装过程依赖的镜像服务在国内访问很不稳定,很多朋友都无法配置成功.我们提供了一个简单的工具帮助大家开启Docke ...
- hadoop之yarn详解(基础架构篇)
本文主要从yarn的基础架构和yarn的作业执行流程进行阐述 一.yarn的概述 Apache Yarn(Yet Another Resource Negotiator的缩写)是hadoop集群资源管 ...
- go语言标准库之http/template
html/template包实现了数据驱动的模板,用于生成可对抗代码注入的安全HTML输出.它提供了和text/template包相同的接口,Go语言中输出HTML的场景都应使用text/templa ...
- 从零开始搭建WebAPI Core_SqlSugar管理系统(一) 项目环境需求以及项目搭建
从零开始搭建WebAPI Core_SqlSugar管理系统(一) 项目环境需求以及项目搭建 环境需求 想要使用.NET Core,首先你的Visual Studio(以下简称vs)升级到较高的版本, ...
- JAVA的List接口的remove重载方法调用原理
前言 说真的,平常看源码都是自己看完自己懂,很少有写出来的冲动. 但是在写算法的时候,经常用到java中各种集合,其中也比较常用到remove方法. remove有重载函数,分别传入参数是索引inde ...
- Zygote家的大儿子 —— SystemServer
本文基于 Android 9.0 , 代码仓库地址 : android_9.0.0_r45 文中源码链接: SystemServer.java SystemServiceManager.java Sy ...
- python+selenium自动化框架
---恢复内容开始--- 主要使用的模块: selenium/webdriver模块(须准备Chrome驱动),主要用于调用浏览器实现自动点击. unittest模块,主要用于整合测试用例. xlrd ...