
flink Standalone Cluster
Requirements
Software Requirements
Flink runs on all UNIX-like environments, e.g. Linux, Mac OS X, and Cygwin (for Windows) and expects the cluster to consist of one master node and one or more worker nodes. Before you start to setup the system, make sure you have the following software installed on each node:
- Java 1.8.x or higher,
- ssh (sshd must be running to use the Flink scripts that manage remote components)
If your cluster does not fulfill these software requirements you will need to install/upgrade it.
Having passwordless SSH and the same directory structure on all your cluster nodes will allow you to use our scripts to control everything.
ssh免密登录:
在源机器执行
ssh-keygen //一路回车,生成公钥,位置~/.ssh/id_rsa.pub
ssh-copy-id -i ~/.ssh/id_rsa.pub root@目的机器 //将源机器生成的公钥拷贝到目的机器的~/.ssh/authorized_keys
或者 手动将源机器生成的公钥拷贝到目的机器的~/.ssh/authorized_keys。注意:不要有换行
完成!
JAVA_HOME Configuration
系统环境配置了JAVA_HOME即可,无需如下操作
Flink requires the JAVA_HOME environment variable to be set on the master and all worker nodes and point to the directory of your Java installation.
You can set this variable in conf/flink-conf.yaml via the env.java.home key.
Flink Setup
Go to the downloads page and get the ready-to-run package. Make sure to pick the Flink package matching your Hadoop version. If you don’t plan to use Hadoop, pick any version.
After downloading the latest release, copy the archive to your master node and extract it:
tar xzf flink-*.tgz

cd flink-*
Configuring Flink (不做任何设置,在单节点上直接运行bin/start-cluster.sh,可在单机启动单个jobmanager和单个taskmanager,方便debug代码)
After having extracted the system files, you need to configure Flink for the cluster by editing conf/flink-conf.yaml.
Set the jobmanager.rpc.address key to point to your master node. You should also define the maximum amount of main memory the JVM is allowed to allocate on each node by setting the jobmanager.heap.mb and taskmanager.heap.mb keys.
These values are given in MB. If some worker nodes have more main memory which you want to allocate to the Flink system you can overwrite the default value by setting the environment variable FLINK_TM_HEAP on those specific nodes.
Finally, you must provide a list of all nodes in your cluster which shall be used as worker nodes. Therefore, similar to the HDFS configuration, edit the file conf/slaves and enter the IP/host name of each worker node. Each worker node will later run a TaskManager.
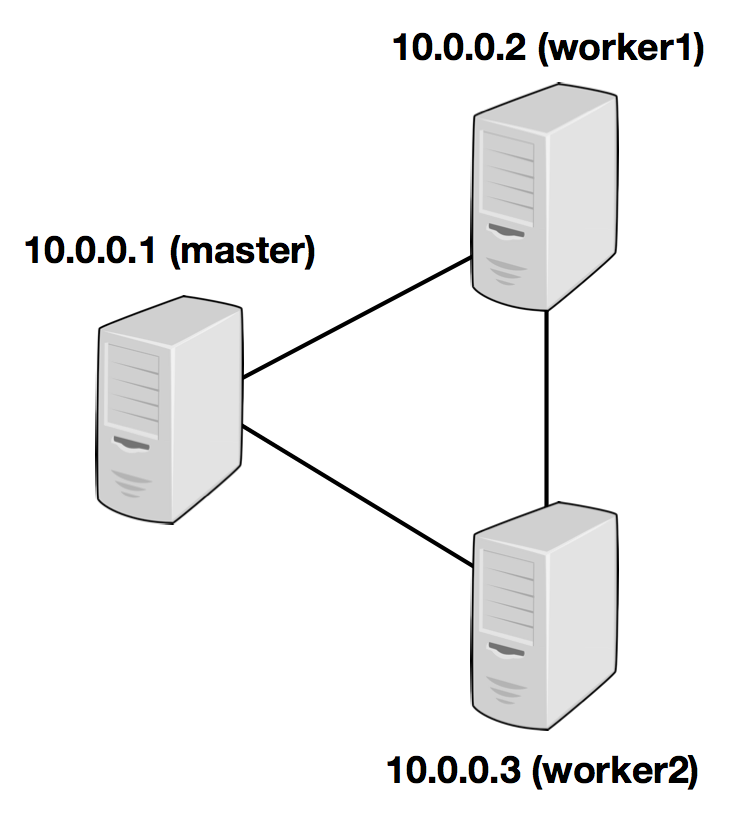
The following example illustrates the setup with three nodes (with IP addresses from 10.0.0.1 to 10.0.0.3 and hostnames master, worker1, worker2) and shows the contents of the configuration files (which need to be accessible at the same path on all machines):
jobmanager.rpc.address: 10.0.0.1
注意:需要在所有需要启动taskmanager的机器进行如上配置
/path/to/flink/conf/slaves
10.0.0.2

10.0.0.3
The Flink directory must be available on every worker under the same path. You can use a shared NFS directory, or copy the entire Flink directory to every worker node.
Please see the configuration page for details and additional configuration options.
In particular,
- the amount of available memory per JobManager (
jobmanager.heap.mb), - the amount of available memory per TaskManager (
taskmanager.heap.mb), - the number of available CPUs per machine (
taskmanager.numberOfTaskSlots), - the total number of CPUs in the cluster (
parallelism.default) and - the temporary directories (
taskmanager.tmp.dirs)
are very important configuration values.
Starting Flink
The following script starts a JobManager on the local node and connects via SSH to all worker nodes listed in the slaves file to start the TaskManager on each node. Now your Flink system is up and running. The JobManager running on the local node will now accept jobs at the configured RPC port.
Assuming that you are on the master node and inside the Flink directory:
bin/start-cluster.shTo stop Flink, there is also a stop-cluster.sh script.
Adding JobManager/TaskManager Instances to a Cluster
You can add both JobManager and TaskManager instances to your running cluster with the bin/jobmanager.sh and bin/taskmanager.shscripts.
Adding a JobManager
bin/jobmanager.sh ((start|start-foreground) cluster)|stop|stop-allAdding a TaskManager
bin/taskmanager.sh start|start-foreground|stop|stop-allMake sure to call these scripts on the hosts on which you want to start/stop the respective instance.
flink Standalone Cluster的更多相关文章
- flink初识及安装flink standalone集群
flink architecture 1.可以看出,flink可以运行在本地,也可以类似spark一样on yarn或者standalone模式(与spark standalone也很相似),此外fl ...
- Apache Spark源码走读之19 -- standalone cluster模式下资源的申请与释放
欢迎转载,转载请注明出处,徽沪一郎. 概要 本文主要讲述在standalone cluster部署模式下,Spark Application在整个运行期间,资源(主要是cpu core和内存)的申请与 ...
- Spark Standalone cluster try
Spark Standalone cluster node*-- stop firewalldsystemctl stop firewalldsystemctl disable firewalld-- ...
- flink部署操作-flink standalone集群安装部署
flink集群安装部署 standalone集群模式 必须依赖 必须的软件 JAVA_HOME配置 flink安装 配置flink 启动flink 添加Jobmanager/taskmanager 实 ...
- Spark运行模式_spark自带cluster manager的standalone cluster模式(集群)
这种运行模式和"Spark自带Cluster Manager的Standalone Client模式(集群)"还是有很大的区别的.使用如下命令执行应用程序(前提是已经启动了spar ...
- Flink standalone模式作业执行流程
宏观流程如下图: client端 生成StreamGraph env.addSource(new SocketTextStreamFunction(...)) .flatMap(new FlatMap ...
- 【转帖】两年Flink迁移之路:从standalone到on yarn,处理能力提升五倍
两年Flink迁移之路:从standalone到on yarn,处理能力提升五倍 https://segmentfault.com/a/1190000020209179 flink 1.7k 次阅读 ...
- Apache Flink 的迁移之路,2 年处理效果提升 5 倍
一.背景与痛点 在 2017 年上半年以前,TalkingData 的 App Analytics 和 Game Analytics 两个产品,流式框架使用的是自研的 td-etl-framework ...
- 重磅!解锁Apache Flink读写Apache Hudi新姿势
感谢阿里云 Blink 团队Danny Chan的投稿及完善Flink与Hudi集成工作. 1. 背景 Apache Hudi 是目前最流行的数据湖解决方案之一,Data Lake Analytics ...
随机推荐
- Chapter 5 Blood Type——3
Disappointment flooded through me as my eyes unerringly focused on his table. 当我的眼睛完全集中在他的桌上时,失望如洪水般 ...
- .NET Core中实现AOP编程
AOP全称Aspect Oriented Progarmming(面向切面编程),其实AOP对ASP.NET程序员来说一点都不神秘,你也许早就通过Filter来完成一些通用的功能,例如你使用Autho ...
- RabbitMQ消息队列(四)-服务详细配置与日常监控管理
RabbitMQ服务管理 启动服务:rabbitmq-server -detached[ /usr/local/rabbitmq/sbin/rabbitmq-server -detached ] 查看 ...
- 设计模式总结篇系列:桥接模式(Bridge)
在实际类设计过程中,有时会遇到此类情况:由于实际的需要,某个类具有两个或两个以上的维度变化,如果利用继承将每种可能的变化情况都定义成一个类,一是会导致类膨胀的问题,二是以后不太好维护和并且违背类的设计 ...
- SQL优化总结之二
1.列优先 如图有表A和表B,对其查询时,会有如下语句: select a.*,b.* from a,b where a.id = b.a_id; 注意from 后边的表名, a.如果多表查询是完全无 ...
- DHTMLX 常用技术
GRID的行设置前景色和背景色 $dataItem->set_row_color("red"); // 设置背景色 $dataItem->set_row_style(& ...
- Odd-e CSD Course Day 4
今天有一部分是透過 Code Review 來引發我們對於下面幾個方向的想法 Good Unit Tests 在今天的 Code Review 裡,Stanly 翻出了一個我們寫的 Unit Test ...
- C# 程序异常关闭时的捕获
本文主要以一个简单的小例子,描述C# Winform程序异常关闭时,如何进行捕获,并记录日志. 概述 有时在界面的事件中,明明有try... catch 进行捕获异常,但是还是会有异常关闭的情况,所以 ...
- 第六讲 smart qq C#开发总结
smart qqC#开发总结: 整个开发下来其实一点都不是很难,从一开始二维码 获取到最终的收发消息,基本上都是模拟浏览器的操作.都是基于http通讯.一下就是 本次新手学习http协议的最关键的一个 ...
- eclipse部署Tomcat9
1.下载 下载地址https://tomcat.apache.org/download-90.cgi 2.解压文件 3.运行bin-->startup.bat文件,若界面如下图,则成功 4. ...