ActiveMq 安装
系统是centos 6.5的
下载ActiveMq的包 下载地址 http://activemq.apache.org/download.html
我下载的是 apache-activemq-5.14.5-bin.tar.gz 版本
新建activemq目录将下载好的吧上传到这个目录里
解压
tar -zxf apache-activemq-5.14.5-bin.tar.gz
cd 到解压包里的bin目录下 启动

查看端口61616

如果用防火墙配置如下
- [# vi + /etc/sysconfig/iptables
- #添加下面两行
- -A INPUT -m state --state NEW -m tcp -p tcp --dport 8161 -j ACCEPT
- -A INPUT -m state --state NEW -m tcp -p tcp --dport 61616 -j ACCEPT
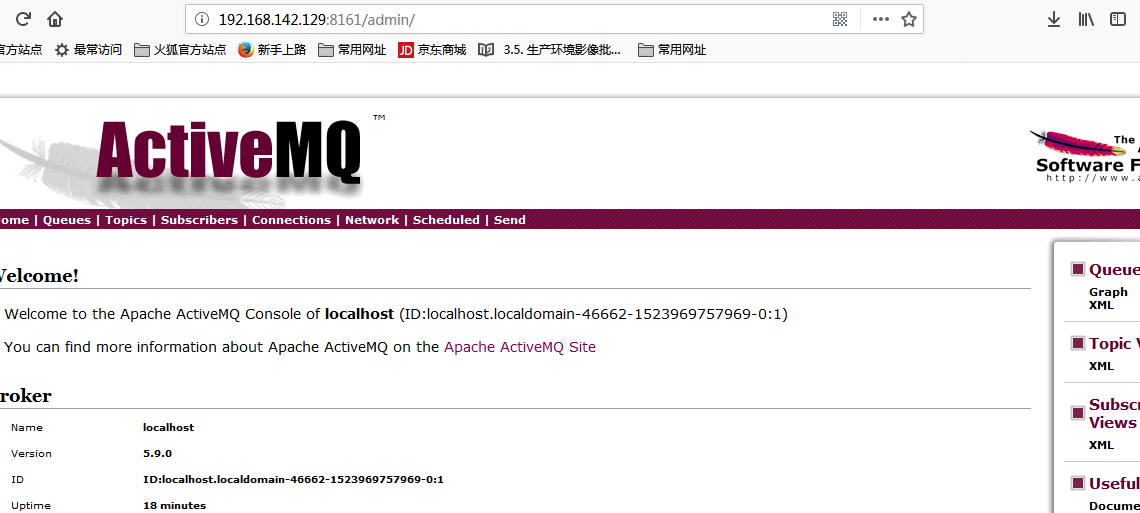
端口8161是访问的端口
如果没有直接ip:8161/admin 用户密码默认都是admin
可以在配置文件中修改用户密码:
打开conf/jetty.xml
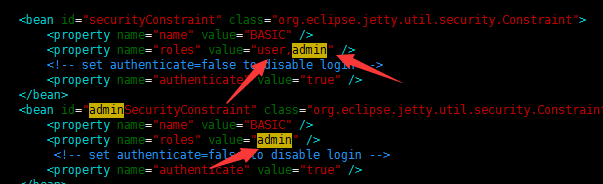
将property name为authenticate的属性value="false" 改为"true",高版本的已经默认为true了
控制台的登录用户名密码保存在conf/jetty-realm.properties文件中,内容如下

值得注意的是 用户名和密码的格式是:用户名 : 密码 ,角色名
.修改客户端连接密码
1.修改activemq.xml配置,需要新增一个插件,在<broker>节点里面<systemUsage>节点前面添加如下

<plugins>

   <simpleAuthenticationPlugin>

         <users>

              <authenticationUser username="${activemq.username}" password="${activemq.password}" groups="users,admins"/>

         </users>

   </simpleAuthenticationPlugin>

</plugins>
或者直接修改为(即直接将username和password赋值,所赋的值即为用户名和密码。如果使用这一种方式的话,下面的第二步则不需要了):
<plugins>

   <simpleAuthenticationPlugin>

         <users>

              <authenticationUser username="testUserName" password="testPassword" groups="users,admins"/>

         </users>

   </simpleAuthenticationPlugin>

</plugins>
2.用户名密码文件为:credentials.properties
## ---------------------------------------------------------------------------

## Licensed to the Apache Software Foundation (ASF) under one or more

## contributor license agreements. See the NOTICE file distributed with

## this work for additional information regarding copyright ownership.

## The ASF licenses this file to You under the Apache License, Version 2.0

## (the "License"); you may not use this file except in compliance with

## the License. You may obtain a copy of the License at

##

## http://www.apache.org/licenses/LICENSE-2.0

##

## Unless required by applicable law or agreed to in writing, software

## distributed under the License is distributed on an "AS IS" BASIS,

## WITHOUT WARRANTIES OR CONDITIONS OF ANY KIND, either express or implied.

## See the License for the specific language governing permissions and

## limitations under the License.

## ---------------------------------------------------------------------------

# Defines credentials that will be used by components (like web console) to access the broker

activemq.username=system    # 用户名

activemq.password=manager   # 密码

guest.password=password
ActiveMq 安装的更多相关文章
- Java JMS 程序基础 与 ActiveMQ 安装(一)
一 ActiveMQ安装 从Apache官网上下载 ActivieMQ的安装包 apache-activemq-5.9.1-bin.tar.gz, 并拷贝到linux的安装目录解压 # tar -zx ...
- ActiveMQ安装配置及使用 转发 https://www.cnblogs.com/hushaojun/p/6016709.html
ActiveMQ安装配置及使用 ActiveMQ介绍 ActiveMQ 是Apache出品,最流行的,能力强劲的开源消息总线.ActiveMQ 是一个完全支持JMS1.1和J2EE 1.4规范的 JM ...
- ActiveMQ安装配置及使用
ActiveMQ介绍 ActiveMQ 是Apache出品,最流行的,能力强劲的开源消息总线.ActiveMQ 是一个完全支持JMS1.1和J2EE 1.4规范的 JMS Provider实现,尽管J ...
- ActiveMQ安装与入门程序 & JMS的消息结构
1.Activemq安装 直接到官网下载:记住apache的官网是域名反过来,比如我们找activemq就是activemq.apache.org. 最新版本要求最低的JDK是8,所以最好在电脑装多个 ...
- activeMQ 安装及启动异常处理
一.环境: [root@centos_6 ~]# cat /etc/system-release CentOS release 6.5 (Final) [root@centos_6 ~]# uname ...
- Windows下ActiveMq安装与使用
一.activeMq安装与启动 Apache Active MQ的官网 :http://activemq.apache.org/ 下载地址: http://activemq.apache.org/ac ...
- linux下activemq安装与配置activemq-5.15.2
linux下activemq安装与配置 前提 配置好jdk环境 一.下载:apache-activemq-5.15.2-bin.tar.gz https://archive.apache.org/ ...
- springboot之activemq安装与实践
环境:腾讯云centos7 注意:activemq安装插件,可能会报错.本人是主机名的问题,所以修改了主机名. vim /etc/hosts vim /etc/hostname 修改这两个文件,并重启 ...
- 开源消息服务中间件ActiveMQ安装部署
1.下载ActiveMQ 去官方网站下载:http://activemq.apache.org/ 2.运行ActiveMQ 解压缩apache-activemq-5.5.1-bin.zip 启动Act ...
- ActiveMQ此例简单介绍基于docker的activemq安装与集群搭建
ActiveMQ拓展连接 此例简单介绍基于Docker的activemq安装与集群搭建 一 :安装 1.获取activemq镜像 docker pull webcenter/activemq 2.启动 ...
随机推荐
- 采用梯度下降优化器(Gradient Descent optimizer)结合禁忌搜索(Tabu Search)求解矩阵的全部特征值和特征向量
[前言] 对于矩阵(Matrix)的特征值(Eigens)求解,采用数值分析(Number Analysis)的方法有一些,我熟知的是针对实对称矩阵(Real Symmetric Matrix)的特征 ...
- python 调用js代码
Python2 安装pyv8 pip install-egit://github.com/brokenseal/PyV8-OS-X#egg=pyv8 from pyv8 import PyV8 c ...
- srping的历史与哲学
历史: 要谈Spring的历史,就要先谈J2EE.J2EE应用程序的广泛实现是在1999年和2000年开始的,它的出现带来了诸如事务管理之类的核心中间层概念的标准化,但是在实践中并没有获得绝对的成功, ...
- 分析Linux内核5.0系统调用处理过程
学号: 363 本实验来源 https://github.com/mengning/linuxkernel/ 一.实验要求 1.编译内核5.02.qemu -kernel linux-5.0.1/ar ...
- ES6的let
1.let声明的变量只在它所在的代码块有效. 例子: var a = [];for (var i = 0; i < 10; i++) {a[i] = function () {console.l ...
- gat和post封装代码和爬虫的5个步奏
1了解需求2根据需求找网站3请求4获取5存储from urllib import request, parsefrom urllib.error import HTTPError, URLError ...
- java根据输入的字符串和字节数来截取,输出对应字节数的字符串
public class Test { //要进行截取操作的字符串 static String ss; //截取的字符串的字节数 static int n; public static void ma ...
- Eclipse在线集成SpringBoot
在线集成下载地址:http://dist.springsource.com/release/TOOLS/update/e4.8/ 注意:需要更改后面的版本号,跟随自己eclipse版本号下载,只需要改 ...
- .net core WebApi ManualResetEvent实现并发同步
ManualResetEvent,即手动重置事件,通过信号量来判别当前线程是否应该阻塞或继续执行.使用方式与ManualResetEventSlim差不多,ManualResetEventSlim只是 ...
- 微信公众号开发前端获取openId
参考 https://blog.csdn.net/qq_35430000/article/details/79299529