Android学习——碎片Fragment的使用
一、碎片的简单用法(实现在一个活动中添加两个碎片,并让这两个碎片平分活动空间)
1、新建一个FragmentTest项目;
新建一个左侧碎片布局left_fragment.xml,代码如下:(只放置一个按钮并水平居中显示)
 <?xml version="1.0" encoding="utf-8"?>

 <LinearLayout xmlns:android="http://schemas.android.com/apk/res/android"

     android:orientation="vertical"

     android:layout_width="match_parent"

     android:layout_height="match_parent">

     <Button

         android:id="@+id/button"

         android:layout_width="wrap_content"

         android:layout_height="wrap_content"

         android:layout_gravity="center_horizontal"

         android:text="Button"

         />

 </LinearLayout>
新建右侧碎片布局right_fragment.xml,代码如下:(布局背景设置成蓝色并放置一个TextView用于显示文本)
 <?xml version="1.0" encoding="utf-8"?>

 <LinearLayout xmlns:android="http://schemas.android.com/apk/res/android"

     android:orientation="vertical"

     android:layout_width="match_parent"

     android:layout_height="match_parent"

     android:background="@color/colorPrimaryDark">

     <TextView

         android:layout_width="wrap_content"

         android:layout_height="wrap_content"

         android:layout_gravity="center_horizontal"

         android:textSize="20sp"

         android:text="This is right fragment"

         />

 </LinearLayout>
2、新建一个LeftFragment类,并让它继承Fragment(注意这里的Fragment使用support-v4中的),代码如下:
 public class LeftFragment extends Fragment{

     @Override

     public View onCreateView(LayoutInflater inflater, ViewGroup container, Bundle savedInstanceState){

         View view=inflater.inflate(R.layout.left_fragment,container,false);

         return view;

     }

 }
重写了Fragment的onCreateView()方法,然后在这个方法中通过LayoutInflater的inflate()方法将刚才定义的left_fragment布局动态加载进来。
新建RightFragment类,同样继承Fragment,代码如下:
 public class RightFragment extends Fragment {

     @Override

     public View onCreateView(LayoutInflater inflater, ViewGroup container, Bundle savedInstanceState){

         View view=inflater.inflate(R.layout.right_fragment,container,false);

         return view;

     }

 }
3、修改activity_main.xml中的代码:
 <?xml version="1.0" encoding="utf-8"?>

 <LinearLayout xmlns:android="http://schemas.android.com/apk/res/android"

     android:layout_width="match_parent"

     android:layout_height="match_parent"

     >

    <fragment

        android:id="@+id/left_fragment"

        android:name="com.example.administrator.fragmenttest.LeftFragment"

        android:layout_width="0dp"

        android:layout_height="match_parent"

        android:layout_weight="1"

        />

     <FrameLayout

         android:id="@+id/right_layout"

         android:layout_width="0dp"

         android:layout_height="match_parent"

         android:layout_weight="1"

         >

     </FrameLayout>

 </LinearLayout>
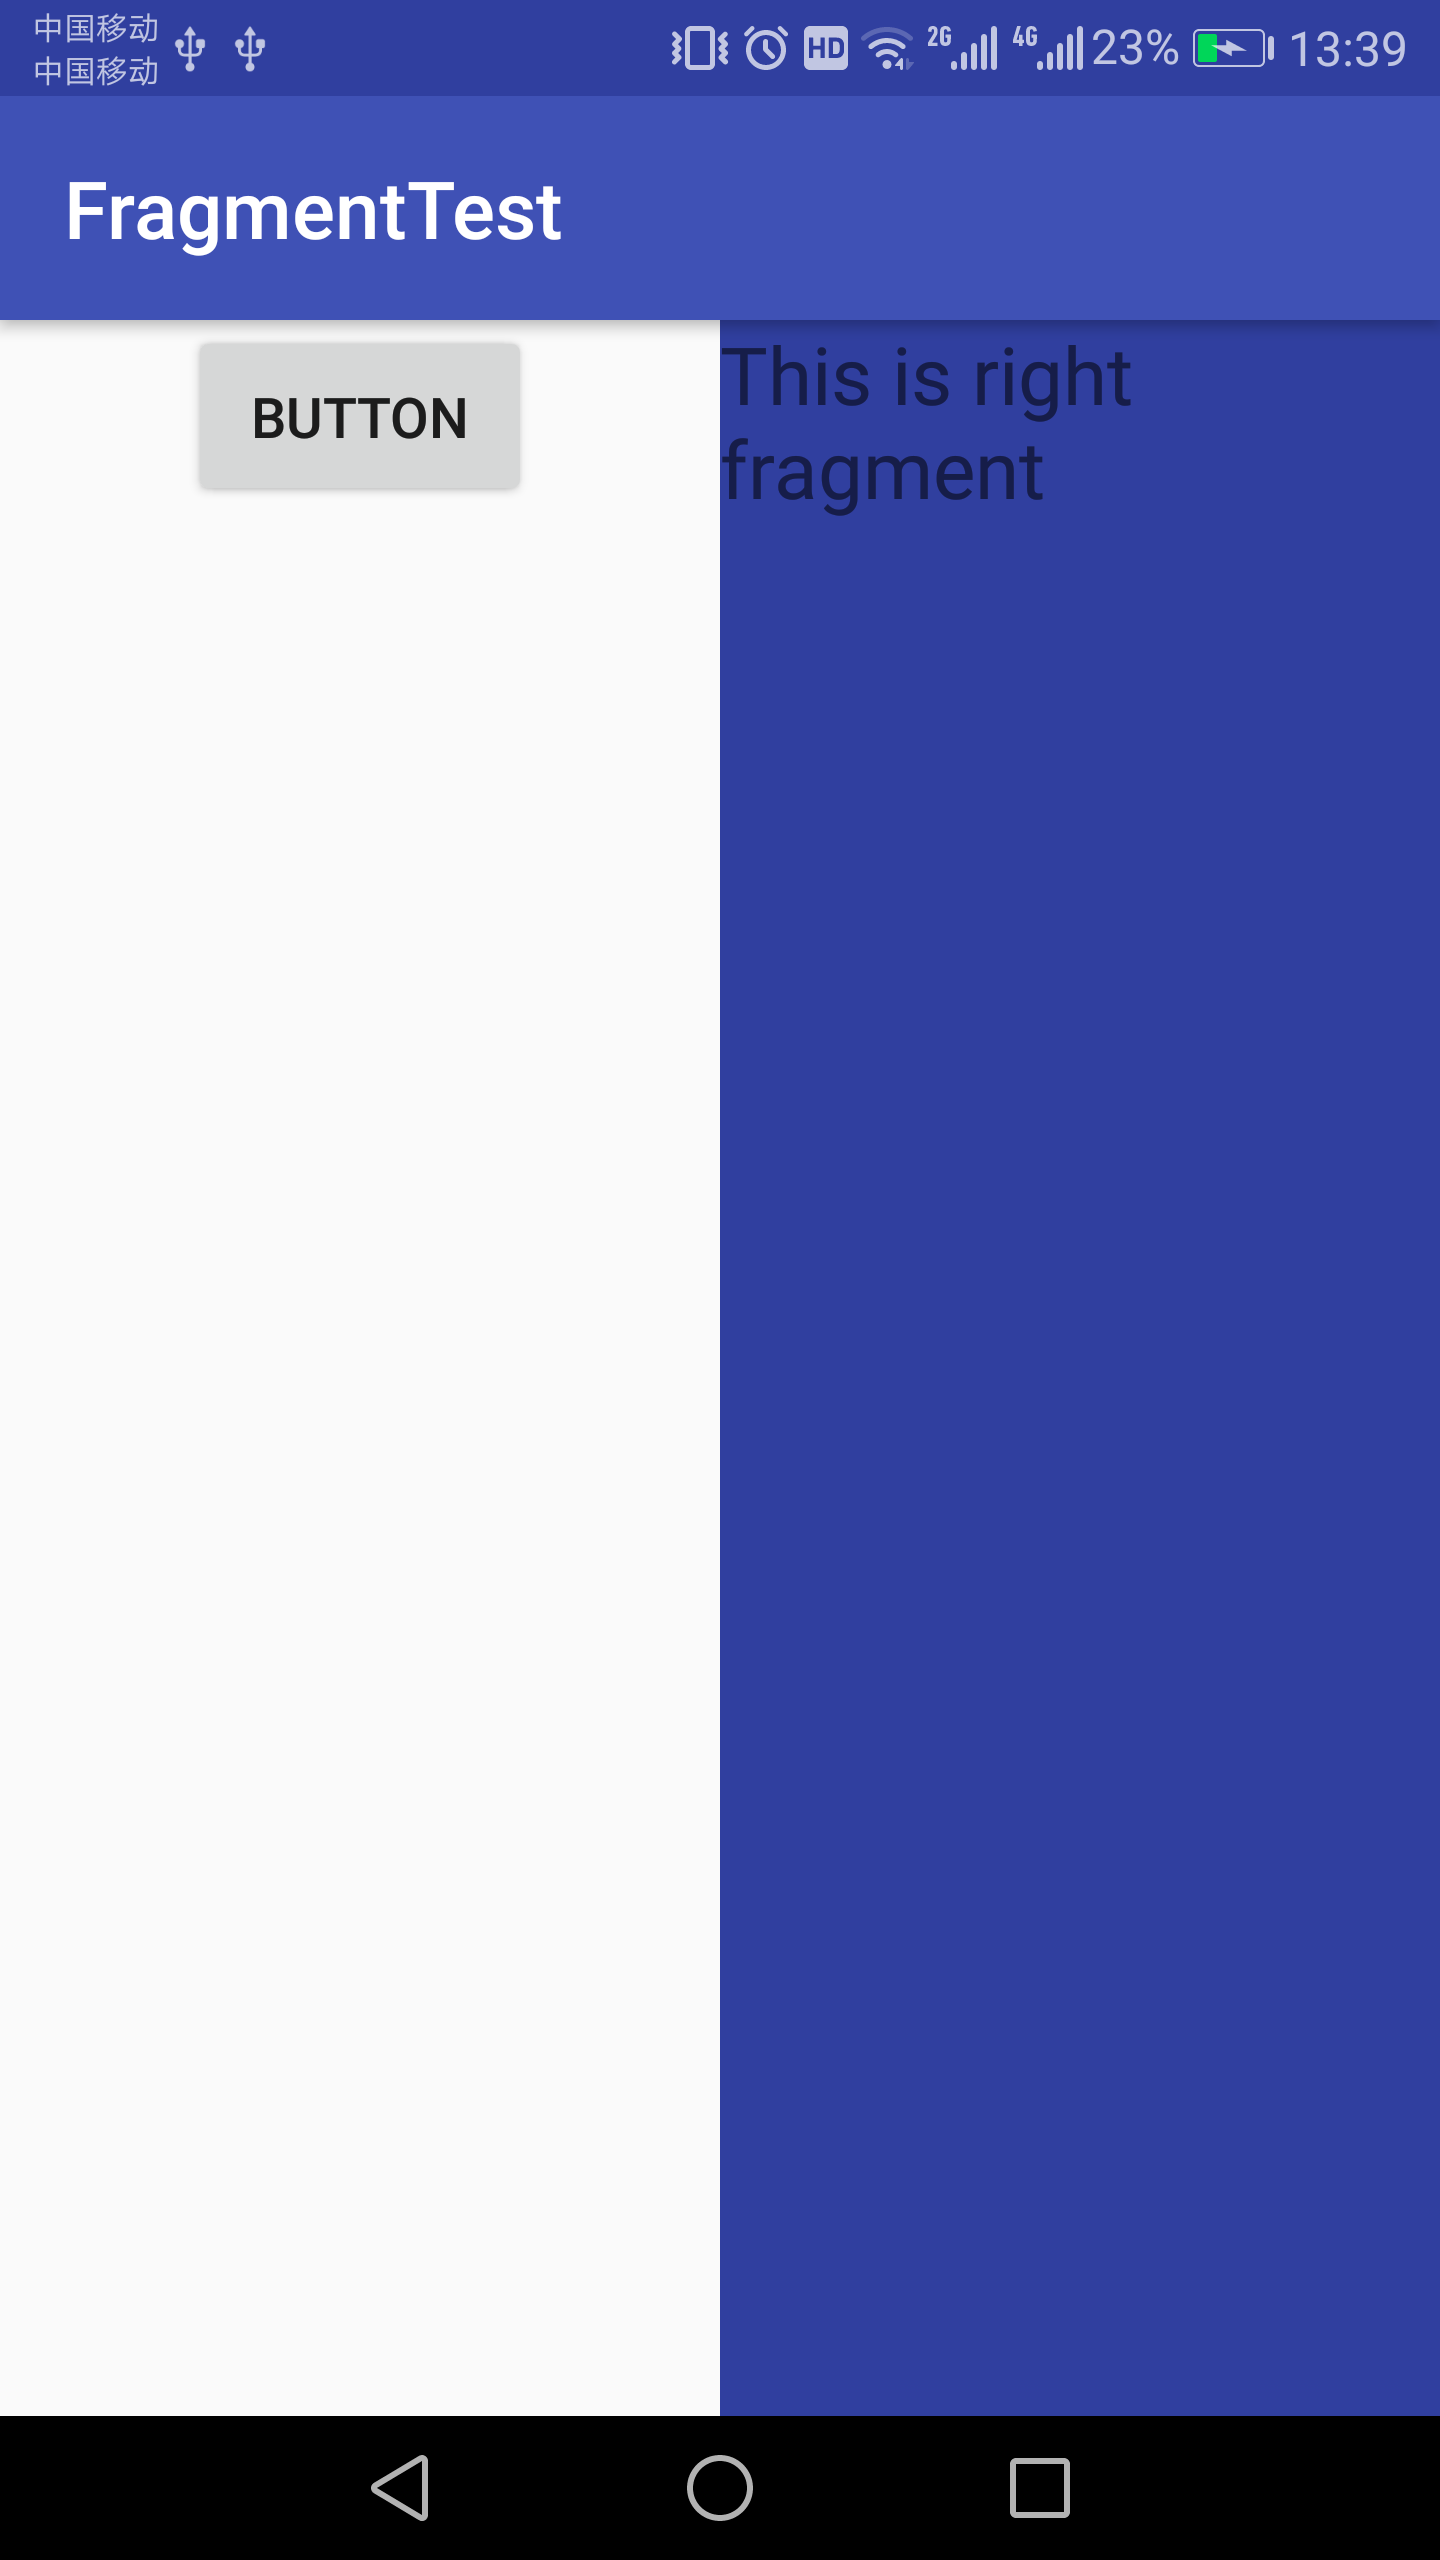
运行程序,效果如下:
二、动态添加碎片
1、在前面基础上新建another_right_fragment.xml,代码如下:(布局文件和right_fragment.xml基本相同,仅修改了背景色和显示文字)
 <?xml version="1.0" encoding="utf-8"?>

 <LinearLayout xmlns:android="http://schemas.android.com/apk/res/android"

     android:orientation="vertical"

     android:layout_width="match_parent"

     android:layout_height="match_parent"

     android:background="#ffff00"

     >

     <TextView

         android:layout_width="wrap_content"

         android:layout_height="wrap_content"

         android:layout_gravity="center_horizontal"

         android:textSize="20sp"

         android:text="This is another right fragment"

         />

 </LinearLayout>
2、新建AnotherRightFragment类作为另一个右侧碎片,代码如下:
 public class AnotherRightFragment extends Fragment{

         @Override

         public View onCreateView(LayoutInflater inflater, ViewGroup container, Bundle savedInstanceState){

             View view=inflater.inflate(R.layout.another_right_fragment,container,false);

             return view;

         }

 }
3、修改activity_main.xml,代码如下:
 <?xml version="1.0" encoding="utf-8"?>

 <LinearLayout xmlns:android="http://schemas.android.com/apk/res/android"

     android:layout_width="match_parent"

     android:layout_height="match_parent"

     >

    <fragment

        android:id="@+id/left_fragment"

        android:name="com.example.administrator.fragmenttest.LeftFragment"

        android:layout_width="0dp"

        android:layout_height="match_parent"

        android:layout_weight="1"

        />

     <FrameLayout

         android:id="@+id/right_layout"

         android:layout_width="0dp"

         android:layout_height="match_parent"

         android:layout_weight="1"

         >

     </FrameLayout>

 </LinearLayout>
4、修改MainActivity中的代码:(在代码中向FrameLayout里添加内容)
 public class MainActivity extends AppCompatActivity implements View.OnClickListener{

     @Override

     protected void onCreate(Bundle savedInstanceState) {

         super.onCreate(savedInstanceState);

         setContentView(R.layout.activity_main);

         Button button=(Button)findViewById(R.id.button);

         button.setOnClickListener(this);

         replaceFragment(new RightFragment());

     }

     @Override

     public void onClick(View v){

         switch(v.getId()){

             case R.id.button:

                 replaceFragment(new AnotherRightFragment());

                 break;

             default:

                 break;

         }

     }

     private void replaceFragment(Fragment fragment){

         FragmentManager fragmentManager=getSupportFragmentManager();

         FragmentTransaction transaction=fragmentManager.beginTransaction();

         transaction.replace(R.id.right_layout,fragment);

         transaction.commit();

     }

 }
首先给左侧碎片中的按钮注册一个点击事件,然后调用replaceFrameLayout()方法动态添加RightFragment这个碎片,当点击左侧碎片中的按钮时,又会调用replaceFragment()方法将右侧碎片替换成AnotherRightFragment。
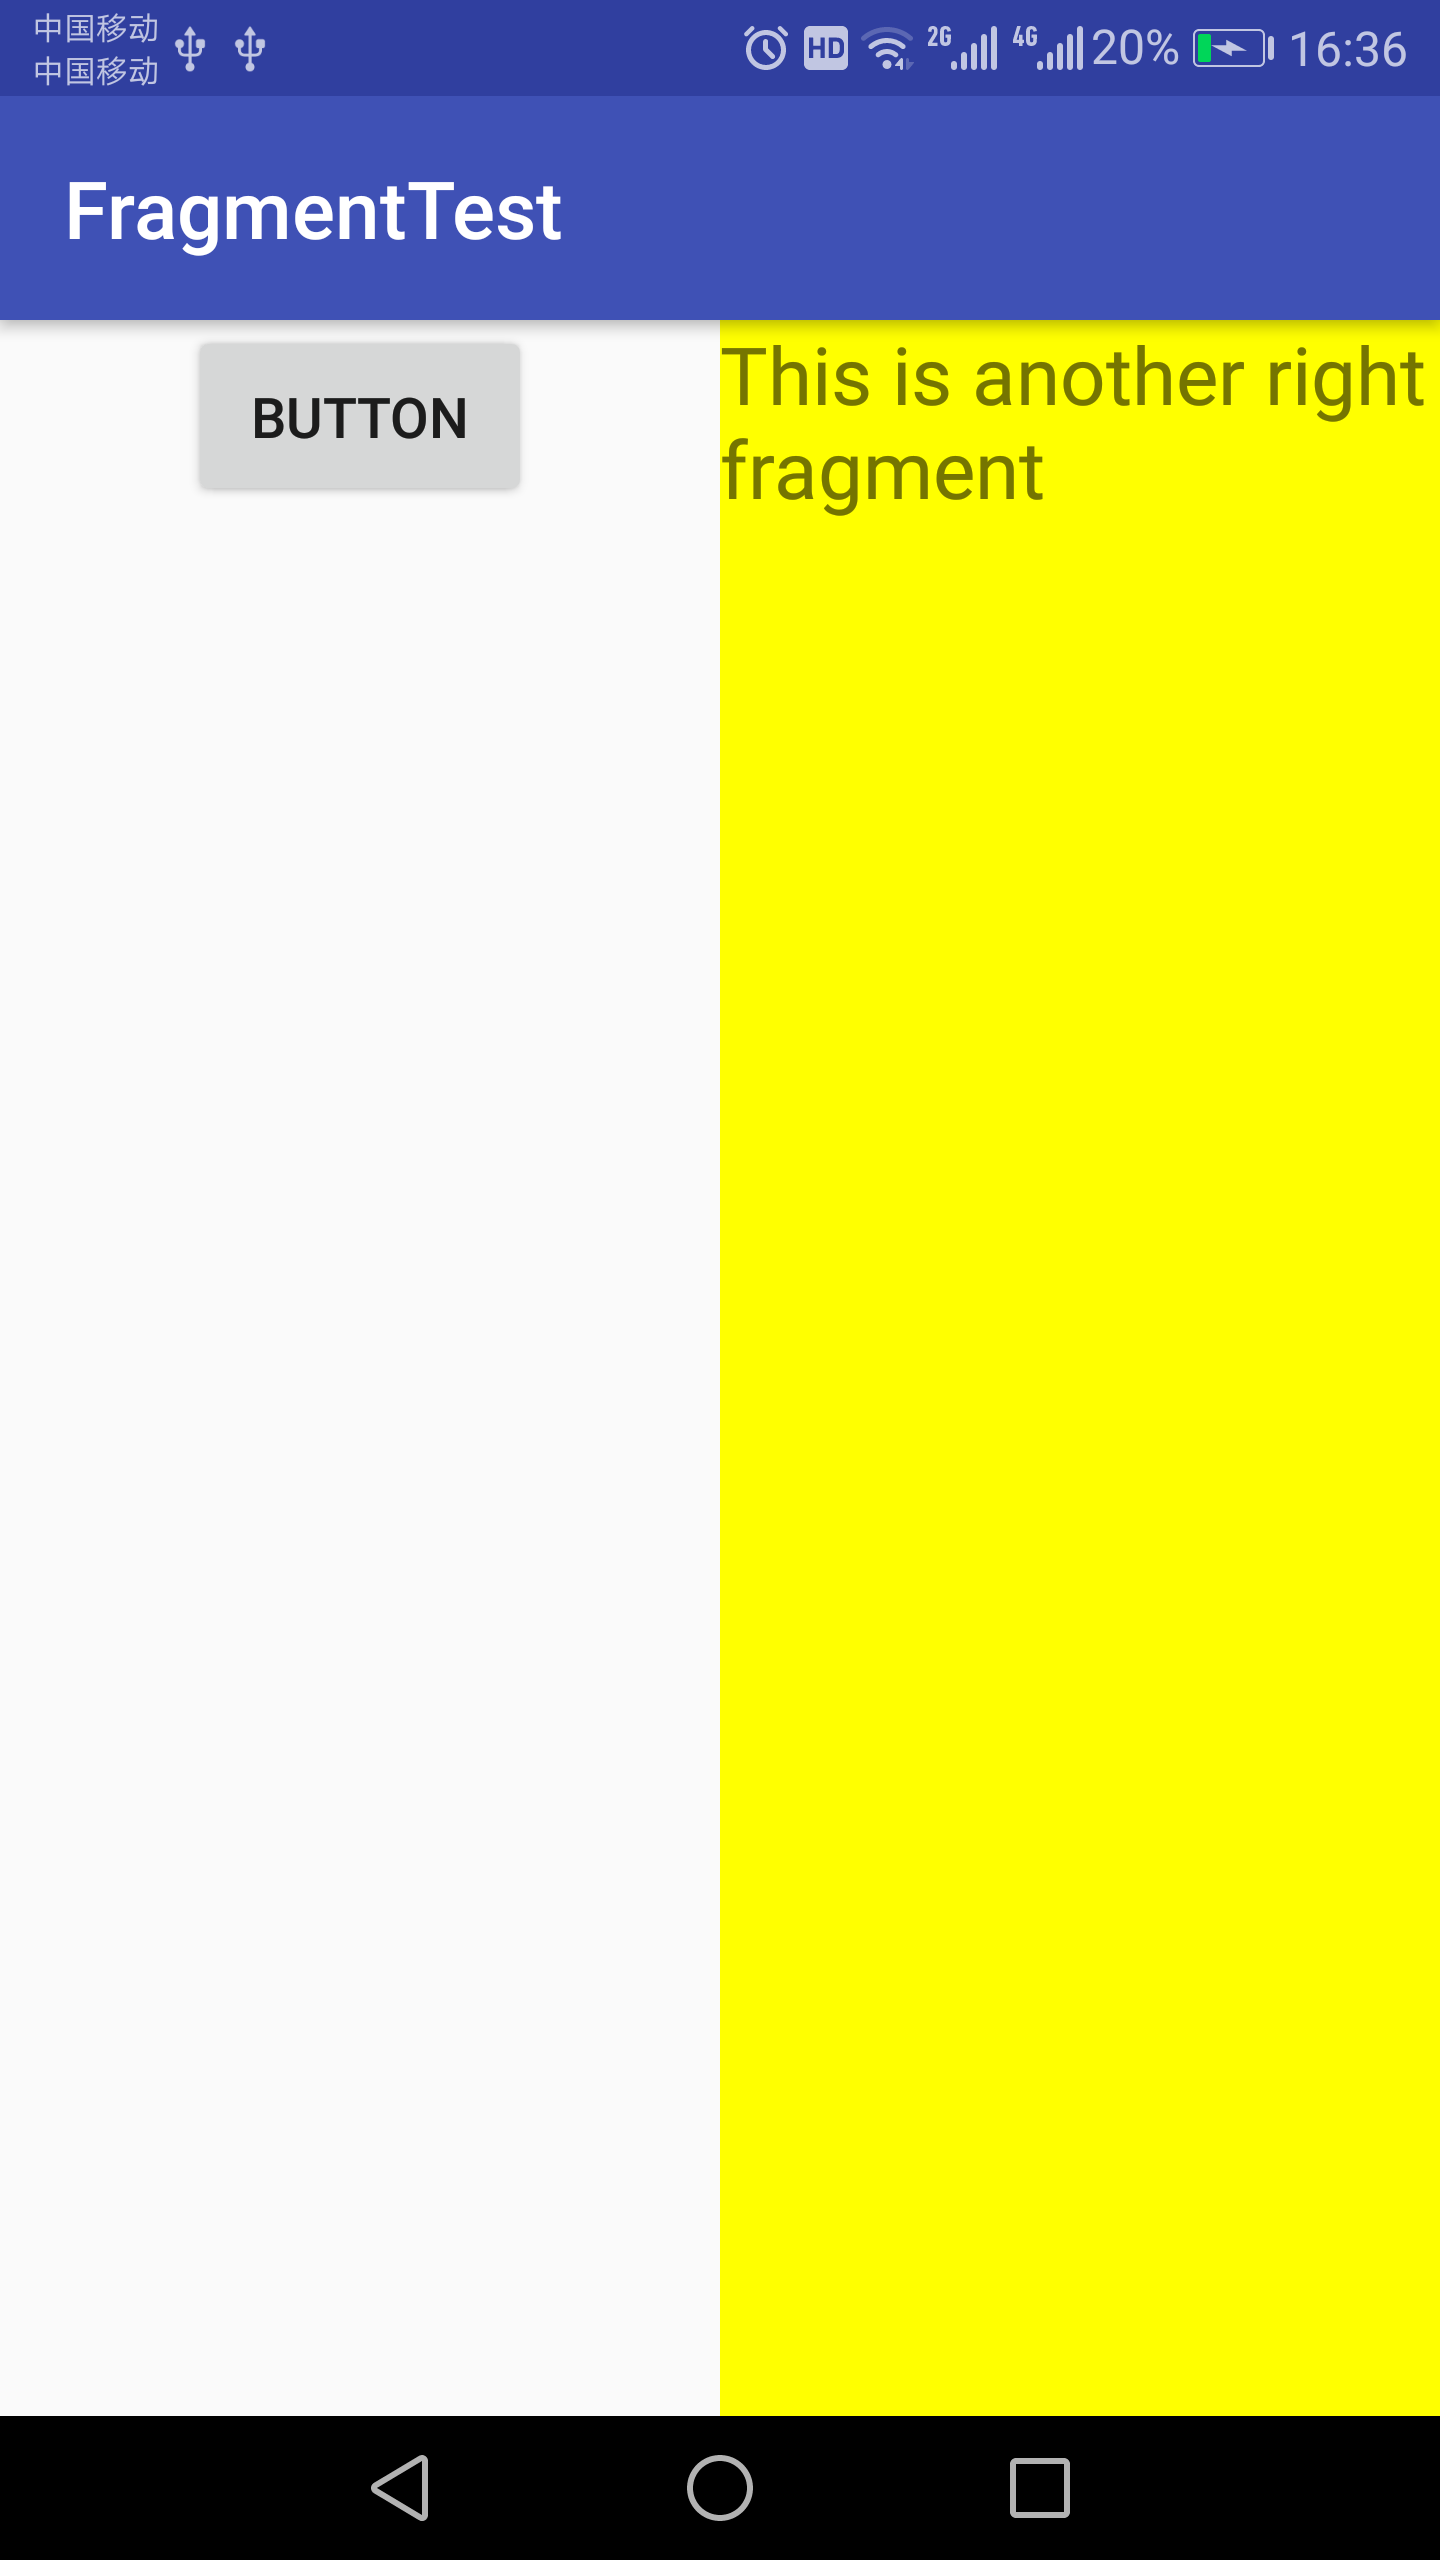
重新运行程序,可以看到和之前一样的界面,然后点击一下按钮,效果如下:
Android学习——碎片Fragment的使用的更多相关文章
- Android开发:碎片Fragment完全解析fragment_main.xml/activity_main.xml
Android开发:碎片Fragment完全解析 为了让界面可以在平板上更好地展示,Android在3.0版本引入了Fragment(碎片)功能,它非常类似于Activity,可以像 Activi ...
- Android之碎片Fragment
Fragment是个特别的存在,有点像报纸上的专栏,看起来只占据页面的一小块,但是这一小块有自己的生命周期,可以自行其是,仿佛独立王国,并且这一小块的特性无论在哪个页面,给一个位置就行,添加以后不影响 ...
- android学习笔记Fragment的使用
Fragment的内容感觉好多啊,主要需要掌握Fragment静态加载,Fragment动态加载,Fragment的生命周期,Fragment与Activity的交互 1,Fragment的静态加载 ...
- Android开发:碎片Fragment完全解析fragment_main.xml/activity_main.xml(转)
注明:这个转的,见谅未能标明原始出处 我们都知道,Android上的界面展示都是通过Activity实现的,Activity实在是太常用了,我相信大家都已经非常熟悉了,这里就不再赘述. 但是Activ ...
- 【Android】碎片Fragment
1.碎片可以让界面在平板上更好地展示. 2.碎片是一种可以嵌入到活动中的UI片段,它能让程序更加合理和充分地利用一个大屏幕的空间.有自己的生命周期,能包含布局. 3.新建碎片类继承Fragment,可 ...
- Android交流会-碎片Fragment,闲聊单位与尺寸
女孩:又周末了哦~ 男孩:那么今日来开个交流会,我们也学一学人家高大尚的大会,自己开一个,广州站,Android开发攻城狮交流会~ 1.Fragment概要: Android从3.0开始引入了Frag ...
- android 开发 碎片Fragment布局例子(用按键切换碎片布局)
实现思路: 1.写一个父类布局,里面写一个按键和一个帧布局(用于给Fragment布局后续替代) 2.写3个子布局,并且在写3个class继承Fragment布局 3.在MainActivity的cl ...
- Android学习之Fragment解析
1.定义 Fragment中文解释是碎片的意思,主要用在大屏幕设备上,例如平板电脑上,支持更加动态和灵活的UI设计.Fragment在你的应用中相当于是一个模块化和可重用的组件,因为Fragm ...
- Android利用碎片fragment实现底部标题栏(Github模板开源)
在安卓开发当中,一个十分重要的布局则是底部标题栏了,拥有了底部标题栏,我们就拥有了整个软件UI开发的框架,一般而言,整个软件的布局首先就是从底部标题栏开始构建,然后再开始其他模块的编写,组成一个完善的 ...
随机推荐
- apicloud iphoneX底部虚拟键盘遮挡
1.首先,底部的高不能写死. 2. var footer = $api.byId('footer'); $api.fixTabBar(footer);这句应该写在 footerHeight = $ap ...
- 【剑指Offer】35、数组中的逆序对
题目描述: 在数组中的两个数字,如果前面一个数字大于后面的数字,则这两个数字组成一个逆序对.输入一个数组,求出这个数组中的逆序对的总数P.并将P对1000000007取模的结果输出. 即输出P ...
- 磁盘测试----fio
测试前提 我们在进行测试时,都会分清楚: 测试对象:要区分硬盘.SSD.RAID.SAN.云硬盘等,因为它们有不同的特点 测试指标:IOPS和MBPS(吞吐率),下面会具体阐述 测试工具:Linux下 ...
- 【VIP视频网站项目二】搭建爱奇艺优酷腾讯视频官网首页轮播图效果及实现原理分析
这个是实现的效果,基本上轮播效果和主流网站的一致,但是我也在上面优化了一些效果, 可以在线预览效果:https://vip.52tech.tech/ 目前项目代码已经全部开源:项目地址:https:/ ...
- NOIP2016 DAY2 T3 愤怒的小鸟
传送门 题目描述 Kiana 最近沉迷于一款神奇的游戏无法自拔. 简单来说,这款游戏是在一个平面上进行的. 有一架弹弓位于 (0,0)(0,0) 处,每次 Kiana 可以用它向第一象限发射一只红色的 ...
- 继续聊WPF
下面看一个Tick控件的例子,这只是演示,Tick单独使用没有意义. <TickBar Height="15" Width="180" Ticks=&qu ...
- datawhale爬虫实训4
DataWhale-Task4(爬取丁香园2) 任务:使用lxml爬虫帖子相关的回复与部分用户信息(用户名,头像地址,回复详情) 难点:需要登录才能看到所有回复 浏览器登录上去,查看cookies信息 ...
- C# 通过反射为一个对象赋值
/// <summary> /// 反射赋值 /// </summary> public class ObjectReflection { publ ...
- VS2015 建立一个C++的MFC简易窗体程序项目
一开始建立的窗体工程都是带很多窗口,而且自己拉到窗体的控件,一调试就看不到了,是因为新建立工程项目时勾选了太多其他的了,这里记录分享一下建立一个单纯的窗体程序项目步骤给有需要的人也可以学习. 第一步: ...
- Python 实现 Excel 里单元格的读写与清空操作
#coding=utf-8 # coding=utf-8 作用是声明python代码的文本格式是utf-8,python按照utf-8的方式来读取程序. # 如果不加这个声明,无论代码中还是注释中有中 ...