
android 开发 碎片Fragment布局例子(用按键切换碎片布局)
实现思路
1.写一个父类布局,里面写一个按键和一个帧布局(用于给Fragment布局后续替代)
2.写3个子布局,并且在写3个class继承Fragment布局
3.在MainActivity的class中写替换碎片布局的方法
(包含:FragmentManger(碎片管理器)、getSupportFragmentManager(得到支持碎片管理器)、FragmenTransaction(碎片交换器)、beginTransaction(开始碎片交换)、replace(替换)、commit(交付))
写一个父类布局,里面写一个按键和一个帧布局
<?xml version="1.0" encoding="utf-8"?>

<LinearLayout xmlns:android="http://schemas.android.com/apk/res/android"

    android:orientation="vertical"

    android:layout_width="match_parent"

    android:layout_height="match_parent"

    >

   <Button

       android:id="@+id/Button1"

       android:layout_width="match_parent"

       android:layout_height="0dp"

       android:layout_weight="1"

       android:text="改变下面的碎片"/>

    <FrameLayout

        android:id="@+id/FrameLayout1"

        android:layout_width="match_parent"

        android:layout_height="0dp"

        android:layout_weight="8">

    </FrameLayout>

</LinearLayout>
写3个子布局,并且在写3个class继承Fragment布局
<?xml version="1.0" encoding="utf-8"?>

<LinearLayout xmlns:android="http://schemas.android.com/apk/res/android"

    android:orientation="vertical"

    android:layout_width="match_parent"

    android:layout_height="match_parent"

    android:padding="10dp">

    <ImageView

        android:id="@+id/fragment_1_ImageView"

        android:layout_width="wrap_content"

        android:layout_height="wrap_content"

        android:layout_gravity="center"

        android:src="@drawable/ace"/>

    <TextView

        android:id="@+id/fragment_1_TextView"

        android:layout_width="match_parent"

        android:layout_height="match_parent"

        android:text="@string/ace"

        android:textColor="@color/colorBlack"

        android:layout_marginTop="20dp"/>

</LinearLayout>
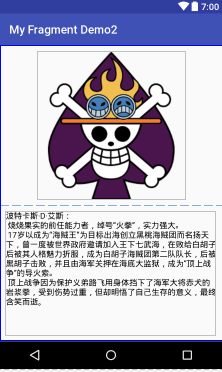
相同布局在写2个
写一个class继承fragment实现碎片布局实例化
package com.example.lenovo.myfragmentdemo2.fragment;

// 注意Fragment的依赖库建议统一使用support-v4库中的

import android.support.v4.app.Fragment;

import android.os.Bundle;

import android.support.annotation.Nullable;

import android.view.LayoutInflater;

import android.view.View;

import android.view.ViewGroup;

import com.example.lenovo.myfragmentdemo2.R;

/**

 * Created by lenovo on 2018/5/7.

 */

public class Fragment1 extends Fragment {

    @Nullable

    @Override

    public View onCreateView(LayoutInflater inflater, @Nullable ViewGroup container, Bundle savedInstanceState) {

        View view = inflater.inflate(R.layout.fragment_1,container,false);

        return view;

    }

}
在MainActivity的class中写替换碎片布局的方法
package com.example.lenovo.myfragmentdemo2;

// 注意Fragment的依赖库

import android.support.v4.app.Fragment;

import android.support.v4.app.FragmentManager;

import android.support.v4.app.FragmentTransaction;

import android.support.v7.app.AppCompatActivity;

import android.os.Bundle;

import android.view.View;

import android.widget.Button;

import com.example.lenovo.myfragmentdemo2.fragment.Fragment1;

import com.example.lenovo.myfragmentdemo2.fragment.Fragment2;

import com.example.lenovo.myfragmentdemo2.fragment.Fragment3;

public class MainActivity extends AppCompatActivity {

    private Button button;

    private int i = 1;

    @Override

    protected void onCreate(Bundle savedInstanceState) {

        super.onCreate(savedInstanceState);

        setContentView(R.layout.activity_main);

        button = (Button)findViewById(R.id.Button1);

        button.setOnClickListener(new View.OnClickListener() {

            @Override

            public void onClick(View v) {

                switch (i){

                    case 1:

                        replaceFragment(new Fragment1());

                        i++;

                        break;

                    case 2:

                        replaceFragment(new Fragment2());

                        i++;

                        break;

                    case 3:

                        replaceFragment(new Fragment3());

                        i++;

                        break;

                    default:

                        replaceFragment(new Fragment1());

                        i=1;

                        break;

                }

            }

        });

    }

    public void  replaceFragment(Fragment fragment){

        FragmentManager fragmentManager = getSupportFragmentManager();

        FragmentTransaction transaction = fragmentManager.beginTransaction();//注意!每次要执行commit()方法的时候都需要重新获取一次FragmentTransaction,否则用已经commit过的FragmentTransaction再次commit会报错!

        transaction.replace(R.id.FrameLayout1,fragment);

        transaction.commit();

    }

}
运行效果:
 点击后:
点击后: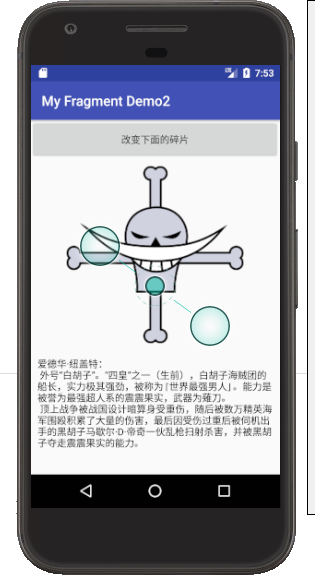
android 开发 碎片Fragment布局例子(用按键切换碎片布局)的更多相关文章
- android开发中fragment获取context
在用到fragment时无法使用.this来指定当前context内容,android开发中fragment获取context,可以使用getActivity().getApplicationCont ...
- Android 开发 之 Fragment 详解
本文转载于 : http://blog.csdn.net/shulianghan/article/details/38064191 本博客代码地址 : -- 单一 Fragment 示例 : http ...
- Android开发笔记(4)——MainActivity.java文件修改&布局嵌套
笔记链接:http://www.cnblogs.com/igoslly/p/6805020.html 笔记以开发名为CoffeeOrder的app活动为线索,介绍app如何从功能设计→ ...
- android开发 写一个自定义形状的按键
步骤: 1.在drawable 文件夹中创建一个xml布局文件. 2.修改布局文件 3.在需要使用背景的按键中导入布局. 创建布局文件: 修改布局文件: <?xml version=" ...
- Android开发笔记(一百三十四)协调布局CoordinatorLayout
协调布局CoordinatorLayout Android自5.0之后对UI做了较大的提升.一个重大的改进是推出了MaterialDesign库,而该库的基础即为协调布局CoordinatorLayo ...
- Android开发实战之拥有Material Design风格的侧滑布局
在实现开发要求中,有需要会使用抽屉式布局,类似于QQ5.0的侧滑菜单,实现的方式有很多种,可以自定义控件,也可以使用第三方开源库. 同样的谷歌也推出了自己的侧滑组件——DrawLayout,使用方式也 ...
- 【Android开发日记】妙用 RelativeLayout 实现3
段布局
在设计过程中,我们经常会遇到这样的需求: 把一条线3控制,左对齐左控制,右侧控制右对齐,中间控制,以填补剩余空间. 或者一列内放3个控件,上面的与顶部对齐,以下的沉在最底部,中间控件是弹性的.充满剩余 ...
- Android开发之利用ViewPager实现页面的切换(仿微信、QQ)
这里利用ViewPager实现页面的滑动,下面直接上代码: 1.首先写一个Activity,然后将要滑动的Fragment镶嵌到写好的Activity中. Activity的布局文件:activity ...
- Android中通过Fragment进行简单的页面切换
首先是activity中的布局 <?xml version="1.0" encoding="utf-8"?> <androidx.constr ...
随机推荐
- hanlp中文智能分词自动识别文字提取实例
需求:客户给销售员自己的个人信息,销售帮助客户下单,此过程需要销售人员手动复制粘贴收获地址,电话,姓名等等,一个智能的分词系统可以让销售人员一键识别以上各种信息 经过调研,找到了一下开源项目 1.wo ...
- 排序算法<No.3>【桶排序】
算法,是永恒的技能,今天继续算法篇,将研究桶排序. 算法思想: 桶排序,其思想非常简单易懂,就是是将一个数据表分割成许多小数据集,每个数据集对应于一个新的集合(也就是所谓的桶bucket),然后每个b ...
- Druid + Grafana 应用实践
谈到大数据,大家首先想到的肯定是Hadoop,近年来互联网技术的快速增长催生了各类大体量数据的爆发,Hadoop最大的贡献在于帮助企业将那些低价值的事件流数据转化为高价值的聚合数据,为企业的经营决策提 ...
- ubuntu下安装Pycharm
先在PyCharm官网下载安装包 链接:https://www.jetbrains.com/pycharm/download/#section=linux 下载完成后,解压并安装,安装过程需要认证身份 ...
- QT建立简单的计时器程序
1.创建一个窗口项目 2.拖一个lcd控件命名lcdNumber,两个pushbutton,分别命名pbStart与pbEnd 3.mainWindow.h添加以下代码 private slots: ...
- Random 中的种子怎么理解
种子就是生成随机数的根,就是产生随机数的基础.计算机的随机数都是伪随机数,以一个真随机数(种子)作为初始条件,然后用一定的算法不停迭代产生随机数.Java项目中通常是通过Math.random方法和R ...
- yarn和npm命令对比
- 【linux】之常用命令-杂项
查看端口:lsof -i :80 二.内存大小[root@xbidc ~]# cat /proc/meminfo |grep MemTotalMemTotal: 1034612 kB[root@xbi ...
- Maven 专题
目录: Maven的安装 Eclipse安装Maven插件 Nexus私服搭建 Maven+Nexus配置 发布自己的构件(至Nexus) 创建maven多模块工程group 整理中[...] 先放一 ...
- jquery下拉菜单
下拉菜单或者导航是我们在网站开发中不可或缺的网站元素之一,使用jQuery可以制作出简洁易用.美观大方的下拉菜单或者导航效果. 下面展示的12款利用jQuery实现的下拉菜单即导航效果整理自前端大牛爱 ...