安装gitlab并汉化
简介:
GitLab是一个利用Ruby on Rails开发的开源应用程序,实现一个自托管的Git项目仓库,可通过Web界面进行访问公开的或者私人项目。
它拥有与GitHub类似的功能,能够浏览源代码,管理缺陷和注释。可以管理团队对仓库的访问,它非常易于浏览提交过的版本并提供一个文件历史库。
团队成员可以利用内置的简单聊天程序(Wall)进行交流。它还提供一个代码片段收集功能可以轻松实现代码复用,便于日后有需要的时候进行查找。
引言:刚从阿里买的4g的服务器,尝试装gitlab
1. 请在代理环境下安装所需环境依赖组件
sudo yum install curl policycoreutils openssh-server openssh-clients
sudo systemctl enable sshd
sudo systemctl start sshd
sudo yum install postfix
sudo systemctl enable postfix
sudo systemctl start postfix(若出现 Job for postfix.service failed. See 'systemctl status postfix.service' and 'journalctl -xn' for deta )
问题出现在网络设置,ipv6网段,
  vim /etc/hosts     //注释掉下面一行

  #::1         localhost localhost.localdomain localhost6 localhost6.localdomain6
sudo firewall-cmd --permanent --add-service=http(若出现FirewallD is not running )
通过systemctl start firewalld开启防火墙,没有任何提示即开启成功。
sudo systemctl reload firewalld
2. 安装gitlab安装包
curl -sS https://packages.gitlab.com/install/repositories/gitlab/gitlab-ce/script.rpm.sh | sudo bash
#注意:如下载失败提示ca证书问题,请使用curl -k ...... 下载即可
sudo yum install gitlab-ce
3. 以上步骤完成后,及gitlab安装就完成了,接下来我们进行相关配置
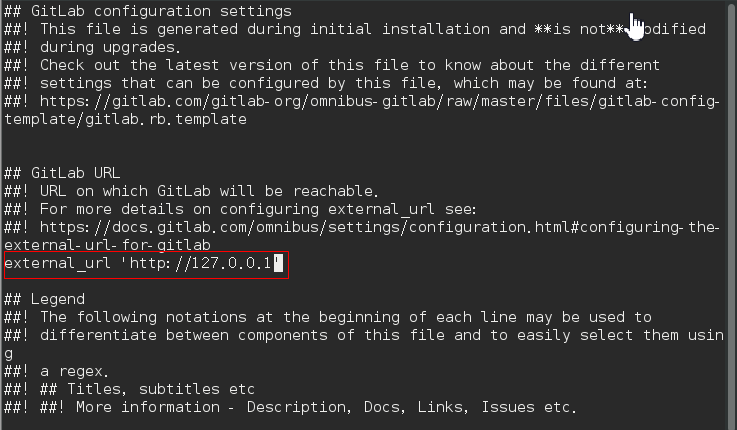
vim /etc/gitlab/gitlab.rb
(1). 配置访问ip及端口或使用域名
(2). 配置email邮件发送(此处已163邮箱做示例),其他邮箱可参照:https://docs.gitlab.com/omnibus/settings/smtp.html
# 配置发送邮箱
gitlab_rails['smtp_enable'] = true
gitlab_rails['smtp_address'] = "smtp.163.com"
gitlab_rails['smtp_port'] = 25
gitlab_rails['smtp_user_name'] = "smtp user@163.com"
gitlab_rails['smtp_password'] = "password"
gitlab_rails['smtp_domain'] = "163.com"
gitlab_rails['smtp_authentication'] = "login"
gitlab_rails['smtp_enable_starttls_auto'] = true
# 修改gitlab配置的发信人
gitlab_rails['gitlab_email_from'] = "smtp user@163.com"
user["git_user_email"] = "smtp user@163.com"
(3). 重启服务以便应用以上配置
sudo gitlab-ctl reconfigure
4. 打开网址: http://127.0.0.1 (注:如安装了Apache占用80端口,请更改Apache的默认端口)
# 首次需要配置root账户密码

# 配置完毕后,跳转至登录界面,使用账户:root 以及刚刚设置的密码即可正常登录!
# 如需配置用户注册后需要验证邮箱才可登录,使用root账号登录后配置

至此gitlab服务器端已经配置完成了!(访问不了 查看端口占用情况)
5.汉化
5.1下载最新的汉化包
git clone https://gitlab.com/xhang/gitlab.git
如果是要下载老版本的汉化包,需要加上老版本的分支,比如今天已经是10.0.4,我依旧想下载10.0.2,可以运行下面的语句
git clone https://gitlab.com/xhang/gitlab.git -b v10.0.2-zh
5.2 查看该汉化补丁的版本
cat gitlab/VERSION
5.3 停止gitlab服务
gitlab-ctl stop
5.4 切换到gitlab汉化包所在的目录(即步骤二获取的汉化版gitlab)
cd /root/gitlab
5.6 比较汉化标签和原标签,导出 patch 用的 diff 文件到/root下
git diff v10.0.2 v10.0.2-zh > ../10.0.2-zh.diff
5.6回到/root目录
cd
5.7 将10.0.2-zh.diff作为补丁更新到gitlab中
yum install patch -y
patch -d /opt/gitlab/embedded/service/gitlab-rails -p1 < 10.0.2-zh.diff
5.8 启动gitlab
gitlab-ctl start
5.9 重新配置gitlab
gitlab-ctl reconfigure
至此gitlab已经是汉化版的了!!!!
安装gitlab并汉化的更多相关文章
- CentOS7安装GitLab、汉化及使用
同步首发:http://www.yuanrengu.com/index.php/20171112.html 一.GitLab简介 GitLab是利用Ruby On Rails开发的一个开源版本管理系统 ...
- CentOS7安装GitLab、汉化、邮箱配置及使用
同步首发:http://www.yuanrengu.com/index.php/20171112.html 一.GitLab简介 GitLab是利用Ruby On Rails开发的一个开源版本管理系统 ...
- centos7安装gitlab并汉化
一.基础环境准备 1.安装依赖包 [root@gitlab-server ~]#yum install curl policycoreutils openssh-server openssh-clie ...
- CentOS7安装GitLab、汉化、邮箱配置及使用(转载)
同步首发: https://www.cnblogs.com/heyonggang/p/7778203.html http://www.yuanrengu.com/index.php/20171112. ...
- centos安装gitlab及汉化
GitLab 是一个用于仓库管理系统的开源项目,使用Git作为代码管理工具,并在此基础上搭建起来的web服务.今天,就记录一下centos部署gitlab及其汉化的操作方法. 1.下载安装 下载地址: ...
- CentOS 7安装GitLab、汉化、配置邮件发送
1.更换国内yum源 1.1 备份 mv /etc/yum.repos.d/CentOS-Base.repo /etc/yum.repos.d/CentOS-Base.repo.backup 1.2 ...
- CentOS7.5安装GitLab及汉化
一.GitLab英文版安装 1.下载gitlab安装包,然后安装 wget --content-disposition https://packages.gitlab.com/gitlab/gitla ...
- 快速安装 GitLab 并汉化
转载:http://www.jianshu.com/p/7a0d6917e009
- ERDAS 2014安装破解及汉化图文教程
关于ERDAS 2014 的安装破解及其汉化过程: 说明:汉化只是之针对英语能力不能正常满足使用软件的朋友们.如果英语过专八,完全没有必要汉化!在此之前查了好多关于ERDAS汉化的文档,可惜只是简单的 ...
随机推荐
- 找出整数数组中出现次数超过数组长度一半的元素(Java)
Question:数组中有一个数字出现的次数超过数组长度的一半,请找出这个数字 package com.study.zhipengs.test; import java.util.Arrays; im ...
- uinxSocket 与 tcpSocket
$tpc = stream_socket_client('unix:///tmp/php-cgi.sock');nginx配置中可以用uninx:/tmp/php-.....这种格式,也可用直接uin ...
- css height:100%和height:auto的区别
css height:100%和height:auto的区别 height:auto,是指根据块内内容自动调节高度.height:100%,是指其相对父块高度而定义的高度,也就是按照离它最近且有定义高 ...
- Spark 基础操作
1. Spark 基础 2. Spark Core 3. Spark SQL 4. Spark Streaming 5. Spark 内核机制 6. Spark 性能调优 1. Spark 基础 1. ...
- LeetCode 515. 在每个树行中找最大值(Find Largest Value in Each Tree Row)
515. 在每个树行中找最大值 515. Find Largest Value in Each Tree Row 题目描述 You need to find the largest value in ...
- 使用 Vagrant + VirtualBox 快速构建 CentOS 下的 Docker 环境
Vagrant - 基础概念: Vagrant 是什么? Vagrant是一款用于在单个工作流程中构建和管理虚拟机环境的工具.凭借易于使用的工作流程和专注于自动化,Vagrant降低了开发环境设置时间 ...
- JSP的部分知识(一)
通过Servlet进行整个网站的开发是可以的. 不过在Servlet中输出html代码,特别是稍微复杂一点的html代码,就会给人一种很酸爽的感觉. 如果能够直接使用Html代码,然后在html中写j ...
- Java正则表达式获取中括号之间的内容
参考: 求一个正则表达式提取中括号里的内容 [问题点数:80分]CSDN论坛 > Java > Web 开发 正则表达式 - 菜鸟教程 不包含中括号 正则表达式如下: \\[(.*?)] ...
- 【字符串hash】DNA
DNA 题目描述 小X身为奆老,兴趣爱好广泛,他还非常喜欢研究DNA序列……小X进行了一项关于DNA序列研究,发现人某条染色体上的一段DNA序列中连续的k个碱基组成的碱基序列与做题的AC率有关!于是他 ...
- 题解-CTS2019随机立方体
problem \(\mathtt {loj-3119}\) 题意概要:一个 \(n\times m\times l\) 的立方体,立方体中每个格子上都有一个数,如果某个格子上的数比三维坐标中至少有一 ...