[转]vue - 前置工作 - 目录功能介绍
一个DEMOS的完整目录(由于GWF问题,我就不一一打开网站一个个去搜索并且解释了)可以去关注:https://www.cnblogs.com/ye-hcj

build
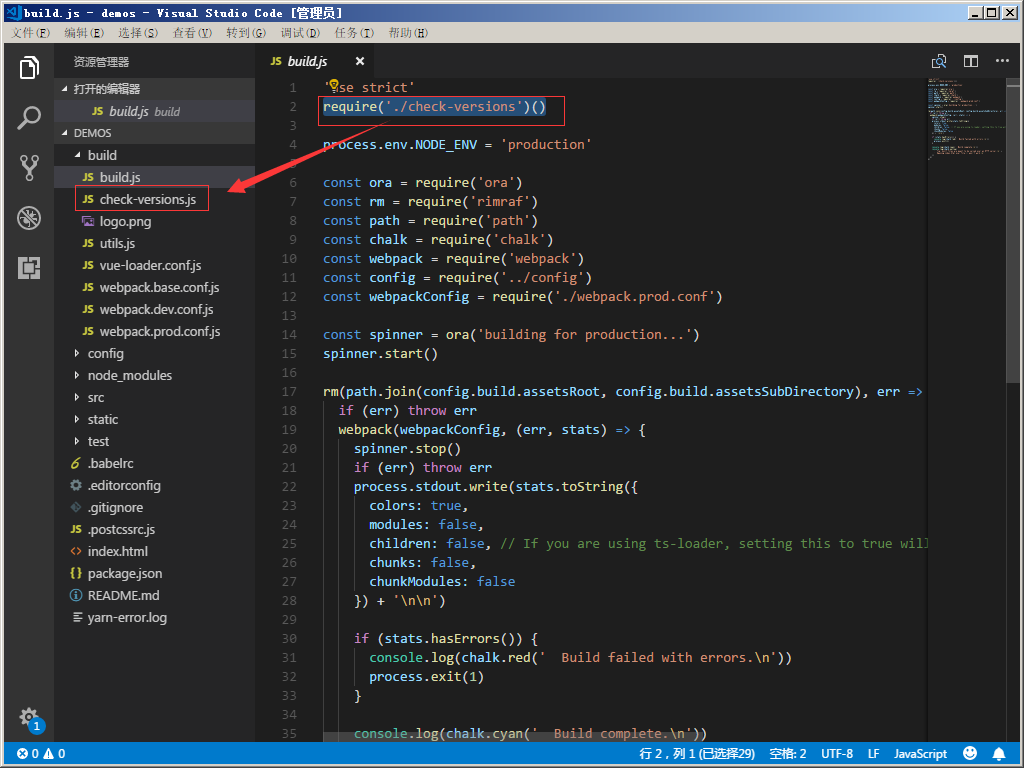
build.js(本文来自https://www.cnblogs.com/ye-hcj/p/7096341.html)
- 这个配置文件是命令
npm run build的入口配置文件,主要用于生产环境 - 由于这是一个系统的配置文件,将涉及很多的模块和插件,所以这部分内容我将分多个文章讲解,请关注我博客的其他文章
 // npm和node版本检查,请看我的check-versions配置文件解释文章require('./check-versions')()

 // 设置环境变量为production

 process.env.NODE_ENV = 'production'

 // ora是一个命令行转圈圈动画插件,好看用的

 var ora = require('ora')

 // rimraf插件是用来执行UNIX命令rm和-rf的用来删除文件夹和文件,清空旧的文件

 var rm = require('rimraf')

 // node.js路径模块

 var path = require('path')

 // chalk插件,用来在命令行中输入不同颜色的文字

 var chalk = require('chalk')

 // 引入webpack模块使用内置插件和webpack方法

 var webpack = require('webpack')

 // 引入config下的index.js配置文件,此配置文件我之前介绍了请自行查阅,主要配置的是一些通用的选项

 var config = require('../config')

 // 下面是生产模式的webpack配置文件,请看我的webpack.prod.conf解释文章

 var webpackConfig = require('./webpack.prod.conf')

 // 开启转圈圈动画

 var spinner = ora('building for production...')

 spinner.start()

 // 调用rm方法,第一个参数的结果就是 dist/static,表示删除这个路径下面的所有文件

 rm(path.join(config.build.assetsRoot, config.build.assetsSubDirectory), err => {

   // 如果删除的过程中出现错误,就抛出这个错误,同时程序终止

   if (err) throw err

   // 没有错误,就执行webpack编译

   webpack(webpackConfig, function (err, stats) {

     // 这个回调函数是webpack编译过程中执行

     spinner.stop() // 停止转圈圈动画

     if (err) throw err // 如果有错误就抛出错误

     // 没有错误就执行下面的代码,process.stdout.write和console.log类似,输出对象

     process.stdout.write(stats.toString({

       // stats对象中保存着编译过程中的各种消息

       colors: true, // 增加控制台颜色开关

       modules: false, // 不增加内置模块信息

       children: false, // 不增加子级信息

       chunks: false, // 允许较少的输出

       chunkModules: false // 不将内置模块的信息加到包信息

     }) + '\n\n')

     // 以上就是在编译过程中,持续打印消息

     // 下面是编译成功的消息

     console.log(chalk.cyan('  Build complete.\n'))

     console.log(chalk.yellow(

       '  Tip: built files are meant to be served over an HTTP server.\n' +

       '  Opening index.html over file:// won\'t work.\n'

     ))

   })

 })
webpack官方文档:https://webpack.js.org/concepts/
check-versions.js(本文来自https://www.cnblogs.com/ye-hcj/p/7096341.html)
 / 下面的插件是chalk插件,他的作用是在控制台中输出不同的颜色的字,大致这样用chalk.blue('Hello world'),这款插件只能改变命令行中的字体颜色

 var chalk = require('chalk')

 // 下面这个是semver插件,是用来对特定的版本号做判断的,比如

 // semver.gt('1.2.3','9.8.7') false 1.2.3版本比9.8.7版本低

 // semver.satisfies('1.2.3','1.x || >=2.5.0 || 5.0.0 - 7.2.3') true 1.2.3的版本符合后面的规则

 var semver = require('semver')

 // 下面是导入package.json文件,要使用里面的engines选项,要注意require是直接可以导入json文件的,并且requrie返回的就是json对象

 var packageConfig = require('../package.json')

 // 下面这个插件是shelljs,作用是用来执行Unix系统命令

 var shell = require('shelljs')

 // 下面涉及了很多Unix命令,这里可能解释的不够详细,第一时间精力有限,第二能力有限。。。

 function exec (cmd) {

   //脚本可以通过 child_process 模块新建子进程,从而执行 Unix 系统命令

   //下面这段代码实际就是把cmd这个参数传递的值转化成前后没有空格的字符串,也就是版本号

   return require('child_process').execSync(cmd).toString().trim()

 }

 var versionRequirements = [

   {

     name: 'node', // node版本的信息

     currentVersion: semver.clean(process.version), // 使用semver插件吧版本信息转化成规定格式,也就是 '  =v1.2.3  ' -> '1.2.3' 这种功能

     versionRequirement: packageConfig.engines.node // 这是规定的pakage.json中engines选项的node版本信息 "node":">= 4.0.0"

   },

 ]

 if (shell.which('npm')) {

   versionRequirements.push({

     name: 'npm',

     currentVersion: exec('npm --version'), // 自动调用npm --version命令,并且把参数返回给exec函数,从而获取纯净的版本号

     versionRequirement: packageConfig.engines.npm // 这是规定的pakage.json中engines选项的node版本信息 "npm": ">= 3.0.0"

   })

 }

 module.exports = function () {

   var warnings = []

   for (var i = 0; i < versionRequirements.length; i++) {

     var mod = versionRequirements[i]

     if (!semver.satisfies(mod.currentVersion, mod.versionRequirement)) {

         //上面这个判断就是如果版本号不符合package.json文件中指定的版本号,就执行下面的代码

       warnings.push(mod.name + ': ' +

         chalk.red(mod.currentVersion) + ' should be ' +

         chalk.green(mod.versionRequirement)

         // 大致意思就是 把当前版本号用红色字体 符合要求的版本号用绿色字体 给用户提示具体合适的版本

       )

     }

   }

   if (warnings.length) {

     console.log('')

     console.log(chalk.yellow('To use this template, you must update following to modules:'))

     console.log()

     for (var i = 0; i < warnings.length; i++) {

       var warning = warnings[i]

       console.log('  ' + warning)

     }

     console.log()

     process.exit(1)

     // 提示用户更新版本,具体不解释了,应该能看懂

   }

 }
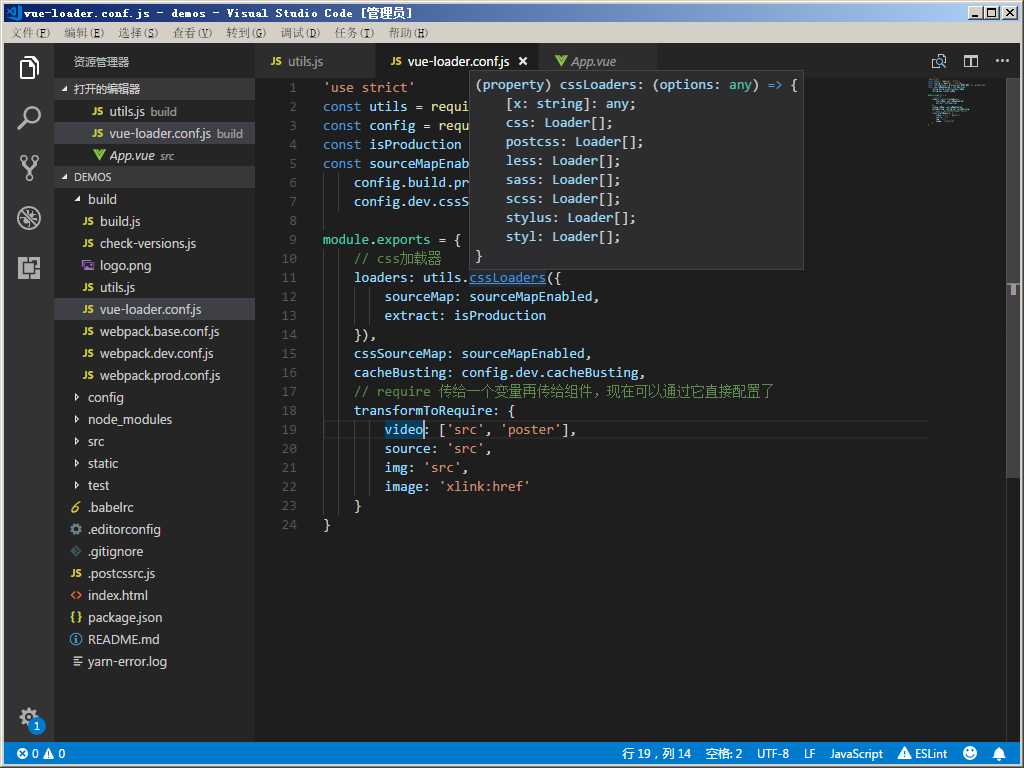
vue-loader.conf.js(本博客)
 'use strict'

 const utils = require('./utils')

 const config = require('../config')

 const isProduction = process.env.NODE_ENV === 'production'

 const sourceMapEnabled = isProduction ?

     config.build.productionSourceMap :

     config.dev.cssSourceMap

 module.exports = {

     // css加载器

     loaders: utils.cssLoaders({

         sourceMap: sourceMapEnabled,

         extract: isProduction

     }),

     cssSourceMap: sourceMapEnabled,

     cacheBusting: config.dev.cacheBusting,

     //css编译之类

     transformToRequire: {

         video: ['src', 'poster'],

         source: 'src',

         img: 'src',

         image: 'xlink:href'

     }

 }
详细使用,就不多说了,已经有一个示例了!
webpack.base.conf.js
 'use strict'

 const path = require('path')

 const utils = require('./utils')

 const config = require('../config')

 const vueLoaderConfig = require('./vue-loader.conf')

 function resolve(dir) {

     return path.join(__dirname, '..', dir)

 }

 // 控制生成以及src目录

 // 详细webpack配置,请看官方文档

 module.exports = {

     context: path.resolve(__dirname, '../'),

     // 入口

     entry: {

         app: './src/main.js'

     },

     // 出口

     output: {

         path: config.build.assetsRoot,

         filename: '[name].js',

         publicPath: process.env.NODE_ENV === 'production' ?

             config.build.assetsPublicPath : config.dev.assetsPublicPath

     },

     resolve: {

         extensions: ['.js', '.vue', '.json'],

         alias: {

             'vue$': 'vue/dist/vue.esm.js',

             '@': resolve('src'),

         }

     },

     module: {

         // 各种模块加载(vue,js,png等)

         rules: [{

                 test: /\.vue$/,

                 loader: 'vue-loader',

                 options: vueLoaderConfig

             },

             {

                 test: /\.js$/,

                 loader: 'babel-loader',

                 include: [resolve('src'), resolve('test'), resolve('node_modules/webpack-dev-server/client')]

             },

             {

                 test: /\.(png|jpe?g|gif|svg)(\?.*)?$/,

                 loader: 'url-loader',

                 options: {

                     limit: 10000,

                     name: utils.assetsPath('img/[name].[hash:7].[ext]')

                 }

             },

             {

                 test: /\.(mp4|webm|ogg|mp3|wav|flac|aac)(\?.*)?$/,

                 loader: 'url-loader',

                 options: {

                     limit: 10000,

                     name: utils.assetsPath('media/[name].[hash:7].[ext]')

                 }

             },

             {

                 test: /\.(woff2?|eot|ttf|otf)(\?.*)?$/,

                 loader: 'url-loader',

                 options: {

                     limit: 10000,

                     name: utils.assetsPath('fonts/[name].[hash:7].[ext]')

                 }

             }

         ]

     },

     node: {

         // prevent webpack from injecting useless setImmediate polyfill because Vue

         // source contains it (although only uses it if it's native).

         setImmediate: false,

         // prevent webpack from injecting mocks to Node native modules

         // that does not make sense for the client

         dgram: 'empty',

         fs: 'empty',

         net: 'empty',

         tls: 'empty',

         child_process: 'empty'

     }

 }
webpack.dev.conf.js
 'use strict'

 const utils = require('./utils')

 const webpack = require('webpack')

 const config = require('../config')

     // 一个可以合并数组和对象的插件

 const merge = require('webpack-merge')

 const path = require('path')

 const baseWebpackConfig = require('./webpack.base.conf')

 const CopyWebpackPlugin = require('copy-webpack-plugin')

     // 一个用于生成HTML文件并自动注入依赖文件(link/script)的webpack插件

 const HtmlWebpackPlugin = require('html-webpack-plugin')

     // 用于更友好地输出webpack的警告、错误等信息

 const FriendlyErrorsPlugin = require('friendly-errors-webpack-plugin')

 const portfinder = require('portfinder')

 const HOST = process.env.HOST

 const PORT = process.env.PORT && Number(process.env.PORT)

     // 合并基础的webpack配置

 const devWebpackConfig = merge(baseWebpackConfig, {

     module: {

         rules: utils.styleLoaders({ sourceMap: config.dev.cssSourceMap, usePostCSS: true })

     },

     // cheap-module-eval-source-map is faster for development

     // 配置Source Maps。在开发中使用cheap-module-eval-source-map更快

     devtool: config.dev.devtool,

     // 这些devServer选项应该在/config/index.js中定制

     devServer: {

         clientLogLevel: 'warning',

         historyApiFallback: {

             rewrites: [

                 { from: /.*/, to: path.posix.join(config.dev.assetsPublicPath, 'index.html') },

             ],

         },

         hot: true,

         contentBase: false, // 因为我们使用CopyWebpackPlugin必需

         compress: true,

         host: HOST || config.dev.host,

         port: PORT || config.dev.port,

         open: config.dev.autoOpenBrowser,

         overlay: config.dev.errorOverlay ? { warnings: false, errors: true } : false,

         publicPath: config.dev.assetsPublicPath,

         proxy: config.dev.proxyTable,

         quiet: true, // FriendlyErrorsPlugin必需

         watchOptions: {

             poll: config.dev.poll,

         }

     },

     plugins: [

         new webpack.DefinePlugin({

             'process.env': require('../config/dev.env')

         }),

         new webpack.HotModuleReplacementPlugin(),

         new webpack.NamedModulesPlugin(), // HMR在更新控制台上显示正确的文件名.

         new webpack.NoEmitOnErrorsPlugin(),

         // https://github.com/ampedandwired/html-webpack-plugin

         new HtmlWebpackPlugin({

             filename: 'index.html',

             template: 'index.html',

             inject: true

         }),

         // 复制自定义静态assets

         new CopyWebpackPlugin([{

             from: path.resolve(__dirname, '../static'),

             to: config.dev.assetsSubDirectory,

             ignore: ['.*']

         }])

     ]

 })

 module.exports = new Promise((resolve, reject) => {

     portfinder.basePort = process.env.PORT || config.dev.port

     portfinder.getPort((err, port) => {

         if (err) {

             reject(err)

         } else {

             // 发布e2e测试所需的新端口

             process.env.PORT = port

                 // 添加端口配置服务

             devWebpackConfig.devServer.port = port

             // 添加友好错误的插件

             devWebpackConfig.plugins.push(new FriendlyErrorsPlugin({

                 compilationSuccessInfo: {

                     messages: [`Your application is running here: http://${devWebpackConfig.devServer.host}:${port}`],

                 },

                 onErrors: config.dev.notifyOnErrors ?

                     utils.createNotifierCallback() : undefined

             }))

             resolve(devWebpackConfig)

         }

     })

 })
wepack.prod.conf.js
 // 引入依赖模块

 var path = require('path')

 var utils = require('./utils')

 var webpack = require('webpack')

     // 引入基本配置

 var config = require('../config')

 var merge = require('webpack-merge')

 var baseWebpackConfig = require('./webpack.base.conf')

 var HtmlWebpackPlugin = require('html-webpack-plugin')

 // 用于从webpack生成的bundle中提取文本到特定文件中的插件

 // 可以抽取出css,js文件将其与webpack输出的bundle分离

 var ExtractTextPlugin = require('extract-text-webpack-plugin')

 var env = process.env.NODE_ENV === 'testing' ?

     require('../config/test.env') :

     config.build.env

 // 合并基础的webpack配置

 var webpackConfig = merge(baseWebpackConfig, {

     module: {

         rules: utils.styleLoaders({

             sourceMap: config.build.productionSourceMap,

             extract: true

         })

     },

     devtool: config.build.productionSourceMap ? '#source-map' : false,

     // 配置webpack的输出

     output: {

         // 编译输出目录

         path: config.build.assetsRoot,

         // 编译输出文件名格式

         filename: utils.assetsPath('js/[name].[chunkhash].js'),

         // 没有指定输出名的文件输出的文件名格式

         chunkFilename: utils.assetsPath('js/[id].[chunkhash].js')

     },

     // 配置webpack插件

     plugins: [

         // http://vuejs.github.io/vue-loader/en/workflow/production.html

         new webpack.DefinePlugin({

             'process.env': env

         }),

         // 丑化压缩代码

         new webpack.optimize.UglifyJsPlugin({

             compress: {

                 warnings: false

             },

             sourceMap: true

         }),

         // 抽离css文件

         new ExtractTextPlugin({

             filename: utils.assetsPath('css/[name].[contenthash].css')

         }),

         // generate dist index.html with correct asset hash for caching.

         // you can customize output by editing /index.html

         // see https://github.com/ampedandwired/html-webpack-plugin

         new HtmlWebpackPlugin({

             filename: process.env.NODE_ENV === 'testing'

                 ?

                 'index.html' :

                 config.build.index,

             template: 'index.html',

             inject: true,

             minify: {

                 removeComments: true,

                 collapseWhitespace: true,

                 removeAttributeQuotes: true

                     // more options:

                     // https://github.com/kangax/html-minifier#options-quick-reference

             },

             // necessary to consistently work with multiple chunks via CommonsChunkPlugin

             chunksSortMode: 'dependency'

         }),

         // split vendor js into its own file

         new webpack.optimize.CommonsChunkPlugin({

             name: 'vendor',

             minChunks: function(module, count) {

                 // any required modules inside node_modules are extracted to vendor

                 return (

                     module.resource &&

                     /\.js$/.test(module.resource) &&

                     module.resource.indexOf(

                         path.join(__dirname, '../node_modules')

                     ) === 0

                 )

             }

         }),

         // extract webpack runtime and module manifest to its own file in order to

         // prevent vendor hash from being updated whenever app bundle is updated

         new webpack.optimize.CommonsChunkPlugin({

             name: 'manifest',

             chunks: ['vendor']

         })

     ]

 })

 // gzip模式下需要引入compression插件进行压缩

 if (config.build.productionGzip) {

     var CompressionWebpackPlugin = require('compression-webpack-plugin')

     webpackConfig.plugins.push(

         new CompressionWebpackPlugin({

             asset: '[path].gz[query]',

             algorithm: 'gzip',

             test: new RegExp(

                 '\\.(' +

                 config.build.productionGzipExtensions.join('|') +

                 ')$'

             ),

             threshold: 10240,

             minRatio: 0.8

         })

     )

 }

 if (config.build.bundleAnalyzerReport) {

     var BundleAnalyzerPlugin = require('webpack-bundle-analyzer').BundleAnalyzerPlugin

     webpackConfig.plugins.push(new BundleAnalyzerPlugin())

 }

 module.exports = webpackConfig
config/dev.env.js
 'use strict'

 const merge = require('webpack-merge')

 const prodEnv = require('./prod.env')

 // webpack-merge合并模块的作用

 module.exports = merge(prodEnv, {

     NODE_ENV: '"development"'

 })
config/index.js
 'use strict'

 // Template version: 1.3.1

 // see http://vuejs-templates.github.io/webpack for documentation.

 const path = require('path')

 module.exports = {

     dev: {

         // 路径

         assetsSubDirectory: 'static',

         assetsPublicPath: '/',

         proxyTable: {},

         // 各种Dev服务器设置

         host: 'localhost', //可以被process.env.HOST覆盖

         port: 8080, // 可以被process.env.PORT覆盖,如果端口正在使用,则会确定一个空闲的

         autoOpenBrowser: false,

         errorOverlay: true,

         notifyOnErrors: true,

         poll: false, // https://webpack.js.org/configuration/dev-server/#devserver-watchoptions-

         /**

          * Source Maps

          */

         // https://webpack.js.org/configuration/devtool/#development

         devtool: 'cheap-module-eval-source-map',

         // 如果您在devtools中调试vue-files时遇到问题,

         // 设置为false - 它可能会有帮助

         // https://vue-loader.vuejs.org/en/options.html#cachebusting

         cacheBusting: true,

         cssSourceMap: true

     },

     build: {

         // index.html 模板

         index: path.resolve(__dirname, '../dist/index.html'),

         // 路径

         assetsRoot: path.resolve(__dirname, '../dist'),

         assetsSubDirectory: 'static',

         assetsPublicPath: '/',

         /**

          * Source Maps

          */

         productionSourceMap: true,

         // https://webpack.js.org/configuration/devtool/#production

         devtool: '#source-map',

         // Gzip off by default as many popular static hosts such as

         // Surge or Netlify already gzip all static assets for you.

         // Before setting to `true`, make sure to:

         // npm install --save-dev compression-webpack-plugin

         // 生成环境Gzip

         productionGzip: false,

         // 生成环境Gzip压缩扩展

         productionGzipExtensions: ['js', 'css'],

         // Run the build command with an extra argument to

         // View the bundle analyzer report after build finishes:

         // `npm run build --report`

         // Set to `true` or `false` to always turn it on or off

         bundleAnalyzerReport: process.env.npm_config_report

     }

 }
config/prod.env.js
 'use strict'

 module.exports = {

   NODE_ENV: '"production"'

 }
config/test.env.js
 'use strict'

 //合并模块

 const merge = require('webpack-merge')

 const devEnv = require('./dev.env')

 module.exports = merge(devEnv, {

   NODE_ENV: '"testing"'

 })
src/assets(资源路径)
src/component(组件)
src/index.js(配置子组件路由,也称子路由)
App.vue(单文件组件)
main.js(配置主路由)
 // The Vue build version to load with the `import` command

 // (runtime-only or standalone) has been set in webpack.base.conf with an alias.

 import Vue from 'vue'

 import App from './App'

 import router from './router'

 Vue.config.productionTip = false

 /* eslint-disable no-new */

 new Vue({

   el: '#app',

   router,

   components: { App },

   template: '<App/>'

 })
static/.gitkeep(.gitkeep和.gitignore一样,都是配置不git上传的)
test
.babelrc(es6或es7转es5所配置)
.editorconfig(文本编辑时的编码已经一些配置)
 root = true

 [*]

 charset = utf-8

 indent_style = space

 indent_size = 2

 end_of_line = lf

 insert_final_newline = true

 trim_trailing_whitespace = true
.postcssrc.js(css文件之类的配置)
 // https://github.com/michael-ciniawsky/postcss-load-config

 module.exports = {

     "plugins": {

         "postcss-import": {},

         "postcss-url": {},

         // 编辑目标浏览器:使用package.json中的“browserslist”字段

         "autoprefixer": {}

     }

 }
index.html(主页)
 <!DOCTYPE html>

 <html>

   <head>

     <meta charset="utf-8">

     <meta name="viewport" content="width=device-width,initial-scale=1.0">

     <title>demos</title>

   </head>

   <body>

     <div id="app"></div>

     <!-- built files will be auto injected -->

   </body>

 </html>
package.json(配置包与包,以及node_modules之间的关系,版本以及启动的一系列)
 {

   "name": "demos",

   "version": "1.0.0",

   "description": "A Vue.js project",

   "author": "",

   "private": true,

   "scripts": {

     "dev": "webpack-dev-server --inline --progress --config build/webpack.dev.conf.js",

     "start": "npm run dev",

     "unit": "jest --config test/unit/jest.conf.js --coverage",

     "e2e": "node test/e2e/runner.js",

     "test": "npm run unit && npm run e2e",

     "build": "node build/build.js"

   },

   "dependencies": {

     "vue": "^2.5.2",

     "vue-router": "^3.0.1"

   },

   "devDependencies": {

     "autoprefixer": "^7.1.2",

     "babel-core": "^6.22.1",

     "babel-helper-vue-jsx-merge-props": "^2.0.3",

     "babel-jest": "^21.0.2",

     "babel-loader": "^7.1.1",

     "babel-plugin-dynamic-import-node": "^1.2.0",

     "babel-plugin-syntax-jsx": "^6.18.0",

     "babel-plugin-transform-es2015-modules-commonjs": "^6.26.0",

     "babel-plugin-transform-runtime": "^6.22.0",

     "babel-plugin-transform-vue-jsx": "^3.5.0",

     "babel-preset-env": "^1.3.2",

     "babel-preset-stage-2": "^6.22.0",

     "babel-register": "^6.22.0",

     "chalk": "^2.0.1",

     "chromedriver": "^2.27.2",

     "copy-webpack-plugin": "^4.0.1",

     "cross-spawn": "^5.0.1",

     "css-loader": "^0.28.0",

     "extract-text-webpack-plugin": "^3.0.0",

     "file-loader": "^1.1.4",

     "friendly-errors-webpack-plugin": "^1.6.1",

     "html-webpack-plugin": "^2.30.1",

     "jest": "^22.0.4",

     "jest-serializer-vue": "^0.3.0",

     "nightwatch": "^0.9.12",

     "node-notifier": "^5.1.2",

     "optimize-css-assets-webpack-plugin": "^3.2.0",

     "ora": "^1.2.0",

     "portfinder": "^1.0.13",

     "postcss-import": "^11.0.0",

     "postcss-loader": "^2.0.8",

     "postcss-url": "^7.2.1",

     "rimraf": "^2.6.0",

     "selenium-server": "^3.0.1",

     "semver": "^5.3.0",

     "shelljs": "^0.7.6",

     "uglifyjs-webpack-plugin": "^1.1.1",

     "url-loader": "^0.5.8",

     "vue-jest": "^1.0.2",

     "vue-loader": "^13.3.0",

     "vue-style-loader": "^3.0.1",

     "vue-template-compiler": "^2.5.2",

     "webpack": "^3.6.0",

     "webpack-bundle-analyzer": "^2.9.0",

     "webpack-dev-server": "^2.9.1",

     "webpack-merge": "^4.1.0"

   },

   "engines": {

     "node": ">= 6.0.0",

     "npm": ">= 3.0.0"

   },

   "browserslist": [

     "> 1%",

     "last 2 versions",

     "not ie <= 8"

   ]

 }
README.md(说明以及使用)
# demos

> A Vue.js project

## Build Setup

``` bash

# install dependencies

npm install

# serve with hot reload at localhost:8080

npm run dev

# build for production with minification

npm run build

# build for production and view the bundle analyzer report

npm run build --report

# run unit tests

npm run unit

# run e2e tests

npm run e2e

# run all tests

npm test

```

For a detailed explanation on how things work, check out the [guide](http://vuejs-templates.github.io/webpack/) and [docs for vue-loader](http://vuejs.github.io/vue-loader).
Now,现在大家有什么疑惑直接(chrome)CTRL+F,然后搜索本网页字段 有什么不足之间大家可以提出,不足之处可以得以完善!
---------------------
作者:Sunsin
来源:CNBLOGS
原文:https://www.cnblogs.com/cisum/p/8612566.html
版权声明:本文为作者原创文章,转载请附上博文链接!
内容解析By:CSDN,CNBLOG博客文章一键转载插件
[转]vue - 前置工作 - 目录功能介绍的更多相关文章
- vue - 前置工作 - 目录功能介绍
一个DEMOS的完整目录(由于GWF问题,我就不一一打开网站一个个去搜索并且解释了)可以去关注:https://www.cnblogs.com/ye-hcj build build.js(本文来自ht ...
- Vue 入门之目录结构介绍
Vue 是一套用于构建用户界面的渐进式框架,与其它大型的页面框架不同的是,Vue 被设计为可以自底向上逐层应用.Vue 的核心库只关注视图层,不仅易于上手,还便于与第三方库或既有项目整合.另一方面,当 ...
- vue - 前置工作 - 安装vsCode以及插件
开发环境:Win7 x64 开发工具:vsCOde 开发工具vsCode插件配置:Vetur.ivue.Vue 2 Snippets Vetur:强力推荐的一款插件,为什么呢? 格式化代码.高亮.代码 ...
- vue - 前置工作
vue 中文官网:https://cn.vuejs.org/ vue ES6语法:https://www.cnblogs.com/zhouyangla/p/7225335.html vue Debug ...
- jmeter工作目录介绍、jmeter元件及组件介绍
一.jmeter工作目录介绍: bin:放置各项配置文件(如日志设置.JVM设置).启动文件.启动Jar包.示例脚本等: docs:放置JMeter API的离线帮助文档: extras:JMeter ...
- 关于学习Vue的前置工作/技术储备
关于学习Vue的前置工作/技术储备 1.GitBatch 2.Sublime Text 3.Node-----npm 命令 本人用的idea GitBatch: GitBatch是一个可以编写shel ...
- master节点的部署介绍和前置工作
目录 组件介绍 组件介绍 kubernetes master节点运行组件如下: kube-apiserver.kube-scheduler.kube-controller-manager.kube-n ...
- VUE+Element 前端应用开发框架功能介绍
前面介绍了很多ABP系列的文章<ABP框架使用>,一步一步的把我们日常开发中涉及到的Web API服务构建.登录日志和操作审计日志.字典管理模块.省份城市的信息维护.权限管理模块中的组织机 ...
- GNU make简要介绍①指定变量、自动推导规则、清除工作目录过程文件
Makefile简介 在执行make之前需要一个命名为Makefile的特殊文件来告诉make需要做些什么. 当使用 make 工具进行编译时,工程中以下几种文件在执行 make 时将会被编译 (重新 ...
随机推荐
- vs code 配置c/c++环境
1. 编译 通过 code-runner插件 运行编译 安装code-runner后在settings.json中找到code-runner.executorMap,可以看到其中的cpp 文件运行方式 ...
- 面试问题:Vuejs如何实现双向绑定
最近出去面试,栽在这个问题上,提到vuejs,面试官一般会让你说vuejs的特点,一般就要回答virtual dom tree, dom tree diff, 以及数据双向绑定,然后面试官会追问你,v ...
- 【水滴石穿】rnTest
其实就是一个小的demo,不过代码分的挺精巧的 先放地址:https://github.com/linchengzzz/rnTest 来看看效果 确实没有什么可以说的,不过代码部分还行 先入口文件 / ...
- js中错误处理的相关知识
错误bug是指程序执行过程中,导致程序无法正常执行的情况. 后果:程序会强行中断退出: 错误处理: 即使程序出现错误,也保证程序不异常中断的机制. 一般的使用的代 ...
- sas信用评分之第二步变量筛选
sas信用评分之第二步变量筛选 今天介绍变量初步选择.这部分的内容我就只介绍information –value,我这次做的模型用的逻辑回归,后面会更新以基尼系数或者信息熵基础的筛选变量,期待我把. ...
- Directx11教程(6) 画一个简单的三角形(2)
原文:Directx11教程(6) 画一个简单的三角形(2) 在上篇教程中,我们实现了在D3D11中画一个简单的三角形,但是,当我们改变窗口大小时候,三角形形状却随着窗口高宽比例改变而改变, ...
- 纯CSS3绘制的黑色图标按钮组合
在线演示 本地下载
- JavaScript--轮播图_带计时器
轮播图效果: 实现的功能: 1.鼠标移入,左右按钮显示 2.右下叫小圆点鼠标移入,进入下一张图 3.左右按钮点击,右下小圆点页跟随变更 4.自动开启计时器,鼠标移入右下叫小圆点区,计时器停止,鼠标移出 ...
- PyCharm切换Python版本
由于代码格式问题,很多情况下需要我们去切换Python版本,那么在当下火爆的PyCharm中是如何切换Python版本的呢? 打开File菜单,选择Settings: 打开Settings窗口后,选择 ...
- 【JZOJ4886】【NOIP2016提高A组集训第13场11.11】字符串
题目描述 某日mhy12345在教同学们写helloworld,要求同学们用程序输出一个给定长度的字符串,然而发现有些人输出了一些"危险"的东西,所以mhy12345想知道对于任意 ...