NodeJS4-8静态资源服务器实战_构建cli工具
Cli(command-line interface),中文是 命令行界面,简单来说就是可以通过命令行快速生成自己的项目模板等功能(比较熟悉的是vue-cli脚手架这些),把上述写的包做成Cli工具.
延续上一次的代码,这次现在readme.md里面先注释告诉用户又那些命令行的语句具体对应哪些功能
step1:README.md
# anydoor

Tiny NodeJS Static Web server

##安装

```

npm i -g anydoor

```

##使用方法

```

anydoor # 把当前文件夹作为静态资源服务器根目录

anydoor -p 3333 # 设置端口号为 3333 //手工自定义一个端口号

anydoor -h localhost # 设置host为localhost

anydoor -d /usr # 设置根目录为 /usr

```
Step2:安装yargs
yargs是什么? Yargs是通过解析参数和生成优雅的用户界面,帮助您构建交互式命令行工具。
安装yargs
npm i yargs
新建一个src/index.js,与app.js处于平级目录下,注意下面所定义的option是与defaultConfig的对应的内容
// process.argv1

// yargs

const yargs = require('yargs')

const Server = require('./app')

const argv = yargs

    .usage('anywhere [options]')

    .option('p',{

        alias:'port',

        describe:'端口号',

        default:9527

    })

    .option('h',{

        alias:'hostname',

        describe:'host',

        default:'127.0.0.1'

    })

    .option('d',{

        alias:'root',

        describe:'root path',

        default:process.cwd()

    })

    .version()

    .alias('v','version')

    .help()

    .argv;

    const server = new Server(argv)

    server.start()
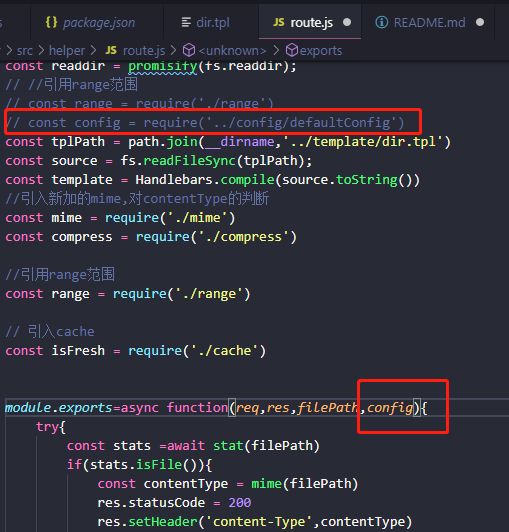
app.js
const http = require('http');

const chalk = require('chalk')

const  path = require('path')

const conf = require('./config/defaultConfig.js');

const route = require('./helper/route')

class Server {

    constructor(config){

        this.conf = Object.assign({},conf,config)

    }

    start(){

        const server = http.createServer((req,res)=>{

            const url = req.url;

            //拿到文件路径

            const filePath = path.join(this.conf.root,req.url)

            route(req,res,filePath,this.conf)

        });

        server.listen(this.conf.port,this.conf.hostname,()=>{

            const addr = `http://${this.conf.hostname}:${this.conf.port}`;

            console.log(`Server started at ${chalk.green(addr)}`);

        })

    }

}

module.exports = Server
package.json添加main和bin两个选项
{

  "devDependencies": {

    "eslint": "^6.2.2"

  },

  "name":"anydoor",

  "version":"0.01",

  "main":"src/app.js",

  "bin":{

    "anydoor":"bin/anydoor"

  }

}
新建anydoor/bin/anydoor
#! /usr/bin/env node

require('../src/index')
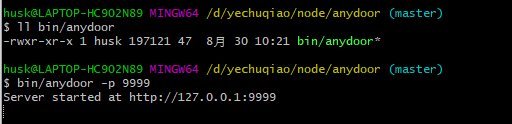
运行代码,成功启动服务,打开http://127.0.0.1:9999可以看到之前运行app.js的页面
--------------------------------------------------------------------------------------------------------------------
优化自动打开浏览器操作,下面修改之后运行之后会自动打开网页,非常方便
新建src/helper/openUrl.js
const {exec} = require('child_process')

module.exports = url=>{

    switch(process.platform){

        case 'darwin':

            exec(`open ${url}`);

            break

        case 'win32':

            exec(`start ${url}`);

            break

    }

}
src/app.js
const http = require('http');

const chalk = require('chalk')

const  path = require('path')

const conf = require('./config/defaultConfig.js');

const route = require('./helper/route')

const openUrl = require('./helper/openUrl')

class Server {

    constructor(config){

        this.conf = Object.assign({},conf,config)

    }

    start(){

        const server = http.createServer((req,res)=>{

            const url = req.url;

            //拿到文件路径

            const filePath = path.join(this.conf.root,req.url)

            route(req,res,filePath,this.conf)

        });

        server.listen(this.conf.port,this.conf.hostname,()=>{

            const addr = `http://${this.conf.hostname}:${this.conf.port}`;

            console.log(`Server started at ${chalk.green(addr)}`);

            openUrl(addr)

        })

    }

}

module.exports = Server
NodeJS4-8静态资源服务器实战_构建cli工具的更多相关文章
- NodeJS4-7静态资源服务器实战_缓存
浏览器发出一个请求,服务器解析出响应的结果返回给浏览器. 缓存是怎么工作的? 用户发起请求,浏览器检查本地是否存在缓存,如果第一次请求没有缓存,那就向服务器发起请求,服务器协商缓存的内容并且返回响应, ...
- NodeJS4-5静态资源服务器实战_优化压缩文件
浏览器控制台看一下RequestHeader有一个Accept-Encoding,而RespondHeaders中也会有一个Content-Encoding和他进行对应. Accept-Encodin ...
- NodeJS4-9静态资源服务器实战_发到npm上
登录->publish一下 ->上npm官网查看 -> 安装全局 //登录 npm login //推上去npm npm publish //全局安装 npm i -g 你的文件名
- NodeJS4-4静态资源服务器实战_优化引入模板引擎
引入模板引擎(handlebars) cnpm i handlebars 结构大概是这样子的,新建模板dir.tpl文件和route.js dir.tpl <!DOCTYPE html> ...
- NodeJS4-3静态资源服务器实战_优化成近似同步写法
实例3 上面有点回调,优化成近似同步的写法 route.js const fs =require('fs') const promisify = require('util').promisify; ...
- NodeJS4-2静态资源服务器实战_实现获取文件路径
实例2 : 实现获取文件路径,判断是文件还是文件夹,如果是文件夹就显示里面的列表文件,如果是文件就显示里面的内容 defaultConfig.js module.exports={ root:proc ...
- NodeJS4-1静态资源服务器实战_实现访问获取里面的内容
.gitignore 匹配模式前 / 代表项目根目录 匹配模式最后加 / 代表是目录 匹配模式前加 ! 代表取反 * 代表任意一个字符 ? 匹配任意一个字符 ** 匹配多级目录 统一代码风格配置可以用 ...
- NodeJS4-6静态资源服务器实战_range范围请求
range范围请求:向服务器发起请求可以申明我想请求判断内容的范围,从多少个字节到多少个字节,一次要求把所有的内容拿回来,服务器在得到相应的请求之后,从拿到对应的文件,拿到对应的字节返回给客户端.要实 ...
- 使用Node.js搭建静态资源服务器
对于Node.js新手,搭建一个静态资源服务器是个不错的锻炼,从最简单的返回文件或错误开始,渐进增强,还可以逐步加深对http的理解.那就开始吧,让我们的双手沾满网络请求! Note: 当然在项目中如 ...
随机推荐
- 学习记录:《C++设计模式——李建忠主讲》4.“单一职责”模式
单一职责模式:在软件组件的设计中,如果责任划分的不清晰,使用继承得到的结果往往是随着需求的变化,子类急剧膨胀,同时充斥着重复代码,这时候的关键是划清责任. 典型模式:装饰模式(Decorator).桥 ...
- 安装eclipse血泪史
从大一到大三,屡次卸掉eclipse又屡次安装上,每次都要卡壳,所以这里开帖贴出自己的血泪史,以帮助大家 首先找一篇安装教程,网上有很多,这里不再赘述.举例 https://blog.csdn.net ...
- GeoServer 发布的图层预览不了
说明: 在用Geoserver发布Postgis发布的图层后,去LayerPreview中预览,但是选openlayers时,没有跳转到预览页面,而是弹出了下载WMS. 解决方案: 用KML方式预览时 ...
- Theano 更多示例
Logistic函数 logistic函数的图,其中x在x轴上,s(x)在y轴上. 如果你想对双精度矩阵上的每个元素计算这个函数,这表示你想将这个函数应用到矩阵的每个元素上. 嗯,你是这样做的: x= ...
- 异常:java.lang.RuntimeException: Canvas: trying to draw too large(161740800bytes) bitmap
现象 今天做一个安卓项目的时候,我使用了10张图片,这10张图片都是放在了drawable目录下. 根据这个错误,我在网上寻找解决问题的方案,然后我放在了mipmap-xxhdpi下结果可以运行. 但 ...
- JavaScript实战实例剖析——(激励倒计时日历)
如今JavaScript在前端开发中的地位越来越高,掌握JavaScript的深度往往能决定你职业道路深远,这次通过制作 带着倒计时功能的激励日历的小实例,进一步细致的掌握JavaScript的语法与 ...
- 品优购详情页---产品细节模块product_detail
结构搭建 整个大盒子产品细节模块命名为: product_detail(不给高度,注意清除浮动带来的影响) 1号盒子命名为:aside(左侧浮动,有宽带不给高度) 2号盒子命名为:detail(右侧浮 ...
- FastAdmin的基本使用
FastAdmin是一款基于ThinkPHP5+Bootstrap的极速后台开发框架. 1.在线命名管理 (1)菜单的生成 (2)一键 crud 首先要安装在线命名 在翡翠分类生成菜单,如下: 它的 ...
- 大型情感剧集Selenium:9_selenium配合Pillow完成浏览器局部截图
网页截图 上次提到了selenium的四种截图方法,最终截图了整张网页.但很多时候,我们仅仅需要截图部分的内容.比如截取某个关键信息,或者现在已经不常见的截图验证码(现在都是各种按规则点击-).那么我 ...
- Python协程与Go协程的区别二
写在前面 世界是复杂的,每一种思想都是为了解决某些现实问题而简化成的模型,想解决就得先面对,面对就需要选择角度,角度决定了模型的质量, 喜欢此UP主汤质看本质的哲学科普,其中简洁又不失细节的介绍了人类 ...