爬虫基本库的使用---requests库
使用requests---实现Cookies、登录验证、代理设置等操作
处理网页验证和Cookies时,需要写Opener和Handler来处理,为了更方便地实现这些操作,就有了更强大的库requests
例子简单使用requests库
import requests r = requests.get('http://wwww.baidu.com/')
print(type(r), r.status_code, r.text, r.cookies, sep='\n\n') # 输出:
<class 'requests.models.Response'> 200 <!DOCTYPE html>
<!--STATUS OK--><html> <head><meta http-equiv=content-type content=text/html;charset=utf-8><meta http-equiv=X-UA-Compatible
......
feedback>æè§åé¦</a> 京ICPè¯030173å· <img src=//www.baidu.com/img/gs.gif> </p> </div> </div> </div> </body> </html> <RequestsCookieJar[<Cookie BDORZ=27315 for .baidu.com/>]>GET请求
- GET请求,返回相应的请求信息
- requests.get(url, params, **kwargs)
- url表示要捕获的页面链接,params表示url的额外参数(字典或字节流格式),**kwargs表示12个控制访问的参数
 import requests

 r = requests.get('http://httpbin.org/get')

 print(r.text)

 # 输出:

 {

   "args": {},

   "headers": {

     "Accept": "*/*",

     "Accept-Encoding": "gzip, deflate",

     "Host": "httpbin.org",

     "User-Agent": "python-requests/2.21.0"

   },

   "origin": "120.85.108.192, 120.85.108.192",

   "url": "https://httpbin.org/get"

 }

 # 返回结果中包含请求头、URL、IP等信息
import requests data = {
'name': 'LiYihua',
'age': ''
}
r = requests.get('http://httpbin.org/get', params=data)
print(r.text) # 输出:
{
"args": {
"age": "",
"name": "LiYihua"
},
"headers": {
"Accept": "*/*",
"Accept-Encoding": "gzip, deflate",
"Host": "httpbin.org",
"User-Agent": "python-requests/2.21.0"
},
"origin": "120.85.108.92, 120.85.108.92",
"url": "https://httpbin.org/get?name=LiYihua&age=21"
}import requests r = requests.get('http://httpbin.org/get')
print(type(r.text), r.json(), type(r.json()), sep='\n\n') # 输出:
<class 'str'> {'args': {}, 'headers': {'Accept': '*/*', 'Accept-Encoding': 'gzip, deflate', 'Host': 'httpbin.org', 'User-Agent': 'python-requests/2.21.0'}, 'origin': '120.85.108.92, 120.85.108.92', 'url': 'https://httpbin.org/get'} <class 'dict'> # json()方法可以将返回结果是JSON格式的字符串转化为字典抓取二进制数据
 import requests

 r = requests.get('https://github.com/favicon.ico')

 print(r.text, r.content, sep='\n\n')

 # response.content返回的是bytes型的数据。

 # 如果想取图片,文件,则可以通过r.content

 # response.text返回的是Unicode型的数据。

 # 如果想取文本,可以通过r.text

 # 输出:

 :�������OL��......

 b'\x00\x00\x01\x00\x02\x00\x10\x10\x00\x00\x0......
将提取到的图片保存
 import requests

 r = requests.get('https://github.com/favicon.ico')

 with open('favicon.ico', 'wb') as f:

     f.write(r.content)

 # 运行结束后生成一个名为favicon.ico的图标
上一个例子用到的open()方法和with as语句
# open()方法

# def open(file, mode='r', buffering=None, encoding=None, errors=None, newline=None, closefd=True)

# 常用参数:

file表示要打开的文件            mode表示打开文件的模式:只读,写入,追加等

buffering : 如果 buffering 的值被设为 0,就不会有寄存。如果 buffering 的值取 1,访问文件时会寄存行。如果将 buffering 的值设为大于 1 的整数,表明了这就是的寄存区的缓冲大小。如果取负值,寄存区的缓冲大小则为系统默认

# 对于mode参数

========= ===============================================================

    字母的意义

    --------- ---------------------------------------------------------------

    'r'         打开阅读(默认)

    'w'        打开进行写入,首先截断文件

    'x'        创建一个新文件并打开它进行写入

    'a'        打开进行写入,如果文件存在,则附加到文件结尾

    'b'        二进制模式

    't'         文本模式(默认)

    '+'        打开磁盘文件进行更新(读写)

    'U'       通用换行模式(已弃用)

    ========= ===============================================================

# with as 语句

有一些任务,可能事先需要设置,事后做清理工作。对于这种场景,Python的with语句提供了一种非常方便的处理方式。

with的处理基本思想是with所求值的对象必须有一个__enter__()方法,一个__exit__()方法。紧跟with后面的语句被求值后,返回对象的__enter__()方法被调用,这个方法的返回值将被赋值给as后面的变量。当with后面的代码块全部被执行完之后,将调用前面返回对象的__exit__()方法。

代码解释说明:

class Sample:

    def __enter__(self):

        print "In __enter__()"

        return "Foo"

    def __exit__(self, type, value, trace):

        print "In __exit__()"

def get_sample():

    return Sample()

with get_sample() as sample:

    print "sample:", sample
添加headers
 import requests

 r = requests.get('https://www.zhihu.com/explore')

 print(r.text)

 # 输出:

 <html>

 <head><title>400 Bad Request</title></head>

 <body bgcolor="white">

 <center><h1>400 Bad Request</h1></center>

 <hr><center>openresty</center>

 </body>

 </html>

 # 部分网址需要传递headers,如果不传递,就不能正常请求

 import requests

 headers = {

     'User-Agent': 'Mozilla/5.0 (Macintosh; Intel Mac OS X 10_14_5) AppleWebKit/537.36 (KHTML, like Gecko '

                   'Chrome/52.0.2743.116 Safari/537.36'

 }

 r = requests.get('https://www.zhihu.com/explore', headers=headers)

 print(r.text)

 # 输出:

 <!DOCTYPE html>

 <html lang="zh-CN" dropEffect="none" class="no-js no-auth ">

 <head>

 <meta charset="utf-8" />

 ......

 <script type="text/zscript" znonce="d78db0c15fa84270ac967503884baf11"></script>

 <input type="hidden" name="_xsrf" value="cdb6166e0dc5f38afc3ee95053d7ef55"/>

 </body>

 </html>
- url表示要捕获的页面链接,params表示url的额外参数(字典或字节流格式),**kwargs表示12个控制访问的参数
POST请求
- 这是一种比较常见的URL请求方式
 import requests

 data = {

     'name': 'LiYihua',

     'age': 21

 }

 r = requests.post('http://httpbin.org/post', data=data)

 print(r.text)

 # 输出:

 {

   "args": {},

   "data": "",

   "files": {},

   "form": {

     "age": "",

     "name": "LiYihua"

   },

   "headers": {

     "Accept": "*/*",

     "Accept-Encoding": "gzip, deflate",

     "Content-Length": "",

     "Content-Type": "application/x-www-form-urlencoded",

     "Host": "httpbin.org",

     "User-Agent": "python-requests/2.21.0"

   },

   "json": null,

   "origin": "120.85.108.90, 120.85.108.90",

   "url": "https://httpbin.org/post"

 }

 # POST请求成功,获得返回结果,form部分为提交的数据
- 这是一种比较常见的URL请求方式
响应
text 和 content 获取响应的内容
status code 属性得到状态码 headers 属性得到响应头 cookies属性得到 Cookies
url属性得到 URL history属性得到请求历史
 import requests

 r = requests.get('https://www.cnblogs.com/liyihua/')

 print(type(r.status_code), r.status_code,

       type(r.headers), r.headers,

       type(r.cookies), r.cookies,

       type(r.url), r.url,

       type(r.history), r.history,

       sep='\n\n')

 # 输出:

 <class 'int'>

 200

 <class 'requests.structures.CaseInsensitiveDict'>

 {'Date': 'Thu, 20 Jun 2019 08:18:00 GMT', 'Content-Type': 'text/html; charset=utf-8', 'Transfer-Encoding': 'chunked', 'Connection': 'keep-alive', 'Vary': 'Accept-Encoding', 'Cache-Control': 'private, max-age=10', 'Expires': 'Thu, 20 Jun 2019 08:18:10 GMT', 'Last-Modified': 'Thu, 20 Jun 2019 08:18:00 GMT', 'X-UA-Compatible': 'IE=10', 'X-Frame-Options': 'SAMEORIGIN', 'Content-Encoding': 'gzip'}

 <class 'requests.cookies.RequestsCookieJar'>

 <RequestsCookieJar[]>

 <class 'str'>

 https://www.cnblogs.com/liyihua/

 <class 'list'>

 []
状态码通常用来判断请求是否成功
 import requests

 r = requests.get('http://www.baidu.com')

 exit() if not r.status_code == requests.codes.ok else print('Request Successfully')

 # 输出:

 Request Successfully

 # request.codes.ok 返回成功的状态码200
返回码和相应的查询条件
高级用法
文件上传
 import requests

 files = {

     'file': open('favicon.ico', 'rb')

 }

 r = requests.post('http://httpbin.org/post', files=files)

 print(r.text)

 # 输出:

 {

   "args": {},

   "data": "",

   "files": {

     "file": "data:application/octetstream;base64,AAABAAIAEBAAAAEAIAAoBQAAJgAAACAgAAABACAAKBQAAE4FAAAoAAAAEAAAACAAAAABACAAAAAAAAAFAAA...

   },

   "form": {},

   "headers": {

     "Accept": "*/*",

     "Accept-Encoding": "gzip, deflate",

     "Content-Length": "",

     "Content-Type": "multipart/form-data; boundary=c1b665273fc73e67e57ac97e78f49110",

     "Host": "httpbin.org",

     "User-Agent": "python-requests/2.21.0"

   },

   "json": null,

   "origin": "120.85.108.71, 120.85.108.71",

   "url": "https://httpbin.org/post"

 }
Cookies
 import requests

 headers = {

     'Cookie': 'tgw_l7_route=66cb16bc7......ECLNu3tQ',

     'Host': 'www.zhihu.com',

     'User-Agent': 'Mozilla/5.0 (Macintosh; Intel Mac OS X 10_11_4) AppleWebKit/537.36 (KHTML, like Gecko) Chrome/53.0.2785.116 Safari/537.36'

 }

 r = requests.get('https://www.zhihu.com', headers=headers)

 print(r.text)

 # 输出:

 <!doctype html>

 <html lang="zh" data-hairline="true" data-theme="light"><head><meta charSet="utf-8"/><title data-react-helmet="true">首页 - 知乎</title><meta name="viewport" ......

 # 说明登录成功

 # Cookie维持登录状态,首先登录知乎,复制headers中的Cookie,然后将其设置到Headers里面,然后发送请求
from requests.cookies import RequestsCookieJar
import requests cookies = 'tgw_l7_route=66cb16bc7f45da64562a07.......ALNI_MbNds66nlodoTCxp8EVE6ECLNu3tQ'
jar = requests.cookies.RequestsCookieJar() headers = {
'Host': 'www.zhihu.com',
'User-Agent': 'Mozilla/5.0 (Macintosh; Intel Mac OS X 10_11_4) AppleWebKit/537.36 (KHTML, like Gecko) Chrome/53.0.2785.116 Safari/537.36'
} for cookies in cookies.split(';'):
key, value = cookies.split('=', 1)
jar.set(key, value) r = requests.get('https://www.zhihu.com', cookies=jar, headers=headers)
print(r.text) # 输出同上面一样
# 将复制下来的cookies利用split()方法处理分割
# 创建RequestsCookieJar对象,利用set()方法设置好每个Cookie的key和value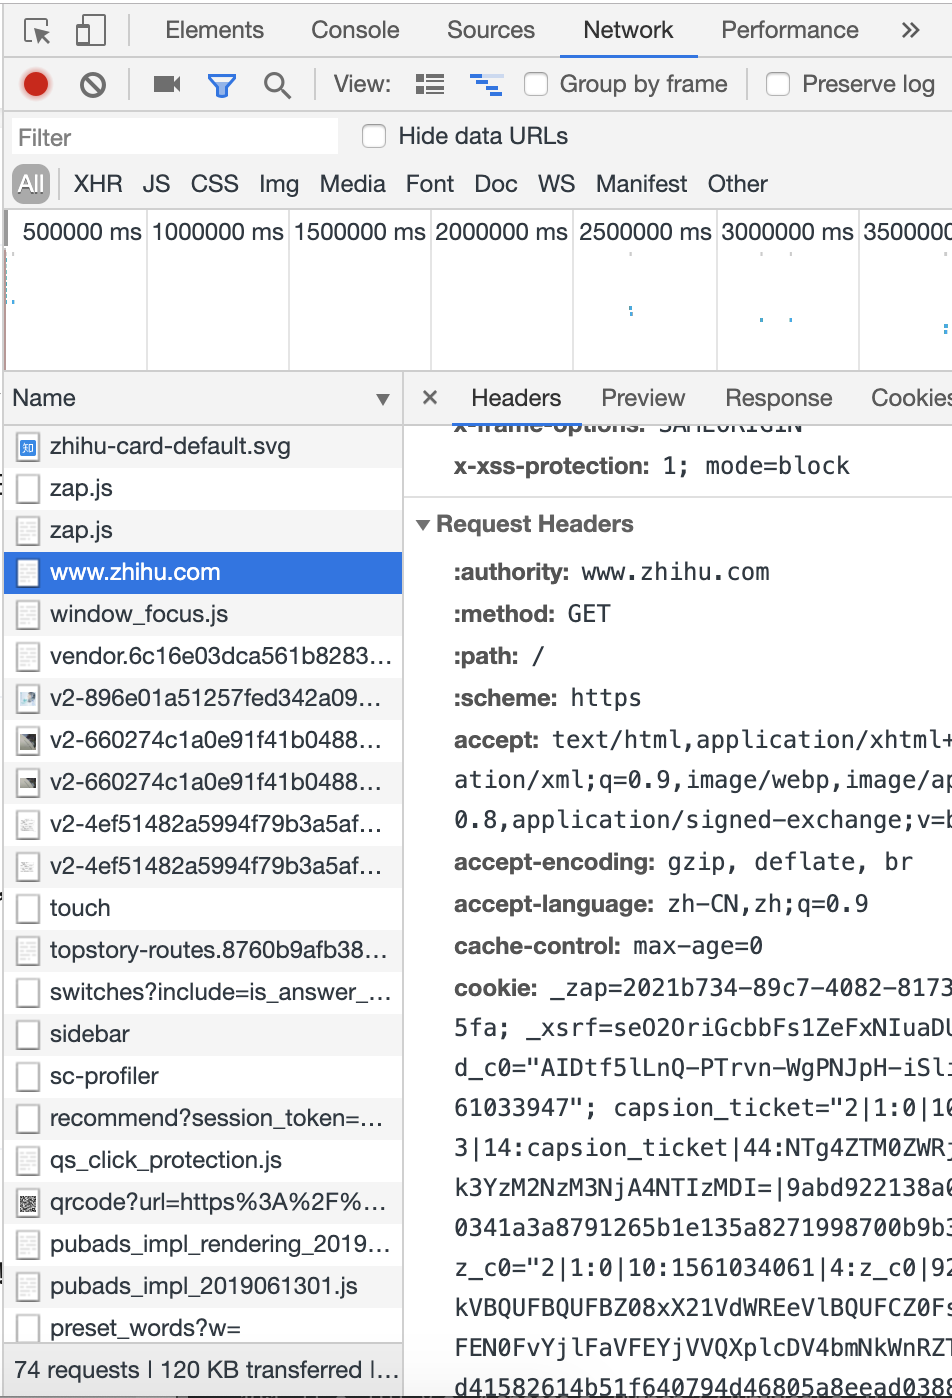
会话维持
Session对象,可以方便的维护一个会话
 import requests

 requests.get('http://httpbin.org/cookies/set/number/123456789')

 r = requests.get('http://httpbin.org/cookies')

 print(r.text)

 # 输出:

 {

   "cookies": {}

 }

 import requests

 s = requests.Session()

 s.get('http://httpbin.org/cookies/set/number/123456789')

 r = s.get('http://httpbin.org/cookies')

 print(r.text)

 # 输出:

 {

   "cookies": {

     "number": ""

   }

 }
SSL证书验证
 import requests

 r = requests.get('https://www.12306.cn')

 print(r.status_code)

 # 没有出错会输出:200

 # 如果请求一个HTTPS站点,但是证书验证错误的页面时,就会错误。

 # 为了避免错误,可以将改例子稍作修改

 import requests

 from requests.packages import urllib3

 urllib3.disable_warnings()

 r = requests.get('https://www.12306.cn', verify=False)

 print(r.status_code)
代理设置
 import requests

 proxies = {

     'http': 'socks5://user:password@10.10.1.10:3128',

     'https': 'socks5://user:password@10.10.1.10:1080'

 }

 requests.get('https://www.taobao.com', proxies=proxies)

 # 使用SOCKS协议代理
超时设置
import requests r = requests.get('https://taobao.com', timeout=(0.1, 1))
print(r.status_code) # 输出:200- 身份验证
 import requests

 from requests.auth import HTTPBasicAuth

 r = requests.get('http://localhost', auth=HTTPBasicAuth('liyihua', 'woshiyihua134'))

 print(r.status_code)

 # 输出:200

 # 也可以使用OAuth1方法

 import requests

 from requests_oauthlib import OAuth1

 url = 'https://api.twitter.com/1.1/account/verify_credentials.json'

 auth = OAuth1('YOUR_APP_KEY', 'YOUR_APP_SECRET'

               'USER_OAUTH_TOKEN', 'USER_OAUTH_TOKEN_SECRET')

 requests.get(url, auth=auth)
Prepared Request(准备请求)
要获取一个带有状态的 Prepared Request, 需要用Session.prepare_request()
 from requests import Request, Session

 url = 'http://httpbin.org/post'

 data = {

     'name': 'LiYihua'

 }           # 参数

 header = {

     'User-Agent': 'Mozilla/5.0 (Macintosh; Intel Mac OS X 10_11_4) AppleWebKit/537 (KHTML, like Gecko Chrome/53.0.2785.116 Safari/537.36'

 }           # 伪装浏览器

 s = Session()                       # 会话维持

 req = Request('POST', url, data=data, headers=header)

 prepped = s.prepare_request(req)            # Session的prepare_request()方法将req转化为一个 Prepared Request对象

 r = s.send(prepped)                 # send() 发送请求

 print(r.text)

 # 输出:

 {

   "args": {},

   "data": "",

   "files": {},

   "form": {

     "name": "LiYihua"

   },

   "headers": {

     "Accept": "*/*",

     "Accept-Encoding": "gzip, deflate",

     "Content-Length": "",

     "Content-Type": "application/x-www-form-urlencoded",

     "Host": "httpbin.org",

     "User-Agent": "Mozilla/5.0 (Macintosh; Intel Mac OS X 10_11_4) AppleWebKit/537 (KHTML, like Gecko Chrome/53.0.2785.116 Safari/537.36"

   },

   "json": null,

   "origin": "120.85.108.184, 120.85.108.184",

   "url": "https://httpbin.org/post"

 }
爬虫基本库的使用---requests库的更多相关文章
- 爬虫1.1-基础知识+requests库
目录 爬虫-基础知识+requests库 1. 状态返回码 2. URL各个字段解释 2. requests库 3. requests库爬虫的基本流程 爬虫-基础知识+requests库 关于html ...
- Python爬虫:HTTP协议、Requests库(爬虫学习第一天)
HTTP协议: HTTP(Hypertext Transfer Protocol):即超文本传输协议.URL是通过HTTP协议存取资源的Internet路径,一个URL对应一个数据资源. HTTP协议 ...
- Python爬虫(二):Requests库
所谓爬虫就是模拟客户端发送网络请求,获取网络响应,并按照一定的规则解析获取的数据并保存的程序.要说 Python 的爬虫必然绕不过 Requests 库. 1 简介 对于 Requests 库,官方文 ...
- 爬虫(三):Requests库的基本使用
一:什么是Requests Requests是用python语言基于urllib编写的,采用的是Apache2 Licensed开源协议的HTTP库如果你看过上篇文章关于urllib库的使用,你会发现 ...
- Python爬虫学习==>第八章:Requests库详解
学习目的: request库比urllib库使用更加简洁,且更方便. 正式步骤 Step1:什么是requests requests是用Python语言编写,基于urllib,采用Apache2 Li ...
- python之爬虫(四)之 Requests库的基本使用
什么是Requests Requests是用python语言基于urllib编写的,采用的是Apache2 Licensed开源协议的HTTP库如果你看过上篇文章关于urllib库的使用,你会发现,其 ...
- Python爬虫:HTTP协议、Requests库
HTTP协议: HTTP(Hypertext Transfer Protocol):即超文本传输协议.URL是通过HTTP协议存取资源的Internet路径,一个URL对应一个数据资源. HTTP协议 ...
- 爬虫入门【2】Requests库简介
发送请求 使用Requests发送网络请求很简单 #首先要导入requests库 import requests #返回一个Response对象 r=requests.get('https://git ...
- python爬虫---从零开始(三)Requests库
1,什么是Requests库 Requests是用python语言编写,基于urllib,采用Apache2 Licensed 开源协议的HTTP库. 它比urllib更加方便,可以节约我们大量的工作 ...
随机推荐
- 使用.NET Core创建Windows服务(二) - 使用Topshelf方式
原文:Creating Windows Services In .NET Core – Part 2 – The "Topshelf" Way 作者:Dotnet Core Tut ...
- 死磕 java线程系列之线程模型
问题 (1)线程类型有哪些? (2)线程模型有哪些? (3)各语言使用的是哪种线程模型? 简介 在Java中,我们平时所说的并发编程.多线程.共享资源等概念都是与线程相关的,这里所说的线程实际上应该叫 ...
- git将当前分支上修改的东西转移到新建分支
比如我在A分支做了一些修改,现在由于某种原因(如A分支已经合并到master)不能把A分支上修改的东西保留下来但是需要把A分支上修改的东西继续在新分支继续修改.那么现在我们可以有两种简单的做法完成这一 ...
- Scala 数组和List
Scala 数组和List: import scala.collection.mutable.ArrayBuffer import scala.collection.mutable.Buffer ob ...
- 软件开发工具(第9章:使用Eclipse进行C/C++开发)
一.安装MinGW MinGW是指用来生成可执行文件的编译环境,它是开发C/C++项目 的工具集.为了能够使用Eclipse CDT编译且运行C和C++程序,必须 要安装一个C/C++编译器. 下载: ...
- LitePal的基本用法
快速配置 1. 引入Jar包或源码 首先我们需要将LitePal的jar包引入到项目当中,可以点击这里查看LitePal的最新版本,选择你需要的下载即可.下载好了jar包之后,把它复制到项目的li ...
- Windows中0环与3环通信(常规方式)
Windows内核分析索引目录:https://www.cnblogs.com/onetrainee/p/11675224.html 一.知识点讲解 1. 设备对象 我们在开发窗口程序的时候,消息被封 ...
- JVM类加载过程与双亲委派模型
类加载过程 类加载过程为JVM将类描述数据从.class文件中加载到内存,并对数据进行解析和初始化,最终形成被JVM直接使用的Java类型.包含: 加载:获取该类的二进制字节流,将字节流代表的静态存储 ...
- kubernetes垃圾回收器GarbageCollector源码分析(一)
kubernetes版本:1.13.2 背景 由于operator创建的redis集群,在kubernetes apiserver重启后,redis集群被异常删除(包括redis exporter s ...
- POJ - 2393Yogurt factory
The cows have purchased a yogurt factory that makes world-famous Yucky Yogurt. Over the next N (1 &l ...