CentOS7 安装FastDFS单机版
1. 下载
https://github.com/happyfish100/fastdfs/releases
https://github.com/happyfish100/libfastcommon/releases
本次使用版本:FastDFS_v5.05.tar.gz、 libfastcommonV1.0.7.tar.gz
本次安装将 tracker 和 storage 安装在同一台centos7上
2. FastDFS环境安装
FastDFS 是 C 语言开发,建议在 linux 上运行,本教程使用 Centos7 作为安装环境。安装 FastDFS 需要先将官网下载的源码进行编译,编译依赖 gcc 环境,如果没有 gcc 环境,需要安装gcc:
yum install gcc-g++
FastDFS 依赖 libevent 库,需要安装:
yum -y install libevent
安装libfastcommon,libfastcommon 是 FastDFS 官方提供的,libfastcommon 包含了 FastDFS 运行所需要的一些基础库
将 libfastcommonV1.0.7.tar.gz 拷贝至/usr/local/下
cd /usr/local

tar -zxvf libfastcommonV1.0.7.tar.gz

cd libfastcommon-1.0.

./make.sh

./make.sh install
如果执行./make.sh报错
[root@localhost libfastcommon-1.0.]# ./make.sh

./make.sh:行99: perl: 未找到命令

./make.sh:行100: perl: 未找到命令

cc  -c -fPIC -o hash.lo hash.c

cc  -c -fPIC -o chain.lo chain.c

cc  -c -fPIC -o shared_func.lo shared_func.c

cc  -c -fPIC -o ini_file_reader.lo ini_file_reader.c

cc  -c -fPIC -o logger.lo logger.c

cc  -c -fPIC -o sockopt.lo sockopt.c

sockopt.c: 在函数‘tcpsendfile_ex’中:

sockopt.c::: 错误:‘remain_bytes’未声明(在此函数内第一次使用)

  *total_send_bytes = file_bytes - remain_bytes;

                                   ^

sockopt.c::: 附注:每个未声明的标识符在其出现的函数内只报告一次

make: *** [sockopt.lo] 错误

[root@localhost libfastcommon-1.0.]# ./make.sh

./make.sh:行99: perl: 未找到命令

./make.sh:行100: perl: 未找到命令

cc  -c -fPIC -o sockopt.lo sockopt.c

sockopt.c: 在函数‘tcpsendfile_ex’中:

sockopt.c::: 错误:‘remain_bytes’未声明(在此函数内第一次使用)

  *total_send_bytes = file_bytes - remain_bytes;

                                   ^

sockopt.c::: 附注:每个未声明的标识符在其出现的函数内只报告一次

make: *** [sockopt.lo] 错误
执行以下命令:
yum -y install zlib zlib-devel pcre pcre-devel gcc gcc-c++ openssl openssl-devel libevent libevent-devel perl unzip net-tools wget
注意:libfastcommon 安装好后会自动将库文件拷贝至/usr/lib64 下,由于 FastDFS 程序引用 usr/lib 目录,所以需要将/usr/lib64 下的库文件拷贝至/usr/lib 下。
cd /usr/lib64/

cp libfastcommon.so /usr/lib
3. tracker安装
将 FastDFS_v5.05.tar.gz 拷贝至/usr/local/下
tar -zxvf FastDFS_v5..tar.gz

cd FastDFS

./make.sh 编译

./make.sh install 安装
执行安装无误后将FastDFS安装目录下的conf文件夹下的文件拷贝到/etc/fdfs/下
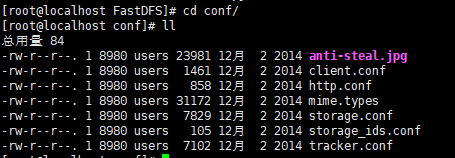
批量复制conf文件夹下的文件到/etc/fdfs/下
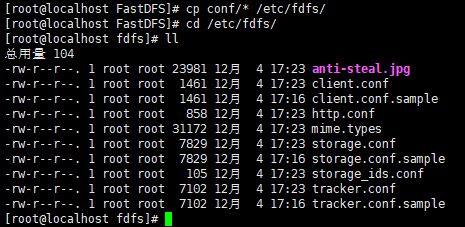
cp conf/* /etc/fdfs/
3.1 tracker文件配置
以上操作完成后,进入 cd /etc/fdfs/ :
拷贝一份 tracker 配置文件重名为 tracker.conf ,如果已存在了还是建议执行一下覆盖它:
cp tracker.conf.sample tracker.conf

cat tracker.conf
[root@localhost fdfs]# cat tracker.conf

# is this config file disabled

# false for enabled

# true for disabled

disabled=false

# bind an address of this host

# empty for bind all addresses of this host

bind_addr=

# the tracker server port

port=

# connect timeout in seconds

# default value is 30s

connect_timeout=

# network timeout in seconds

# default value is 30s

network_timeout=

# the base path to store data and log files

base_path=/home/yuqing/fastdfs

# max concurrent connections this server supported

max_connections=

# accept thread count

# default value is

# since V4.

accept_threads=

# work thread count, should <= max_connections

# default value is

# since V2.

work_threads=

# the method of selecting group to upload files

# : round robin

# : specify group

# : load balance, select the max free space group to upload file

store_lookup=

# which group to upload file

# when store_lookup set to , must set store_group to the group name

store_group=group2

# which storage server to upload file

# : round robin (default)

# : the first server order by ip address

# : the first server order by priority (the minimal)

store_server=

# which path(means disk or mount point) of the storage server to upload file

# : round robin

# : load balance, select the max free space path to upload file

store_path=

# which storage server to download file

# : round robin (default)

# : the source storage server which the current file uploaded to

download_server=

# reserved storage space for system or other applications.

# if the free(available) space of any stoarge server in

# a group <= reserved_storage_space,

# no file can be uploaded to this group.

# bytes unit can be one of follows:

### G or g for gigabyte(GB)

### M or m for megabyte(MB)

### K or k for kilobyte(KB)

### no unit for byte(B)

### XX.XX% as ratio such as reserved_storage_space = %

reserved_storage_space = %

#standard log level as syslog, case insensitive, value list:

### emerg for emergency

### alert

### crit for critical

### error

### warn for warning

### notice

### info

### debug

log_level=info

#unix group name to run this program,

#not set (empty) means run by the group of current user

run_by_group=

#unix username to run this program,

#not set (empty) means run by current user

run_by_user=

# allow_hosts can ocur more than once, host can be hostname or ip address,

# "*" means match all ip addresses, can use range like this: 10.0..[-,] or

# host[-,-].domain.com, for example:

# allow_hosts=10.0..[-,]

# allow_hosts=host[-,-].domain.com

allow_hosts=*

# sync log buff to disk every interval seconds

# default value is  seconds

sync_log_buff_interval =

# check storage server alive interval seconds

check_active_interval =

# thread stack size, should >= 64KB

# default value is 64KB

thread_stack_size = 64KB

# auto adjust when the ip address of the storage server changed

# default value is true

storage_ip_changed_auto_adjust = true

# storage sync file max delay seconds

# default value is  seconds (one day)

# since V2.

storage_sync_file_max_delay =

# the max time of storage sync a file

# default value is  seconds

# since V2.

storage_sync_file_max_time =

# if use a trunk file to store several small files

# default value is false

# since V3.

use_trunk_file = false

# the min slot size, should <= 4KB

# default value is  bytes

# since V3.

slot_min_size =

# the max slot size, should > slot_min_size

# store the upload file to trunk file when it's size <=  this value

# default value is 16MB

# since V3.

slot_max_size = 16MB

# the trunk file size, should >= 4MB

# default value is 64MB

# since V3.

trunk_file_size = 64MB

# if create trunk file advancely

# default value is false

# since V3.

trunk_create_file_advance = false

# the time base to create trunk file

# the time format: HH:MM

# default value is :

# since V3.

trunk_create_file_time_base = :

# the interval of create trunk file, unit: second

# default value is  (one day)

# since V3.

trunk_create_file_interval =

# the threshold to create trunk file

# when the free trunk file size less than the threshold, will create

# the trunk files

# default value is

# since V3.

trunk_create_file_space_threshold = 20G

# if check trunk space occupying when loading trunk free spaces

# the occupied spaces will be ignored

# default value is false

# since V3.

# NOTICE: set this parameter to true will slow the loading of trunk spaces

# when startup. you should set this parameter to true when neccessary.

trunk_init_check_occupying = false

# if ignore storage_trunk.dat, reload from trunk binlog

# default value is false

# since V3.

# set to true once for version upgrade when your version less than V3.

trunk_init_reload_from_binlog = false

# the min interval for compressing the trunk binlog file

# unit: second

# default value is ,  means never compress

# FastDFS compress the trunk binlog when trunk init and trunk destroy

# recommand to set this parameter to  (one day)

# since V5.

trunk_compress_binlog_min_interval =

# if use storage ID instead of IP address

# default value is false

# since V4.

use_storage_id = false

# specify storage ids filename, can use relative or absolute path

# since V4.

storage_ids_filename = storage_ids.conf

# id type of the storage server in the filename, values are:

## ip: the ip address of the storage server

## id: the server id of the storage server

# this paramter is valid only when use_storage_id set to true

# default value is ip

# since V4.

id_type_in_filename = ip

# if store slave file use symbol link

# default value is false

# since V4.

store_slave_file_use_link = false

# if rotate the error log every day

# default value is false

# since V4.

rotate_error_log = false

# rotate error log time base, time format: Hour:Minute

# Hour from  to , Minute from  to

# default value is :

# since V4.

error_log_rotate_time=:

# rotate error log when the log file exceeds this size

#  means never rotates log file by log file size

# default value is

# since V4.

rotate_error_log_size =

# keep days of the log files

#  means do not delete old log files

# default value is

log_file_keep_days =

# if use connection pool

# default value is false

# since V4.

use_connection_pool = false

# connections whose the idle time exceeds this time will be closed

# unit: second

# default value is

# since V4.

connection_pool_max_idle_time =

# HTTP port on this tracker server

http.server_port=

# check storage HTTP server alive interval seconds

# <=  for never check

# default value is

http.check_alive_interval=

# check storage HTTP server alive type, values are:

#   tcp : connect to the storge server with HTTP port only,

#        do not request and get response

#   http: storage check alive url must return http status

# default value is tcp

http.check_alive_type=tcp

# check storage HTTP server alive uri/url

# NOTE: storage embed HTTP server support uri: /status.html

http.check_alive_uri=/status.html
修改 tracker.conf :
vim tracker.conf

# 如果提示找不到vim,安装一下就好了

yum -y install vim
base_path=/home/yuqing/FastDFS  改为:base_path=/home/fastdfs/tracker

http.server_port=8080  端口改为80: http.server_port=80
3.2 启动
/usr/bin/fdfs_trackerd /etc/fdfs/tracker.conf restart
可能会报错: ERROR - file: process_ctrl.c, line: , "/home/fastdfs" can't be accessed, error info: No such file or directory
因为修改配置文件后并没有创建该文件夹,Linux多级创建文件夹使用 mkdir -p ,创建: mkdir -p /home/fastdfs/tracker

这里是直接就启动过了,现在重启一下才会这样,不然可能就是按enter后,就没了
可以用 netstat -unltp|grep fdfs 查看它的端口占用情况:

4. storage 安装
4.1 storage文件配置
进入 /etc/fdfs 目录:
cd /etc/fdfs/

ll  #列出文件列表
[root@localhost ~]# cd /etc/fdfs/

[root@localhost fdfs]# ll

总用量

-rw-r--r--.  root root  12月   : anti-steal.jpg

-rw-r--r--.  root root   12月   : client.conf

-rw-r--r--.  root root   12月   : client.conf.sample

-rw-r--r--.  root root    12月   : http.conf

-rw-r--r--.  root root  12月   : mime.types

-rw-r--r--.  root root   12月   : storage.conf

-rw-r--r--.  root root   12月   : storage.conf.sample

-rw-r--r--.  root root    12月   : storage_ids.conf

-rw-r--r--.  root root   12月   : tracker.conf

-rw-r--r--.  root root   12月   : tracker.conf.sample
拷贝一份新的storage配置文件:
cp storage.conf.sample storage.conf
[root@localhost fdfs]# cp storage.conf.sample storage.conf

cp:是否覆盖"storage.conf"?y

[root@localhost fdfs]#
提示是否覆盖,输入 y 然后按Enter键就好了
修改 storage.conf :
vim storage.conf

group_name=group1

base_path=/home/yuqing/FastDFS    改为:base_path=/home/fastdfs/storage

store_path0=/home/yuqing/FastDFS  改为:store_path0=/home/fastdfs/storage


#如果有多个挂载磁盘则定义多个store_path,如下

#store_path=.....

#store_path=......
#配置 tracker 服务器:IPtracker_server=你的tracker安装的LinuxIP地址:22122 #如果有多个则配置多个
tracker_server=192.168.101.120: #配置 http 端口http.server_port=8888 修改为 http.server_port=
4.2 启动
/usr/bin/fdfs_storaged /etc/fdfs/storage.conf restart

查看端口占用情况, netstat -unltp|grep fdfs :

5.一些相关命令
查看端口使用情况:
netstat -ntlp

netstat -unltp|grep fdfs
启动:
sudo service fdfs_trackerd start

sudo service fdfs_storaged start
重启:
sudo /usr/bin/fdfs_trackerd /etc/fdfs/tracker.conf restart

sudo /usr/bin/fdfs_storaged /etc/fdfs/storage.conf restart
终止:
sudo /usr/bin/fdfs_trackerd /etc/fdfs/tracker.conf stop

sudo /usr/bin/fdfs_storaged /etc/fdfs/storage.conf stop
未完............
CentOS7 安装FastDFS单机版的更多相关文章
- CentOS7 安装FastDFS分布式文件系统
CentOS7 安装FastDFS分布式文件系统 最近要用到fastDFS,所以自己研究了一下,在搭建FastDFS的过程中遇到过很多的问题,为了能帮忙到以后搭建FastDFS的同学,少走弯路,与大家 ...
- docker安装fastdfs单机版
docker search fastdfs INDEX NAME DESCRIPTION STARS OFFICIAL AUTOMATED docker.io docker.io/season/fas ...
- Linux 安装FastDFS<单机版>(使用Mac远程访问)
阅读本文需要先阅读安装FastDFS<准备> 一 编译环境 yum install gcc-c++ yum -y install libevent yum install -y pcre ...
- 阿里云服务器Centos7安装FastDFS(一)
安装步骤一 安装FastDFS需要安装:gcc.libevent.libfastcommon.FastDFS(包括tracker和storage) 安装gcc 判断是否安装了gcc gcc -V 如果 ...
- CentOS7 安装Redis 单机版
1,下载Redis4.0.9 进入Redis中文网的下载页面 http://www.redis.cn/download.html 2,上传压缩包到linux系统 cd /user/local/java ...
- Centos7安装FastDFS
离线安装包准备: 将相关的安装包上传到 /usr/local 目录,安装包下载 并解压到当前目录 1.安装 gcc yum install -y gcc gcc-c++ 2.安装 perl yum i ...
- centos7安装redis单机版
一 下载redis 二 解压安装 cd /opt/ tar -zxf redis-4.0.1.tar.gz cd redis-4.0.1.tar.gz make && make ins ...
- CentOS7 安装Redis Cluster集群
上一篇中已经讲到了如何安装单击版Redis,这一篇我们来说下如何安装Cluster,关于哨兵模式这里我就不写文章安装了,有兴趣的同学可以自己去研究,哨兵模式可以在主从模式下在创建三台机器的哨兵集群监控 ...
- Linux 安装FastDFS<准备>(使用Mac远程访问)
阅读本文需要一定的Linux基础 一 FastDFS简介 fastdfs是用c语言编写的一款开源分布式文件系统, fastdfs为互联网量身定制, 充分考虑了冗余备份, 负载均衡, 线性扩容等机制, ...
随机推荐
- web网页利用JavaScript实现对摄像头的调用
实现效果: 代码如下: <!DOCTYPE html> <html lang="zh"> <head> <meta charset=&qu ...
- requests---参数关联
在做接口测试的过程中,我们经常会遇到参数关联,也就是我们经常所说的上一个接口返回是下一个接口的请求 参数关联 在应用业务接口中,完成一个业务功能时,有时候一个接口可能不满足业务的整个流程逻辑,需要多个 ...
- SpringCloud学习笔记(一、SpringCloud 基础)
目录: 概述 观察者模式 代理模式 概述: spring系列中使用了大量的设计模式,而最常见的便是这观察者.代理模式,所以在讲解SpringCloud之前我们先学习下这两个最常见的设计模式. 观察者模 ...
- 【第4题】 什么是https
https是基于http和SSL/TLS实现的一个协议,他可以保证在网络上传输的数据都是加密的,从而保证数据安全. 接下来我们从http协议开始,提出想法并逐步进行分析,最终实现Https. 1. h ...
- git--配置文件、.gitignore
配置文件 git给我们提供了三种配置文件的方法,一种是项目配置文件,一种是全局配置文件,还有一种是系统配置文件. 在我们第一次使用git commit提交代码的时候,git让我们配置用户名和邮箱 全局 ...
- Paper | Fast image processing with fully-convolutional networks
目录 故事 方法 实验 发表在2017年ICCV. 核心任务:加速图像处理算子(accelerate image processing operators). 核心方法:将算子处理前.后的图像,训练一 ...
- 【笔记】Clean Code(持续更新)
这个暑假出来实习,第一次体会到在一个团队中开发的体验,与网上的网站看到的大为不同,以前看网上说什么程序员写了屎山代码,写了一堆模糊的注释或者说垃圾代码不写注释. 但在我的实习体验中,代码虽然看起来很多 ...
- java8 LinkedHashMap 原理
LinkedHashMap 原理 基于jdk1.8 HashMap原理:http://www.cnblogs.com/zhaojj/p/7805376.html LinkedHashMap 继承Has ...
- 探索ASP.Net Core 3.0系列六:ASP.NET Core 3.0新特性启动信息中的结构化日志
前言:在本文中,我将聊聊在ASP.NET Core 3.0中细小的变化——启动时记录消息的方式进行小的更改. 现在,ASP.NET Core不再将消息直接记录到控制台,而是正确使用了logging 基 ...
- SQL Server 2014:为什么数据库里的表提示“单元格是只读的”,不能修改?该如何处理?
出现以上这种情况,首先看一下这个字段的属性“标识规范”是不是选了“是”,自增属性下是不能修改的,属于只读.