spring入门之环境搭建
本人刚刚接触spring,看了一些教程,但是很多概念都不懂(以前没接触过,看着很抽象),所以我觉得通过动手可能会更好的理解并且掌握。看了一些小实例,但是都没有成功,终于在各种尝试之后搭建成功了,现在我就把我的过程简单地展示一下。
首先准备相应的jar包:spring-framework-3.1.2.RELEASE-with-docs中dist目录下所有jar包(有些多余,但是很方便) 还有spring-framework-3.1.2.RELEASE-dependences中的包(这个spring-framework-3.1.2.RELEASE-dependences.zip不好找,我是一个个百度下面的jar包):com.springsource.org.apache.commons.logging-1.1.1.jar
com.springsource.org.apache.log4j-1.2.15.jar
com.springsource.org.apache.commons.collections-3.2.1.jar(相关的jar包我已经传到我的文件中了,不知道怎么去插入链接)。
下载开发工具:SpringSource Tool Suite 参考http://jinnianshilongnian.iteye.com/blog/1413851这个讲的很详细,后面的有点不清晰
接下来的操作就是打开eclipse,建一个javaproject,然后导入jar包

如上,然后配置junit环境:选择上图中Add Libraries.. 然后会弹出一个对话框,选择junit,点击下方next 然后选择junit4
这样就ok了
下面就是代码了:
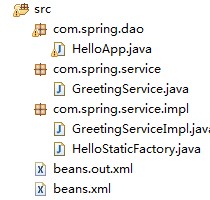
其中HelloStaticFactory.java是我自己后来加的 ,与本篇文章无关。
HelloApp.java:
package com.spring.dao;

import org.junit.Test;

import org.springframework.beans.factory.BeanFactory;

import org.springframework.beans.factory.xml.XmlBeanFactory;

import org.springframework.context.ApplicationContext;

import org.springframework.context.support.ClassPathXmlApplicationContext;

import org.springframework.core.io.FileSystemResource;

import org.springframework.test.context.TestExecutionListeners;

import com.spring.service.GreetingService;

import com.spring.service.impl.GreetingServiceImpl;

public class HelloApp {

 //这里我使用的是Junit测试的方法,也可以使用main方法来测试,使用Junit测试要导入Junit的Jar包

 @Test

 public void hello() throws Exception{

  ApplicationContext factory=new ClassPathXmlApplicationContext("beans.xml");

  GreetingService greetingService=(GreetingService)factory.getBean("greetingService");

  greetingService.sayGreeting();

}
GreetingService.java:
package com.spring.service;

public interface GreetingService {

 void sayGreeting();

}
GreetingServiceImpl.java:
package com.spring.service.impl;

import com.spring.service.GreetingService;

public class GreetingServiceImpl implements GreetingService {

 private String greeting;

 public void setGreeting(String greeting) {

  this.greeting = greeting;

 }

 public GreetingServiceImpl(){}

 public GreetingServiceImpl(String greeting){

  this.greeting=greeting;

 }

 public void sayGreeting(){

  System.out.println(greeting);

 }

}
beans.xml:
<?xml version="1.0" encoding="UTF-8"?>

<beans xmlns="http://www.springframework.org/schema/beans"

       xmlns:xsi="http://www.w3.org/2001/XMLSchema-instance"

       xsi:schemaLocation="http://www.springframework.org/schema/beans

           http://www.springframework.org/schema/beans/spring-beans-3.0.xsd">

  <bean id="greetingService" class="com.spring.service.GreetingService" >

  < property name="greeting" value="hello,world"/>

  </bean>

</beans>

按照以上方法就可以了,好好看看beans.xml更方便理解整个框架。谢谢大家!
spring入门之环境搭建的更多相关文章
- 【个人笔记】003-PHP基础-01-PHP快速入门-03-PHP环境搭建
003-PHP基础-01-PHP快速入门 03-PHP环境搭建 1.客户端(浏览器) IE FireFox CHROME Opera Safari 2.服务器 是运行网站的基本 是放置程序代码的地方 ...
- Android入门之环境搭建
欢迎访问我的新博客:http://www.milkcu.com/blog/ 原文地址:http://www.milkcu.com/blog/archives/1376935560.html 原创:An ...
- SpringData系列一 Spring Data的环境搭建
本节作为主要讲解Spring Data的环境搭建 JPA Spring Data :致力于减少数据访问层(DAO)的开发量.开发者唯一要做的就是声明持久层的接口,其他都交给Spring Data JP ...
- scala 入门Eclipse环境搭建
scala 入门Eclipse环境搭建及第一个入门经典程序HelloWorld IDE选择并下载: scala for eclipse 下载: http://scala-ide.org/downloa ...
- 新手嘛,先学习下 Vue2.0 新手入门 — 从环境搭建到发布
Vue2.0 新手入门 — 从环境搭建到发布 转自:http://www.runoob.com/w3cnote/vue2-start-coding.html 具体文章详细就不搬了,步骤可过去看,我这就 ...
- scala 入门Eclipse环境搭建及第一个入门经典程序HelloWorld
scala 入门Eclipse环境搭建及第一个入门经典程序HelloWorld 学习了: http://blog.csdn.net/wangmuming/article/details/3407911 ...
- spring boot 开发环境搭建(Eclipse)
Spring Boot 集成教程 Spring Boot 介绍 Spring Boot 开发环境搭建(Eclipse) Spring Boot Hello World (restful接口)例子 sp ...
- 总结Vue 第四天:vue-cli(Vue2.0 新手入门 — 从环境搭建到发布)
总结Vue 第四天:vue-cli(Vue2.0 新手入门 - 从环境搭建到发布) 一.Vue CLI----(Vue2.0 新手入门 - 从环境搭建到发布): ■ CLI是Command-Lin ...
- Spring1:Spring简介、环境搭建、源码下载及导入MyEclipse
框架学习前言 这个模块是面向Spring的,Spring的学习我是这么想的: 1.简单介绍Spring,主要是从网上借鉴一些重点 2.尽量说明清楚Spring的使用方法以及细节点 3.尽量以自己的理解 ...
随机推荐
- JMS 之 Active MQ 消息存储
一.消息的存储方式 ActiveMQ支持JMS规范中的持久化消息与非持久化消息 持久化消息通常用于不管是否消费者在线,它们都会保证消息会被消费者消费.当消息被确认消费后,会从存储中删除 非持久化消息通 ...
- Nmap脚本文件分析(AMQP协议为例)
Nmap脚本文件分析(AMQP协议为例) 一.介绍 上两篇文章 Nmap脚本引擎原理 编写自己的Nmap(NSE)脚本,分析了Nmap脚本引擎的执行过程,以及脚本文件的编写,这篇文章将以解析AMQ ...
- node.js零基础详细教程(7):node.js操作mongodb,及操作方法的封装
第七章 建议学习时间4小时 课程共10章 学习方式:详细阅读,并手动实现相关代码 学习目标:此教程将教会大家 安装Node.搭建服务器.express.mysql.mongodb.编写后台业务逻辑. ...
- cookie 与 session
cookie简介 Cookie是存储在客户端浏览器中的数据,我们通过Cookie来跟踪与存储用户数据.一般情况下,Cookie通过HTTP headers从服务端返回到客户端.多数web程序都支持Co ...
- tcp/ip详解 卷1 -- 协议概述
第一章 概述 分层 TCP/IP 通常被认为是一个四层协议系统. 每一层负责不同的功能. 链路层, 也成为数据链路层或者网络接口层. 通常包括 操作系统中的设备驱动程序和计算机中对应的网络接口卡. 主 ...
- centos 6.6 ios镜像文件 下载 官网和阿里云两种方式教你下载
1百度一下:centos 打开打开官网.选择这一项 CET CENTOS 2选择 DVD ISO,双击下载 直接选择左键点击下载 这里需要迅雷 方法 二 打开 https://mirrors.aliy ...
- HTTP协议 状态码 telnet 笔记分享
最近计算机网络课讲到这个,实习的笔试也考到了,做笔记总结一下.
- Gist - ES6 Iterator
Introduction Iterator is one of the most common design modes in daily development. Let's explore the ...
- linux 下载文件到本地磁盘的命令是什么
linux下可以直接运行命令下载或上传文件1.检查并安装相应的包:yum install lrzsz2.使用 sz 文件名 现在相应的文件到本地磁盘.3.上传使用rz 选择相应文件即可.
- Solr6.6 Tomcat8部署
原文:https://github.com/x113773/testall/issues/6 准备工作:[solr-6.6.0](http://www.apache.org/dyn/closer.lu ...