Python开发简单爬虫

简单爬虫框架:
爬虫调度器 -> URL管理器 -> 网页下载器(urllib2) -> 网页解析器(BeautifulSoup) -> 价值数据
Demo1:
# coding:utf8

import urllib2,cookielib

url = "https://www.baidu.com"

print '第一种方法'

response1 = urllib2.urlopen(url)

print response1.getcode() #返回状态码

print len(response1.read()) #返回的网页内容的长度

print "第二种方法"

request = urllib2.Request(url)

request.add_header("user-agent","Mozilla/5.0")

response2 = urllib2.urlopen(request)

print response2.getcode()

print len(response2.read())

print '第三种方法'

cj = cookielib.CookieJar()

opener = urllib2.build_opener(urllib2.HTTPCookieProcessor(cj))

urllib2.install_opener(opener)

response3 = urllib2.urlopen(url)

print response3.getcode() #返回状态码

print cj    #返回cookie

print response3.read()  #返回网页内容
Python有哪几种网页解析器:
正则表达式、html.parser、Beautiful Soup、lxml
BeautifulSoup:
- Python第三方库,用于从HTML或XML中提取数据
- 官网:http://www.crummy.com/software/BeautifulSoup/bs4/doc/
安装并测试beautifulsoup4:
- 安装:pip install beautifulsoup4
- 测试:import bs4
如果PyCharm无法识别beautifulsoup4,则在设置里找到Python Intercepter这一项,改为python2.7版本即可。
Demo2:
# coding:utf-8

import re

from bs4 import BeautifulSoup

# 示例代码片段(来自beautifulsoup官网)

html_doc = """

<html><head><title>The Dormouse's story</title></head>

<body>

<p class="title"><b>The Dormouse's story</b></p>

<p class="story">Once upon a time there were three little sisters; and their names were

<a href="http://example.com/elsie" class="sister" id="link1">Elsie</a>,

<a href="http://example.com/lacie" class="sister" id="link2">Lacie</a> and

<a href="http://example.com/tillie" class="sister" id="link3">Tillie</a>;

and they lived at the bottom of a well.</p>

<p class="story">...</p>

"""

soup = BeautifulSoup(html_doc,'html.parser',from_encoding='utf-8')

print '获取所有的链接'

links = soup.find_all('a')

for link in links:

    print link.name,link['href'],link.get_text()

print '获取lacie的链接'

link_node = soup.find('a',href='http://example.com/lacie')

print link_node.name,link_node['href'],link_node.get_text()

print '正则匹配'

link_node = soup.find('a', href= re.compile(r"ill"))

print link_node.name,link_node['href'],link_node.get_text()

print '获取p段落文字'

p_node = soup.find('p', class_="title")

print p_node.name,p_node.get_text()
实战编写爬取百度百科页面:
目录结构:
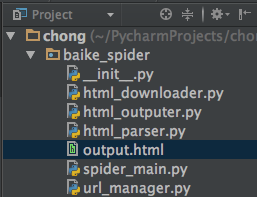
注:mac osx下用alt+enter添加相应方法
(爬虫调度器)spider_main.py:
# coding=utf-8

from baike_spider import url_manager,html_downloader,html_parser,html_outputer

class SpiderMain(object):

    def __init__(self):

        self.urls = url_manager.UrlManager()    #url管理器

        self.downloader = html_downloader.HtmlDownloader()  #下载器

        self.parser = html_parser.HtmlParser()  #解析器

        self.outputer = html_outputer.HtmlOutputer()    #输出器

    def craw(self, root_url):

        count = 1 #判断当前爬取的是第几个url

        self.urls.add_new_url(root_url)

        while self.urls.has_new_url():      #循环,爬取所有相关页面,判断异常情况

            try:

                new_url = self.urls.get_new_url()   #取得url

                print 'craw %d : %s' % (count, new_url) #打印当前是第几个url

                html_cont = self.downloader.download(new_url)   #下载页面数据

                new_urls, new_data = self.parser.parse(new_url,html_cont)    #进行页面解析得到新的url以及数据

                self.urls.add_new_urls(new_urls) #添加新的url

                self.outputer.collect_data(new_data) #收集数据

                if count == 10:  # 此处10可以改为100甚至更多,代表循环次数

                    break

                count = count + 1

            except:

                print 'craw failed'

        self.outputer.output_html()   #利用outputer输出收集好的数据

if __name__=="__main__":

    root_url = "http://baike.baidu.com/view/21087.htm"

    obj_spider = SpiderMain()   # 创建

    obj_spider.craw(root_url)   # craw方法启动爬虫
(url管理器)url_manager.py:
# coding=utf-8

class UrlManager(object):

    def __init__(self):

         self.new_urls = set()  # 待爬取url

         self.old_urls = set()  # 已爬取url

    def add_new_url(self, url):    # 向管理器中添加一个新的url

        if url is None:

            return

        if url not in self.new_urls and url not in self.old_urls:

            self.new_urls.add(url)

    def add_new_urls(self, urls): # 向管理器中添加新的更多的url

        if urls is None or len(urls) == 0:

            return

        for url in urls:

            self.add_new_url(url)

    def has_new_url(self):  # 判断管理器是否有新的待爬取的url

        return len(self.new_urls) != 0

    def get_new_url(self):  # 从管理器中获取一个新的待爬取的url

        new_url = self.new_urls.pop()

        self.old_urls.add(new_url)

        return new_url
(下载器)html_downloader.py:
import urllib2

class HtmlDownloader(object):

    def download(self, url):

        if url is None:

            return None

        response = urllib2.urlopen(url)

        if response.getcode() != 200:

            return None

        return response.read()
(解析器)html_parser.py:
import re

import urlparse

from bs4 import BeautifulSoup

class HtmlParser(object):

    def parse(self,page_url,html_cont):

        if page_url is None or html_cont is None:

            return

        soup = BeautifulSoup(html_cont,'html.parser', from_encoding='utf-8')

        new_urls = self._get_new_urls(page_url, soup)

        new_data = self._get_new_data(page_url, soup)

        return new_urls, new_data

    def _get_new_urls(self, page_url, soup):

        new_urls = set()

        # /view/123.htm

        links = soup.find_all('a', href=re.compile(r"/view/\d+\.htm"))

        for link in links:

            new_url = link['href']

            new_full_url = urlparse.urljoin(page_url, new_url)

            new_urls.add(new_full_url)

        return new_urls

    def _get_new_data(self, page_url, soup):

        res_data = {}

        # url

        res_data['url'] = page_url

        # <dd class="lemmaWgt-lemmaTitle-title"> <h1>Python</h1>

        title_node = soup.find('dd',class_="lemmaWgt-lemmaTitle-title").find("h1")

        res_data['title'] = title_node.get_text()

        # <div class="lemma-summary" label-module="lemmaSummary">

        summary_node = soup.find('div',class_="lemma-summary")

        res_data['summary'] = summary_node.get_text()

        return res_data
(数据输出)html_outputer.py:
# coding=utf-8

class HtmlOutputer(object):

    #初始化

    def __init__(self):

        self.datas = []

    def collect_data(self, data):   #收集数据

        if data is None:

            return

        self.datas.append(data)

    def output_html(self):  #输出数据

        fout = open('output.html', 'w')

        fout.write("<html>")

        fout.write("<head>")

        fout.write("<meta charset= 'UTF-8'>")

        fout.write("</head>")

        fout.write("<body>")

        fout.write("<table>")

        # ASCII

        for data in self.datas:

            fout.write("<tr>")

            fout.write("<td>%s</td>" % data['url'])

            fout.write("<td>%s</td>" % data['title'].encode('utf-8'))

            fout.write("<td>%s</td>" % data['summary'].encode('utf-8'))

            fout.write("</tr>")

        fout.write("</html>")

        fout.write("</body>")

        fout.write("</table>")

        fout.close()
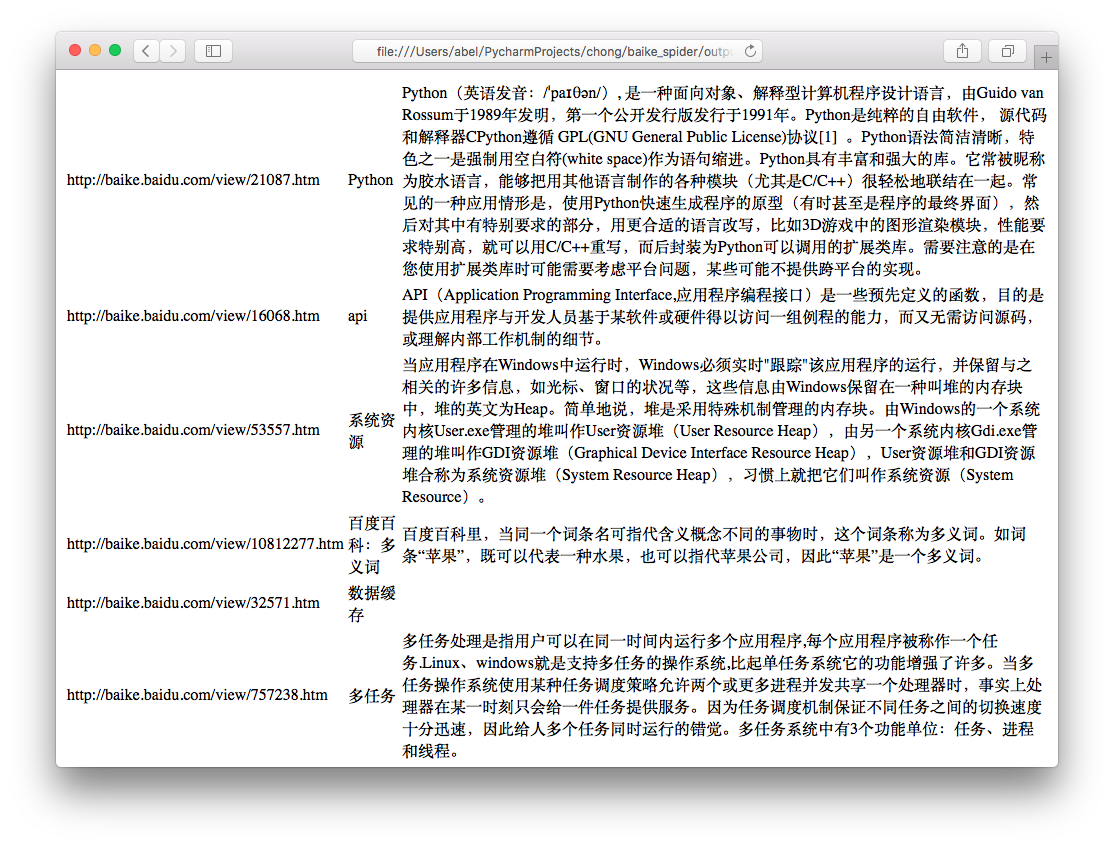
运行程序spider_main.py可进行爬取页面,最终文件输出为output.html,里面包含词条和词条解释,爬取完毕。
output.html:
这只是最简单的爬虫,如果想深入学习,还有登录、验证码、Ajax、服务器防爬虫、多线程、分布式等等。
GitHub:https://github.com/AbelSu131/baike_spider
Python开发简单爬虫的更多相关文章
- Python开发简单爬虫 - 慕课网
课程链接:Python开发简单爬虫 环境搭建: Eclipse+PyDev配置搭建Python开发环境 Python入门基础教程 用Eclipse编写Python程序 课程目录 第1章 课程介绍 ...
- Python开发简单爬虫(一)
一 .简单爬虫架构: 爬虫调度端:启动爬虫,停止爬虫,监视爬虫运行情况 URL管理器:对将要爬取的和已经爬取过的URL进行管理:可取出带爬取的URL,将其传送给“网页下载器” 网页下载器:将URL指定 ...
- Python开发简单爬虫(二)---爬取百度百科页面数据
一.开发爬虫的步骤 1.确定目标抓取策略: 打开目标页面,通过右键审查元素确定网页的url格式.数据格式.和网页编码形式. ①先看url的格式, F12观察一下链接的形式;② 再看目标文本信息的标签格 ...
- Python 开发轻量级爬虫05
Python 开发轻量级爬虫 (imooc总结05--网页下载器) 介绍网页下载器 网页下载器是将互联网上url对应的网页下载到本地的工具.因为将网页下载到本地才能进行后续的分析处理,可以说网页下载器 ...
- Python 开发轻量级爬虫03
Python 开发轻量级爬虫 (imooc总结03--简单的爬虫架构) 现在来看一下一个简单的爬虫架构. 要实现一个简单的爬虫,有哪些方面需要考虑呢? 首先需要一个爬虫调度端,来启动爬虫.停止爬虫.监 ...
- Python 开发轻量级爬虫01
Python 开发轻量级爬虫 (imooc总结01--课程目标) 课程目标:掌握开发轻量级爬虫 为什么说是轻量级的呢?因为一个复杂的爬虫需要考虑的问题场景非常多,比如有些网页需要用户登录了以后才能够访 ...
- Python 开发轻量级爬虫08
Python 开发轻量级爬虫 (imooc总结08--爬虫实例--分析目标) 怎么开发一个爬虫?开发一个爬虫包含哪些步骤呢? 1.确定要抓取得目标,即抓取哪些网站的哪些网页的哪部分数据. 本实例确定抓 ...
- Python 开发轻量级爬虫07
Python 开发轻量级爬虫 (imooc总结07--网页解析器BeautifulSoup) BeautifulSoup下载和安装 使用pip install 安装:在命令行cmd之后输入,pip i ...
- Python 开发轻量级爬虫06
Python 开发轻量级爬虫 (imooc总结06--网页解析器) 介绍网页解析器 将互联网的网页获取到本地以后,我们需要对它们进行解析才能够提取出我们需要的内容. 也就是说网页解析器是从网页中提取有 ...
随机推荐
- Linux 释放Linux 系统预留的硬盘空间
释放 Linux 系统预留的硬盘空间 by:授客 QQ:1033553122 大多数文件系统都会保留一部分空间作为紧急情况时用(比如硬盘空间满了),这样能保证有些关键应用(比如数据库)在硬盘满的时 ...
- Nodejs搭建wss服务器
首先使用OpenSSL创建自签名证书: #生成私钥key文件 openssl genrsa > /path/to/private.pem // #通过私钥文件生成CSR证书签名 openssl ...
- 【three.js练习程序】旋转、缩放场景
<!DOCTYPE html> <html> <head> <meta charset="utf-8"> <title> ...
- LeetCode题解之Climbing Stairs
1.题目描述 2.问题分析 使用动态规划. 3.代码 int climbStairs(int n) { ){ return n; } ]; dp[] = ; dp[] = ; dp[] = ; ; i ...
- SQLServer的TDE加密
TDE的主要作用是防止数据库备份或数据文件被偷了以后,偷数据库备份或文件的人在没有数据加密密钥的情况下是无法恢复或附加数据库的. 首先创建SQL Server中master系统数据库的MASTER K ...
- MySql服务的启动和停止
1.启动:net start mysql; 2.停止:net stop mysql.
- git命令:全局设置用户名邮箱配置
1.查看git配置信息 git config --list 2.查看git用户名 git config user.name 3.查看邮箱配置 git config user.email 4.全局配置用 ...
- Linux运维之——每日小技巧,谈进程与线程的区别
线程是进程中执行运算的最小单位,是进程中的一个实体,是被系统独立调度和分派的基本单位,线程自己不拥有系统资源,只拥有一点在运行中必不可少的资源,但它可与同属一个进程的其它线程共享进程所拥有的全部资源. ...
- 阿里八八Alpha阶段Scrum(11/12)
今日进度 叶文滔: 合并日程界面debug成功,但是目前出现了新的问题,日程界面一些控件无法适配屏幕,正在排查问题 李嘉群: 尝试用okhttp的方式发送请求 王国超: 今天开始进行recycerli ...
- linux sqlplus查询数据中文乱码解决方法记录
locale-gen -lang en.US.UTF-8 重启.