
如何使用GitHub创建Maven私有仓库
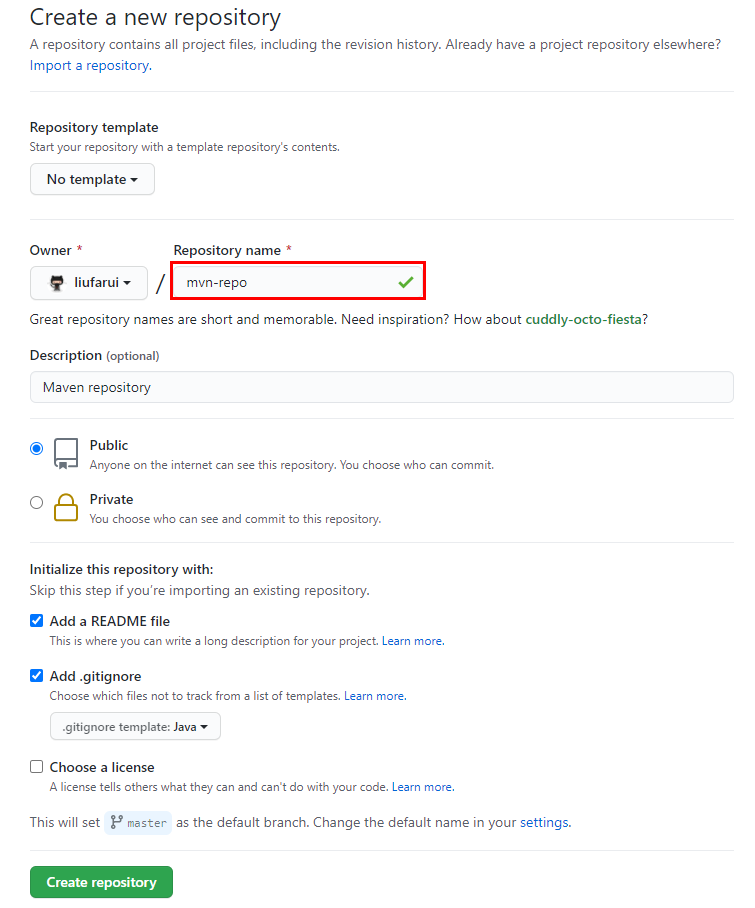
【Github上创建仓库】
首先,在GitHub上创建自己的仓库(mvn-repo):
【配置本地setting文件】
找到本地的maven settings文件,配置server:

有两种选择,可以选择配置username和password,或者选择配置Personal access tokens<OAUTH2TOKEN>(也是填充到password字段)。
优先使用Personal access tokens,因为有些公司内部可能会对用户名和密码做限制(我也不知道为什么)。
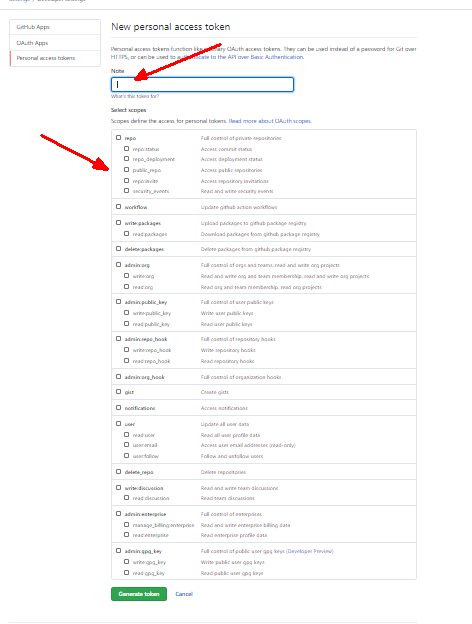
前者即是GitHub的用户名以及密码,后者需要在GitHub上进行申请,步骤如下:
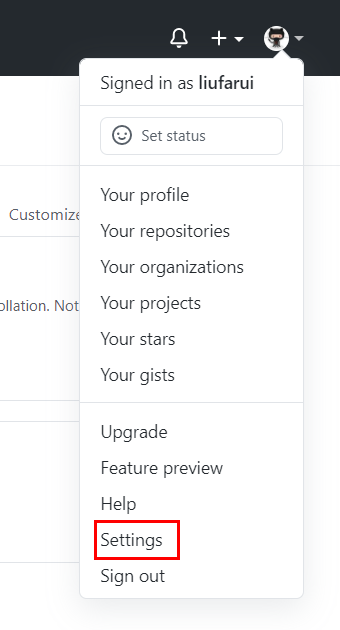
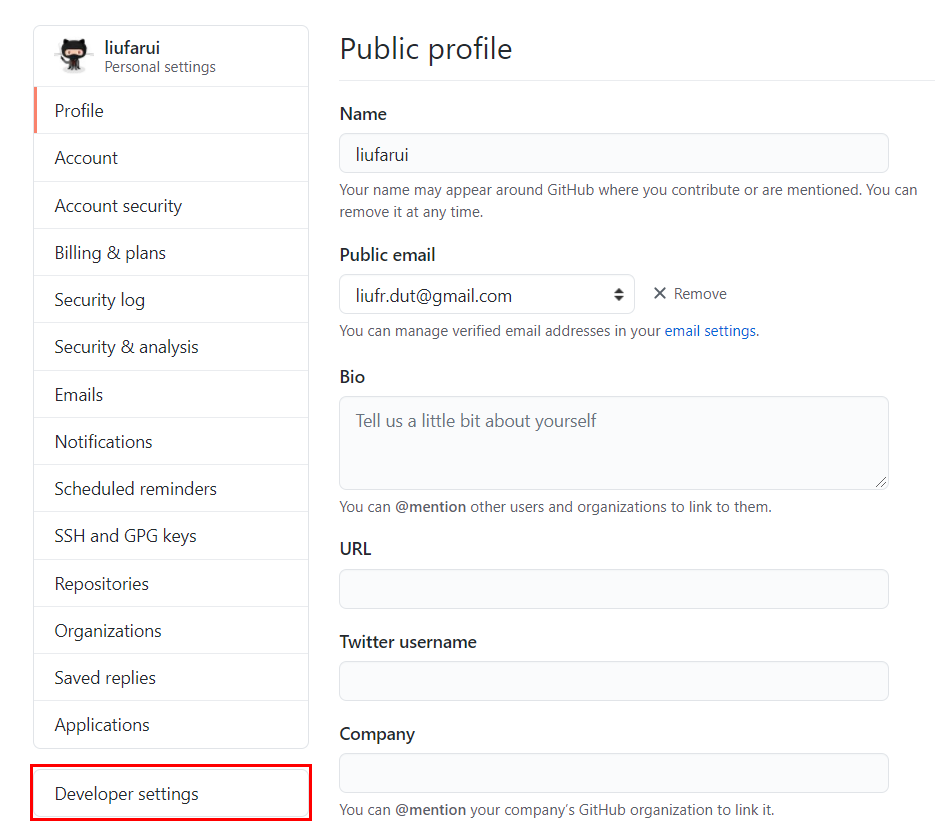
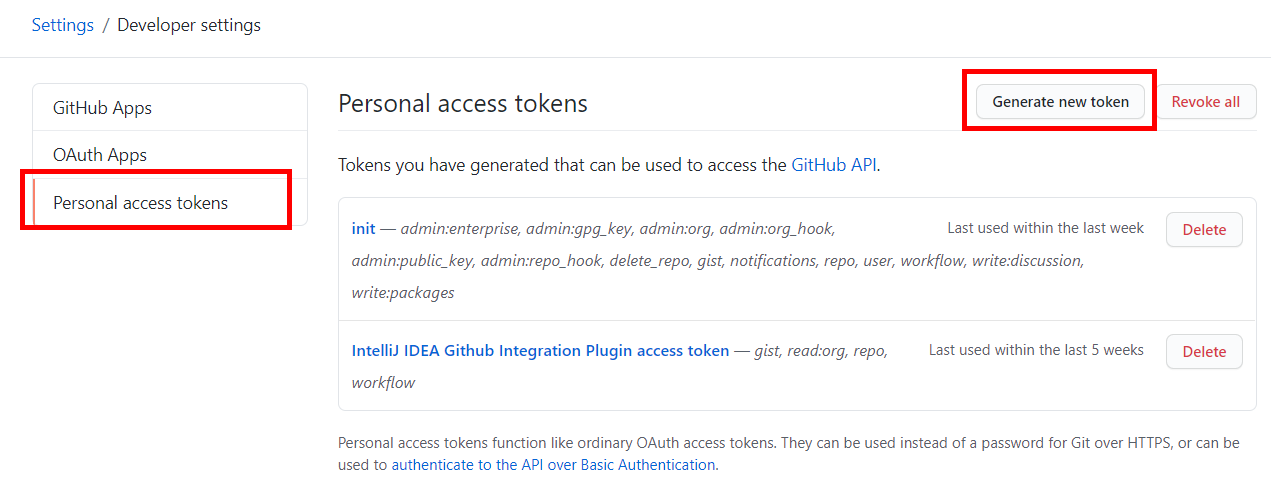
选择对应的权限,并标注Note:
然后点击查看:
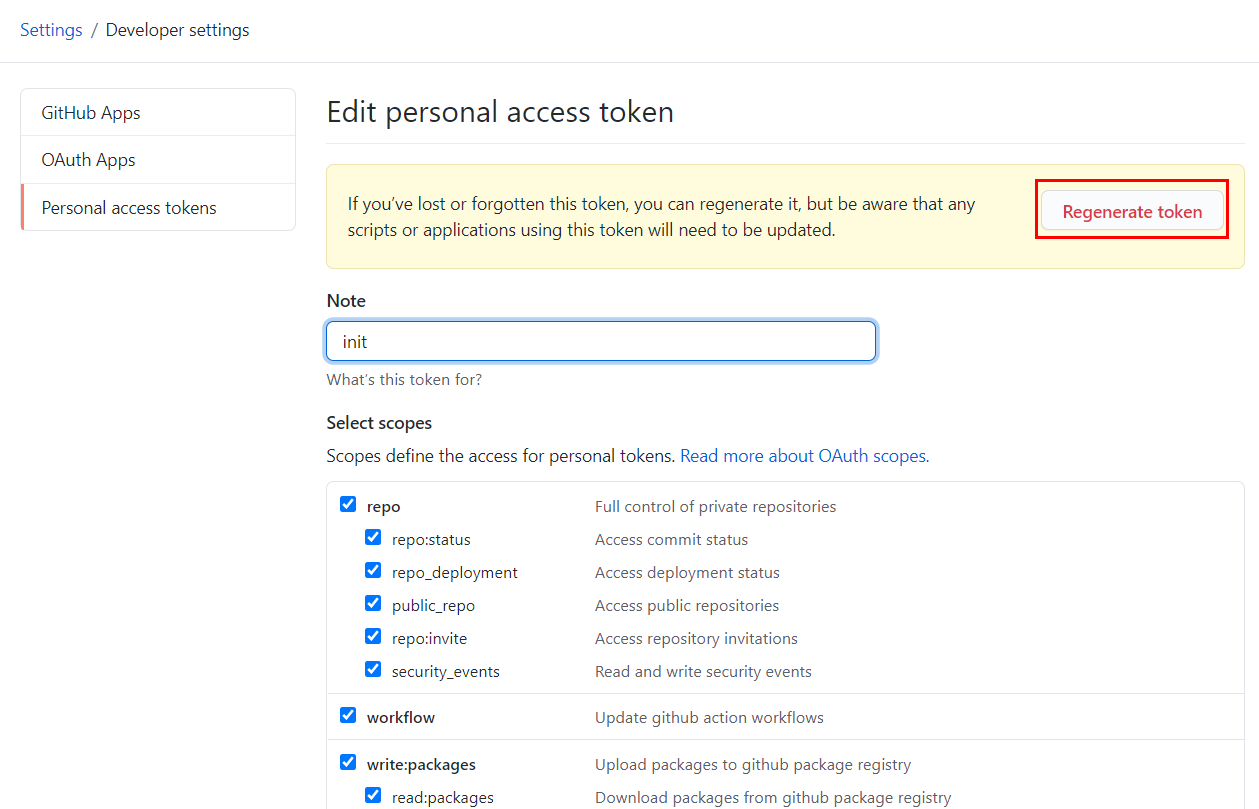
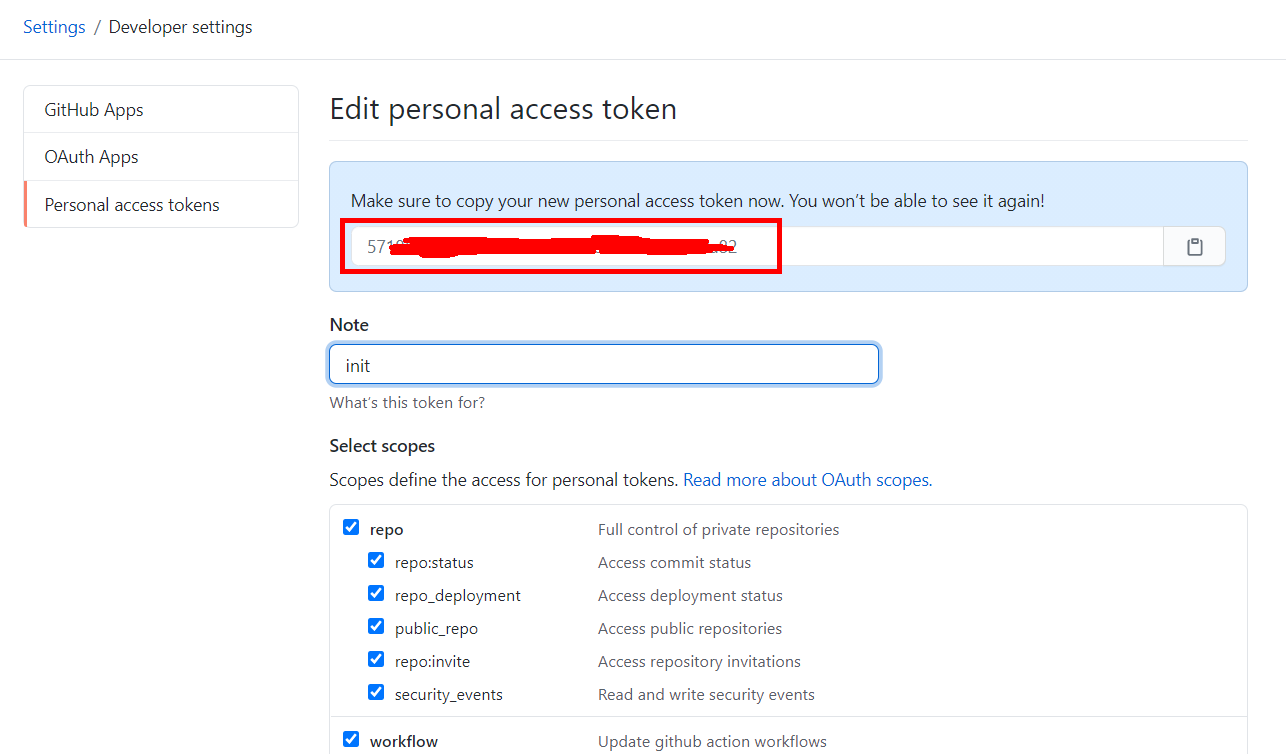
上图红框即是你的personal access token。
注:此token会不断发生变化,每一次查看都会更新,更新后之前的不可用,所以要妥善保存。
【增加本地临时存储库】
在pom文件中增加
<build>

    <plugins>

        <plugin>

            <artifactId>maven-deploy-plugin</artifactId>

            <version>2.8.2</version>

            <configuration>

                <!-- altDeploymentRepository :指定替代方案应该部署项目工件的存储库(除了指定的工件)。 -->

                <altDeploymentRepository>internal.repo::default::file://${project.build.directory}/mvn-repo

                </altDeploymentRepository>

            </configuration>

        </plugin>

    </plugins>

</build>
然后执行mvn clean deploy。


如下图,版本已经正确地发布到本地指定的存储库中了。

【配置远程的github服务】
在pom文件中增加以下几行:
<properties>

    <github.global.server>github</github.global.server>

</properties>
【发布到远程的github指定的仓库】
在pom文件中配置以下几行:
<!--源码-->

<plugin>

    <groupId>org.apache.maven.plugins</groupId>

    <artifactId>maven-source-plugin</artifactId>

    <version>3.2.1</version>

    <executions>

        <execution>

            <id>attach-sources</id>

            <goals>

                <goal>jar-no-fork</goal>

            </goals>

        </execution>

    </executions>

</plugin>

<!--github上传插件,用于修改后的发布,执行 mvn clean deploy 自动打包上传到github-->

<plugin>

    <groupId>com.github.github</groupId>

    <artifactId>site-maven-plugin</artifactId>

    <version>0.12</version>

    <configuration>

        <message>Creating site for ${project.artifactId} ${project.version}</message>

        <noJekyll>true</noJekyll>

        <!--本地jar地址, 对应上面的altDeploymentRepository-->

        <outputDirectory>${project.build.directory}/mvn-repo</outputDirectory>

        <!--分支-->

        <branch>refs/heads/master</branch>

        <merge>true</merge>

        <includes>

            <include>**/*</include>

        </includes>

        <!--对应github上创建的仓库名称 name-->

        <repositoryName>mvn-repo</repositoryName>

        <!--github登录账号 对应的密码存在maven的setting.xml文件中-->

        <!--由github组织拥有,则该值将是组织名称,如果由用户拥有,则该值将是用户名-->

        <repositoryOwner>liufarui</repositoryOwner>

    </configuration>

    <executions>

        <execution>

            <goals>

                <goal>site</goal>

            </goals>

            <phase>deploy</phase>

        </execution>

    </executions>

</plugin>
再次执行mvn clean deploy命令即可发布到GitHub的maven仓库中。

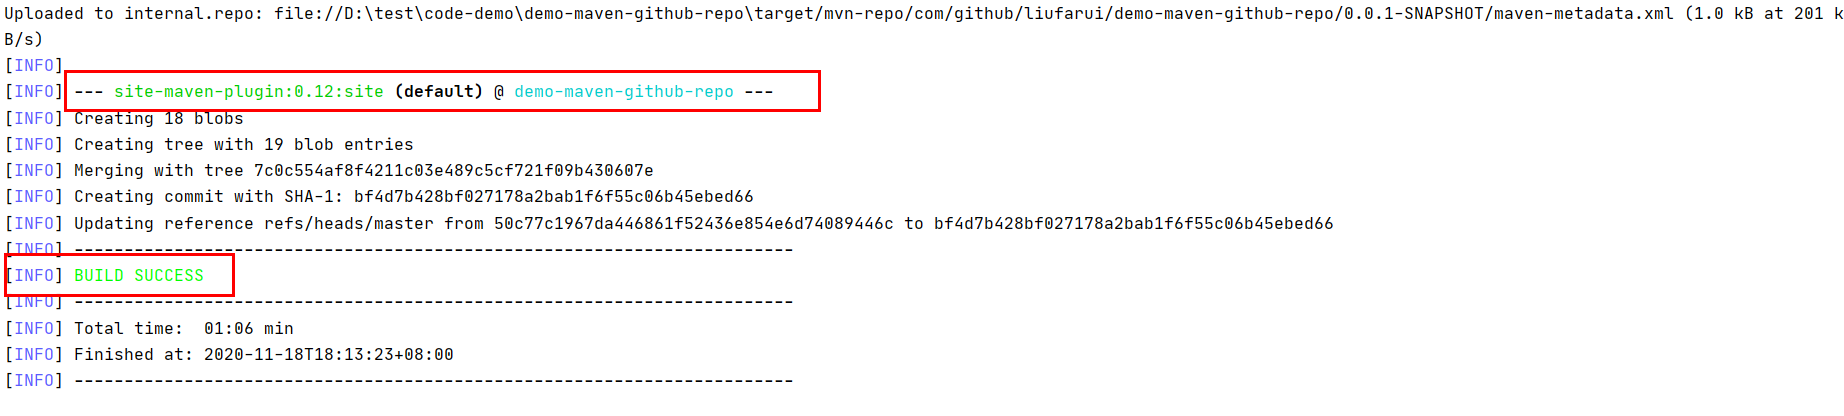
如上图即为成功;
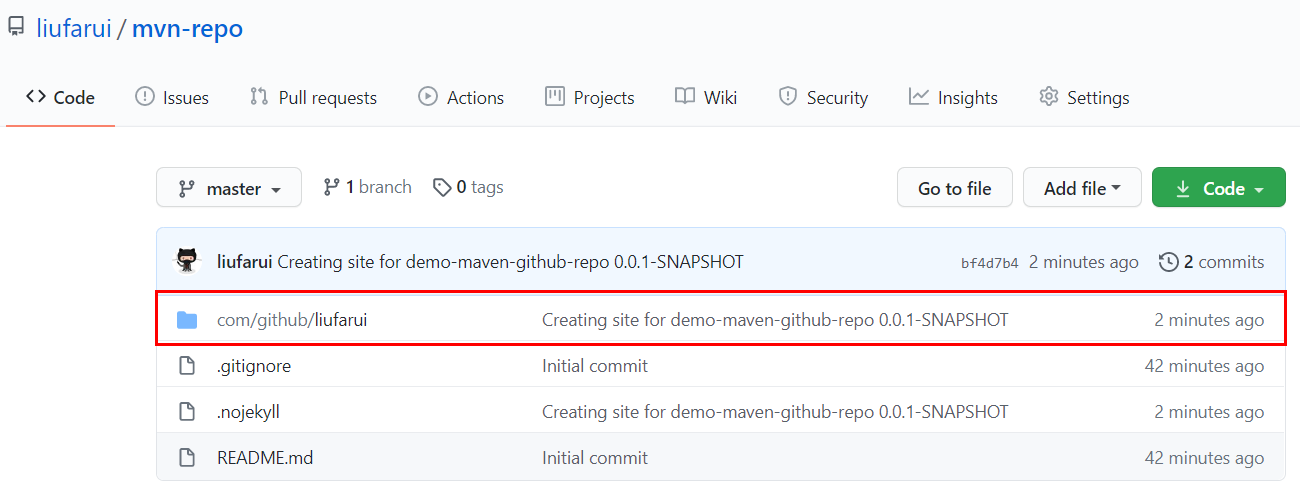
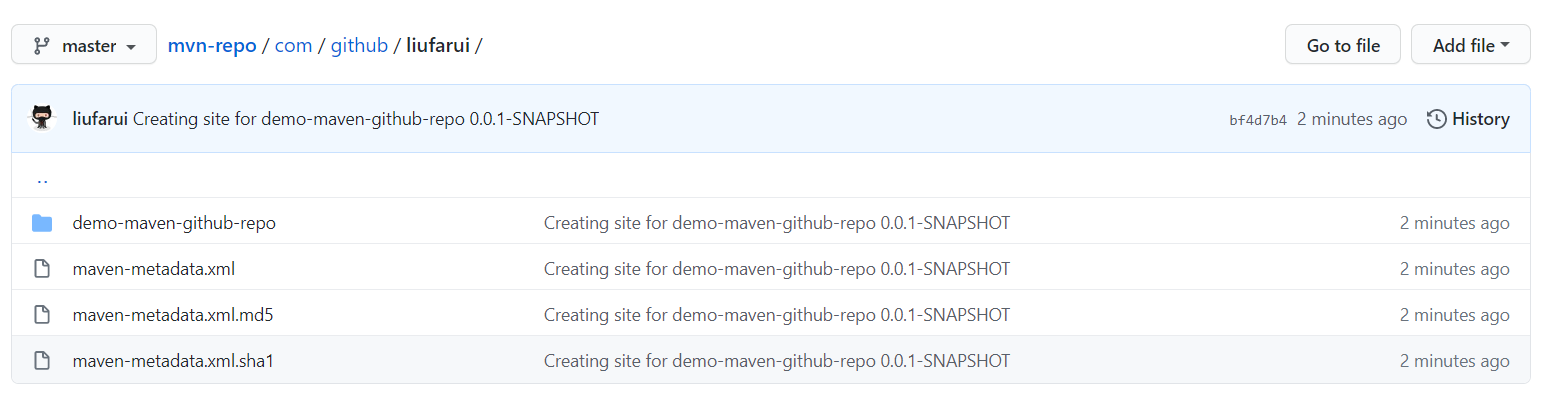
我们可以查看我们的mvn-repo项目,发现内容已经发生了变化:
【使用依赖包】
在新项目的pom文件中增加以下行:
<repositories>

    <repository>

        <id>mvn-repo</id>

        <!-- https://raw.github.com/用户名/仓库名/分支名 -->

        <url>https://raw.github.com/liufarui/mvn-repo/master</url>

        <snapshots>

            <enabled>true</enabled>

            <updatePolicy>always</updatePolicy>

        </snapshots>

    </repository>

</repositories>
在新项目的pom文件中增加依赖:
<dependencies>

    <dependency>

        <groupId>com.github.liufarui</groupId>

        <artifactId>demo-maven-github-repo</artifactId>

        <version>0.0.1-SNAPSHOT</version>

    </dependency>

</dependencies>
由于我们之前开发的这个是个maven插件工程,所以增加以下行进行使用:
<build>

    <plugins>

        <plugin>

            <groupId>com.github.liufarui</groupId>

            <artifactId>demo-maven-github-repo</artifactId>

            <version>0.0.1-SNAPSHOT</version>

        </plugin>

    </plugins>

</build>
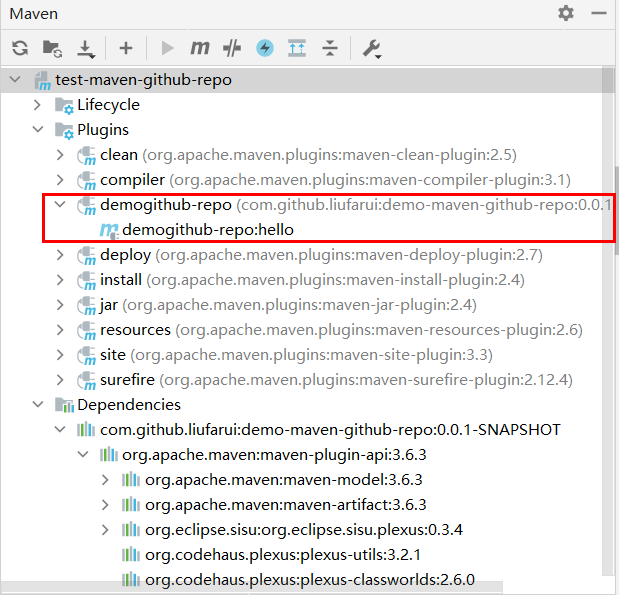
我们现在可以在右侧Maven中看到我们的插件
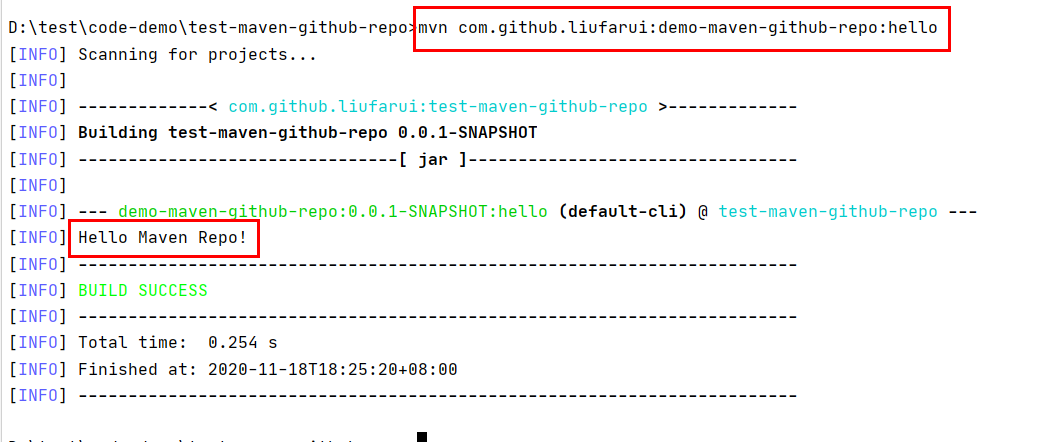
执行看结果:
【demo地址】
以上,即是整个Github创建maven仓库的内容,为了方便大家查看学习,我把demo项目放到了我的github上,大家可以自行查看,有问题也可以在评论区随时讨论:
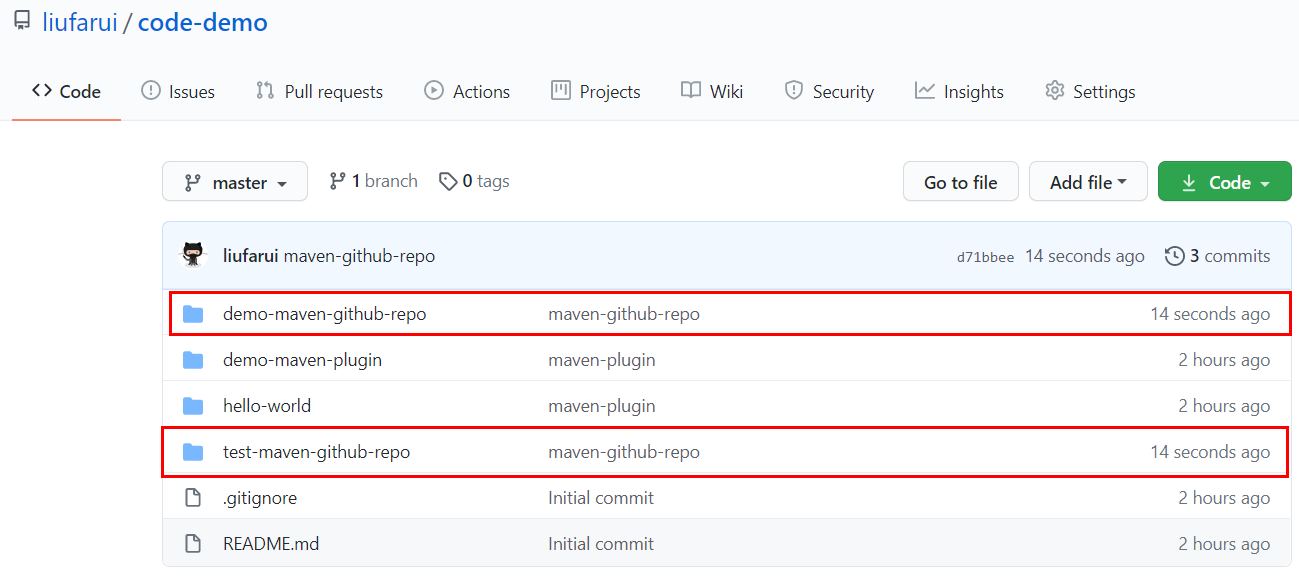
https://github.com/liufarui/code-demo
【问题】
|
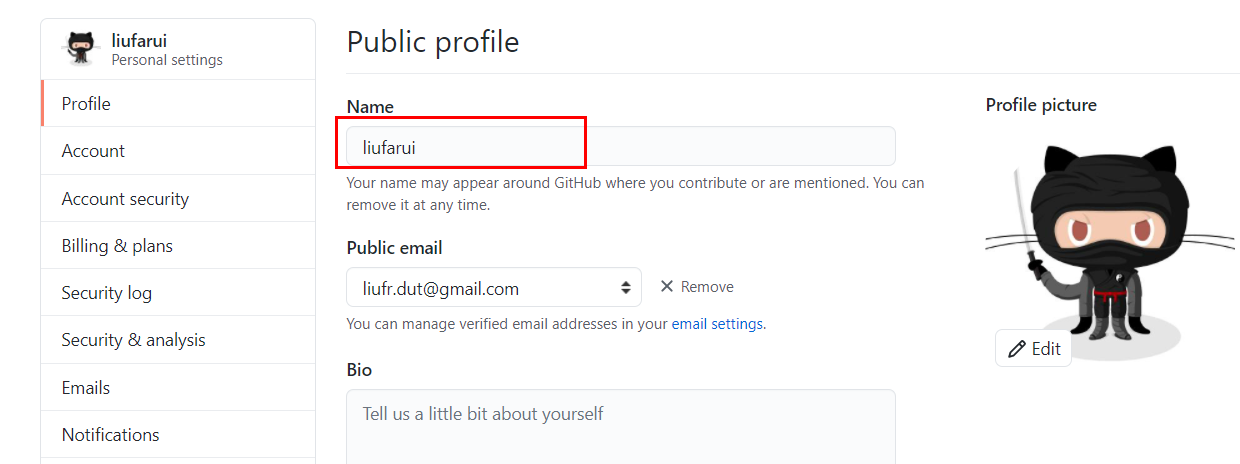
[ERROR] Failed to execute goal com.github.github:site-maven-plugin:0.12:site (default) on project path: Error creating commit: Invalid request. |
遇到以上问题是因为没有设置姓名,在setting中进行设置:
|
Error creating blob: cannot retry due to server authentication, in streaming mode |
很多人都遇到了此问题,此问题一般是权限问题,有可能是用户名密码不对,也有可能是公司网络做了特殊的限制,还有一些奇怪的原因,一般可以通过配置Personal access tokens去解决,附上网上的讨论链接:
https://github.com/github/maven-plugins/issues/36
以上,是如何搭建私有的maven仓库,这个仓库必须是有个人账户认证才可以使用的,无法确保大家可以一起用,之后,会再写一篇如何搭建public仓库的博客。
如何使用GitHub创建Maven私有仓库的更多相关文章
- 如何在云服务器创建maven私有仓库
参考链接:https://blog.csdn.net/silence_jjj/article/details/77531916 nexus3创建maven私有仓库(windows) 1.官网:http ...
- [maven] 使用Nexus创建maven私有仓库
1.为什么需要maven私有仓库? 从Maven中央仓库下载所需的jar包,需要外网的支持.如果公司不能上外网的话则不能从中央仓库下载所需jar包,公司网速慢的时候也会影响项目构建的速度.用户可以用n ...
- 使用nexus创建maven私有仓库
nexus安装 nexus下载 wget https://sonatype-download.global.ssl.fastly.net/nexus/oss/nexus-2.11.1-01-bundl ...
- 安装Maven并搭建Maven私有仓库
一.说明 Maven是基于项目对象模型(POM),可以通过一小段描述信息来管理项目的构建,报告和文档的软件项目管理工具.我们在进行Java代码开发的时候,Eclipse+Maven+Jetty是一个十 ...
- nexus3使用docker运行/创建docker私有仓库/maven私有仓库
version: '3.2' services: nexus3: container_name: nexus3 hostname: nexus3 image: sonatype/nexus3:3.14 ...
- 实战maven私有仓库三部曲之三:Docker下搭建maven私有仓库
本章是<实战maven私有仓库>系列的第三篇,在前两章中,我们先在linux搭建maven私有仓库,然后在开发环境使用此仓库,本章我们在docker下快速搭建maven私有仓库,然后像前面 ...
- 实战maven私有仓库三部曲之二:上传到私有仓库
在上一章<实战maven私有仓库三部曲之一:搭建和使用>我们搭建了maven私有仓库,并体验了私有仓库缓存jar包的能力,避免了局域网内开发人员去远程中央仓库下载的痛苦等待,本章我们再来体 ...
- 使用Nexus配置Maven私有仓库
使用Nexus配置Maven私有仓库 作者:尹正杰 版权声明:原创作品,谢绝转载!否则将追究法律责任. 一.安装配置Nexus 1>.下载nexus 下载地址:https://www.sonat ...
- 创建Harbor私有仓库
前提 1.安装docker服务 参考:https://blog.csdn.net/weixin_36522099/article/details/108861134 老名字:docker.docker ...
随机推荐
- selenium基础 --获取内容
from time import sleep from selenium import webdriver browser = webdriver.Chrome() url = "http: ...
- Ubuntu搜狗输入法安装
一.下载sogoupinyin_2.2.0.0108_amd64.deb 二.拷贝到服务器并安装 sudo dpkg -i sogoupinyin_2.2.0.0108_amd64.deb 三.设置搜 ...
- 测试之-Jmeter使用
一. 修改语言 修改 在 bin 目录下的 Jemeter.properties 二 . Jmeter主要元件 1.测试计划:是使用 JMeter 进行测试的起点,它是其它 JMeter测试元件的容器 ...
- BERT模型详解
1 简介 BERT全称Bidirectional Enoceder Representations from Transformers,即双向的Transformers的Encoder.是谷歌于201 ...
- CentOS7使用firewalld管理防火墙
firewalld的基本使用 #启动 systemctl start firewalld #关闭 systemctl stop firewalld #查看状态 systemctl status fir ...
- Java中<?>,<? extends E>,<? super E>
在集合中,经常可看到<?>,<? extends E>,<? super E>,它们都是属于泛型: <?>: 是泛型通配符,任意类型,如果没有明确,那么 ...
- .net core autofac asyncinterceptor 异步拦截器帮助包
autofac使用拦截器实现AOP,是基于Castle.Core的.然而Castle.Core并未提供原生异步支持.所以需要使用帮助类实现,这在autofac官方文档的已知问题中有详细说明: http ...
- Django (学习第一部 基础操作)
django 1 django 文件相关信息 2 Python创建django 3 命令行创建django 4 Django 必会三板斧 5 静态文件配置 6 request对象方法 7 pychar ...
- javascript模块化(简)
这里书写一个个人理解以及整理的东西,关于模块化以及ES6语法推荐大家阅读阮一峰老师的ES6入门教程 地址:https://es6.ruanyifeng.com/ 比较散,请见谅 以前的js是没有模块化 ...
- Centos7 使用nginx部署vue项目
一.安装nginx #设置源 sudo rpm -Uvh http://nginx.org/packages/centos/7/noarch/RPMS/nginx-release-centos-7-0 ...