
在CentOS 8 上 部署 .Net Core 应用程序
在Centos 8 上 部署 .Net Core 应用程序
—— 记录篇
1、更新dnf 源
1 dnf update
2、安装 Asp.Net Core 运行时
1 dnf install aspnetcore-runtime-3.1
2.1、验证是否安装成功
1 dotnet --info
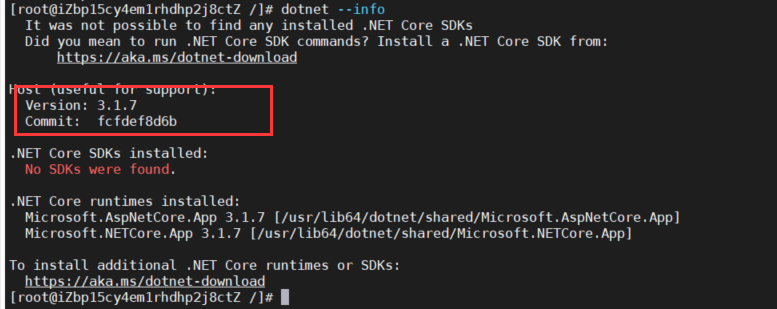
出现如上图所示就说明安装成功
3、安装Nginx
dnf -y install nginx
3.1、查看nginx版本
nginx -v

3.2、设置开机自启动
1 systemctl enable nginx
3.3、启动 nginx 服务
service nginx start
3.4、其他 相关 指令
1 # 卸载

2 dnf remove nginx

3 # 停止 服务

4 service nginx stop

5 # 重启

6 service nginx restart

7 # 加载配置文件

8 service nginx reload
4、MySql 安装
4.1、下载
wget https://repo.mysql.com//mysql80-community-release-el8-1.noarch.rpm
4.2、使用rpm 安装 mysql
rpm -ivh mysql80-community-release-el8-1.noarch.rpm
4.3、dnf 安装 mysql 服务
dnf -y install mysql-server
4.4、设置开机自启动
systemctl enable mysqld.service
4.5、启动mysql
systemctl start mysqld.service
4.6、设置远程连接(可选)
因我时在某云上,所以需要设置我本地连接,如果是在自己虚拟器可跳过此步骤
4.6.1、进入 mysql 命令行

4.6.2、更新 系统表(user)
update mysql.user set host="%" where user="root";
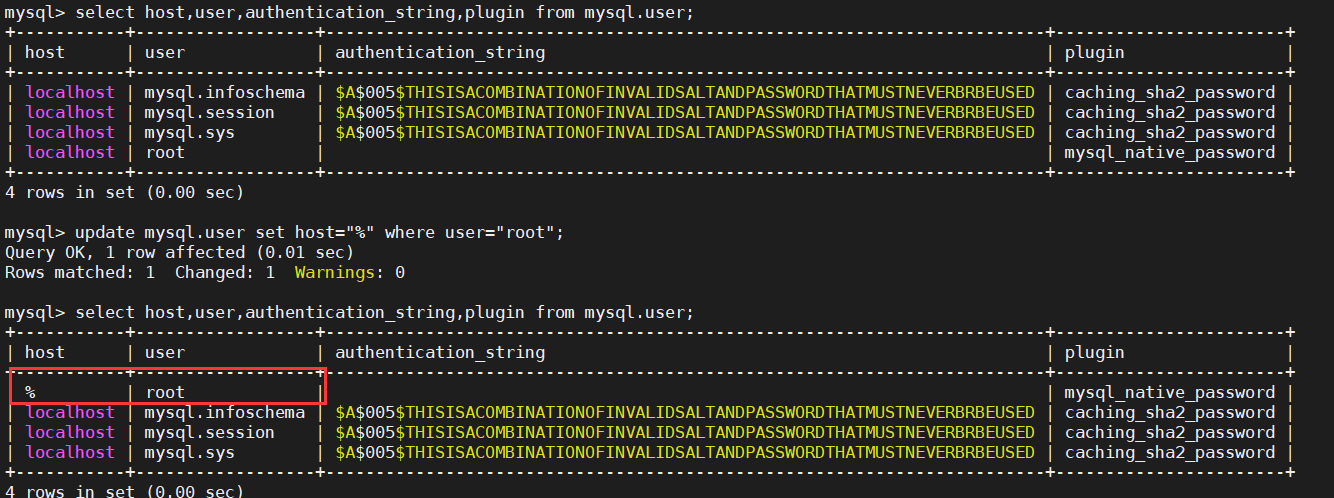
4.6.3、设置 root 密码
-- 切换数据库

use mysql;

-- 执行语句

ALTER  USER 'root'@'%' IDENTIFIED WITH mysql_native_password BY '123';

-- 刷新修改后的权限

flush privileges;

-- 退出

exit;
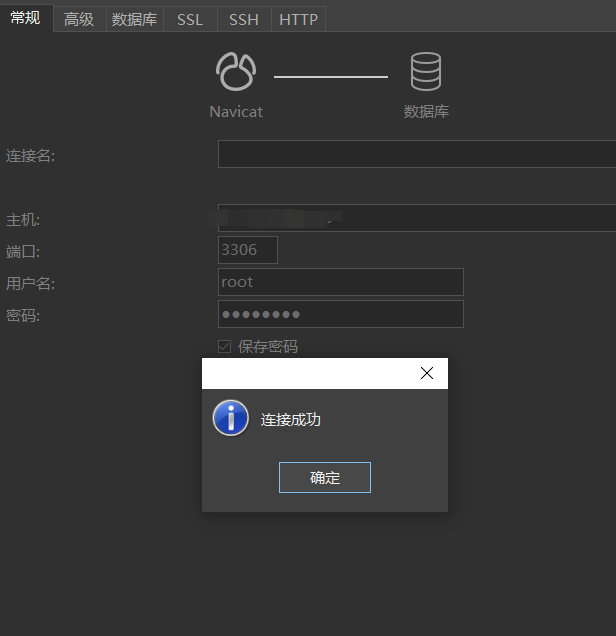
4.6.4、测试
5、将应用程序发布后的包上传
5.1、创建文件夹(用于存放应用程序包)
mkdir -p /var/www/web
5.2、ftp 上传应用程序文件到 上一步创建的文件夹(/var/www/web/)中
6、Redis 安装(可选)
如果项目中没有用到 Redis 可以跳过此步骤
6.1、下载、解压、编译
 wget http://download.redis.io/releases/redis-6.0.6.tar.gz

 tar xzf redis-6.0.6.tar.gz

 cd redis-6.0.6

 dnf install tcl

 make
6.2、编译测试
make test
6.3、迁移到指定的目录(可选)
 1 mkdir -p /usr/local/soft/redis

 2 cd /usr/local/soft/redis/

 3 mkdir bin

 4 mkdir conf

 5 cd bin/

 6 cp /redis-6.0.6/src/redis-cli ./

 7 cp /redis-6.0.6/src/redis-server ./

 8 cd ../conf/

 9 cp /redis-6.0.6/redis.conf ./

10 # 配置 redis-server 的 配置文件为 /usr/local/soft/conf/redis.conf

11 /usr/local/soft/redis/bin/redis-server /usr/local/soft/redis/conf/redis.conf

12 # 检查端口是否在使用

13 netstat -anp | grep 6379
6.4、使用 systemd 方式守护 redis 进程
6.4.1、编辑 redis.service 文件
vim /lib/systemd/system/redis.service
6.4.2、设置redis.service 内容
[Unit]
Description=Redis
After=network.target
[Service]
Type=forking
PIDFile=/var/run/redis_6379.pid
ExecStart=/usr/local/soft/redis/bin/redis-server /usr/local/soft/redis/conf/redis.conf
ExecReload=/bin/kill -s HUP $MAINPID
ExecStop=/bin/kill -s QUIT $MAINPID
PrivateTmp=true
[Install]
WantedBy=multi-user.target
6.4.3、重载系统
systemctl daemon-reload
6.4.4、设置开机启动及其他指令
# 开机自启

systemctl enable redis

# 启动

systemctl start redis

# 查看状态

systemctl status redis

# 停止

systemctl stop redis
7、配置.Net Core 应用程序的守护进程
7.1、编辑 aspnetCore.service 文件
文件名 自定义,这里我起名为 aspnetCore.service
vim /lib/systemd/system/aspnetCore.service
7.2、编辑内容
[Unit]

Description=AspnetCoreDemo running on Centos8

[Service]
# 应用程序所在的文件目录

WorkingDirectory=/var/www/web/

ExecStart=/usr/bin/dotnet /var/www/web/Carefree.AspNetCoreDemo.dll

Restart=always

# 如果dotnet服务崩溃,10秒后重新启动服务

RestartSec=10

KillSignal=SIGINT

SyslogIdentifier=AspNetCoreDemo

User=root

#Production:生产环境 Development:开发环境

Environment=ASPNETCORE_ENVIRONMENT=Development

Environment=DOTNET_PRINT_TELEMETRY_MESSAGE=false

[Install]

WantedBy=multi-user.target
7.3、重载系统及设置开机启动
# 重载系统
systemctl daemon-reload
# 开机自启动
systemctl enable aspnetCore.service
8、Nginx 代理
8.1、编辑配置文件
vim /etc/nginx/conf.d/web.conf
8.2、编辑内容
server

{

   listen       80;

   location /

   {

           proxy_pass http://localhost:5000;

           proxy_http_version 1.1;

           proxy_set_header Upgrade $http_upgrade;

           proxy_set_header Connection keep-alive;

           proxy_set_header Host $host;

           proxy_cache_bypass $http_upgrade;

           proxy_set_header   X-Forwarded-For

                   proxy_add_x_forwarded_for;

           proxy_set_header   X-Forwarded-Proto $scheme;

   }

}
8.3、编辑 nginx.conf 文件

8.4、验证配置文件是否正确及加载配置文件
# 验证配置文件

nginx -t

# 加载配置文件

nginx -s reload
至此我们的应用程序可正常访问了。如有何问题可与我联系,共同学习。
在CentOS 8 上 部署 .Net Core 应用程序的更多相关文章
- So Easy - 在Linux服务器上部署 .NET Core App
.NET Core 是微软提供的免费.跨平台和开源的开发框架,可以构建桌面应用程序.移动端应用程序.网络应用程序.物联网应用程序和游戏应用程序等.如果你是 Windows 平台下的 dotnet 开发 ...
- 如何在CentOS 7上部署Google BBR【搬运、机翻】
如何在CentOS 7上部署Google BBR 本文章搬运自 https://www.vultr.com/docs/how-to-deploy-google-bbr-on-centos-7 [注:文 ...
- 在CentOS 7上安装.NET Core R2跑Hello World
前言 在上个月.NET Core出了最新版本预览版,只是在Window系统上试验了一下.原本想等发布正式版的时候在linux系统上试试,可能还需要一段时间,刚好有空可以折腾一下. 由于之前安装的Ubu ...
- IIS上部署Net.Core
部署: 1.安装vc_redist.x64vc_redist.x64 2.安装DotNetCore.1.0.0.RC2-WindowsHosting 3.安装DotNetCore.1.0.0-SDK. ...
- 如何在centos操作系统上发布.net core的项目
环境:操作系统: centos 7.net core: 2.1.101 官方网站的示例地址: https://docs.microsoft.com/zh-cn/dotnet/core/linux-pr ...
- 在CentOS 7上部署Ghost博客
作者:waringid 一.简介 跟静态博客不同的是,Ghost 这种轻量级的动态博客,有一个管理后台,可以直接写作和管理博客.本质上,跟 WordPress 是相通的,只是 Ghost 搭建在 No ...
- 在IIS上部署 .Net Core 3.0 项目踩坑实录
在IIS上部署 .Net Core 3.0 项目的主要流程有: 安装并启用IIS 安装AspNetCoreModuleV2 添加.配置网站 设置应用程序池 通过VS发布 一.安装并启用IIS: 安装了 ...
- Centos7安装.Net Core 2.2环境以及部署.Net Core MVC程序(Apache+Jexus环境)
原文:Centos7安装.Net Core 2.2环境以及部署.Net Core MVC程序(Apache+Jexus环境) 1.双11抢购***VPS.配置如下: CPU:2 核 内存:2048 M ...
- [翻译]第三天- 在 Mac 上运行 .NET Core 应用程序
原文: http://michaelcrump.net/part3-aspnetcore/ *** 简介 该系列文章的完整列表如下: 第一天 - 在 Windows 下安装和运行 .NET Core ...
随机推荐
- jquery学习:
1.什么是jQuery jquery 全称 javaScript Query.是js的一个框架.本质上仍然是js. 2.jQuery的特点 支持各种主流的浏览器. 使用特别简单 拥有便捷的插件扩展机制 ...
- http(Hyper Text Transfer Protocol)
一.定义 http(Hyper Text Transfer Protocol):超文本传输协议二.作用 数据传输三.概念 HTTP消息: 1.客户端发向服务器的请求消息 ...
- 一键生成数据库文档,堪称数据库界的Swagger,有点厉害
最近部门订单业务调整,收拢其他业务线的下单入口,做个统一大订单平台.需要梳理各业务线的数据表,但每个业务线库都有近百张和订单相关的表,挨个表一个一个字段的弄脑瓜子嗡嗡的. 为了不重复 CV 操作,抱着 ...
- Onethink 前台编辑器调用
比较偷懒的调用方式 <textarea name="content"></textarea> {:hook('documentEditFormContent ...
- Matlab .asv文件
参考: https://blog.csdn.net/u013152895/article/details/44724199 有时在存放m文件的文件夹中会出现*.asv asv 就是auto save的 ...
- BSGS算法解析
前置芝士: 1.快速幂(用于求一个数的幂次方) 2.STL里的map(快速查找) 详解 BSGS 算法适用于解决高次同余方程 \(a^x\equiv b (mod p)\) 由费马小定理可得 x &l ...
- Windows10系统下wsappx占用CPU资源过高?wsappx是什么?如何关闭wsappx进程?
在Windows10系统开机的时候,wsappx进程占用的CPU资源非常高,导致电脑运行速度缓慢,那么我们如何关闭wsappx进程,让电脑加快运行速度呢?下面就一起来看一下操作的方法吧. [现象] 1 ...
- Linux网卡命名规则
网卡命名 一.为什么需要这个 服务器通常有多块网卡,有板载集成的,同时也有插在PCIe插槽的.Linux系统的命名原来是eth0,eth1这样的形式,但是这个编号往往不一定准确对应网卡接口的 ...
- 详解gitignore的使用方法,让你尽情使用git add .
大家好,欢迎来到周一git专题. 今天和大家聊聊gitignore的作用,其实如果你英文还可以的话,你应该已经基本上猜到它的作用了.ignore在英文当中的意思是忽视.忽略,gitignore自然就是 ...
- 用C写一个简单的推箱子游戏(二)
下面接着上一篇随笔<用C写一个简单的推箱子游戏(一)>来写 tuidong()函数是用来判断游戏人物前方情况的函数,是推箱子游戏中非常重要的一个函数,下面从它开始继续介绍推箱子的小程序怎么 ...