
iOS - 视图与手势(UIview & UIGestureRecognizer)
01 UIView视图的基本使用 --- 在根视图中添加2个UIView视图
//视图确实加载时调用
- (void)viewDidLoad {
[super viewDidLoad];
// Do any additional setup after loading the view, typically from a nib.
//CGRect包含了原点和大小等信息.
CGRect rect1 = CGRectMake(30, 50, 200, 200);
UIView *view1 = [[UIView alloc] initWithFrame:rect1];
[view1 setBackgroundColor:[UIColor brownColor]];
CGRect rect2 = CGRectMake(60, 90, 200, 200);
UIView *view2 = [[UIView alloc] initWithFrame:rect2];
[view2 setBackgroundColor:[UIColor purpleColor]];
[view2 setAlpha:0.5];
[self.view addSubview:view1];
[self.view addSubview:view2];
}
02 UIView视图的层次关系 --- 创建3个视图:视图1是视图2的父视图;视图2是视图3的父视图
- (void)viewDidLoad {
[super viewDidLoad];
// Do any additional setup after loading the view, typically from a nib.
UIView *view1 = [[UIView alloc] initWithFrame:CGRectMake(20, 80, 200, 280)];
view1.backgroundColor = [UIColor redColor];
[self.view addSubview:view1];
UIView *view2 = [[UIView alloc] initWithFrame:CGRectMake(0, 0, 200, 200)];
[view2 setBounds:CGRectMake(-40, -20, 200, 200)];
view2.backgroundColor = [UIColor yellowColor];
[view1 addSubview:view2];
UIView *view3 = [[UIView alloc] initWithFrame:CGRectMake(0, 0, 100, 100)];
view3.backgroundColor = [UIColor blueColor];
[view2 addSubview:view3];
}
03 UIView视图的基本操作 --- 视图的添加与删除,以及切换视图在父视图中的层次
- (void)viewDidLoad {
[super viewDidLoad];
// Do any additional setup after loading the view, typically from a nib.
CGRect rect = CGRectMake(30, 50, 200, 200);
UIView *view = [[UIView alloc] initWithFrame:rect];
[view setBackgroundColor:[UIColor brownColor]];
[self.view addSubview:view];
UIButton *btAdd = [[UIButton alloc] initWithFrame:CGRectMake(30, 350, 80, 30)];
[btAdd setBackgroundColor:[UIColor grayColor]];
[btAdd setTitle:@"Add" forState:UIControlStateNormal];
[btAdd addTarget:self action:@selector(addView) forControlEvents:UIControlEventTouchUpInside];
[self.view addSubview:btAdd];
UIButton *btBack = [[UIButton alloc] initWithFrame:CGRectMake(120, 350, 80, 30)];
[btBack setBackgroundColor:[UIColor grayColor]];
[btBack setTitle:@"Switch" forState:UIControlStateNormal];
[btBack addTarget:self action:@selector(bringViewToBack) forControlEvents:UIControlEventTouchUpInside];
[self.view addSubview:btBack];
UIButton *btRemove = [[UIButton alloc] initWithFrame:CGRectMake(210, 350, 80, 30)];
[btRemove setBackgroundColor:[UIColor grayColor]];
[btRemove setTitle:@"Remove" forState:UIControlStateNormal];
[btRemove addTarget:self action:@selector(removeView) forControlEvents:UIControlEventTouchUpInside];
[self.view addSubview:btRemove];
}
-(void)addView {
CGRect rect = CGRectMake(60, 90, 200, 200);
UIView *view = [[UIView alloc] initWithFrame:rect];
[view setBackgroundColor:[UIColor purpleColor]];
[view setTag:1];
[self.view addSubview:view];
}
04 UIView视图添加边框效果 --- 给一张图片添加一个彩色相框: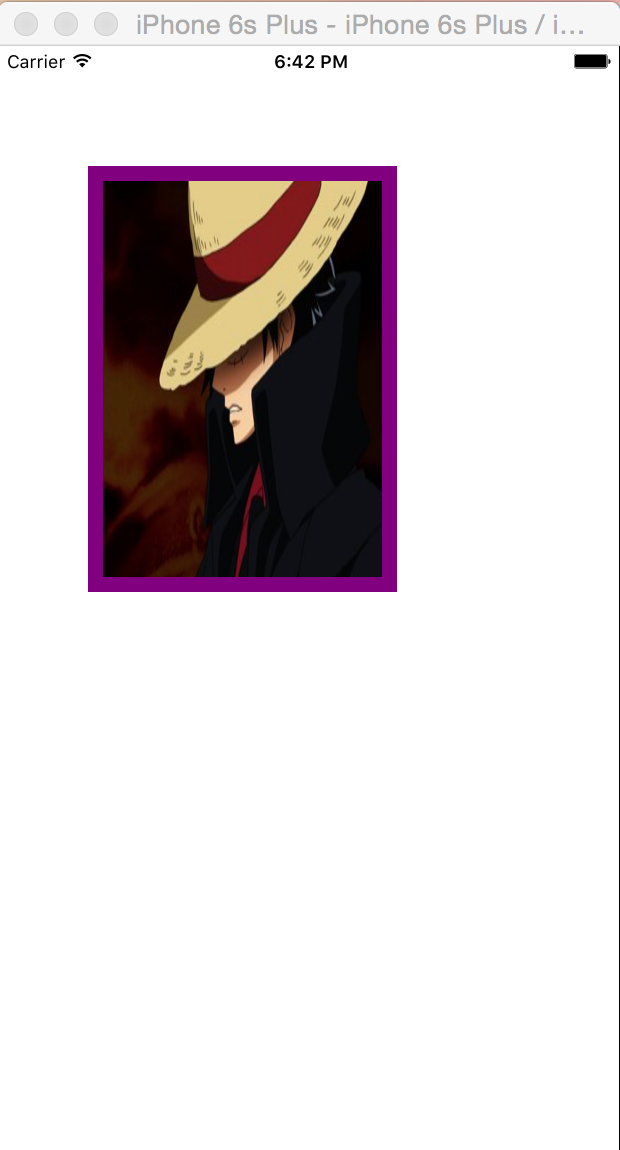
- (void)viewDidLoad {
[super viewDidLoad];
// Do any additional setup after loading the view, typically from a nib.
//UIImage是用来加载和绘制图像的类
UIImage *uiimage = [UIImage imageNamed:@"pic"];
//加载图像后,将图片赋值给UIImageView视图,可以将图像视图,看作是图片的容器
UIImageView *imgView = [[UIImageView alloc] initWithImage:uiimage];
imgView.frame = CGRectMake(60, 80, 206, 284);
//设置图片视图的图层边框宽度,视图真正的绘图部分,是由一个叫CALayer的类来管理的
imgView.layer.borderWidth = 10;
//视图本身更像是一个图层的管理器,访问它的根绘图和坐标有关的属性,实际上都是在访问它所包含的图层的相关属性.
imgView.layer.borderColor = [[UIColor purpleColor] CGColor];
[self.view addSubview:imgView];
}
05 UIView视图添加圆角效果 --- 给矩形图片,添加圆角效果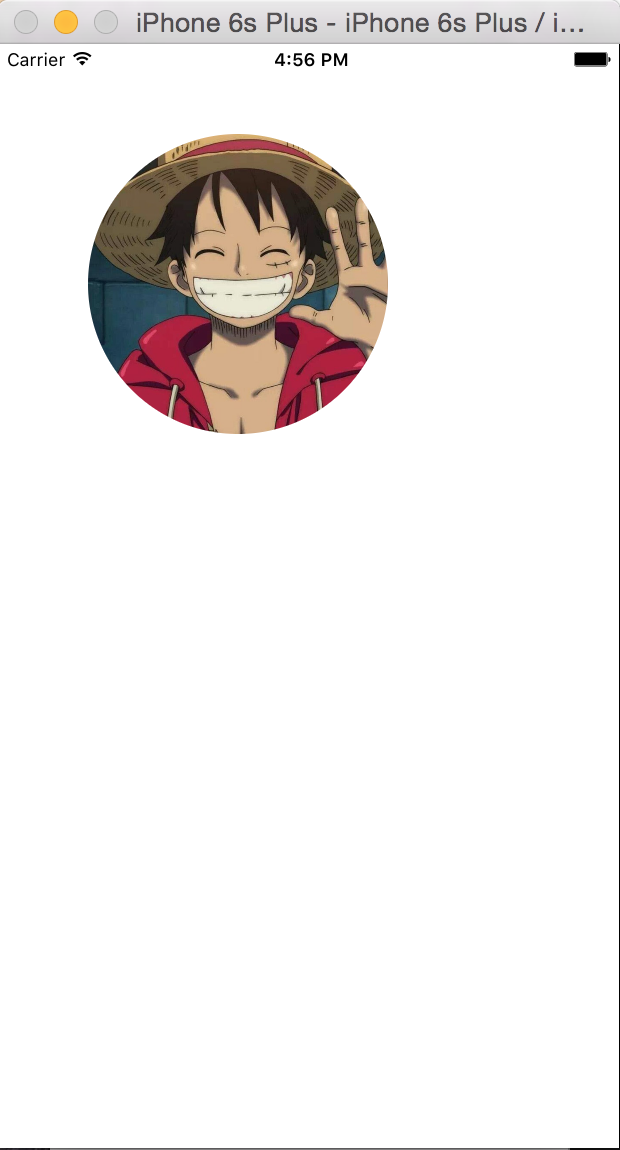
- (void)viewDidLoad {
[super viewDidLoad];
// Do any additional setup after loading the view, typically from a nib.
UIImage *img = [UIImage imageNamed:@"pic"];
UIImageView *imgView = [[UIImageView alloc] initWithImage:img];
CGRect rect = CGRectMake(60, 60, 200, 200);
imgView.frame = rect;
//设置图像层的圆角半径大小
imgView.layer.cornerRadius = 100;
//设置图像视图的层的遮罩覆盖属性,进行边界裁切
imgView.layer.masksToBounds = YES;
[self.view addSubview:imgView];
}
06 UIView视图添加阴影效果 --- 给矩形图片添加阴影效果
- (void)viewDidLoad {
[super viewDidLoad];
// Do any additional setup after loading the view, typically from a nib.
UIImage *img = [UIImage imageNamed:@"pic"];
UIImageView *imgView = [[UIImageView alloc] initWithImage:img];
CGRect rect = CGRectMake(60, 60, 206, 284);
imgView.frame = rect;
// //设置图像视图的阴影颜色
// imgView.layer.shadowColor = [UIColor blackColor].CGColor;
// //设置图像视图层的阴影的横向和纵向的偏移值
// imgView.layer.shadowOffset = CGSizeMake(5.0f, 5.0f);
// //设置图像视图层的阴影透明度
// imgView.layer.shadowOpacity = 0.75;
// //设置图像视图层的阴影半径大小
// imgView.layer.shadowRadius = 10.0f;
[self.view addSubview:imgView];
}
07 UIView视图的渐变填充 --- 创建一个渐变图形
- (void)viewDidLoad {
[super viewDidLoad];
// Do any additional setup after loading the view, typically from a nib.
CGRect rect = CGRectMake(60, 120, 600, 600);
UIView *view = [[UIView alloc] initWithFrame:rect];
view.backgroundColor = [UIColor whiteColor];
//新建一个渐变层
CAGradientLayer *gradientLayer = [CAGradientLayer layer];
//设置渐变层的位置和尺寸,与视图对象一致
gradientLayer.frame = view.bounds;
//设置渐变的起始颜色为蓝色
CGColorRef fromColor = [UIColor blueColor].CGColor;
//设置渐变的中间颜色为红色
CGColorRef midColor = [UIColor redColor].CGColor;
//设置渐变的结束颜色为黄色
CGColorRef toColor = [UIColor yellowColor].CGColor;
//创建一个数组对象,存储三个颜色变量
NSArray *colorArray = [NSArray arrayWithObjects:(__bridge id _Nonnull)(fromColor),midColor,toColor, nil];
//设置渐变层的颜色数组属性为三个渐变色构建的数组.
gradientLayer.colors = colorArray;
//将渐变层添加到视图对象的层中
[view.layer addSublayer:gradientLayer];
[self.view addSubview:view];
}
08 UIView视图的纹理填充
//新建一个颜色对象,并将导入的图片赋予该对象
UIColor *background = [[UIColor alloc] initWithPatternImage:[UIImage imageNamed:@"bg.png"]];
//再将此颜色对象,赋值给当前窗口根视图的背景
self.view.backgroundColor = background;
09 CGAffineTransform仿射变换 -- 仿射变换,旋转视图
- (void)viewDidLoad {
[super viewDidLoad];
// Do any additional setup after loading the view, typically from a nib.
CGRect myImageRect = CGRectMake(50.0f, 150.0f, 200.0f, 50.0f);
UIView *myView = [[UIView alloc] initWithFrame:myImageRect];
myView.backgroundColor = [UIColor redColor];
[self.view addSubview:myView];
//Rotate
//创建一个仿射变换变量,仿射变换可以用于平易、旋转、缩放变换路径或者图形上下文.
CGAffineTransform transform = myView.transform;
//选择使用旋转功能
transform = CGAffineTransformRotate(transform, 3.14/4);
//将变换变量,赋值给视图对象,完成变换操作.
myView.transform = transform;
}
- (void)didReceiveMemoryWarning {
[super didReceiveMemoryWarning];
// Dispose of any resources that can be recreated.
}
**********************************************************************************************************
使用iOS手势,完成视图的交互功能**********************************************************************************
**********************************************************************************************************
10 UITapGestureRecognizer手势之单击
- (void)viewDidLoad {
[super viewDidLoad];
// Do any additional setup after loading the view, typically from a nib.
CGRect rect = CGRectMake(100, 100, 107, 107);
UIImageView *imgView = [[UIImageView alloc] initWithFrame:rect];
//加载项目中的图片
UIImage *img = [UIImage imageNamed:@"star.png"];
//使用加载的图片,创建一个视图
[imgView setImage:img];
//开启图像视图的交互功能
[imgView setUserInteractionEnabled:YES];
[self.view addSubview:imgView];
//UIKit中包含了手势识别的类,用于检测发生在设备中的各种首饰.
UITapGestureRecognizer *guesture = [[UITapGestureRecognizer alloc] initWithTarget:self action:@selector(singleTap)];
//将手势指定给图像视图
[imgView addGestureRecognizer:guesture];
}
-(void)singleTap {
//当接受到手势事件后,弹出一个提示窗口
UIAlertView *alertView = [[UIAlertView alloc] initWithTitle:@"Information" message:@"Single Tap" delegate:self cancelButtonTitle:@"Ok" otherButtonTitles:nil, nil];
[alertView show];
}
11 UITapGestureRecognizer手势之长按
- (void)viewDidLoad {
[super viewDidLoad];
// Do any additional setup after loading the view, typically from a nib.
CGRect rect = CGRectMake(100, 100, 107, 107);
UIImageView *imgView = [[UIImageView alloc] initWithFrame:rect];
UIImage *img = [UIImage imageNamed:@"star.png"];
[imgView setImage:img];
//激活图像视图的交互功能
[imgView setUserInteractionEnabled:YES];
//将图像视图添加到当前视图控制器的根视图
[self.view addSubview:imgView];
//创建一个长按手势对象,用于检测发生在设备中的长按手势.
UILongPressGestureRecognizer *guesture = [[UILongPressGestureRecognizer alloc] initWithTarget:self action:@selector(longPress:)];
//将手势指定给视图对象
[imgView addGestureRecognizer:guesture];
}
//创建接受手势视图的方法
-(void)longPress:(UILongPressGestureRecognizer *)guesture {
//检测手势事件的阶段
if (guesture.state) {
//当接受到手势事件时,弹出一个窗口
UIAlertView *alertView = [[UIAlertView alloc] initWithTitle:@"Information" message:@"Long press" delegate:self cancelButtonTitle:@"Ok" otherButtonTitles:nil, nil];
[alertView show];
}
}
12 UITapGestureRecognizer手势之双击
- (void)viewDidLoad {
[super viewDidLoad];
// Do any additional setup after loading the view, typically from a nib.
CGRect rect = CGRectMake(100, 100, 107, 107);
UIImageView *imgView = [[UIImageView alloc] initWithFrame:rect];
UIImage *img = [UIImage imageNamed:@"star.png"];
[imgView setImage:img];
//激活图像视图的交互功能
[imgView setUserInteractionEnabled:YES];
//将图像视图添加到当前视图控制器的根视图
[self.view addSubview:imgView];
//创建一个手势对象
UITapGestureRecognizer *guesture = [[UITapGestureRecognizer alloc] initWithTarget:self action:@selector(doubleTap)];
//设置点击次数为2,模拟双击事件
[guesture setNumberOfTapsRequired:2];
//设置为单次双击事件
[guesture setNumberOfTouchesRequired:1];
//将手势指定给图像视图对象
[imgView addGestureRecognizer:guesture];
}
//创建接受手势事件的方法
-(void)doubleTap {
UIAlertView *alertView = [[UIAlertView alloc] initWithTitle:@"information" message:@"Double Tap" delegate:self cancelButtonTitle:@"Ok" otherButtonTitles:nil, nil];
[alertView show];
}
iOS - 视图与手势(UIview & UIGestureRecognizer)的更多相关文章
- iOS手势学习UIGestureRecognizer & cocos2d 手势推荐
iOS手势学习UIGestureRecognizer & cocos2d 手势推荐 手势识别类型: UILongPressGestureRecognizer // 长按UIPanGestur ...
- [Xcode 实际操作]二、视图与手势-(2)UIView视图的层次关系
目录:[Swift]Xcode实际操作 本文将演示创建三个视图对象,其中第二个视图是第三个视图的父视图. 现在开始编写代码,实现这项功能 import UIKit class ViewControll ...
- [Xcode 实际操作]二、视图与手势-(3)UIView视图的基本操作
目录:[Swift]Xcode实际操作 本文将实现视图的添加与删除,以及切换视图在父视图中的层次. import UIKit class ViewController: UIViewControlle ...
- iOS 视图控制器转场详解
iOS 视图控制器转场详解 前言的前言 唐巧前辈在微信公众号「iOSDevTips」以及其博客上推送了我的文章后,我的 Github 各项指标有了大幅度的增长,多谢唐巧前辈的推荐.有些人问我相关的问题 ...
- View Programming Guide for iOS ---- iOS 视图编程指南(一)
Next About Windows and Views 关于窗口和视图 In iOS, you use windows and views to present your application’s ...
- iOS七种手势
// 初始化一个UIimageView UIImageView *imageView = [[UIImageView alloc]initWithFrame:CGRectMake(100, 100, ...
- iOS视图控制器的生命周期
今天面试有一道面试题因为回答不好,因为也不经常涉及所以有点模糊,我选择了最保守的回答,没有展开写出我对这个问题的理解. 问题:IOS 开发 loadView 和 viewDidLoad 的区别? 经过 ...
- iOS学习之手势
UIGestureRecognizer 为了完成手势识别,必须借助于手势识别器--UIGestureRecognizer,利用UIGestureRecognizer,能轻松识别用户在某个view上面做 ...
- iOS视图控制对象生命周期
iOS视图控制对象生命周期-init.viewDidLoad.viewWillAppear.viewDidAppear.viewWillDisappear.viewDidDisappear的区别及用途 ...
随机推荐
- [1.1]Knowledge that should be prepared
Actually, there are a huge amount of knowledge we need to learn. So I hope you don't be scared. It's ...
- Cocos2d-x——pthread的使用注意事项
1:多线程所调用的成员方法定义为static. 2:互斥锁(pthread_mutex_t)定义在cpp文件的开头,并且也定义为static. 3:pthread_mutex_init方法尽量在最早的 ...
- [Javascript] Other functor
EventStream: You can use RxJS, BaconJS or any reactive programming lib you want: var id_s = map(func ...
- SQL Server中内连接和外连接的区别
SQL Server中内连接和外连接的区别 假设一个数据库中有两张表,一张是学生表StudentInfo,一张是班级表ClassInfo,两张表之间用ClassId字段进行关联. 如果用内连接,正常的 ...
- Android中this.*与*.this还有*.class的区别是什么?
这些是java的基础知识.首先this代表本类的一个引用,this.*表示调用本类的某个方法,这个时候通常可以省略this:但在内部类中不能省略,否则编译器会认为是内部类的引用,所以要在this前加上 ...
- oracle_partition sample_simple
一:范围分区 就是根据数据库表中某一字段的值的范围来划分分区,例如: create table graderecord ( sno varchar2(10), sname varchar2(20), ...
- Implementing the skip list data structure in java --reference
reference:http://www.mathcs.emory.edu/~cheung/Courses/323/Syllabus/Map/skip-list-impl.html The link ...
- redis终于有比较大的进展了,redis3.0.1 稳定版本发布,支持集群。
原文地址:https://raw.githubusercontent.com/antirez/redis/3.0/00-RELEASENOTES Redis 3.0 release notes --[ ...
- c语言数组的初始化
#include "stdio.h" int main() { ][]; a[][]="1,2,3,4,5,6,7,8,9,10,11,12"; ]=a,*p= ...
- 琐碎-关于hadoop2.2.0
HDFS模块功能 namenode:主节点,存储文件的元数据如文件名.文件目录结构.文件属性(生成时间.副本数.文件权限).以及每个文件的块列表和块所在的datanode等: datanode:在本地 ...