
Linux学习16-CentOS安装gitlab环境
前言
在学习Gitlab的环境搭建之前,首先需要了解Git,Gitlab,GitHub他们三者之间的关系
Git 它是一个源代码版本控制系统,可让您在本地跟踪更改并从远程资源推送或提取更改。
GitHub 是一项公开可用的免费服务,它要求所有代码(除非您有付费帐户)公开。 任何人都可以看到您推送给GitHub的代码并提供改进建议。
GitLab是一种类似github的服务,组织可以使用它来提供git存储库的内部管理。 它是一个自我托管的Git-repository管理系统,可以保持用户代码的私密性,并且可以轻松地部署代码的更改。
简单来说,github是全世界最大的开源的gay友平台,适合免费公开的代码。gitlab是搭建本公司的代码管理平台,适合私有的平台代码管理。
因为本公司的代码不想被其它人看到,这就需要搭建一个本公司的gitlab平台,供公司内部人员使用。
环境准备:
centos 7
gitlab 10
安装依赖包
GitLab 10.x之后添加多了一些依赖,并且要启动sshd服务,所以我们先添加依赖,启动sshd,为防火墙添加服务
sudo yum install -y curl policycoreutils-python openssh-server openssh-clients

sudo systemctl enable sshd

sudo systemctl start sshd

# 防火墙这2步可以不用管

# sudo firewall-cmd –permanent –add-service=http

# sudo systemctl reload firewalld
postfix的产生是为了替代传统的sendmail.相较于sendmail,postfix在速度。性能和稳定性上都更胜一筹。
如今眼下许多的主流邮件服务事实上都在採用postfix. 当我们须要一个轻量级的的邮件server是,postfix不失为一种选择。
- postfix想要作用的范围是广大的Internet用户。试图影响大多数的Internet上的电子邮件系统,因此它是免费的。
- postfix在性能上大约比sendmail快三倍。一部执行postfix的台式PC每天能够收发上百万封邮件。
- postfix是sendmail兼容的,从而使sendmail用户能够非常方便地迁移到postfix。Postfix支持/var[/spool]/mail、/etc/aliases、 NIS、和 ~/.forward 文件。
- postfix被设计成在重负荷之下仍然能够正常工作。当处理的邮件数目增长时,postfix执行的进程不会跟着添加。
- postfix是由超过一打的小程序组成的,每一个程序完毕特定的功能。
gitlab配置需要用到邮件发送,所以先安装postfix
yum -y install postfix
安装完之后,启动postfix
systemctl start postfix
启动过程中如果报错:Job for postfix.service failed because the control process exited with error code. See "systemctl status postfix.service" and "journalctl -xe" for details.
解决办法,vim打开/etc/postfix/main.cf,修改如下两项,修改之前可以先备份下

# 修改 /etc/postfix/main.cf的设置

inet_protocols = ipv4

inet_interfaces = all
修改完成后,再次启动,就不会报错了,设置postfix为开机自启动
systemctl enable postfix
查看启动状态,看到 Active: active (running) 就是已经正常启动了
[root@yoyo ~]# systemctl status postfix
完整的操作如下
[root@yoyo ~]# yum -y install policycoreutils-python openssh-server openssh-clients

[root@yoyo ~]# systemctl enable sshd

[root@yoyo ~]# systemctl start sshd

[root@yoyo ~]# yum -y install postfix

[root@yoyo ~]# systemctl start postfix

Job for postfix.service failed because the control process exited with error code. See "systemctl status postfix.service" and "journalctl -xe" for details.

[root@yoyo ~]# cp /etc/postfix/main.cf  /etc/postfix/main.cf.bak

[root@yoyo ~]# vim /etc/postfix/main.cf

# 修改inet_protocols = ipv4   和inet_interfaces = all

[root@yoyo ~]# systemctl start postfix

[root@yoyo ~]# systemctl enable postfix

 [root@yoyo ~]# systemctl status postfix

● postfix.service - Postfix Mail Transport Agent

   Loaded: loaded (/usr/lib/systemd/system/postfix.service; enabled; vendor preset: disabled)

   Active: active (running) since Tue 2019-01-15 15:37:28 CST; 5min ago

  Process: 3171 ExecStart=/usr/sbin/postfix start (code=exited, status=0/SUCCESS)

  Process: 3167 ExecStartPre=/usr/libexec/postfix/chroot-update (code=exited, status=0/SUCCESS)

  Process: 3164 ExecStartPre=/usr/libexec/postfix/aliasesdb (code=exited, status=0/SUCCESS)

 Main PID: 3244 (master)

   CGroup: /system.slice/postfix.service

           ├─3244 /usr/libexec/postfix/master -w

           ├─3245 pickup -l -t unix -u

           └─3246 qmgr -l -t unix -u

Jan 15 15:37:27 yoyo systemd[1]: Starting Postfix Mail Transport Agent...

Jan 15 15:37:28 yoyo postfix/postfix-script[3242]: starting the Postfix mail system

Jan 15 15:37:28 yoyo postfix/master[3244]: daemon started -- version 2.10.1, configuration /etc/postfix

Jan 15 15:37:28 yoyo systemd[1]: Started Postfix Mail Transport Agent.

[root@yoyo ~]#
gitlab安装
centos 7系统的下载地址:https://mirrors.tuna.tsinghua.edu.cn/gitlab-ce/yum/el7
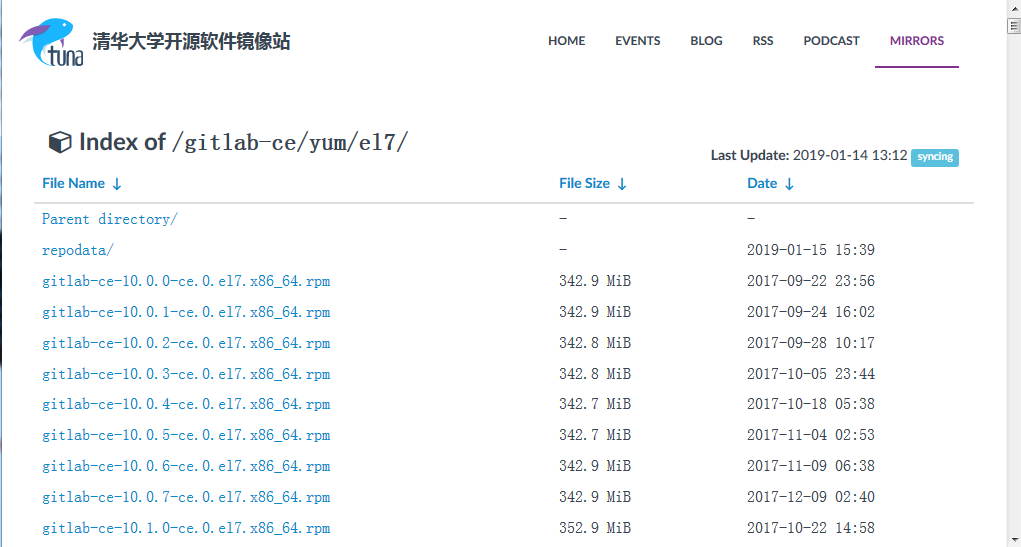
找个最新版去下载gitlab-ce-11.6.3-ce.0.el7.x86_64.rpm
下载rpm包并安装
[root@yoyo ~]# wget https://mirrors.tuna.tsinghua.edu.cn/gitlab-ce/yum/el7/gitlab-ce-10.0.0-ce.0.el7.x86_64.rpm

[root@yoyo ~]# mkdir /usr/local/gitlab

[root@yoyo ~]# mv gitlab-ce-10.0.0-ce.0.el7.x86_64.rpm /usr/local/gitlab/

[root@yoyo ~]# cd /usr/local/gitlab/

[root@yoyo gitlab]# rpm -i gitlab-ce-10.0.0-ce.0.el7.x86_64.rpm

warning: gitlab-ce-11.6.3-ce.0.el7.x86_64.rpm: Header V4 RSA/SHA1 Signature, key ID f27eab47: NOKEY

error: Failed dependencies:

	policycoreutils-python is needed by gitlab-ce-10.0.0-ce.0.el7.x86_64.rpm

# 如果出现上面这个报错就执行yum install policycoreutils-python

[root@yoyo gitlab]# yum -y install policycoreutils-python

[root@yoyo gitlab]# rpm -i gitlab-ce-11.6.3-ce.0.el7.x86_64.rpm

warning: gitlab-ce-10.0.0-ce.0.el7.x86_64.rpm: Header V4 RSA/SHA1 Signature, key ID f27eab47: NOKEY

It looks like GitLab has not been configured yet; skipping the upgrade script.

       *.                  *.

      ***                 ***

     *****               *****

    .******             *******

    ********            ********

   ,,,,,,,,,***********,,,,,,,,,

  ,,,,,,,,,,,*********,,,,,,,,,,,

  .,,,,,,,,,,,*******,,,,,,,,,,,,

      ,,,,,,,,,*****,,,,,,,,,.

         ,,,,,,,****,,,,,,

            .,,,***,,,,

                ,*,.

     _______ __  __          __

    / ____(_) /_/ /   ____ _/ /_

   / / __/ / __/ /   / __ `/ __ \

  / /_/ / / /_/ /___/ /_/ / /_/ /

  \____/_/\__/_____/\__,_/_.___/

Thank you for installing GitLab!

GitLab was unable to detect a valid hostname for your instance.

Please configure a URL for your GitLab instance by setting `external_url`

configuration in /etc/gitlab/gitlab.rb file.

Then, you can start your GitLab instance by running the following command:

  sudo gitlab-ctl reconfigure

For a comprehensive list of configuration options please see the Omnibus GitLab readme

https://gitlab.com/gitlab-org/omnibus-gitlab/blob/master/README.md
安装完成之后,会出现gitlab官方文档地址https://gitlab.com/gitlab-org/omnibus-gitlab/blob/master/README.md
配置并启动gitlab-ce
gitlab安装完成后,需要设置一个访问地址(或域名),打开/etc/gitlab/gitlab.rb,将默认的external_url = 'http://git.example.com'修改为自己的IP地址:http://xxx.xx.xxx.xx
[root@yoyo conf]# vim /etc/gitlab/gitlab.rb
原来默认的external_url
## GitLab URL

##! URL on which GitLab will be reachable.

##! For more details on configuring external_url see:

##! https://docs.gitlab.com/omnibus/settings/configuration.html#configuring-the-external-url-for-gitlab

external_url 'http://git.example.com'
修改成自己定义的url地址,端口自己设置一个,别和已有的冲突了
## GitLab URL

##! URL on which GitLab will be reachable.

##! For more details on configuring external_url see:

##! https://docs.gitlab.com/omnibus/settings/configuration.html#configuring-the-external-url-for-gitlab

external_url 'http://47.104.x.x:8100'
修改完成后:wq保存退出,执行以下命令,让配置生效
[root@yoyo conf]# gitlab-ctl reconfigure
启动Gitlab
[root@yoyo conf]# gitlab-ctl start
[root@yoyo ~]# gitlab-ctl start

ok: run: gitaly: (pid 6638) 186s

ok: run: gitlab-monitor: (pid 6656) 186s

ok: run: gitlab-workhorse: (pid 6659) 186s

ok: run: logrotate: (pid 6703) 185s

ok: run: nginx: (pid 6709) 185s

ok: run: node-exporter: (pid 6715) 184s

ok: run: postgres-exporter: (pid 6720) 184s

ok: run: postgresql: (pid 7324) 44s

ok: run: prometheus: (pid 6752) 171s

ok: run: redis: (pid 6761) 171s

ok: run: redis-exporter: (pid 6765) 170s

ok: run: sidekiq: (pid 7299) 45s

ok: run: unicorn: (pid 7476) 18s
启动完成后,在浏览器输入http://47.104.x.x:8100,就是gitlab的登录首页了,如果出现502页面,需修改默认的8080端口
502问题
打开gitlab首页出现502问题
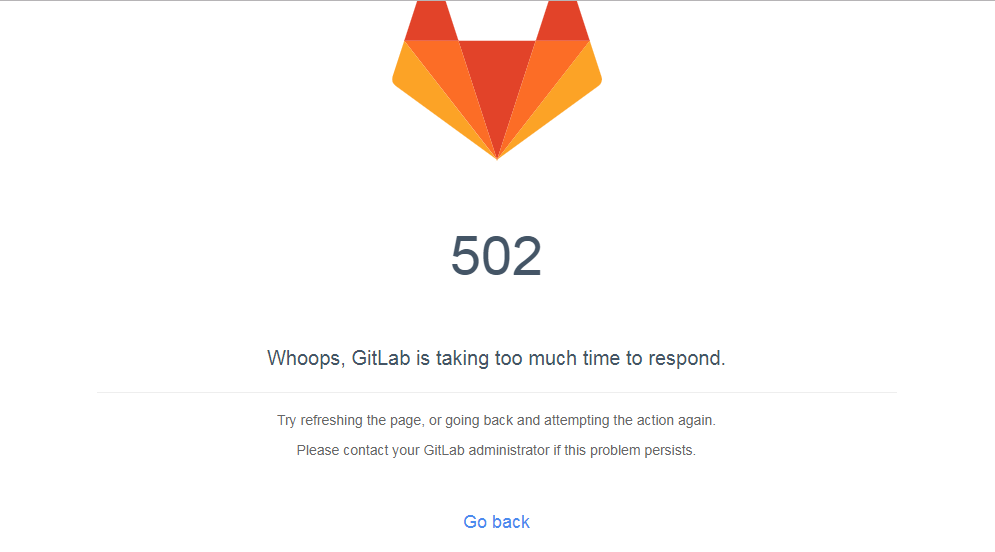
出现这个问题,主要是因为8080端口被占用,之前安装tomcat默认的是8080端口,netstat -ntpl查看端口情况
[root@yoyo ~]# netstat -ntpl

Active Internet connections (only servers)

Proto Recv-Q Send-Q Local Address           Foreign Address         State       PID/Program name

tcp        0      0 127.0.0.1:9100          0.0.0.0:*               LISTEN      6715/node_exporter

tcp        0      0 0.0.0.0:8080            0.0.0.0:*               LISTEN      801/java

tcp        0      0 0.0.0.0:8060            0.0.0.0:*               LISTEN      6709/nginx: master

tcp        0      0 127.0.0.1:9121          0.0.0.0:*               LISTEN      6765/redis_exporter

tcp        0      0 127.0.0.1:9090          0.0.0.0:*               LISTEN      6752/prometheus

tcp        0      0 127.0.0.1:9187          0.0.0.0:*               LISTEN      6720/postgres_expor

tcp        0      0 0.0.0.0:8100            0.0.0.0:*               LISTEN      6709/nginx: master

tcp        0      0 127.0.0.1:8101          0.0.0.0:*               LISTEN      7495/unicorn master

tcp6       0      0 :::3306                 :::*                    LISTEN      1370/mysqld
杀掉8080端口即可,8080端口对应的pip是801
[root@yoyo ~]# kill -9 801
重启下服务,刷新页面就可以访问了
[root@yoyo ~]# gitlab-ctl restart
为了避免8080端口冲突问题,可以修改下unicorn的默认端口,vim打开/etc/gitlab/gitlab.rb配置文件
新增一项unicorn['port'] = 8101,修改后内容如下
## GitLab URL

##! URL on which GitLab will be reachable.

##! For more details on configuring external_url see:

##! https://docs.gitlab.com/omnibus/settings/configuration.html#configuring-the-external-url-for-gitlab

external_url 'http://47.104.x.x:8100'

unicorn['port'] = 8101
修改完成后:wq保存退出,执行gitlab-ctl reconfigure命令,让配置生效,再重新启动服务
[root@yoyo conf]# gitlab-ctl reconfigure

[root@yoyo conf]# gitlab-ctl stop

[root@yoyo conf]# gitlab-ctl start
接着在浏览器访问就能看的gitlab登录首页了

gitlab配置查看
gitlab的配置主要是etc/gitlab/gitlab.rb下的两个地方
external_url 'http://47.104.x.x:8100'

unicorn['port'] = 8101
查看更多配置信息可以,在/opt/gitlab/embedded/service/gitlab-rails/config/gitlab.yml查看具体的详情
  gitlab:

    ## Web server settings (note: host is the FQDN, do not include http://)

    host: 47.104.x.x

    port: 8100

    https: false
相关操作
启动服务:gitlab-ctl start
查看状态:gitlab-ctl status
停掉服务:gitlab-ctl stop
重启服务:gitlab-ctl restart
让配置生效:gitlab-ctl reconfigure
交流QQ群:779429633
Linux学习16-CentOS安装gitlab环境的更多相关文章
- Linux学习(一)------CentOs安装mysql5.5 数据库
具体方法和步骤如下所示: 1.第一步就是看linu是否安装了mysql,经过rpm -qa|grep mysql查看到centos下安装了mysql5.1,那就开始卸载咯 2.接下来就是卸载mysql ...
- linux学习之centos(三):mysql数据库的安装和配置
前言:mysql简介 说到数据库,我们大多想到的是关系型数据库,比如mysql.oracle.sqlserver等等,这些数据库软件在windows上安装都非常的方便,在Linux上如果要安装数据库, ...
- [转] Linux学习之CentOS(十三)--CentOS6.4下Mysql数据库的安装与配置
from: http://www.cnblogs.com/xiaoluo501395377/archive/2013/04/07/3003278.html 如果要在Linux上做j2ee开发,首先得 ...
- Linux学习之CentOS(十三)--CentOS6.4下Mysql数据库的安装与配置
原文:http://www.cnblogs.com/xiaoluo501395377/archive/2013/04/07/3003278.html 如果要在Linux上做j2ee开发,首先得搭建好j ...
- Linux学习之CentOS(一)--CentOS6.4环境搭建
Linux学习之CentOS(一)--CentOS6.4环境搭建http://www.cnblogs.com/xiaoluo501395377/archive/2013/03/31/CentOs.ht ...
- Linux学习之CentOS(十三)--CentOS6.4下Mysql数据库的安装与配置(转)
原文地址:http://www.cnblogs.com/xiaoluo501395377/archive/2013/04/07/3003278.html 如果要在Linux上做j2ee开发,首先得搭建 ...
- Linux学习之CentOS(五)--CentOS下VMware-Tools安装
已经进入到了Linux学习之CentOS的第六篇随笔了,所以这里就介绍一下VMware-Tools的安装. VMware-Tools的安装 VMware-Tools 主要的功能就是让用户在虚拟机和真实 ...
- Linux CentOS安装PHP环境
Linux CentOS安装PHP环境 1.下载php环境 wget http://cn2.php.net/distributions/php-7.2.1.tar.gz 更多php版本下载 http ...
- CentOS安装gitLab服务器
首先利用gitlab-install-el6.sh安装,比较简单: (出处:http://www.linuxidc.com/Linux/2013-06/85754.htm) 1:如果有条件,提供一台全 ...
- linux学习之centos(三):网卡配置
Linux系统版本:Centos 6.5 在linux学习之centos(二):虚拟网络三种连接方式和SecureCRT的使用中,使用远程工具SecureCRT,通过“ifconfig eth0 + ...
随机推荐
- mybatis-config.xml 模板
ssm模板 <?xml version="1.0" encoding="UTF-8" ?> <!DOCTYPE configuration ...
- 【转载】redis容灾策略
版权声明:转载请注明出处 http://blog.csdn.net/irean_lau. https://blog.csdn.net/Irean_Lau/article/details/5136027 ...
- 利用 Vmware 安装 Linux 虚拟机
之前写过一篇利用MS系的 Hyper-v 安装 Ubuntu 的教程,这里给出使用 Vmware 安装 Linux 的教程.(ps:Hyper-v 的体验感不太好,而且不够大众化) 1.准备工作 1. ...
- 解决vue项目打包后背景图片找不到的问题
在build->webpack.base.conf.js里添加一句代码: 具体位置在module->rules下 publicPath:"../../",
- Ubuntu下登陆远程postgresql数据库
登陆公司远程postgresql:psql -h <host or remote id> -p <port> dbdame 如: psql -h aliyunsql_addr ...
- 循序渐进学.Net Core Web Api开发系列【14】:异常处理
系列目录 循序渐进学.Net Core Web Api开发系列目录 本系列涉及到的源码下载地址:https://github.com/seabluescn/Blog_WebApi 一.概述 本篇介绍异 ...
- java 注解 总结
http://www.importnew.com/23564.html 注解的好处: 1.能够读懂别人写的代码,特别是框架相关的代码. 2.本来可能需要很多配置文件,需要很多逻辑才能实现的内容,就可以 ...
- Android-认识Service
Android-认识Service 学习自 郭霖的博客 https://developer.android.google.cn/reference/android/app/Service#WhatIs ...
- 数据包编辑工具bittwiste
数据包编辑工具bittwiste bittwiste是数据包重放工具bittwist的一个工具.该工具可以编辑修改PCAP抓包文件.该工具提供数据包过滤功能,如根据范围和时间过滤.同时,该工具支持 ...
- 21.python中的闭包和装饰器
python中的闭包从表现形式上定义(解释)为:如果在一个内部函数里,对在外部作用域(但不是在全局作用域)的变量进行引用,那么内部函数就被认为是闭包(closure). 以下说明主要针对 python ...