
SpringBoot整合Freemarker+Mybatis
开发工具
 ,
,
开始
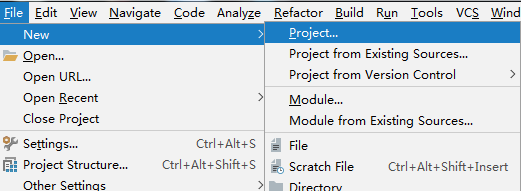
新建工程
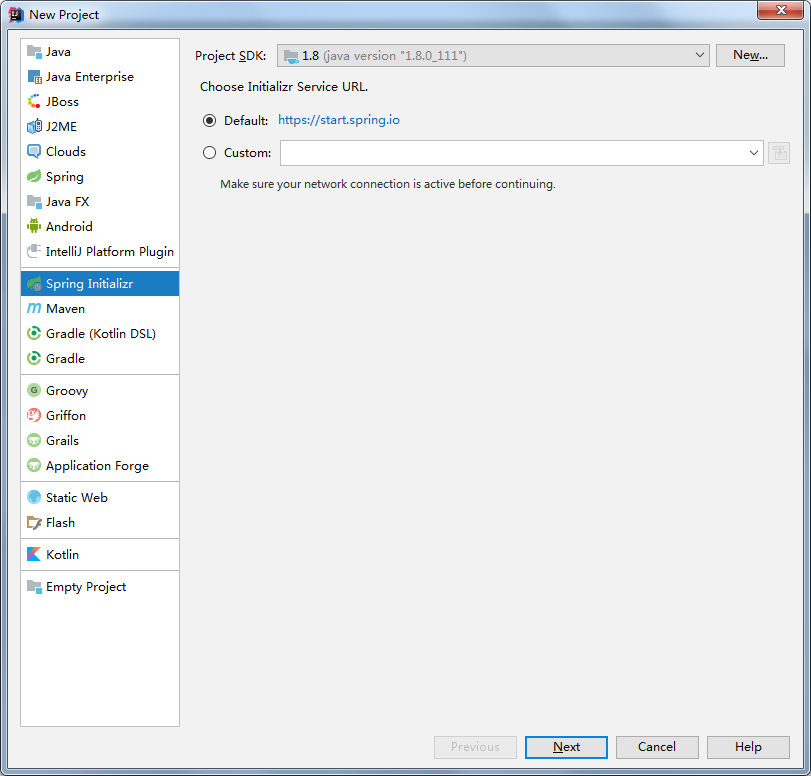
.选择Spring Initializr
下一步
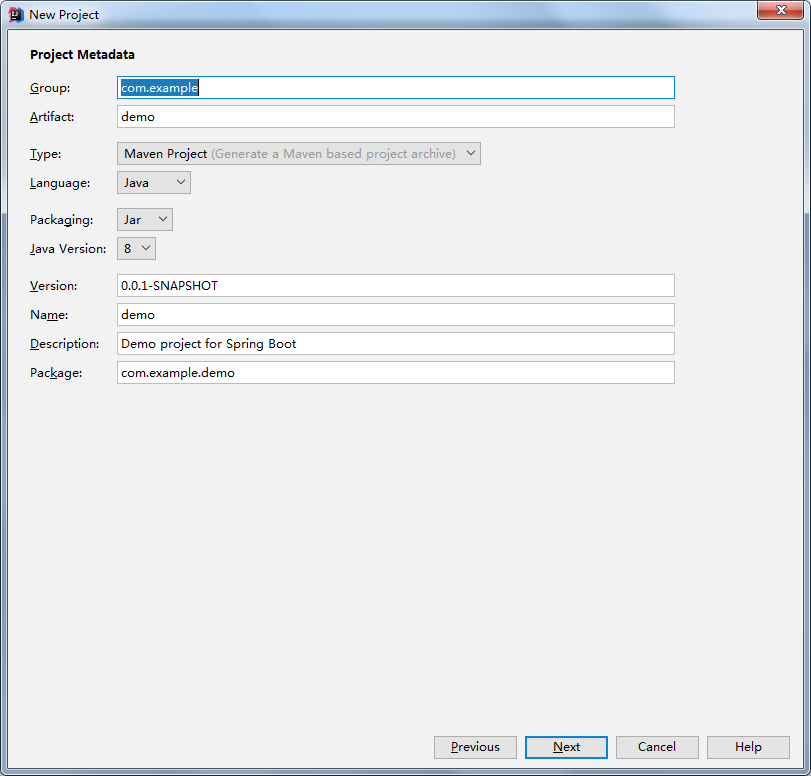
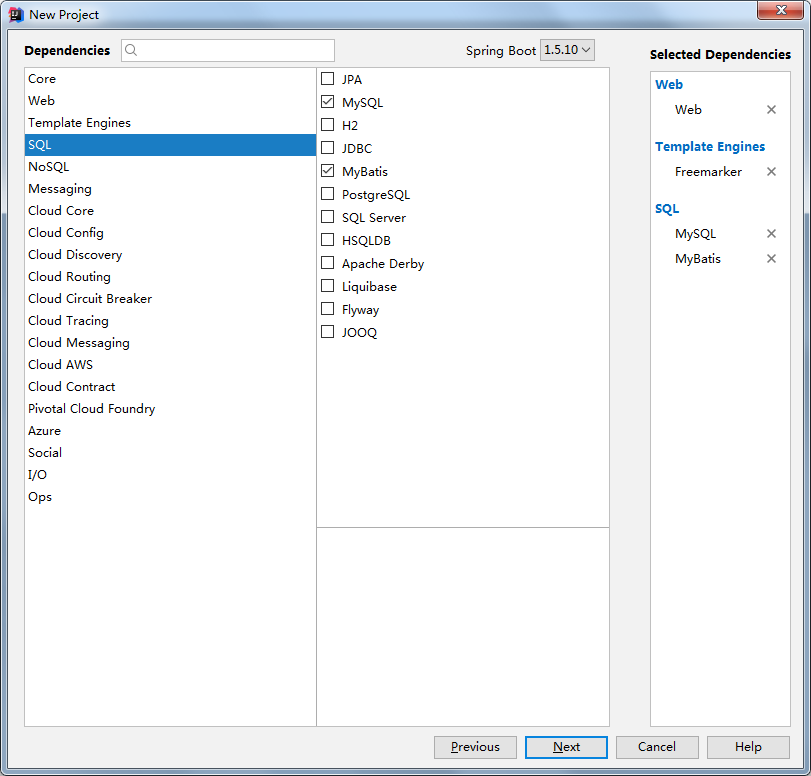
下一步,选择需要的组件
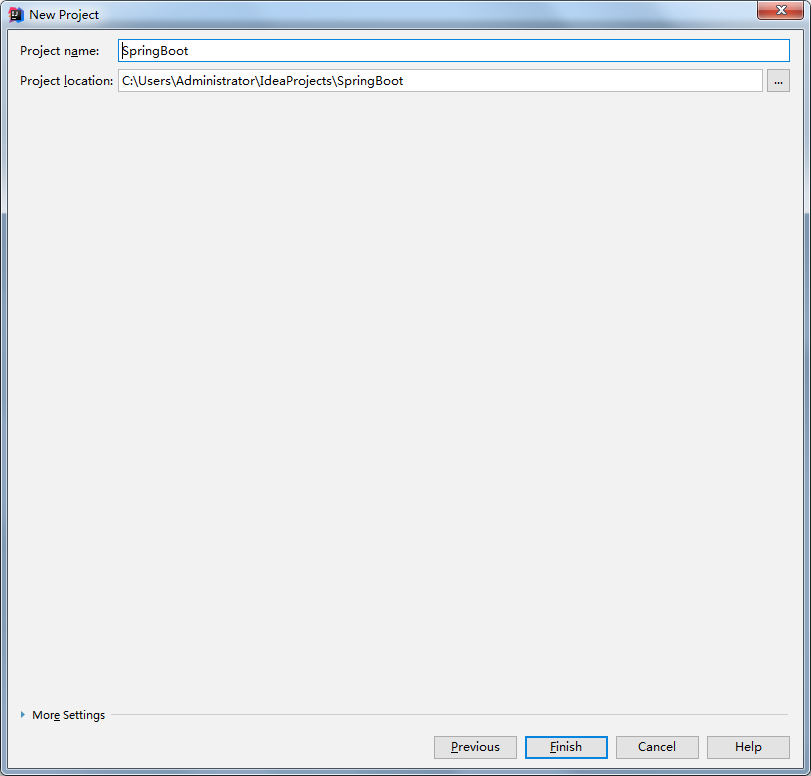
..改一下工程名,Finish
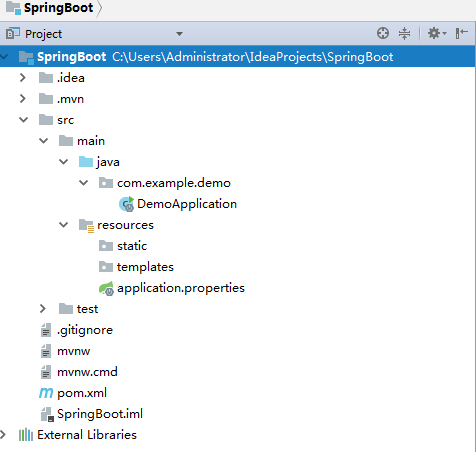
..目录结构
首先,修改pom文件
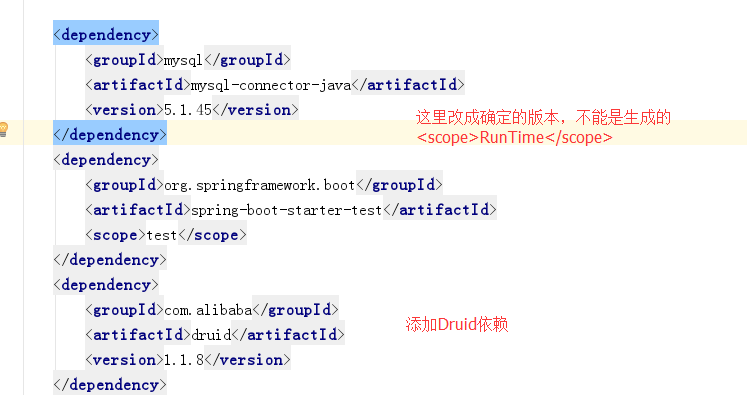
然后,将application.properties改成yml文件,并且配置相关参数
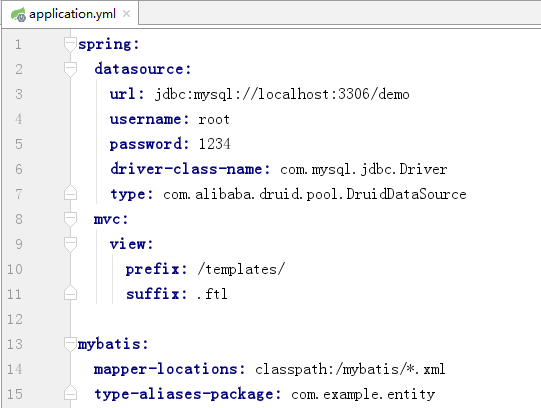
我的数据库很简单,user表,int类型的自增id,varchar类型的name。
之后建立各个文件,目录结构如下:
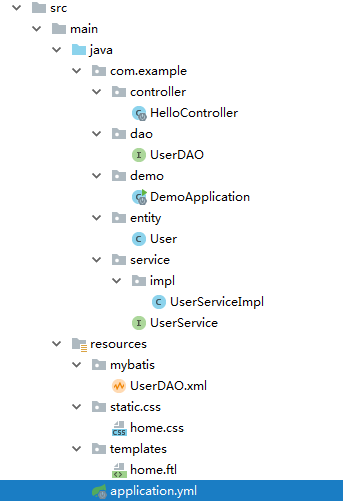
HelloController
package com.example.controller;

import com.example.entity.User;

import com.example.service.UserService;

import org.springframework.beans.factory.annotation.Autowired;

import org.springframework.boot.autoconfigure.EnableAutoConfiguration;

import org.springframework.web.bind.annotation.RequestMapping;

import org.springframework.web.bind.annotation.RestController;

import org.springframework.web.servlet.ModelAndView;

import java.util.HashMap;

import java.util.Map;

@RestController

public class HelloController {

    @Autowired

    private UserService userService;

    @RequestMapping("/index")

    public String index(){

        return "Hello !!";

    }

    @RequestMapping("/add")

    public Map<Integer, Integer> addUsers(){

        Map<Integer, Integer> map = new HashMap<>();

        for (int i = 0; i < 10; i++){

            map.put(i, userService.addUser(new User("name-" + i)));

        }

        return map;

    }

    @RequestMapping("/get")

    public Map<String, Object> getUsers(){

        Map<String, Object> map = new HashMap<>();

        map.put("users", userService.getUsers());

        return map;

    }

    @RequestMapping("/view")

    public ModelAndView viw(){

        ModelAndView mv = new ModelAndView("home");

        mv.addObject("name","Tom's Table");

        mv.addObject("users", userService.getUsers());

        return mv;

    }

}
UserDAO
package com.example.dao;

import com.example.entity.User;

import org.springframework.stereotype.Repository;

import java.util.List;

@Repository

public interface UserDAO {

    int addUser(User user);

    List<User> getUsers();

}
User
package com.example.entity;

public class User {

    private int id;

    private String name;

    public User(String name) {

        this.name = name;

    }

    public User() {

    }

    public int getId() {

        return id;

    }

    public void setId(int id) {

        this.id = id;

    }

    public String getName() {

        return name;

    }

    public void setName(String name) {

        this.name = name;

    }

    @Override

    public String toString() {

        return "User{" +

                "id=" + id +

                ", name='" + name + '\'' +

                '}';

    }

}
UserService
package com.example.service;

import com.example.entity.User;

import org.springframework.stereotype.Service;

import java.util.List;

@Service

public interface UserService {

    int addUser(User user);

    List<User> getUsers();

}
UserServiceImpl
package com.example.service.impl;

import com.example.dao.UserDAO;

import com.example.entity.User;

import com.example.service.UserService;

import org.springframework.beans.factory.annotation.Autowired;

import org.springframework.stereotype.Service;

import java.util.List;

@Service

public class UserServiceImpl implements UserService {

    @Autowired

    private UserDAO userDAO;

    @Override

    public int addUser(User user) {

        return userDAO.addUser(user);

    }

    @Override

    public List<User> getUsers() {

        return userDAO.getUsers();

    }

}
然后在Resource文件夹新建一个mybatis文件夹,用来存放mapper
UserDAO.xml
<?xml version="1.0" encoding="UTF-8"?>

<!DOCTYPE mapper PUBLIC "-//mybatis.org//DTD Mapper 3.0//EN" "http://mybatis.org/dtd/mybatis-3-mapper.dtd">

<mapper namespace="com.example.dao.UserDAO">

    <insert id="addUser" parameterType="User">INSERT INTO USER(NAME) VALUES (#{name})</insert>

    <select id="getUsers" resultType="User">SELECT * FROM USER </select>

</mapper>
home.css
@charset "UTF-8";

h1{

    color: #ff527d;

}
home.ftl
<!DOCTYPE html>

<html>

<head lang="en">

    <meta charset="UTF-8" />

    <title></title>

    <link rel="stylesheet" type="text/css" href="/css/home.css">

</head>

<body>

    <h1>${name}</h1>

    <table>

        <thead>

        <tr>

            <th>ID</th>

            <th>Name</th>

        </tr>

        </thead>

        <tbody>

        <#list users as u>

            <tr>

                <td>${u.id}</td>

                <td>${u.name}</td>

            </tr>

        </#list>

        </tbody>

    </table>

</body>

</html>
对于mybatis相关xml生成以及操作,ftl文件的新建,请看最后。
最关键的类:启动类,很有必要说明一下。
package com.example.demo;

import org.mybatis.spring.annotation.MapperScan;

import org.springframework.boot.SpringApplication;

import org.springframework.boot.autoconfigure.SpringBootApplication;

import org.springframework.context.annotation.ComponentScan;

@SpringBootApplication

@MapperScan("com.example.dao")

@ComponentScan("com.example")

public class DemoApplication {

    public static void main(String[] args) {

        SpringApplication.run(DemoApplication.class, args);

    }

}
默认SpringBoot的装配规则是: 只扫描Application所在的包以及所有子包!这个坑我一直踩却没有怀疑他。
@MapperScan-----扫描Mapper类
@ComponentScan----扫描指定的包
到此为止,可以启动SpringBoot应用了。
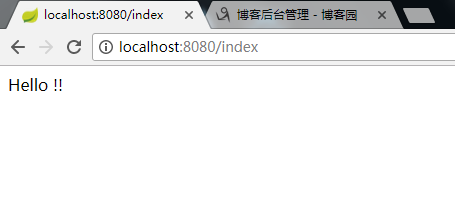
---------------------
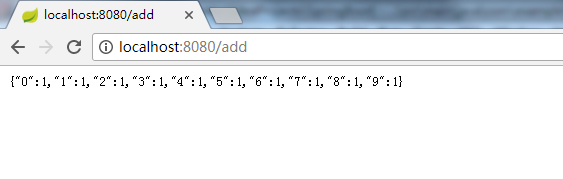
---------------------
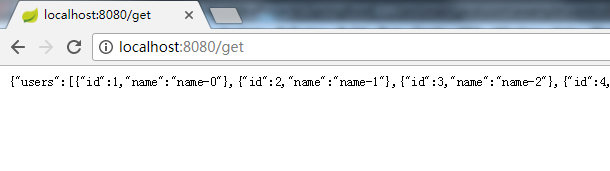
----------------------最后一个,从后台读取数据,freemarker渲染视图
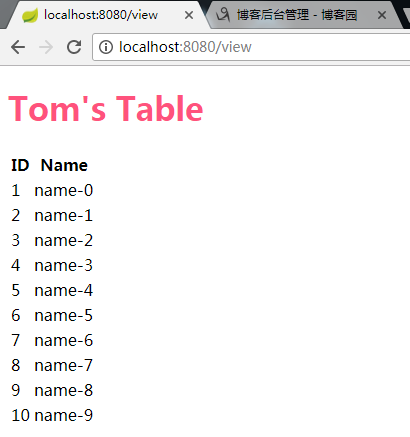
下面进行采坑指南---
第一个,用过eclipse+mybatis插件的都知道,有个插件来生成mybatis配置文件和映射文件是个方便的事,其实IDEA也有,但是用的我有点不习惯↓↓
..Settings
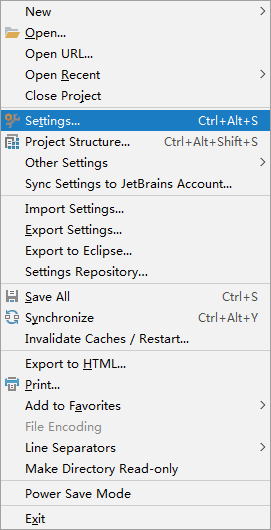
..找到下面这个
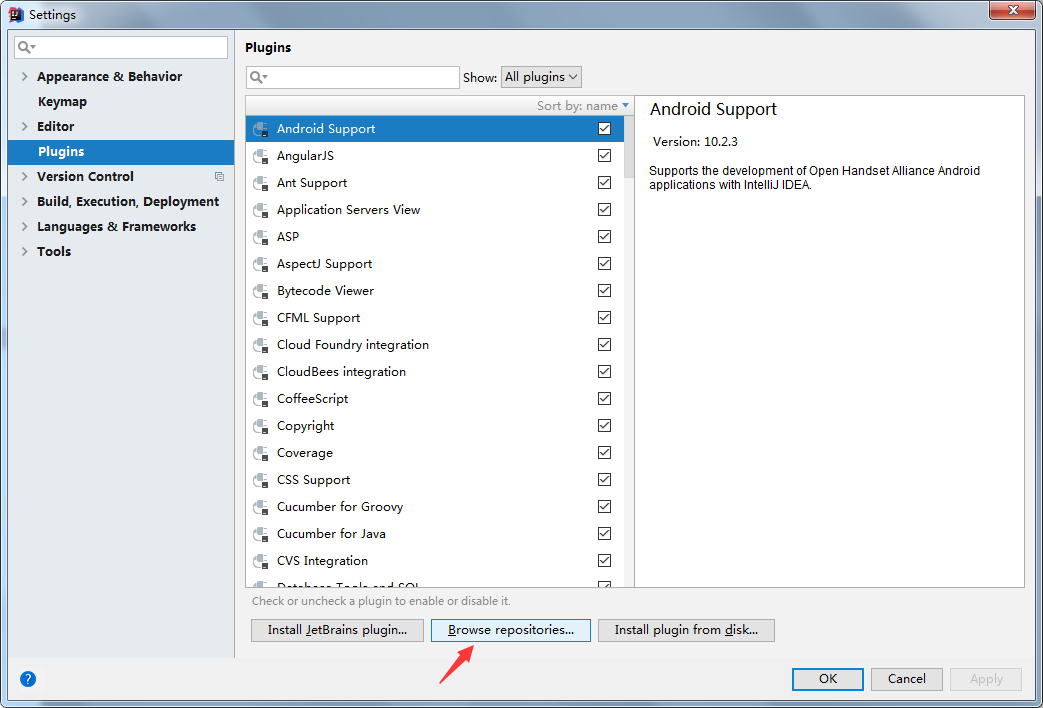
..搜索mybatis,选择下面这三个,主要是第二个和第三个,单独选中右侧会出现Install选项
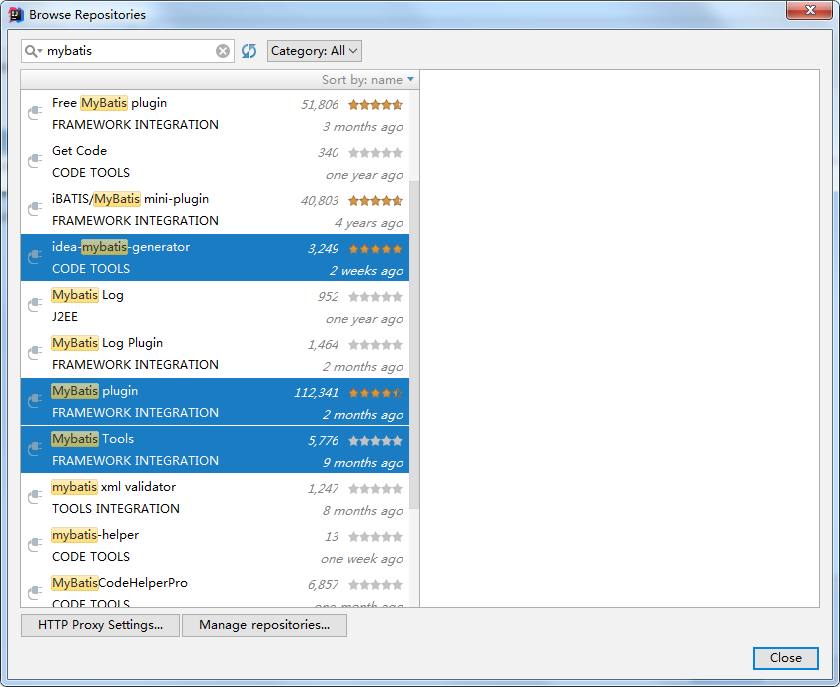
..安装完之后,会让你重启,重启之后,会出现Mybatis的选项,不过问题是,它只有config的新建选项,没有mapper的新建选项。
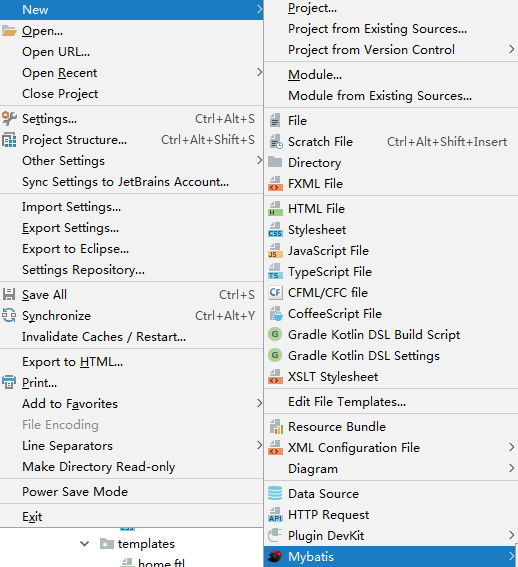
..我不知道大家有啥更好的方法没有,反正我去尝试编辑右键菜单,无果。只好采取以下方法。
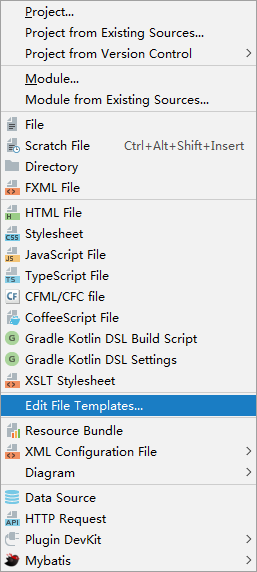
..找到other选项卡,看到这里你们肯定会问,这里不是有吗,对呀,你有本事把它搞到右键菜单啊。复制右侧的内容
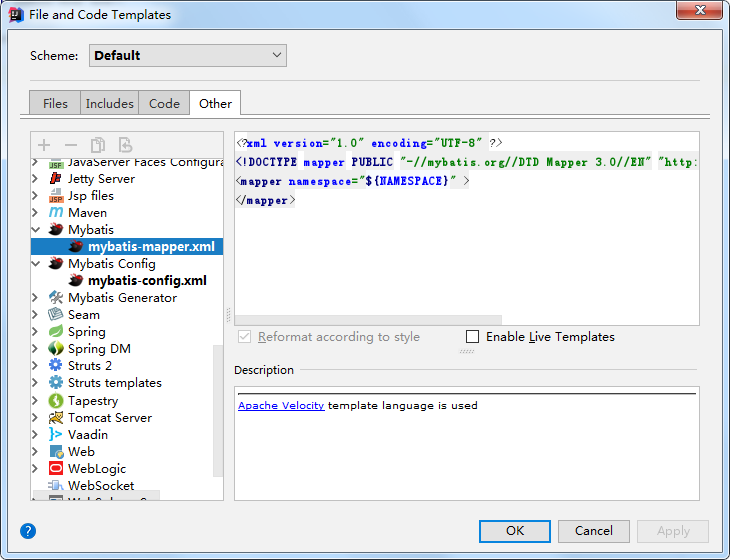
..回到Files,点击加号,输入Name,扩展名,并把复制的内容粘贴到此处。注意把namespace里面的代码去掉
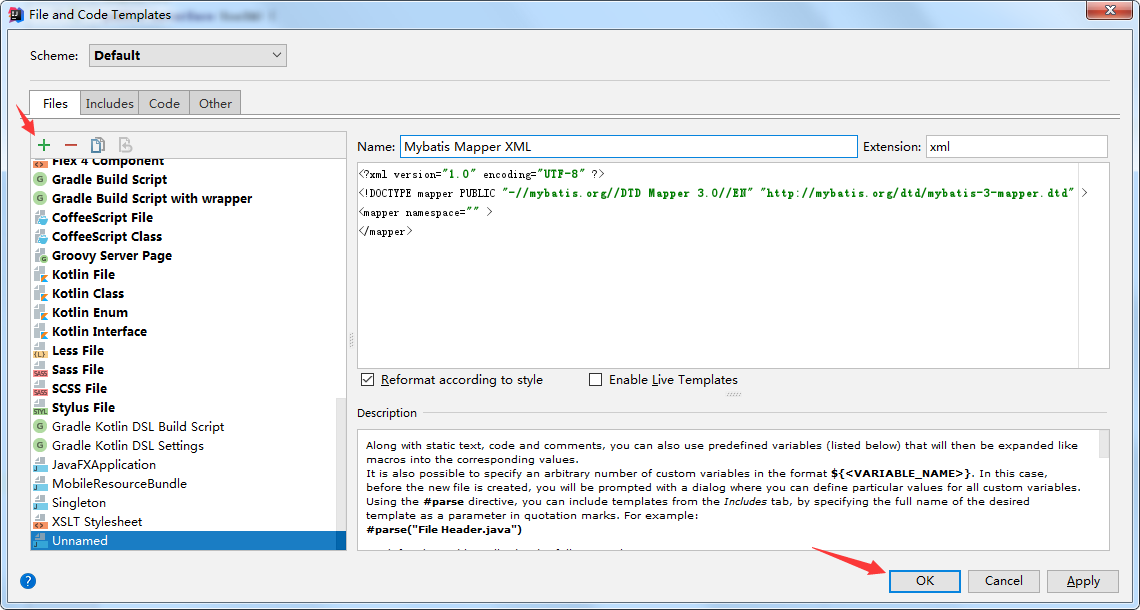
点击OK,可以看到,出现了Mapper选项,但是!他并没有像eclipse里面的插件那样智能,他只是生成一个普通的文件而已。里面的namespace的值需要你自己修改。
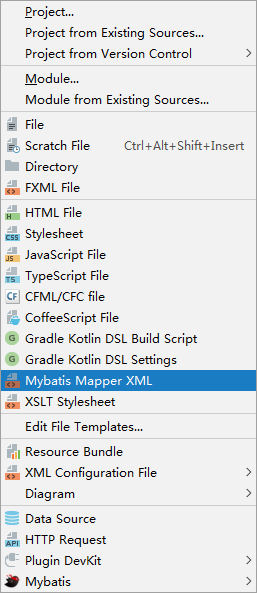
到此,实现了Mybatis配置文件的代码追踪等等实用的操作
插一句:网上都是告诉你使用generator来生成mapper文件以及简单的sql语句,节省了时间,但是我不是特别喜欢那种全自动的。
第二个,关于freemarker模板的问题。
SpringBoot的文件目录:static用来存放静态文件,templates用来存放视图。那么,freemarker模板需要引用static里面的css文件呢?
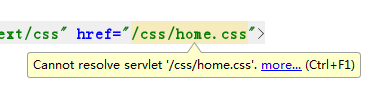
如果在freemarker文件里面直接这样写,他说他找不到,但是,你不用管它!当项目运行起来,SpringBoot会自动从static里面去找。如果你有强迫症,没关系,我能忍。
第三个,同样,IDEA如何创建freemarker文件?
唉,没有相应的模板。你可以自己建一个:
复制HTML5的模板
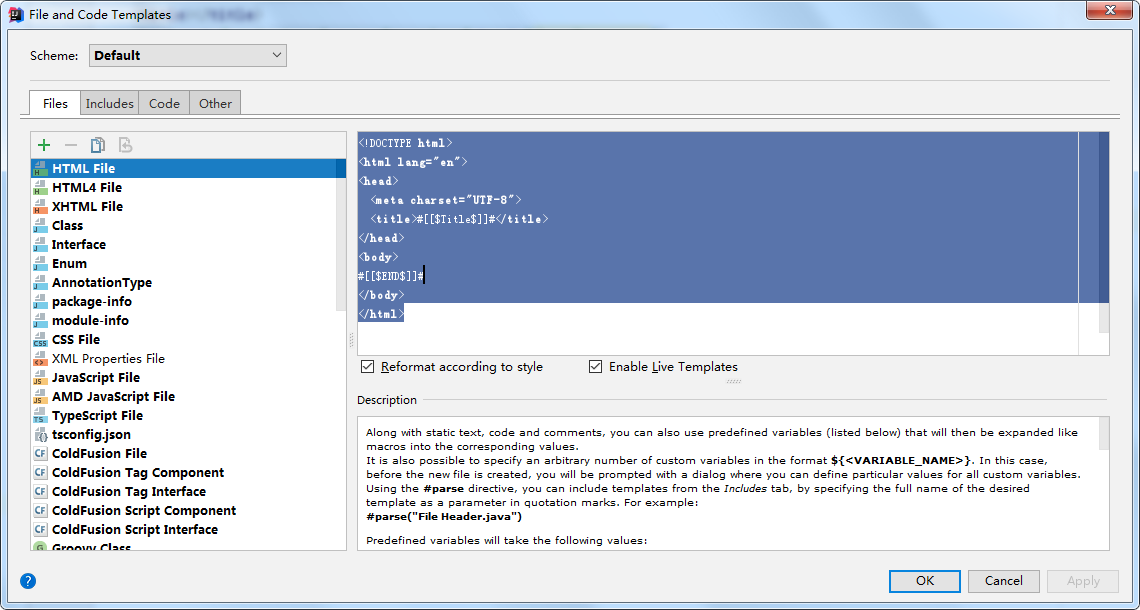
点击加号,新建一个

点击OK,右键new
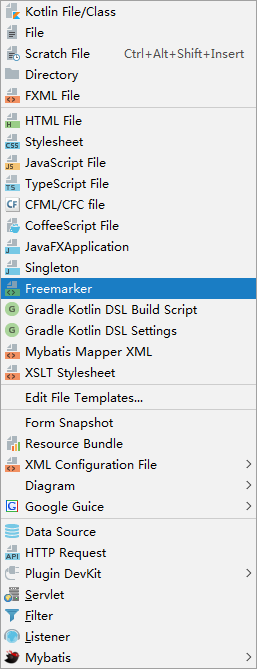
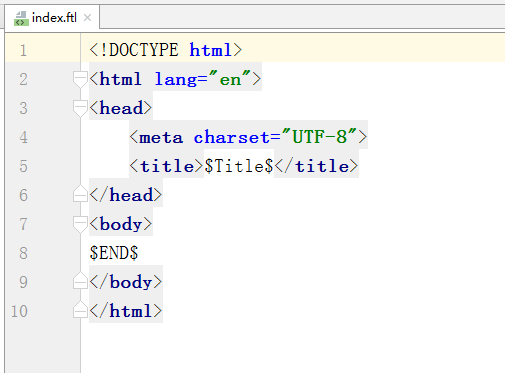
点击,输入文件名(这里的$Title$,因为不是html文件,所以识别不了,你看着费劲可以修改模板)
SpringBoot整合Freemarker+Mybatis的更多相关文章
- SpringBoot整合freemarker 引用基础
原 ElasticSearch学习笔记Ⅲ - SpringBoot整合ES 新建一个SpringBoot项目.添加es的maven坐标如下: <dependency> <groupI ...
- springboot整合freemarker
前后端分离现在越来越多,如何有效的使用springboot来整合我们的页面是一个很重要的问题. springboot整合freemarker有以下几个步骤,也总结下我所犯的错误: 1.加依赖: 2.配 ...
- springboot 整合 freemarker
springboot 整合 freemarker 依赖 <parent> <groupId>org.springframework.boot</groupId> & ...
- 【SpringBoot】11.Springboot整合SpringMVC+Mybatis(上)
Springboot整合SpringMVC+Mybatis 需求分析:通过使用Springboot+SpringMVC+Mybatis 整合实现一个对数据库表users表的CRUD操作. 1.创建项目 ...
- 【SpringBoot】09.SpringBoot整合Freemarker
SpringBoot整合Freemarker 1.修改pom文件,添加坐标freemarker启动器坐标 <project xmlns="http://maven.apache.org ...
- SpringBoot学习8:springboot整合freemarker
1.创建maven项目,添加pom依赖 <!--springboot项目依赖的父项目--> <parent> <groupId>org.springframewor ...
- springboot整合freemarker(转)
添加依赖 <dependency> <groupId>org.springframework.boot</groupId> <artifactId>sp ...
- 【SpringBoot】11-1.Springboot整合Springmvc+Mybatis增删改查操作(下)
整合过程:https://www.isdxh.com/68.html 一.增--增加用户 1.创建实体类 package com.dxh.pojo; public class Users { priv ...
- Spring-Boot整合freemarker引入静态资源css、js等
一.概述 springboot 默认静态资源访问的路径为:/static 或 /public 或 /resources 或 /META-INF/resources 这样的地址都必须定义在src/mai ...
随机推荐
- 集合之LinkedHashSet(含JDK1.8源码分析)
一.前言 上篇已经分析了Set接口下HashSet,我们发现其操作都是基于hashMap的,接下来看LinkedHashSet,其底层实现都是基于linkedHashMap的. 二.linkedHas ...
- NLP的原理,框架及具体实例
1. 什么是NLP 所谓NLP就是自然语言处理,即计算机识别人的自然沟通语言,将人的语言转换成表达含义相同的文字.因为NLP的目的是将人和计算机通过自然语言沟通成为可能,而人最方便的沟通是通过语音发声 ...
- DataSet 取值,DataSet行数,DataSet列数 从DataSet中取出特定值
1 DataSet.Table[0].Rows[ i ][ j ] 其中i 代表第 i 行数, j 代表第 j 列数 2 DataSet.Table[0].Rows[ i ].ItemArray[ j ...
- c#处理json数据最好的方式,没有之一。
c#处理json数据最好的方式,没有之一. 引用Json.Net(需要.NET 4.5及以上版本) using Newtonsoft.Json.Linq; 使用非常简单 JObject result ...
- JavaScript学习笔记之数组(二)
JavaScript学习笔记之数组(二) 1.['1','2','3'].map(parseInt) 输出什么,为什么? ['1','2','3'].map(parseInt)//[1,NaN,NaN ...
- How to flash Havoc on enchilada
update fastboot and adb fastboot oem unlock adb debug enchilada reboot to fastboot fastboot devices ...
- RBS SharePoint 2010 Server.wmv
视频地址: https://www.youtube.com/watch?v=DXi2er514iA&feature=youtu.be
- mysql中count的注意事项
1.count()函数是用来统计表中记录的一个函数,返回匹配条件的行数. 2.count()语法: (1)count(*)---包括所有列,返回表中的记录数,相当于统计表的行数,在统计结果的时候,不会 ...
- 查询SQLSERVER中系统所有表
SQL 查询所有表名: SELECT NAME FROM SYSOBJECTS WHERE TYPE='U' SELECT * FROM INFORMATION_SCHEMA.TABLES 查询表的所 ...
- MT【270】含参绝对值函数最大之二
已知$f(x)=2ax\cos^2x+(a-1)\cos x-1,a>0$,记$|f(x)|$的最大值为$A$,1)求A.2)证明:$|-2a\sin 2x+(1-a)\sin x|\le 2A ...