uni-app开发经验分享二十: 微信小程序 授权登录 获取详细信息 获取手机号
授权页面
因为微信小程序提供的 权限弹窗 只能通用户确认授权 所以可以 写一个授权页面,让用户点击 来获取用户相关信息 然后再配合后台就可以完成登录
<button class="btnInfo" open-type="getUserInfo"/>
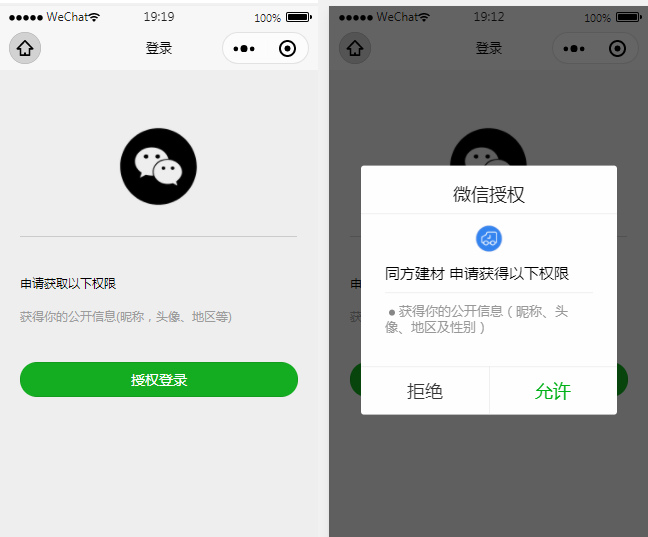
素材

页面代码示例
这个接口要在后端调用(https://api.weixin.qq.com无法加入白名单)
https://api.weixin.qq.com/sns/jscode2session?appid="+appid+"&secret="+secret+"&js_code="+code+"&grant_type=authorization_code
<template>

	<view>

		<view>

		  <view>

			<view class='header'>

			  <image src='../../static/wx_login.png'></image>

			</view>

			<view class='content'>

			  <view>申请获取以下权限</view>

			  <text>获得你的公开信息(昵称,头像、地区等)</text>

			</view>

			<!-- withCredentials=true  获取到除用户基本信息之外的encryptedData以及iv等数据 -->

			<button class='bottom' type='primary' open-type="getUserInfo" withCredentials="true" lang="zh_CN" @getuserinfo="wxGetUserInfo">

			  授权登录

			</button>

			<!-- <button class='bottom' type='primary' open-type="getPhoneNumber"  @getphonenumber="getPhoneNumber">

			  授权登录

			</button> -->

		  </view>

		</view>

	</view>

</template>

<script>

	import { htxcx } from "@/store/api.js"

	import { mapMutations } from 'vuex'

	export default {

		data() {

			return {

				code:"",

				SessionKey: '',

				encryptedData:"",

				iv:"",

				OpenId: '',

				nickName: null,

				avatarUrl: null,

				isCanUse: uni.getStorageSync('isCanUse')//默认为true  记录当前用户是否是第一次授权使用的

			}

		},

		onLoad() {

			this.login()

		},

		methods: {

			...mapMutations(["setName"]),

			wxGetUserInfo(){ //第一授权获取用户信息===》按钮触发

				let _this = this;

				// 获取用户信息

				uni.getUserInfo({

					provider: 'weixin',

					success: function (infoRes) {

						_this.encryptedData = infoRes.encryptedData

						_this.iv = infoRes.iv

						_this.nickName = infoRes.userInfo.nickName; //昵称

						_this.avatarUrl = infoRes.userInfo.avatarUrl; //头像

						uni.setStorageSync('isCanUse', false);//记录是否第一次授权 false:表示不是第一次授权

						_this.updateUserInfo();

					},fail:function (fail){console.log("fail:",fail)}

				});

			},

			login(){

				let _this = this;

				uni.showLoading({

				  title: '登录中...'

				});

				// 1.wx获取登录用户code

				uni.login({

					provider: 'weixin',

					success: function(loginRes) {

						_this.code = loginRes.code;

						if (!_this.isCanUse) {

							//非第一次授权获取用户信息

							uni.getUserInfo({

								provider: 'weixin',

								success: function(infoRes) {

									console.log('login用户信息:',infoRes);

				            //获取用户信息后向调用信息更新方法

									_this.nickName = infoRes.userInfo.nickName; //昵称

									_this.avatarUrl = infoRes.userInfo.avatarUrl; //头像

									_this.updateUserInfo();//调用更新信息方法

								}

							});

						}

						// 将用户登录code传递到后台置换用户SessionKey、OpenId等信息

						uni.hideLoading();

					},

				})

			},

			updateUserInfo(){ //向后台更新信息

				this.setName(this.nickName,this.avatarUrl)

				let _this = this;

				var obj ={

					appid:"wx1*********0f06",

					secret:"07bd3*************096",

					code:this.code

				}

				// 这个接口要在后端调用(https://api.weixin.qq.com无法加入白名单)

				// https://api.weixin.qq.com/sns/jscode2session?appid="+appid+"&secret="+secret+"&js_code="+code+"&grant_type=authorization_code

				// 请求微信端地址获取用户唯一标识的

				htxcx(obj.appid,obj.secret,obj.code).then(res=>{

					console.log("res:",res)

					res.data.openid // 唯一

					res.data.session_key

					this.encryptedData

					this.iv

					uni.reLaunch({//信息更新成功后跳转到小程序首页

						url: '/pages/index/index'

					});

				},err=>{

					console.log("err:",err)

				})

			}

		}

	}

</script>

<style scoped>

	.header {

	    margin: 90rpx 0 90rpx 50rpx;

	    border-bottom: 1px solid #ccc;

	    text-align: center;

	    width: 650rpx;

	    height: 300rpx;

	    line-height: 450rpx;

	  }

	  .header image {

	    width: 200rpx;

	    height: 200rpx;

	  }

	  .content {

	    margin-left: 50rpx;

	    margin-bottom: 90rpx;

	  }

	  .content text {

	    display: block;

	    color: #9d9d9d;

	    margin-top: 40rpx;

	  }

	  .bottom {

	    border-radius: 80rpx;

	    margin: 70rpx 50rpx;

	    font-size: 35rpx;

	  }

</style>
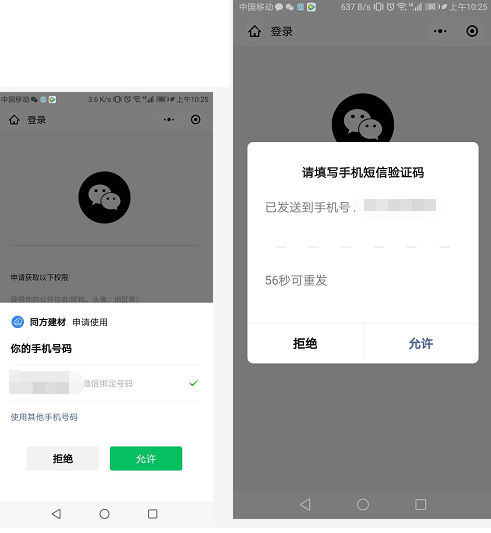
获取手机号
微信文档:https://developers.weixin.qq.com/miniprogram/dev/framework/open-ability/getPhoneNumber.html
前提条件 先要登录
onLoad() {

	this.login()

},
还是用上面的授权页面
<button class='bottom' type='primary' open-type="getUserInfo" withCredentials="true" lang="zh_CN" @getuserinfo="wxGetUserInfo">授权登录</button>

<button class='bottom' type='primary' open-type="getPhoneNumber" @getphonenumber="getPhoneNumber">获取手机号</button>

事件

getPhoneNumber(val){

	console.log(val)

},
这个需要 真机测试 或 预览
<template>

	<view>

		<view>

		  <view>

			<view class='header'>

			  <image src='../../static/wx_login.png'></image>

			</view>

			<view class='content'>

			  <view>申请获取以下权限</view>

			  <text>获得你的公开信息(昵称,头像、地区等)</text>

			</view>

			<!-- withCredentials=true  获取到除用户基本信息之外的encryptedData以及iv等数据 -->

			<!-- <button class='bottom' type='primary' open-type="getUserInfo" withCredentials="true" lang="zh_CN" @getuserinfo="wxGetUserInfo">

			  授权登录

			</button> -->

			<button class='bottom' type='primary' open-type="getPhoneNumber"  @getphonenumber="getPhoneNumber">

			  授权登录

			</button>

		  </view>

		</view>

	</view>

</template>

<script>

	import { htxcx } from "@/store/api.js"

	import { mapMutations } from 'vuex'

	export default {

		data() {

			return {

				code:"",

				SessionKey: '',

				encryptedData:"",

				iv:"",

				OpenId: '',

				nickName: null,

				avatarUrl: null,

				isCanUse: uni.getStorageSync('isCanUse')//默认为true  记录当前用户是否是第一次授权使用的

			}

		},

		onLoad() {

			this.login()

		},

		methods: {

			...mapMutations(["setName"]),

			wxGetUserInfo(){ //第一授权获取用户信息===》按钮触发

				let _this = this;

				// 获取用户信息

				uni.getUserInfo({

					provider: 'weixin',

					success: function (infoRes) {

						_this.encryptedData = infoRes.encryptedData

						_this.iv = infoRes.iv

						_this.nickName = infoRes.userInfo.nickName; //昵称

						_this.avatarUrl = infoRes.userInfo.avatarUrl; //头像

						uni.setStorageSync('isCanUse', false);//记录是否第一次授权 false:表示不是第一次授权

						_this.updateUserInfo();

					},fail:function (fail){console.log("fail:",fail)}

				});

			},

			getPhoneNumber:function(e){

				this.encryptedData = e.detail.encryptedData

				this.iv = e.detail.iv

				uni.setStorageSync('isCanUse', false);

				this.updateUserInfo()

			},

			login(){

				let _this = this;

				uni.showLoading({

				  title: '登录中...'

				});

				// 1.wx获取登录用户code

				uni.login({

					provider: 'weixin',

					success: function(loginRes) {

						console.log("登录",loginRes.code)

						_this.code = loginRes.code;

						if (!_this.isCanUse) {

							//非第一次授权获取用户信息

							uni.getUserInfo({

								provider: 'weixin',

								success: function(infoRes) {

									console.log('login用户信息:',infoRes);

				            //获取用户信息后向调用信息更新方法

									_this.nickName = infoRes.userInfo.nickName; //昵称

									_this.avatarUrl = infoRes.userInfo.avatarUrl; //头像

									_this.updateUserInfo();//调用更新信息方法

								},

								fail(err) {

									console.log(err)

								}

							});

						}

						// 将用户登录code传递到后台置换用户SessionKey、OpenId等信息

						uni.hideLoading();

					},

				})

			},

			updateUserInfo(){ //向后台更新信息

				this.setName(this.nickName,this.avatarUrl)

				let _this = this;

				var obj ={

					appid:"wx1b02a26b03110f06",

					secret:"07bd35d41e7fb6a9bff173c728d6a096",

					code:this.code

				}

				// 这一步一般是在后台  这里是为了测试

				// 正常给 后台 5个测试 appId appsecret code(登录接口获取) encryptedData iv

				htxcx(obj.appid,obj.secret,obj.code).then(res=>{

					console.log("res:",res)

					res.data.openid // 唯一

					res.data.session_key

					this.encryptedData

					this.iv

					// 把这些参数通过接口传给后台 解密 获取手机号

					return

					uni.reLaunch({//信息更新成功后跳转到小程序首页

						url: '/pages/index/index'

					});

				},err=>{

					console.log("err:",err)

				})

			}

		}

	}

</script>
至于后台解密
我的项目后台解密
package jstfsn;

import java.io.UnsupportedEncodingException;

import java.security.Security;

import java.security.spec.AlgorithmParameterSpec;

import java.sql.Connection;

import java.text.ParseException;

import javax.crypto.BadPaddingException;

import javax.crypto.Cipher;

import javax.crypto.IllegalBlockSizeException;

import javax.crypto.KeyGenerator;

import javax.crypto.NoSuchPaddingException;

import javax.crypto.spec.IvParameterSpec;

import javax.crypto.spec.SecretKeySpec;

import javax.naming.NamingException;

import org.apache.commons.codec.binary.Base64;

import org.apache.log4j.Logger;

import GCcom.CommonValue;

import GCcom.DBOperation;

import StxsysBass.StxsysAdmin.CheckingLineService;

import com.alibaba.fastjson.JSONObject;

import com.justep.baas.action.ActionContext;

public class Login {

	/**

	 * 查询历史线路未巡检的巡检点

	 *

	 * @param params

	 * @param context

	 * @return

	 * @throws NamingException

	 */

	/**

	 * 日志

	 */

	public static Logger logger = Logger.getLogger(CheckingLineService.class);

	/**

	 * 数据库名

	 */

//	public static String DATASOURCE = CommonValue.MYSQL_DATA_BASE_JSTFSN;

	/************************************************************************************

	 * 函数名:	getWxUserInfo

	 * 参数名:	JSONObject params: 参数集

	 * 			ActionContext context : 上下文

	 *

	 * 功能:	通过用户授权加密信息解密获取用户信息

	 *

	 * 开发者:	Leechen8@gmail.com 20200317

	 *

	 * 修改者:

	 *

	 * @return

	 * @throws ParseException

	 *

	 *

	 ************************************************************************************/

	public static JSONObject getWxUserInfo(JSONObject params, ActionContext context) throws NamingException {

		// 获取参数

		String strCipher = "";

		String strEncrypdata = params.getString("encrypdata");

		String strIvdata = params.getString("ivdata");

		String strSessionkey= params.getString("sessionkey");

		byte[] byEncrypdata = Base64.decodeBase64(strEncrypdata);

		byte[] byIvdata = Base64.decodeBase64(strIvdata);

		byte[] bySessionkey = Base64.decodeBase64(strSessionkey);

		JSONObject jsData = new JSONObject();

		AlgorithmParameterSpec ivSpec = new IvParameterSpec(byIvdata);

		Cipher cipher;

		try {

			SecretKeySpec keySpec = new SecretKeySpec(bySessionkey, "AES");

			cipher = Cipher.getInstance("AES/CBC/PKCS5Padding");

			cipher.init(Cipher.DECRYPT_MODE, keySpec, ivSpec);

			strCipher = new String(cipher.doFinal(byEncrypdata),"UTF-8");

			jsData.put("phone", strCipher);

		} catch (Exception e) {

			// TODO Auto-generated catch block

			e.printStackTrace();

			jsData.put("error", e.getMessage());

		}

		return jsData;

	}

}
可参考 https://blog.csdn.net/qq_38194393/article/details/81382108
获取详细信息 获取手机号 优化封装
页面
<template>

	<view>

		<view>

			 <view>

				<view class='header'>

					<image src='../../static/wx_login.png'></image>

				</view>

				<view class='content'>

					<view>申请获取以下权限</view>

					<text>获得你的公开信息(昵称,头像、地区等)</text>

					<text>获得你微信绑定的手机号</text>

				</view>

				<!-- <picker class="view_input" @change="bindPickerMPChange" :value="type" :range="typeArr">

					<view :class="typeArr[type]?'uni-input':'uni-input options'">{{typeArr[type]? typeArr[type]:"请选择用户身份"}}</view>

				</picker> -->

				<button class='bottom' type='primary' open-type="getUserInfo" withCredentials="true" lang="zh_CN" @getuserinfo="wxGetUserInfo">

					授权登录

				</button>

				<button class='bottom' type='primary' open-type="getPhoneNumber"  @getphonenumber="getPhoneNumber">

					手机号授权

				</button>

			</view>

		</view>

	</view>

</template>

<script>

	import {wxlogin, getPhone, wxUserInfo} from "@/store/wxlogin.js"

	import {htxcx} from "@/store/api.js"

	export default {

		data() {

			return {

				appid:"wx1b02a26b03110f06",

				secret:"07bd35d41e7fb6a9bff173c728d6a096",

				type:0,

				phone:"",

				typeArr:["承运人","管理员"],

				phoneParams:{

					sessionkey:"",

					ivdata:"",

					encrypdata:""

				},

				loginStatus:false,

				phoneStatus:false

			}

		},

		onLoad() {

			try{

				this.init()

			}catch(e){

				console.log("init错误信息:",e)

			}

		},

		methods: {

			async init(){

				var code = await wxlogin()

				// 获取sessionkey

				var key = await htxcx(this.appid,this.secret,code)

				this.phoneParams.sessionkey = key.data.session_key;

			},

			async getPhoneNumber(e){

				this.phoneParams.encrypdata = e.detail.encryptedData

				this.phoneParams.ivdata = e.detail.iv

				var phone = await getPhone(this.phoneParams)

				this.phone = phone.purePhoneNumber

				console.log("phone:",this.phone)

				if(this.phone){

					this.phoneStatus = true

					this.reLaunch()

				}

			},

			async wxGetUserInfo(){

				var info = await wxUserInfo()

				this.loginStatus = true

				this.reLaunch()

			},

			reLaunch(){

				if(this.loginStatus && this.phoneStatus){

					uni.setStorageSync("tongfang-phone",this.phone)

					// 后续业务代码

					// uni.reLaunch({//信息更新成功后跳转到小程序首页

					// 	url: '/pages/index/index'

					// });

				}

			},

			bindPickerMPChange(e){

				this.type =  e.target.value

			}

		}

	}

</script>

<style>

	.header {

	    margin: 90rpx 0 50rpx 50rpx;

	    border-bottom: 1px solid #ccc;

	    text-align: center;

	    width: 650rpx;

	    height: 300rpx;

	    line-height: 450rpx;

	}

	.header image {

	    width: 200rpx;

	    height: 200rpx;

	}

	.content {

	    margin-left: 50rpx;

	    margin-bottom: 50rpx;

	}

	.content text {

	    display: block;

	    color: #9d9d9d;

	    margin-top: 40rpx;

	}

	.bottom {

	    border-radius: 80rpx;

	    margin: 35rpx 50rpx;

	    font-size: 35rpx;

	}

	.bottom:first-child{

		margin-top: 50rpx;

	}

	.view_input{

		margin: 0 50rpx;

		background-color: white;

		padding: 10px;

		height: 1rem;

		line-height: 1rem;

	}

</style>
wxlogin.js
import {getPhone as getphone} from '@/store/api.js'

/*

微信登录

	返回 code

*/

export const wxlogin = ()=> {

	return new Promise((resolve, reject)=>{

		uni.showLoading({

		  title: '登录中...'

		});

		uni.login({

			provider: 'weixin',

			success: function(loginRes) {

				resolve(loginRes.code);

				uni.hideLoading();

			},

			fail(err) {

				reject(err)

				uni.hideLoading();

			}

		})

	})

}

/*

获取微信用户信息 要先调用登录接口

	返回用户信息

*/

export const wxUserInfo = ()=>{

	return new Promise((resolve, reject)=>{

		uni.getUserInfo({

			provider: 'weixin',

			success: function(res) {

				resolve(res);

			},

			fail(err) {

				reject(err)

			}

		});

	})

}

/*

获取微信用户手机号 要先调用登录接口

	参数:obj{

		sessionkey,

		ivdata,

		encrypdata

	}

	返回手机号相关信息

*/

export const getPhone = (obj)=>{

	return new Promise((resolve, reject)=>{

		getphone(obj).then(res=>{

			resolve(JSON.parse(res.data.data.phone))

		},err=>{

			reject(err)

		})

	})

}
api.js
// 接口获取 sessionkey

export const htxcx = (appid,secret,code)=>uniAjax("https://api.weixin.qq.com/sns/jscode2session?appid="+appid+"&secret="+secret+"&js_code="+code+"&grant_type=authorization_code")

// 解密手机号

export const getPhone = (obj)=>uniAjax(BASE_URL_dev+"/getWxUserInfo",obj,"POST")
转载于:https://blog.csdn.net/weixin_42448623/article/details/104928750
uni-app开发经验分享二十: 微信小程序 授权登录 获取详细信息 获取手机号的更多相关文章
- 微信小程序授权登录以及用户信息相关接口调整导致授权框不弹出
前言:4月8号升级了小程序业务后提交了版本并上线.突然一个同事说体验版的点击"登录"按钮无效.当时觉得应该不会呀,这几天一直用手机调试,每天也在不停的登录授权,弹框一直有的呀.然后 ...
- 完整微信小程序授权登录页面教程
完整微信小程序授权登录页面教程 1.前言 微信官方对getUserInfo接口做了修改,授权窗口无法直接弹出,而取而代之是需要创建一个button,将其open-type属性绑定getUseInfo方 ...
- uni-app 微信小程序授权登录
1.微信小程序 获取用户信息 与获取手机号 详细信息看官方公告:https://developers.weixin.qq.com/community/develop/doc/000cacfa20ce8 ...
- 微信小程序授权登录将open_id传至后台并入库
要求能把用户昵称.头像以及open_id写入数据库,服务端保持用户登录状态 wxml: <block wx:else> <button type="primary" ...
- 微信小程序授权登录
目录 自定义授权页面 点击授权登录后出现微信自带的授权登录弹窗 <!--index.wxml--> <!-- 授权界面 --> <cover-view class='au ...
- 微信小程序API 登录-wx.login(OBJECT) + 获取微信用户唯一标识openid | 小程序
wx.login(OBJECT) 调用接口获取登录凭证(code)进而换取用户登录态信息,包括用户的唯一标识(openid) 及本次登录的 会话密钥(session_key).用户数据的加解密通讯需要 ...
- 微信小程序授权登录--PHP后端接口
由于之前做过公众号的一个开发,所以再开发小程序就没有那么多坑了,在这也记录一下开发过程,以方便后续进行参考. 废话不多说,直接上官方文档,任何使用第三方开发的,不看文档就是耍流氓.小程序开发文档,可以 ...
- day87_11_7微信小程序之登录,支付(获取ip,requests使用),授权
一.登录接口. 官方文档https://developers.weixin.qq.com/miniprogram/dev/framework/open-ability/login.html 在登录接口 ...
- 使用Shiro+JWT完成的微信小程序的登录(含讲解)
使用Shiro+JWT完成的微信小程序的登录 源码地址https://github.com/Jirath-Liu/shiro-jwt-wx 微信小程序用户登陆,完整流程可参考下面官方地址,本例中是按此 ...
随机推荐
- PHP 直接使用html输出excel
1 <?php 2 header("Cache-Control:public"); 3 header("Pragma:public"); 4 5 head ...
- Python批量创建word文档(2)- 加图片和表格
Python创建word文档,任务要求:小杨在一家公司上班,每天都需要给不同的客户发送word文档,以告知客户每日黄金价格.要求在文档开始处给出banner条,价格日期等用表格表示.最后贴上自己的联系 ...
- 利用xlutils第三方库复制excel模板
Python之利用第三方库套用excel模板,模板的样子假设如下: 现在要用这个模板,并且在"第二行第二列"的下方填入内容: #!usr/bin/python3 # -*-codi ...
- 解决uiautomator截取不到手机App界面信息
今天在使用uiautomatorviewer进行安卓app控件定位的时候,出现以下异常,(用的是真机测试Android版本是10,据说是Android 8以后sdk自带的uiautomator直接打开 ...
- C#中搜索xsd文件中的某个数据源
步骤 1.打开***.xsd文件. 2.数据源之间的空白处,右键->属性. 3.在VS右侧会跳出一个属性窗口. 4.有个名称为DataSet的下拉框,所有的数据源名称都在其中,单击即可定位到所选 ...
- CVE-2017-12149 JBOOS反序列化漏洞复现
一.漏洞描述 2017年8月30日,厂商Redhat发布了一个JBOSSAS 5.x 的反序列化远程代码执行漏洞通告.该漏洞位于JBoss的HttpInvoker组件中的 ReadOnlyAccess ...
- 关于ajax已经成功了,却报404的错误的问题
经分析是请求没有返回状态码,这是因为我用的是SpringMVC框架,前后端使用JSON传递数据,因为返回的是对象,而忘记了添加 @ResponseBody 注解,所以 Spring对我的返回值进行了映 ...
- Oracle 使用MERGE INTO 语句 一条语句搞定新增编辑
MERGE INTO RDP_CHARTS_SETTING T1 USING (SELECT '10001' AS PAGE_ID, 'test' AS CHART_OPTION FROM DUAL) ...
- [leetcode]Next Greater Element
第一题:寻找子集合中每个元素在原集合中右边第一个比它大的数. 想到了用哈希表存这个数的位置,但是没有想到可以直接用哈希表存next great,用栈存还没找到的数,没遍历一个数就考察栈中的元素小,小的 ...
- C语言结构体参数传递
结构体的形参或实参传递和和一般的程序一样: #include<stdio.h> #include<string.h> struct student //结构体定义 { char ...