EVE磁盘扩容
1、登录到EVE
输入df -h查看一下/dev/mapper/eve--ng--vg-root这个文件目录,这里就是存放镜像的。

2、EVE关机编辑EVE虚拟机
如下图扩展目前的容量:
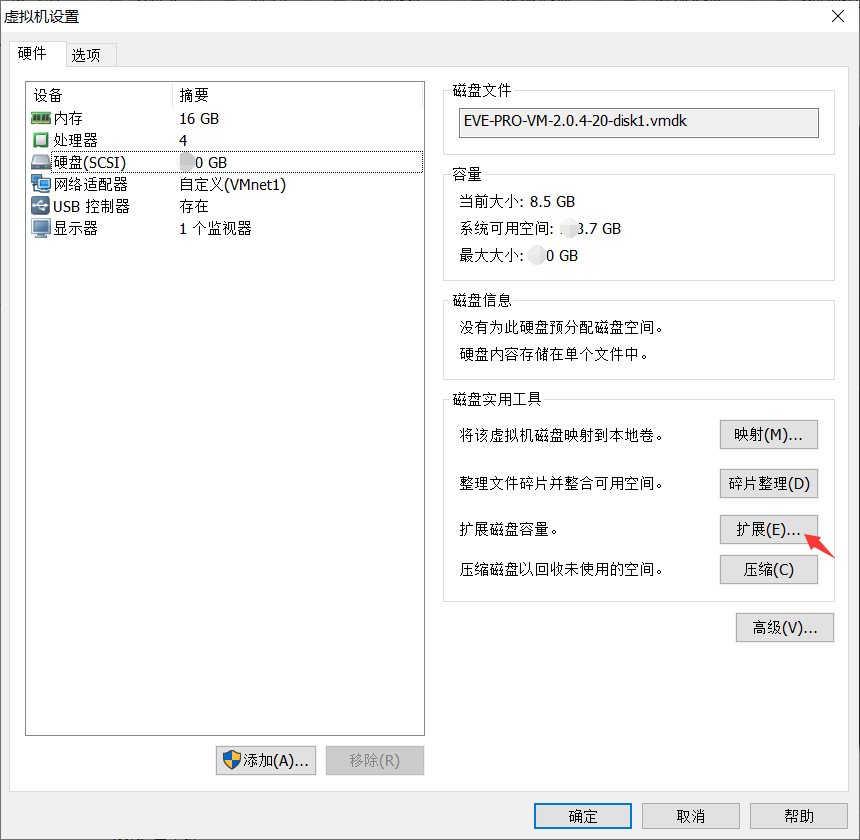

然后点击扩展,扩展完毕之后,会提示:磁盘已成功扩展,您必须从客户及操作系统内部对磁盘重新进行分区和扩展文件系统。
注意:你无法扩展具有快照的虚机中的磁盘,必须删除快照。
3、EVE系统层面增加对磁盘出重新配置
我这里分配的是200G
root@eve-ng:~# fdisk -l
Disk /dev/ram0: 64 MiB, 67108864 bytes, 131072 sectors
Units: sectors of 1 * 512 = 512 bytes
Sector size (logical/physical): 512 bytes / 4096 bytes
I/O size (minimum/optimal): 4096 bytes / 4096 bytes
.......
Disk /dev/sda: 82882562 39.5G 5 Extended
/dev/sda5 1001472 83884031 82882560 39.5G 8e Linux LVM
Disk /dev/mapper/eve--ng--vg-root: 38.6 GiB, 41406169088 bytes, 80871424 sectors
Units: sectors of 1 * 512 = 512 bytes
Sector size (logical/physical): 512 bytes / 512 bytes
I/O size (minimum/optimal): 512 bytes / 512 bytes
Disk /dev/mapper/eve--ng--vg-swap_1: 980 MiB, 1027604480 bytes, 2007040 sectors
Units: sectors of 1 * 512 = 512 bytes
Sector size (logical/physical): 512 bytes / 512 bytes
I/O size (minimum/optimal): 512 bytes / 512 bytes
给硬盘sda分区:
root@eve-ng:~# fdisk /dev/sda
First sector (999424-419430399, default 999424): 83884032 //sda3的start sector值是sda2的end sector + 1 ,因为sda1和sda2中间有一些sector没使用,所以First sector提示的默认值为999424
Last sector, +sectors or +size{K,M,G,T,P} (83884032-419430399, default 419430399): (直接回车)
Created a new partition 3 of type 'Linux' and of size 160 GiB.
Command (m for help): p
Disk /dev/sda: 200 GiB, 214748364800 bytes, 419430400 sectors
Units: sectors of 1 * 512 = 512 bytes
Sector size (logical/physical): 512 bytes / 512 bytes
I/O size (minimum/optimal): 512 bytes / 512 bytes
Disklabel type: dos
Disk identifier: 0x3e3ca055
Device Boot Start End Sectors Size Id Type
/dev/sda1 * 2048 999423 997376 487M 83 Linux
/dev/sda2 1001470 83884031 82882562 39.5G 5 Extended
/dev/sda3 83884032 419430399 335546368 160G 83 Linux
/dev/sda5 1001472 83884031 82882560 39.5G 8e Linux LVM
Partition table entries are not in disk order.
Command (m for help): w
The partition table has been altered.
Calling ioctl() to re-read partition table.
Re-reading the partition table failed.: Device or resource busy
The kernel still uses the old table. The new table will be used at the next reboot or after you run partprobe(8) or kpartx(8).
root@eve-ng:~# reboot //重启,使得分区生效
将sda3加入到Volume group(VG)中:
查看VG名字:
root@eve-ng:~# vgdisplay
--- Volume group ---
VG Name eve-ng-vg
System ID
Format lvm2
Metadata Areas 1
Metadata Sequence No 3
VG Access read/write
VG Status resizable
MAX LV 0
Cur LV 2
Open LV 2
Max PV 0
Cur PV 1
Act PV 1
VG Size 39.52 GiB
PE Size 4.00 MiB
Total PE 10117
Alloc PE / Size 10117 / 39.52 GiB
Free PE / Size 0 / 0
VG UUID EvwUbc-nfsg-dHqA-znxB-U3gv-V782-Q8ZxkI
将sda3加入到eve-ng-vg这个VG中
root@eve-ng:~# vgextend eve-ng-vg /dev/sda3
Physical volume "/dev/sda3" successfully created
Volume group "eve-ng-vg" successfully extended
再次查看:
root@eve-ng:~# vgdisplay
--- Volume group ---
VG Name eve-ng-vg
System ID
Format lvm2
Metadata Areas 2
Metadata Sequence No 4
VG Access read/write
VG Status resizable
MAX LV 0
Cur LV 2
Open LV 2
Max PV 0
Cur PV 2
Act PV 2
VG Size 199.52 GiB
PE Size 4.00 MiB
Total PE 51077
Alloc PE / Size 10117 / 39.52 GiB
Free PE / Size 40960 / 160.00 GiB
VG UUID EvwUbc-nfsg-dHqA-znxB-U3gv-V782-Q8ZxkI
4、扩容Logical Volume(LV)
首先查看LV的路径和大小
root@eve-ng:~# lvdisplay
--- Logical volume ---
LV Path /dev/eve-ng-vg/root
LV Name root
VG Name eve-ng-vg
LV UUID ktUpR0-VpqS-rJJv-a1FC-u6Gd-U8yN-2WYQ53
LV Write Access read/write
LV Creation host, time eve-ng, 2018-03-21 02:25:21 +0200
LV Status available
# open 1
LV Size 38.56 GiB
Current LE 9872
Segments 1
Allocation inherit
Read ahead sectors auto
- currently set to 256
Block device 253:0
--- Logical volume ---
LV Path /dev/eve-ng-vg/swap_1
LV Name swap_1
VG Name eve-ng-vg
LV UUID oFbeHd-xHkl-cpe1-22Nx-xX73-xLJF-fJKrXK
LV Write Access read/write
LV Creation host, time eve-ng, 2018-03-21 02:25:21 +0200
LV Status available
# open 2
LV Size 980.00 MiB
Current LE 245
Segments 1
Allocation inherit
Read ahead sectors auto
- currently set to 256
Block device 253:1
将剩下的容量扩容到/dev/eve-ng-vg/root路径下:
root@eve-ng:~# lvextend -l +100%FREE /dev/eve-ng-vg/root
Size of logical volume eve-ng-vg/root changed from 38.56 GiB (9872 extents) to 198.56 GiB (50832 extents).
Logical volume root successfully resized.
再次查看:
root@eve-ng:~# lvdisplay
--- Logical volume ---
LV Path /dev/eve-ng-vg/root
LV Name root
VG Name eve-ng-vg
LV UUID ktUpR0-VpqS-rJJv-a1FC-u6Gd-U8yN-2WYQ53
LV Write Access read/write
LV Creation host, time eve-ng, 2018-03-21 02:25:21 +0200
LV Status available
# open 1
LV Size 198.56 GiB
Current LE 50832
Segments 2
Allocation inherit
Read ahead sectors auto
- currently set to 256
Block device 253:0
--- Logical volume ---
LV Path /dev/eve-ng-vg/swap_1
LV Name swap_1
VG Name eve-ng-vg
LV UUID oFbeHd-xHkl-cpe1-22Nx-xX73-xLJF-fJKrXK
LV Write Access read/write
LV Creation host, time eve-ng, 2018-03-21 02:25:21 +0200
LV Status available
# open 2
LV Size 980.00 MiB
Current LE 245
Segments 1
Allocation inherit
Read ahead sectors auto
- currently set to 256
Block device 253:1
重新计算文件系统大小
root@eve-ng:~# resize2fs /dev/eve-ng-vg/root
resize2fs 1.42.13 (17-May-2015)
Filesystem at /dev/eve-ng-vg/root is mounted on /; on-line resizing required
old_desc_blocks = 3, new_desc_blocks = 13
The filesystem on /dev/eve-ng-vg/root is now 52051968 (4k) blocks long.
5、查看磁盘使用情况
root@eve-ng:~# df -h
Filesystem Size Used Avail Use% Mounted on
udev 7.9G 0 7.9G 0% /dev
tmpfs 1.6G 18M 1.6G 2% /run
/dev/mapper/eve--ng--vg-root 196G 8.1G 179G 5% /
tmpfs 7.9G 0 7.9G 0% /dev/shm
tmpfs 5.0M 0 5.0M 0% /run/lock
tmpfs 7.9G 0 7.9G 0% /sys/fs/cgroup
/dev/sda1 472M 83M 365M 19% /boot
扩容完成!
EVE磁盘扩容的更多相关文章
- VMware下对虚拟机Ubuntu14系统所在分区sda1进行磁盘扩容
VMware下对虚拟机Ubuntu14系统所在分区sda1进行磁盘扩容 一般来说,在对虚拟机里的Ubuntu下的磁盘进行扩容时,都是添加新的分区,而并不是对其系统所在分区进行扩容,如在此链接中http ...
- SQL Server 磁盘空间告急(磁盘扩容)转载
一.背景 在线上系统中,如果我们发现存放数据库文件的磁盘空间不够,我们应该怎么办呢?新买一个硬盘挂载上去可以嘛?(linux下可以直接挂载硬盘进行扩容),但是我们的SQL Server是运行在Wind ...
- 【转载】CentOS LVM磁盘扩容
转自:http://blog.sina.com.cn/s/blog_8882a6260101cpfs.html EXSI5.1主机有一个linux虚拟机,系统是centos运行httpd服务,因为是多 ...
- centos6.5磁盘扩容
3台虚拟机都是20G磁盘,用着用着发现不够了,先扩容了一台,各种百度...各种坑,每个人的情况不一样,发现不一样的地方最后立即百度查看.一台扩容成功后,打算再扩容一台,目的是留一个记录.(我是用xsh ...
- ECS Linux服务器xfs磁盘扩容
ECS Linux服务器xfs磁盘扩 ECS Linux服务器xfs磁盘使用阿里云官方提供的磁盘扩容方法扩容会有报错: [root@iZ28u04wmy2Z ~]# e2fsck /dev/xvdb1 ...
- es 加磁盘扩容
elasticsearch多磁盘扩容 1.问题 由于早前elasticsearch集群数据存储路径只配置了一个,所以某天磁盘突然爆满,集群差点当机.需重新配置多路径存储路径,因为在生产环境,得保证 ...
- VMware 虚拟机快照、克隆、磁盘扩容
1. 快照 快照是虚拟机某个时间点上完整系统的镜像,可以在虚拟机内部通过快照文件恢复系统到之前的节点. 拍摄快照: 恢复快照: 2. 克隆 克隆是原始虚拟机全部状态的一个拷贝,是脱离原始虚拟机独立存在 ...
- 故障处理:磁盘扩容出错:e2fsck: Bad magic number in super-block while trying to open /dev/vdb1
按照阿里云官网教程对云服务器进行磁盘扩容,使用fdisk重新分区,最后使用e2fsck和resize2fs来完成文件系统层面的扩容 在执行“e2fsck -f /dev/vdb1”命令时报错,如果你的 ...
- Linux磁盘扩容
Linux磁盘扩容 fdisk -l # 查看硬盘信息 lvextend -L +1G /dev/mapper/vg00-lvroot 或者 lvextend -l +%FREE /dev/mappe ...
随机推荐
- Python记:静夜偶记
- sql查询 —— 分页
-- 分页 -- limit -- limit start count (start 显示骑士值,单页数量) select *from student where gender=1 limit 6,3 ...
- Echarts使用一个图例legend实现全选和全部取消的功能
1.修改legend的data值,在前面加上全选和全不选,data = ['全选','全不选',1,2,3] 2.监听 legendselectchanged事件 / 使用刚指定的配置项和数据显示图表 ...
- Date、DateFormat、Calendar、Math、System
Date(基本已过时了,被Calendar替换) 构造方法(有两个) Date(); Date(long l);long类型的毫秒值 常用方法(其他方法都已被Calendar替换) getTime() ...
- Python获取最新电影的信息
这次将从电影天堂获取最新的电影的详细信息,这里电影的信息罗列的比较详细. 本来只是想获取电影的迅雷链接,然后用迅雷去下载.但看到这里的电影的信息比较完整和详细,忍不住把所有信息都爬取下来了. 下图是& ...
- MVC5+EF6 入门完整教程5 :UI的一些改造
https://www.cnblogs.com/miro/p/4095165.html 上篇文章介绍了EF实现CRUD及一些基本的Html Helpers. 这次我们将会对之前的内容进行一些修改和重构 ...
- beego登录退出与检查登录过滤器
// ShowLogin 登陆显示 func (c *UserController) ShowLogin() { username := c.Ctx.GetCookie("username& ...
- centos7 sshpass 用法详解
可以参考文章:https://www.cnblogs.com/kaishirenshi/p/7921308.html 安装方式直接通过yum 安装 yum -y install sshpass 常用的 ...
- (c#)删除链表中的节点
题目 解: 解析: n1→n2→n3→n4删除n2即将n2更改成n3n1→n3(n2)→n4
- [RedHat]“is not in the sudoers file”解决方法
当在终端执行sudo命令时,系统提示“luckchengis not in the sudoers file”: $ sudo ls Password: luckcheng is not in the ...