Spring Boot配置方式
Spring提供了xml、注解、Java配置、groovy配置实现Bean的创建和注入。
配置元数据
无论xml配置、注解配置还是Java配置,都被称为配置元数据,所谓元数据即描述数据的数据。元数据本身不具备任何可执行的能力,只能通过外界代码对这些元数据进行解析后进行一些有意义操作。Spring容器解析这些配置元数据进行Bean初始化、配置和管理依赖。
准备工作
本文代码测试均在《Spring Boot应用连接数据库MySQL》基础上开发。在com.neon.apple包下,建立一个名为service。然后建立功能类TestService ,使用TestService 的功能类UseTestService,Java配置类JavaConfig,XML配置类XMLConfig。在src/main/resources下建立application-bean.xml。
xml配置
在Spring 1.x时代,使用Spring开发满眼都是xml配置的Bean。Spring IoC有个非常核心的概念bean。由Spring容器来负责Bean的实例化,装配和管理。xml用来描述Bean的配置关系,Spring从XML配置文件中读取任何类型的元数据并自动转换成相应的Java代码。使用XML来配置Bean失去编译时的类型安全检查,同时大量的XML配置使得整个项目变得更加复杂。
下面简单介绍xml配置的使用。
1、编写功能类的Bean
package com.neon.apple.service;

public class TestService {

    public TestService(){

        System.out.println("TestService.TestService()");

    }

    public void SayHello(){

        System.out.println("Hello World!");

    }

}
2、使用功能类的Bean
package com.neon.apple.service;

public class UseTestService {

    TestService testService;

    public UseTestService(TestService testService){

        System.out.println("UseTestService.UseTestService()");

        this.testService = testService;

        this.testService.SayHello();

        System.out.println(this.testService.getName());

     }

}
3、编辑XML文件application-bean.xml
编辑src/main/resources下的application-bean.xml,装配TestService Bean,通过属性注入法设置类的属性值,通过构造方法注入TestService Bean装配UseTestService。
<?xml version="1.0" encoding="UTF-8"?>

<beans xmlns="http://www.springframework.org/schema/beans"

 xmlns:xsi="http://www.w3.org/2001/XMLSchema-instance" xmlns:context="http://www.springframework.org/schema/context"

 xmlns:tx="http://www.springframework.org/schema/tx"

 xsi:schemaLocation="http://www.springframework.org/schema/beans http://www.springframework.org/schema/beans/spring-beans-2.5.xsd

 http://www.springframework.org/schema/context http://www.springframework.org/schema/context/spring-context-2.5.xsd

 http://www.springframework.org/schema/tx http://www.springframework.org/schema/tx/spring-tx-2.5.xsd">

 <!-- 通过属性注入(setter方法) -->

 <bean name="TestService" class="com.neon.apple.service.TestService">

  <property name="id" value="1"></property>

  <property name="name" value="张三"></property>

 </bean>

 <!-- 通过构造方法注入 -->

 <bean name="UseTestService" class="com.neon.apple.service.UseTestService" autowire="byName">

  <constructor-arg ref = "TestService"></constructor-arg>

 </bean>

</beans>
4、注入配置文件application-bean.xml
编写类XMLConfig ,确保application-bean.xml能被Spring Boot可以扫描到。
package com.neon.apple.service;
import org.springframework.context.annotation.Configuration;
import org.springframework.context.annotation.ImportResource;
@Configuration
@ImportResource(locations={"classpath:application-bean.xml"})
public class XMLConfig {
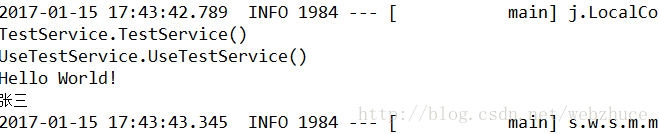
}5、运行
注解配置
在Spring 2.x时代,随着JDK 1.5带来的注解支持,Spring提供了声明Bean的注解(如@Service、@Component)大大减少了配置量。Spring使用注解来描述Bean的配置与采用XML相比,因类注释是在一个类源代码中,可以获得类型安全检查的好处,可以良好地支持重构。
1、编写功能类的Bean
使用@Service注解声明当前TestService类时Spring管理的一个Bean。
package com.neon.apple.service;

import org.springframework.stereotype.Service;

@Service

public class TestService {

    public TestService(){

        System.out.println("TestService.TestService()");

    }

    public void SayHello(){

        System.out.println("Hello World!");

    }

}
代码解释:
使用@Service注解声明当前TestService类是Spring 管理的一个Bean,其中,使用@Component、@Controller等是等效。
2、使用功能类的Bean
使用@Autowired将TestService的实体Bean注入到UseTestService中,让UserTestService具备FunctionService的功能。
package com.neon.apple.service;

import org.springframework.beans.factory.annotation.Autowired;

import org.springframework.stereotype.Service;

@Service

public class UseTestService {

    @Autowired

    TestService testService;

    public UseTestService(TestService testService){

         System.out.println("UseTestService.UseTestService()");

         testService.SayHello();

    }

}
代码解释:
使用@Autowired将TestService的实体Bean注入UseTestService中,让UseTestService具备TestService的功能。
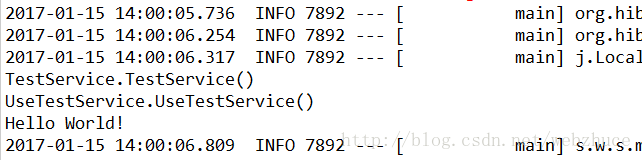
3、运行
Java配置
从Spring 3.x开始,Spring提供了Java配置的能力。Java配置是Spring4.x推荐的配置方式,可以完全替代xml配置;Java配置也是Spring Boot推荐的配置方式。
Java配置是通过@Configuration和@Bean来实现的。
1、@Configuration声明当前类是一个配置类,相当于一个Spring配置的xml文件
2、@Bean注解在方法上,声明当前方法的返回值为一个Bean。
1、编写功能类的Bean
没有@Service注解用来声明Bean。
package com.neon.apple.service;

public class TestService {

    public TestService(){

        System.out.println("TestService.TestService()");

    }

    public void SayHello(){

        System.out.println("Hello World!");

    }

}
2、使用功能类的Bean
没有@Service注解用来声明Bean,没有@Autowired注解将TestService的实体Bean注入到UseTestService中,让UserTestService具备FunctionService的功能。
package com.neon.apple.service;
public class UseTestService { TestService testService; public UseTestService(TestService testService){
System.out.println("UseTestService.UseTestService()");
this.testService = testService;
this.testService.SayHello();
}
}3、配置类
编辑配置类JavaConfig 。package com.neon.apple.service; import org.springframework.context.annotation.Bean;
import org.springframework.context.annotation.Configuration; @Configuration
public class JavaConfig { @Bean
public TestService TestService(){
return new TestService();
} @Bean
public UseTestService UseTestService(){
return new UseTestService(TestService());
} // @Bean
// public UseTestService UseTestService(TestService testService ){
// return new UseTestService(testService);
// }
}代码解释:
1、@Configuration注解表明JavaConfig类是一个配置类,这意味着这个类里可能有零个或多个@Bean注解。
2、@Bean注解声明当前TestService的返回值是一个Bean,Bean的名称是方法名。
3、注入TestService的Bean时直接调用TestService()。
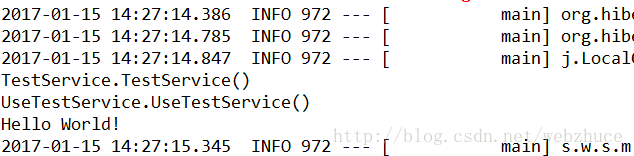
4、另外一种注入的方式,直接将TestService作为参数给UseTestService(),这也是Spring容器提供的极好的功能。在Spring容器中,只要存在某个Bean,就可以在另一个Bean的声明方法的参数中写入。4、运行
总结
何时使用Java配置或者注解配置?主要原则是:全局配置使用Java配置(如数据库相关配置、MVC相关配置),业务Bean的配置使用注解配置。
Spring Boot配置方式的更多相关文章
- 28. Spring Boot配置方式
转自:https://blog.csdn.net/webzhuce/article/details/54564019
- 程序配置的原则和实践以及 Spring Boot 支持方式
原则 软件需要在不同的环境中部署,代码是保持不变的,但是不同的运行环境存在差异,所以需要使用配置适应不同的环境.比如: 数据库,Redis,以及其他 后端服务 的配置: 第三方服务的证书,如 oAut ...
- Spring Boot配置过滤器的两种方式
过滤器(Filter)是Servlet中常用的技术,可以实现用户在访问某个目标资源之前,对访问的请求和响应进行拦截,常用的场景有登录校验.权限控制.敏感词过滤等,下面介绍下Spring Boot配置过 ...
- Spring Boot 配置优先级顺序
一般在一个项目中,总是会有好多个环境.比如: 开发环境 -> 测试环境 -> 预发布环境 -> 生产环境 每个环境上的配置文件总是不一样的,甚至开发环境中每个开发者的环境可能也会有一 ...
- spring boot 配置注入
spring boot配置注入有变量方式和类方式(参见:<spring boot 自定义配置属性的各种方式>),变量中又要注意静态变量的注入(参见:spring boot 给静态变量注入值 ...
- Spring boot配置多个Redis数据源操作实例
原文:https://www.jianshu.com/p/c79b65b253fa Spring boot配置多个Redis数据源操作实例 在SpringBoot是项目中整合了两个Redis的操作实例 ...
- spring boot配置springMVC拦截器
spring boot通过配置springMVC拦截器 配置拦截器比较简单, spring boot配置拦截器, 重写preHandle方法. 1.配置拦截器: 2重写方法 这样就实现了拦截器. 其中 ...
- spring boot配置mybatis和事务管理
spring boot配置mybatis和事务管理 一.spring boot与mybatis的配置 1.首先,spring boot 配置mybatis需要的全部依赖如下: <!-- Spri ...
- Spring Boot 配置 - Consul 配置中心
▶ Spring Boot 依赖与配置 Maven 依赖 <dependencyManagement> <dependencies> <dependency> &l ...
随机推荐
- Android小玩意儿-- 从头开发一个正经的MusicPlayer(一)
之前从未接触过音乐播放器这块东西的开发.今天偶然想做一个自己的音乐播放器.算是练练手.既然要做,就要做一个正儿八经的App.很多网上的资料也是模模糊糊,不是很全,现在开始,自己摸索着尝试着一步一步的做 ...
- Junit测试集锦
Junit测试集锦 前言: 一个程序从设计很好的状态开始,随着新的功能不断地加入,程序逐渐地失去了原有的结构,最终变成了一团乱麻.所以在开发过程中,对于程序员来说,测试是非常重要的.言归正传,开始Ju ...
- 回顾PMP考试
2014年9月20日,于我来说绝对可以说是一个重要的日子.经过考场里4个多小时(4个小时正式的时间+前面的签到以及后面的survey等)的鏖战,出去之后才发现北京外国语大学的楼宇是如此的漂亮,阳光也是 ...
- sql server 2000备份还原数据库
转载请注明出处:http://blog.csdn.net/neochan1108/article/details/79248017 备份: -- Create the backup device fo ...
- HYSBZ 1086 王室联邦 (树的分块)
题意:国王想把他的国家划分成若干个省.他的国家有n个城市,是一棵树,即n-1条边,编号为1..n.为了防止管理太过分散,每个省至少要有B个城市,为了能有效的管理,每个省最多只有3B个城市.每个省必须有 ...
- 记一次mysql优化操作
这次操作,起因是需要获取用户来源及用户性别,而用户的性别信息在第三方授权的中有,存为JSON格式, 不想用php去解析获取,所以试试mysql操作 如果你有更好的解决方案,请留言告诉我! 情景简化 表 ...
- 植物大战僵尸游戏的开发(python)
装备东西: 搭建好python环境, 四张图片,(背景图片,炮弹图片,僵尸图片,豌豆图片),就ok了 没有安装pygame的需要进行安装 pip install pygame 参考视频 # 植物大 ...
- echo - 显示一行文本
SYNOPSIS(总览) echo[OPTION]... [STRING]... DESCRIPTION(描述) 允许在标准输出上显示STRING(s). -n 不输出行尾的换行符. -e 允许对下面 ...
- 用固定长度的数组实现stack queue
package my_basic.class_3; /** * 用数组结构实现大小固定的队列和栈 */ public class Code_01_Array_stack_queue { public ...
- 「 HDOJ P3887 」 Counting Offspring
翻译 题目描述 给你一棵树,和它的树根 $P$,并且节点从 $1\rightarrow n$ 编号,现在定义 $f(i)$ 为 $i$ 的子树中,节点编号小于 $i$ 的节点的个数. 输入格式 有多组 ...