CentOS7 下编译安装 Samba,什么是 SMB/CIFS 协议
一、关于 Samba
1. SMB
(1)定义
SMB (server message block):是一种用来访问网络中文件、打印机和其他共享网络资源的应用层通信协议。主要功能是使网络上的机器能够共享计算机文件、打印机、串行端口和通讯等资源。提供经认证的进程间通信机制,主要运行在windows系统下
(2)特性
- SMB 可以以多种方式运行在会话层(或更低):
- 传输层:直接运行在 TCP 上 port 445
- 会话层:基于 NetBIOS API,运行在不同的传输层
- (1)UDP ports 137, 138 & TCP ports 137, 139 (NetBIOS over TCP/IP)
- (2)一些传统协议,例如 NBF, IPX/SPX.
- SMB 的 "进程间通信" (IPC) 系统提供 命名管道s 机制,它使得程序员可以方便的实现继承认证。
- SMB 签名 Server Message Block version 2 (SMB2) 旨在通过将SMB signals合并为一个数据包来减轻这个性能限制。
- SMB 支持机会锁 - 一种特殊的锁,来提升性能。
- SMB 服务是 Microsoft's Distributed File System 实现的基础。
(3)历史
SMB / CIFS / SMB1
CIFS (Common Internet File System):SMB2之前的SMB协议。
SMB 2.0
2006年,Microsoft 随着 Windows Vista 的发布 引入了新的SMB版本 (SMB 2.0 or SMB2)
SMB 2.1
SMB 2.1, 随 Windows 7 和 Server 2008 R2 引入, 主要是通过引入新的机会锁机制来提升性能。
SMB 3.0
SMB 3.0 (previously named SMB 2.2) 在Windows 8 和 Windows Server 2012 中引入,带来几项重要的变化:
(1)the SMB Direct Protocol (SMB over remote direct memory access [RDMA])
(2)SMB Multichannel (multiple connections per SMB session)
(3)SMB Transparent Failover
SMB 3.0.2
随 Windows 8.1 和 Windows Server 2012 R2引入。在这些版本和以后的版本中,可以选择性地禁用较早的SMB版本1,以提高安全性。
SMB 3.1.1
随 Windows 10 和 Windows Server 2016 引入。这个版本除了SMB3中添加的AES 128 CCM 加密之外,还支持AES 128 GCM 加密,并使用SHA-512散列实现预认证完整性检查。在使用SMB2.x 以上版本的客户端进行连接时,SMB 3.1.1还强制要求进行安全协商。
2. Samba
(1)定义
Samba 实现了 SMB 协议,是适用于 Linux 和 Unix 的标准 Windows 互操作性程序套件。Samba 是免费软件,遵循 GNU General Public License(通用公共许可证)。提供安全、稳定、快速的文件和打印服务 。
(2)官方描述
Samba is the standard Windows interoperability suite of programs for Linux and Unix.
Samba is Free Software licensed under the GNU General Public License, the Samba project is a member of the Software Freedom Conservancy.
Since 1992, Samba has provided secure, stable and fast file and print services for all clients using the SMB/CIFS protocol.
Samba is an important component to seamlessly integrate Linux/Unix Servers and Desktops into Active Directory environments. It can function both as a domain controller or as a regular domain member.
二、yum 安装 Samba
1. 安装 Samba
(1)查看CentOS 版本
# cat /etc/redhat-release

CentOS Linux release 7.4.1708 (Core)
(2)通过 yum 安装 Samba
# yum -y install samba samba-client samba-common
2. 查看版本
# rpm -qi samba

Name        : samba

Epoch       : 0

Version     : 4.7.1

Release     : 9.el7_5

Architecture: x86_64

...
3. 查看配置文件
默认配置文件为:/etc/samba/smb.conf
cat /etc/samba/smb.conf

# See smb.conf.example for a more detailed config file or

# read the smb.conf manpage.

# Run 'testparm' to verify the config is correct after

# you modified it.

[global]

	workgroup = SAMBA

	security = user

	passdb backend = tdbsam

	printing = cups

	printcap name = cups

	load printers = yes

	cups options = raw

[homes]

	comment = Home Directories

	valid users = %S, %D%w%S

	browseable = No

	read only = No

	inherit acls = Yes

[printers]

	comment = All Printers

	path = /var/tmp

	printable = Yes

	create mask = 0600

	browseable = No

[print$]

	comment = Printer Drivers

	path = /var/lib/samba/drivers

	write list = @printadmin root

	force group = @printadmin

	create mask = 0664

	directory mask = 0775
示例文件为:/etc/samba/smb.conf.example
cat /etc/samba/smb.conf.example

#==== Global Settings ====

[global]

# ---- Network-Related Options ----

	workgroup = MYGROUP

	server string = Samba Server Version %v

;	netbios name = MYSERVER

;	interfaces = lo eth0 192.168.12.2/24 192.168.13.2/24

;	hosts allow = 127. 192.168.12. 192.168.13.

# ---- Logging Options ----

	log file = /var/log/samba/log.%m

	max log size = 50

# ---- Standalone Server Options ----

	security = user

	passdb backend = tdbsam

# ---- Printing Options ----

	load printers = yes

	cups options = raw

#==== Share Definitions ====

[homes]

	comment = Home Directories

	browseable = no

	writable = yes

;	valid users = %S

;	valid users = MYDOMAIN\%S

[printers]

	comment = All Printers

	path = /var/spool/samba

	browseable = no

	guest ok = no

	writable = no

	printable = yes

...
4. 启动服务
4.1. 修改配置文件
# vi /etc/samba/smb.conf

[global]

        workgroup = WORKGROUP

        netbios name = 137

        security = user

        map to guest = bad user

[anshare]

        comment = test share file

        path = /samba/anshare

        # 这里限定只能通过 andy 访问

        valid users = andy

        browseable = yes

        writeable = yes

        guest ok = yes

[nobodyshare]

        comment = nobody share file

        path = /samba/share

        browseable = yes

        writeable = yes

        guest ok = yes
4.2. 新增共享文件夹
mkdir /samba/anshare

mkdir /samba/share

//允许 nobodyshare 匿名访问,因此需要修改 share 的用户组

chown -R nobody:nobody /samba/share
注:这里的共享目录可以使用 Ceph 块设备挂载的文件夹,关于如何使用块设备,请参考 块设备快速入门
4.3. 新增用户
// -d 指定用户登入时的启始目录

# useradd -d /home/andy

// 设置密码

# passwd andy
4.4. 新增 smb 用户
# smbpasswd -a andy

New SMB password: //这里输入aa

Retype new SMB password:

Added user andy.
注:smbpasswd 命令的常用方法
smbpasswd -a 增加用户(要增加的用户必须以是系统用户)

smbpasswd -d 冻结用户,就是这个用户不能在登录了

smbpasswd -e 恢复用户,解冻用户,让冻结的用户可以在使用

smbpasswd -x 删除用户
4.5. 关闭防火墙
# systemctl stop firewalld

# setenforce 0
4.6. 启动服务
# systemctl enable smb & systemctl enable nmb

# systemctl restart smb & systemctl restart nmb
5. 本地客户端验证
# smbclient -L localhost -U andy

Enter WORKGROUP\andy's password: //这里输入aa

	Sharename       Type      Comment

	---------       ----      -------

	anshare         Disk      test share file

	IPC$            IPC       IPC Service (Samba 4.7.1)

Reconnecting with SMB1 for workgroup listing.

	Server               Comment

	---------            -------

	Workgroup            Master

	---------            -------

	WORKGROUP            DESKTOP-H5VOITT
6. Windows 连接
(1)在Windows中访问共享文件夹
\\192.168.0.137
(2)进入共享文件夹
- 访问 ansahre ,输入 smb 用户名和密码:andy/aa
- 可以匿名访问 nobodysahre
(3)发现没有权限写入
怀疑是共享目录的权限问题:
# ll /samba

drwxr-xr-x. 2 root   root    6 11月  6 17:51 anshare

drwxr-xr-x. 2 root   root    6 11月  6 17:51 share
修改文件夹权限:
chmod 777 anshare

chmod 777 share
(4)新建文件然后在 Linux 查看
# ll /samba/anshare

drwxr-xr-x. 2 andy andy 6 11月  6 17:55 asd

-rwxr--r--. 1 andy andy 4 11月  6 17:56 asd.txt

# ll /samba/share

-rwxr--r--. 1 andy andy 6 11月  6 18:05 aaa.txt
三、编译安装 Samba
如果需要获得最新的 samba ,需要自己编译安装 samba 源码。
1. 下载
在 官网 下载最新的稳定版,这里我们下载 Samba 4.7.11。
先卸载之前通过 yum 安装的 Samba:
# yum -y remove samba samba-client samba-common
2. 安装 gcc 及依赖包
yum -y install gcc perl python-devel libacl-devel openldap-devel pam-devel
3. 检查系统环境并生成MakeFile
./configure
4. 编译
make
5. 编译安装
make install
6. 查看版本
软件的默认安装目录
# pwd

/usr/local/samba
执行 samba -V 查看版本
# /usr/local/samba/sbin/samba -V

Version 4.7.11
7. 查看配置文件
配置文件的全路径为:/usr/local/samba/etc/smb.conf
注意 smb.conf 默认是没有的,需要手动创建,示例文件为:samba-4.7.11/examples/smb.conf.default
cat smb.conf.default

cp smb.conf.default /usr/local/samba/etc/smb.conf
可以发现,配置文件的结构如下:
#==== Global Settings ====

[global]

   workgroup = MYGROUP

   server string = Samba Server

   server role = standalone server

   log file = /usr/local/samba/var/log.%m

   max log size = 50

   dns proxy = no

#==== Share Definitions ====

[homes]

   comment = Home Directories

   browseable = no

   writable = yes

;[netlogon]

;[Profiles]

[printers]

   comment = All Printers

   path = /usr/spool/samba

   browseable = no

   guest ok = no

   writable = no

   printable = yes

;[tmp]

;[public]

;[fredsprn]

;[fredsdir]

;[pchome]

;[public]

;[myshare]
这段配置默认把用户的家目录共享。
8. 启动服务
8.1. 修改配置如下
vi /usr/local/samba/etc/smb.conf

[global]

   workgroup = MYGROUP

   server string = Samba Server

   server role = standalone server

   log file = /usr/local/samba/var/log.%m

   max log size = 50

   dns proxy = no

[myshare]

   comment = mary's stuff

   path = /usr/somewhere/shared

   valid users = mary

   public = no

   writable = yes

   printable = no

   create mask = 0765
8.2. 创建共享文件夹
mkdir -p /usr/somewhere/shared
8.3. 创建用户
# useradd -d /home/mary -m mary

# passwd mary
8.4. 创建 smb 用户
# /usr/local/samba/bin/smbpasswd -a mary

New SMB password: //这里输入mm

Retype new SMB password:

Added user mary.
得到 smb用户名:mary,smb密码:mm
8.5. 关闭防火墙
systemctl stop firewalld
8.6. 启动 Samba
# /usr/local/samba/sbin/smbd

# /usr/local/samba/sbin/nmbd
9. 本地客户端验证
# /usr/local/samba/bin/smbclient -L localhost -U mary

Enter MYGROUP\mary's password:

	Sharename       Type      Comment

	---------       ----      -------

	myshare         Disk      mary's stuff

	IPC$            IPC       IPC Service (Samba Server)

Reconnecting with SMB1 for workgroup listing.

	Server               Comment

	---------            -------

	Workgroup            Master

	---------            -------

	MYGROUP              SAMBA
10. Windows 连接
(1)在Windows中访问共享文件夹
\\192.168.0.137
(2)输入 smb 用户名和密码
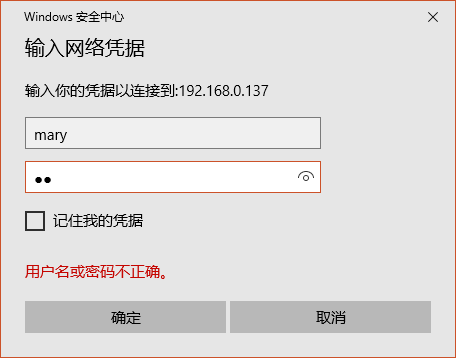
(3)确定后可以看到 myshare

(4)发现没有权限写入
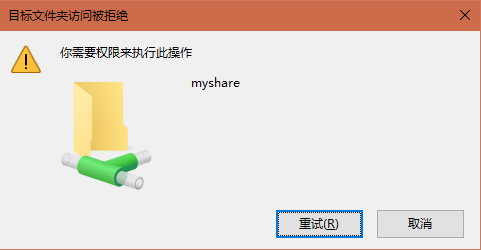
(5)修改共享目录权限
怀疑是共享目录的权限问题:
# ll /usr/somewhere

drwxr-xr-x. 2 root root 6 11月  6 10:54 shared
修改目录权限:
# chmod 777 /usr/somewhere/shared/
(6)完成后可以进行写入了

参考链接:
在CentOS 7中Samba服务安装和配置
centos7编译安装samba共享服务
CentOS7 下编译安装 Samba,什么是 SMB/CIFS 协议的更多相关文章
- centos7下编译安装php-7.0.15(PHP-FPM)
centos7下编译安装php-7.0.15(PHP-FPM) 一.下载php7源码包 http://php.net/downloads.php 如:php-7.0.15.tar.gz 二.安装所需依 ...
- CentOS7下编译安装redis-5.0.9
CentOS7下编译安装redis-5.0.9 本文地址http://yangjianyong.cn/?p=171转载无需经过作者本人授权 下载redis #code start wget https ...
- centos7下编译安装php7.3
一.下载php7.3的源码 https://www.php.net/downloads.php 下载php-7.3.4.tar.gz 二.安装gcc,gcc-c++,kernel-devel yum ...
- CentOS7下编译安装Python3.7.x【亲测有效】
所有操作都在root用户下操作 下载安装包 编译安装 建立软链接 验证 安装: 更新yum: yum update 安装Python依赖: yum install openssl-devel bzip ...
- centos7下编译安装nginx-1.16.0
一.下载nginx源码 http://nginx.org/en/download.html 如:nginx-1.16.0.tar.gz 二.创建用户和组,并解压 groupadd www userad ...
- centos7下编译安装redis5.05
准备环境: 1.一台centos7机器,配置没有什么要求(能联网) 2.下载好redis压缩包 下载redis包: 1.登录redis官网: https://redis.io/download 2.选 ...
- centos7下编译安装python3.7,且与python2.7.5共存
环境:Centos7.6 x64 一.安装python3.7 下载python源码包: wget https://www.python.org/ftp/python/3.7.4/Python-3.7. ...
- Centos7下编译安装php扩展redis5.0.2
安装环境:centos7 + php 7.2.191. 下载地址:http://pecl.php.net/get/redis-5.0.2.tgz .tgz http://pecl.php.net/ge ...
- centos7下编译安装nginx1.10
1.下载pcre 下载地址:ftp://ftp.csx.cam.ac.uk/pub/software/programming/pcre/ 解压到/usr/local/pcre8.3.9 2.下载ope ...
随机推荐
- 20169207 《Linux内核原理与分析》第十一周作业
阅读学习教材「Linux内核设计与实现 (Linux Kernel Development)」第教材第17,19,20章. 在第17章设备与模块章节,关于设备驱动和设备管理,我们讨论四中内核成分. 1 ...
- Android 批量打包利器
因为添加了渠道号,对应不同的渠道包,此时,动不动就几十个包,实在让人头疼,此时,需要引入自动打包功能. 首先,列举出援引的博客内容 美团Android自动化之旅—生成渠道包 http://tech.m ...
- Python基础的练习
---恢复内容开始--- 简单输入输出交互. >>> name='Jame' >>> print('Hi,%s.'%name) Hi,Jame. >>& ...
- shell 命令 mkdir -p
开发中我们会遇到嵌套创建文件目录的需要,这时需要用到 mkdir -p 比如我要在本地嵌套创建 /Users/dairui/Downloads/zookeeper/dataLogDir目录 直接使用 ...
- poj2828 线段树单点更新
Buy Tickets Time Limit: 4000 MS Memory Limit: 65536 KB 64-bit integer IO format: %I64d , %I64u Java ...
- Android-Java-封装
先看一个未封装的Demo案例一: package android.java.oop03; class Person { int age; } public class PottingDemo { pu ...
- mosh——Linux下基于UDP的SSH连接工具
一:TCP over UDP 1.安装mosh yum install epel-releaseyum install mosh 2.使用客户端连接 mosh user@ip -p 3.查看mosh的 ...
- C#实现枚举的相关操作
枚举中的Descript()描述值,以及枚举值是一种一一对应的关系.我们可以获取其描述值和枚举值,存放到字典中, 在实际的使用中我们就可以轻松的根据枚举值来获取其描述值,也可以通过枚举的描述值来获取其 ...
- 重置identity值
如果数据库在SQL2008或以上,可以参考下面方法: DBCC CHECKIDENT ( table_name [, { NORESEED | { RESEED [, new_reseed_value ...
- 2018-2019-2 20175230 实验三《Java面向对象程序设计》实验报告
目录 实验三 实验三 敏捷开发与XP实践 实验内容 实验要求 实验步骤 (一) 编码标准 (二)敏捷开发与XP (三)敏捷开发与XP 实验体会 实验三 实验三 敏捷开发与XP实践 实验内容 1.XP基 ...