
Jaguar_websocket结合Flutter搭建简单聊天室
1.定义消息
在开始建立webSocket之前,我们需要定义消息,如:发送人,发送时间,发送人id等..
import 'dart:convert';

class ChatMessageData {

  final String id;

  final String msg;

  final DateTime created;

  final String name;

  final int role;

  ChatMessageData(

    this.id,

    this.msg,

    this.name,

    this.role,

    this.created,

  );

  static ChatMessageData formMap(Map map) => ChatMessageData(

      map['id'],

      map['msg'],

      map['name'],

      map['role'],

      DateTime.fromMicrosecondsSinceEpoch(map['created']));

  Map toMap() => {

        "id": id,

        "msg": msg,

        "name": name,

        "role":role,

        "created": created.millisecondsSinceEpoch

      };

  String toJson() => jsonEncode(toMap());

  @override

  String toString() => toMap().toString();

}
我们这里定义了一个ChatMessageData,如果你想需要更多字段,可以再添加
2.添加消息订阅
//控制消息的发送

final pub = StreamController<ChatMessageData>();

//当pub调用add(data)方法,该sub的listen会监听到

final Stream<ChatMessageData> sub = pub.stream.asBroadcastStream();
3. 定义接口
这里我们定义两个接口,一个用于连接的接口,一个用于发送消息的接口
/mini/login 提交用户的信息,如果不正确,返回相关的信息,不给连接

/min/connect 连接websocket,该接口获取到websocket对象,然后可以使用该对象
进行发送消息
登陆接口
..post('/mini/login', (ctx) async{

      User user=await ctx.bodyAsJson(convert: User.forMap);

      String username = user.username;

      String password = user.password;

      if (username.isEmpty || password.isEmpty) {

        return Response.json(apiJson.errorMsgA(-, '用户名或密码为空!').toMap());

      } else {

        User user = await userBean.findOneWhere(userBean.username.eq(username));

        if (user == null || user.password != password) {

          return Response.json(apiJson.errorMsgA(-, '用户名或密码不正确!').toMap());

        } else {

          print('用户:$username登陆成功');

          return Response.json(apiJson.successA().toMap());

        }

      }

    })
连接接口
..ws(

      '/mini/connect',

      onConnect: (ctx, ws) {

        var subscription = sub.listen((ChatMessageData data) {

          print(data.toJson());

          ws.add(data.toJson());

        });

        ws.done.then((_) {

          print('用户已退出聊天房');

          subscription.cancel();

        });

        //连接上之后返回一条信息

        ws.add(new ChatMessageData('', '欢迎登陆', '服务器', , DateTime.now()).toJson());

      },

      handler: (data) {

        //获取用户发送的消息

        ChatMessageData msg=ChatMessageData.formMap(json.decode(data));

        print(msg.toJson());

        //广播一条消息

        pub.add(msg);

      },

    )
ok,我们已经搭建好一个简单的聊天接口了,下面,我们使用Flutter简单的编辑一下客户端平台
4.Flutter建立一个简单的聊天室
这部分代码为Flutter下,可简单的编辑一个聊天室
mport 'package:flutter/cupertino.dart';

import 'package:flutter/foundation.dart';

import 'package:flutter/material.dart';

void main() {

  runApp(new FriendlychatApp());

}

final ThemeData kIOSTheme = new ThemeData(

  primarySwatch: Colors.orange,

  primaryColor: Colors.grey[],

  primaryColorBrightness: Brightness.light,

);

final ThemeData kDefaultTheme = new ThemeData(

  primarySwatch: Colors.purple,

  accentColor: Colors.orangeAccent[],

);

const String _name = "Your Name";

class FriendlychatApp extends StatelessWidget {

 @override

 Widget build(BuildContext context) {

    return new MaterialApp(

      title: "Friendlychat",

      theme: defaultTargetPlatform == TargetPlatform.iOS

        ? kIOSTheme

        : kDefaultTheme,

      home: new ChatScreen(),

    );

  }

}

class ChatMessage extends StatelessWidget {

  ChatMessage({this.text, this.animationController});

  final String text;

  final AnimationController animationController;

  @override

  Widget build(BuildContext context) {

    return new SizeTransition(

      sizeFactor: new CurvedAnimation(

        parent: animationController,

        curve: Curves.easeOut

      ),

      axisAlignment: 0.0,

      child: new Container(

        margin: const EdgeInsets.symmetric(vertical: 10.0),

        child: new Row(

          crossAxisAlignment: CrossAxisAlignment.start,

          children: <Widget>[

            new Container(

              margin: const EdgeInsets.only(right: 16.0),

              child: new CircleAvatar(child: new Text(_name[])),

            ),

            new Expanded(

              child: new Column(

                crossAxisAlignment: CrossAxisAlignment.start,

                children: <Widget>[

                  new Text(_name, style: Theme.of(context).textTheme.subhead),

                  new Container(

                    margin: const EdgeInsets.only(top: 5.0),

                    child: new Text(text),

                  ),

                ],

              ),

            ),

          ],

        ),

      )

    );

  }

}

class ChatScreen extends StatefulWidget {

  @override

  State createState() => new ChatScreenState();

}

class ChatScreenState extends State<ChatScreen> with TickerProviderStateMixin {

  final List<ChatMessage> _messages = <ChatMessage>[];

  final TextEditingController _textController = new TextEditingController();

  bool _isComposing = false;

  void _handleSubmitted(String text) {

    _textController.clear();

    setState(() {

      _isComposing = false;

    });

    ChatMessage message = new ChatMessage(

      text: text,

      animationController: new AnimationController(

        duration: new Duration(milliseconds: ),

        vsync: this,

      ),

    );

    setState(() {

      _messages.insert(, message);

    });

    message.animationController.forward();

  }

  void dispose() {

    for (ChatMessage message in _messages)

      message.animationController.dispose();

    super.dispose();

  }

   Widget _buildTextComposer() {

    return new IconTheme(

      data: new IconThemeData(color: Theme.of(context).accentColor),

      child: new Container(

          margin: const EdgeInsets.symmetric(horizontal: 8.0),

          child: new Row(children: <Widget>[

            new Flexible(

              child: new TextField(

                controller: _textController,

                onChanged: (String text) {

                  setState(() {

                    _isComposing = text.length > ;

                  });

                },

                onSubmitted: _handleSubmitted,

                decoration:

                    new InputDecoration.collapsed(hintText: "Send a message"),

              ),

            ),

            new Container(

                margin: new EdgeInsets.symmetric(horizontal: 4.0),

                child: Theme.of(context).platform == TargetPlatform.iOS

                    ? new CupertinoButton(

                        child: new Text("Send"),

                        onPressed: _isComposing

                            ? () => _handleSubmitted(_textController.text)

                            : null,

                      )

                    : new IconButton(

                        icon: new Icon(Icons.send),

                        onPressed: _isComposing

                            ? () => _handleSubmitted(_textController.text)

                            : null,

                      )),

          ]),

          decoration: Theme.of(context).platform == TargetPlatform.iOS

              ? new BoxDecoration(

                  border:

                      new Border(top: new BorderSide(color: Colors.grey[])))

              : null),

    );

  }

  Widget build(BuildContext context) {

    return new Scaffold(

      appBar: new AppBar(

        title: new Text("Friendlychat"),

        elevation:

            Theme.of(context).platform == TargetPlatform.iOS ? 0.0 : 4.0

      ),

      body: new Container(

        child: new Column(

          children: <Widget>[

          new Flexible(

            child: new ListView.builder(

              padding: new EdgeInsets.all(8.0),

              reverse: true,

              itemBuilder: (_, int index) => _messages[index],

              itemCount: _messages.length,

            )

          ),

          new Divider(height: 1.0),

          new Container(

            decoration: new BoxDecoration(

              color: Theme.of(context).cardColor),

            child: _buildTextComposer(),

          ),

         ]

       ),

       decoration: Theme.of(context).platform == TargetPlatform.iOS ? new BoxDecoration(border: new Border(top: new BorderSide(color: Colors.grey[]))) : null),//new

   );

  }

}
上面就是简单的聊天界面,我们还有主要跟服务器交互的方法
WebSocket socket;

void login() {

    httpManager.post(

        url: 'http://192.168.1.101:8080/mini/login',

        body: json.encode({

          "username": "rhyme",

          "password": "",

        }),

        onSend: () {

//key为scaffold的key

          scaffoldKey?.currentState

              ?.showSnackBar(new SnackBar(content: Text('发送请求,连接服务器')));

        },

        onSuccess: (data) {

          WebSocket.connect('ws://192.168.1.101:8080/mini/connect')

              .then((socket) {

            this.socket = socket;

            socket.listen((data) {

//该方法接收服务器信息

              print(data);

              Map map = json.decode(data);

              ChatMessageData msg=ChatMessageData.formMap(map);

              if(msg.id!=widget.user.uuid){

                _handleGetMessage(msg);

              }

            });

            socket.done.then((e){

//当与服务器连接中断调用

              scaffoldKey.currentState.showSnackBar(new SnackBar(content: Text('连接服务器中断!')));

            });

          });

        },

        onError: (error) {

          print(error);

          scaffoldKey.currentState.showSnackBar(

              new SnackBar(content: Text('连接失败!${error.toString()}')));

        });

  }
我们发送消息给服务端
socket.add(new ChatMessageData(widget.user.uuid, value, widget.user.userName, widget.user.role, DateTime.now()).toJson());
最后我们来尝试一下吧!
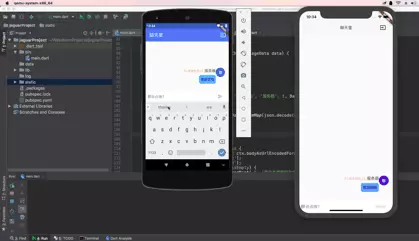
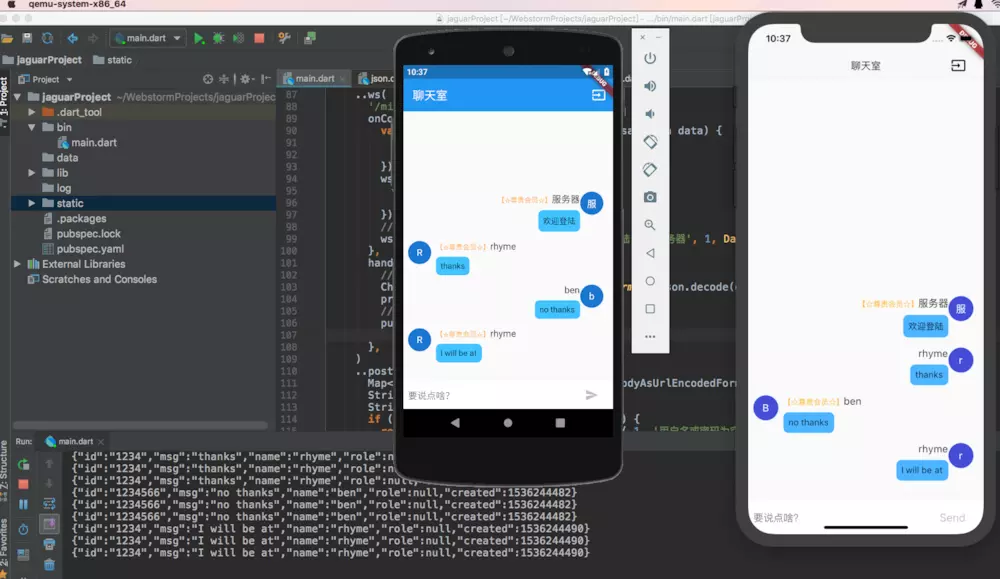
Jaguar_websocket结合Flutter搭建简单聊天室的更多相关文章
- SpringBoot 搭建简单聊天室
SpringBoot 搭建简单聊天室(queue 点对点) 1.引用 SpringBoot 搭建 WebSocket 链接 https://www.cnblogs.com/yi1036943655/p ...
- ASP.NET SingalR + MongoDB 实现简单聊天室(一):搭建基本框架
ASP.NET SingalR不多介绍.让我介绍不如看官网,我这里就是直接上源代码,当然代码还是写的比较简单的,考虑的也少,希望各位技友多多提意见. 先简单介绍聊天室功能: 用户加入聊天室,自动给用户 ...
- Python Socket 简单聊天室2
上篇文章写了一个简单的单线程的一问一答的简单聊天室.这次我们使用SocketServer模块搭建一个多线程异步的聊天室. 1 2 3 4 5 6 7 8 9 10 11 12 13 14 15 16 ...
- 基于Server-Sent Event的简单聊天室 Web 2.0时代,即时通信已经成为必不可少的网站功能,那实现Web即时通信的机制有哪些呢?在这门项目课中我们将一一介绍。最后我们将会实现一个基于Server-Sent Event和Flask简单的在线聊天室。
基于Server-Sent Event的简单聊天室 Web 2.0时代,即时通信已经成为必不可少的网站功能,那实现Web即时通信的机制有哪些呢?在这门项目课中我们将一一介绍.最后我们将会实现一个基于S ...
- SilverLight搭建WCF聊天室详细过程[转]
http://www.silverlightchina.net/html/zhuantixilie/getstart/2011/0424/7148.html 默认节点 SilverLight搭建WCF ...
- Asp.Net SignalR - 简单聊天室实现
简单聊天室 使用持久链接类我们就可以做一些即时通讯的应用了,我使用Group做了一个简单的聊天室,先上图技术细节下面再讲 可以加入聊天室.创建聊天室.发送消息,下面就说说我是如何通过Group做出来的 ...
- 利用socket.io+nodejs打造简单聊天室
代码地址如下:http://www.demodashi.com/demo/11579.html 界面展示: 首先展示demo的结果界面,只是简单消息的发送和接收,包括发送文字和发送图片. ws说明: ...
- C#实例之简单聊天室(状态管理)
前言 状态管理是在同一页或不同页的多个请求发生时,维护状态和页信息的过程.因为Web应用程序的通信协议使用了无状态的HTTP协议,所以当客户端请求页面时,ASP.NET服务器端都会重新生 ...
- java web利用mvc结构实现简单聊天室功能
简单聊天室采用各种内部对象不适用数据库实现. 一个聊天室要实现的基本功能是: 1.用户登录进入聊天室, 2.用户发言 3.用户可以看见别人发言 刚才算是简单的需求分析了,现在就应该是进 ...
随机推荐
- Linux 服务器部署 PgAdmin 4 Server
PostgreSQL 使用率越来越高,但是好用的图形化软件,诸如 Navicat.DataGrip.HeidiSQL 都是客户端软件,对于访问控制来说,比起 MySQL 的 phpMyAdmin 更加 ...
- 课程二(Improving Deep Neural Networks: Hyperparameter tuning, Regularization and Optimization),第三周(Hyperparameter tuning, Batch Normalization and Programming Frameworks) —— 2.Programming assignments
Tensorflow Welcome to the Tensorflow Tutorial! In this notebook you will learn all the basics of Ten ...
- mac 查询端口被哪个进程占用
1,查看端口被哪个程序占用sudo lsof -i tcp:port如: sudo lsof -i tcp:80802,看到进程的PID,可以将进程杀死.sudo kill -9 PID如:sudo ...
- 静态编译 Qt5.7.0 (含 openssl 支持)
关于Qt静态便宜的环境等,请先参见 Win10 + VS2015 下编译 Qt5.6.0 . 首先编译 openssl .我这里用的版本是 openssl 1.0.2j (新的1.1版本的便宜稍有不同 ...
- spring cloud(服务注册中心及服务提供者——初学一)
Eureka是Netflix开源的一款提供服务注册和发现的产品,它提供了完整的Service Registry和Service Discovery实现.也是springcloud体系中最重要最核心的组 ...
- Mysql压缩包版的安装方法详解
Mysql安装的时候可以有msi安装和zip解压缩两种安装方式.zip压缩包解压到目录,要使用它还需对它进行一定的配置.下面对Mysql压缩包版的安装方法进行详细的描述,要是此文有不正确的认识,希望大 ...
- EventProcessor与WorkPool用法--可处理多消费者
单一的生产者,消费者有多个,使用WorkerPool来管理多个消费者: RingBuffer在生产Sequencer中记录一个cursor,追踪生产者生产到的最新位置,通过WorkSequence和s ...
- centos7.0安装docker-18.06.1-ce不能启动问题
最近用centos7.0 yum安装了一个docker-ce18.06.1 但是发现安装好不能启动,于是上官网看了一下,说是docker-ce18.06.1是从centos7.2开始支持的,但是7. ...
- php的explode()和implode()方法
php 中,字符串与数组互转 拆分字符串 到数组 explode() - -(其他语言中的 split) 将数组连接成字符串 implode() <?php $test = ' ...
- Nhibernate + MySQL 类型映射
用SQLyog工具创建表 然后用自动映射工具NHibernate Mapping Generator对表做自动映射,得到 这个是可视化界面,后面有对应的代码. using System; using ...