
Swagger配置与使用
问题:前后端分离时代的到来
前端需要测试后端数据
后端提供接口,实时更新接口的改动
一、Swagger简介
号称世界上最流行的api框架
Restful api文档在线自动生成工具-->api文档与api定义同步更新
直接运行,可以在线测试api接口
支持多种语言(java、php)
在项目中使用swagger需要springfox jar包
- swagger2
- swagger ui
二、springboot集成swagger
新建springboot项目
导入jar包
<!--swaggerjar包-->

<dependency>

    <groupId>io.springfox</groupId>

    <artifactId>springfox-swagger-ui</artifactId>

    <version>2.9.2</version>

</dependency>

<dependency>

    <groupId>io.springfox</groupId>

    <artifactId>springfox-swagger2</artifactId>

    <version>2.9.2</version>

</dependency>
编写一个helloworld
package com.kj.controller;

import org.springframework.web.bind.annotation.RequestMapping;

import org.springframework.web.bind.annotation.RestController;

@RestController

public class SwaggerController {

    @RequestMapping("/hello")

    public String hello(){

        return "hello";

    }

}
配置swagger
import org.springframework.context.annotation.Configuration;

import springfox.documentation.swagger2.annotations.EnableSwagger2;

@Configuration

@EnableSwagger2 //开启swagger

public class SwaggerConfig {

}
启动类加上
@EnableSwagger2注解(遇到Unable to infer base url.bug时加入,可以解决)package com.kj; import org.springframework.boot.SpringApplication;
import org.springframework.boot.autoconfigure.SpringBootApplication;
import springfox.documentation.swagger2.annotations.EnableSwagger2; @SpringBootApplication
@EnableSwagger2
public class SwaggerDemoApplication { public static void main(String[] args) {
SpringApplication.run(SwaggerDemoApplication.class, args);
} }
启动运行
访问localhost/swagger-ui.html。没有配置port的是这个地址localhost:8080/swagger-ui.html
swagger-ui.html所在文件
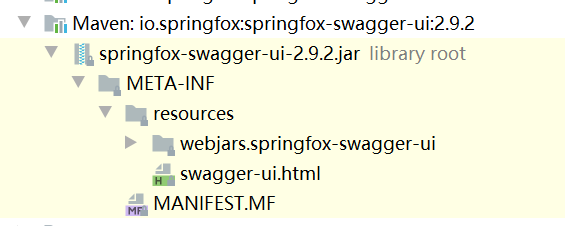

三、配置swagger
1、配置ApiInfo
swagger需要一个docket实例
可以看到docket的构造函数,需要一个DocumentationType
public Docket(DocumentationType documentationType) {

    this.apiInfo = ApiInfo.DEFAULT;

    this.groupName = "default";

    this.enabled = true;

    this.genericsNamingStrategy = new DefaultGenericTypeNamingStrategy();

    this.applyDefaultResponseMessages = true;

    this.host = "";

    this.pathMapping = Optional.absent();

    this.apiSelector = ApiSelector.DEFAULT;

    this.enableUrlTemplating = false;

    this.vendorExtensions = Lists.newArrayList();

    this.documentationType = documentationType;

}
而DocumentationType有三个默认的值
public class DocumentationType extends SimplePluginMetadata {

    public static final DocumentationType SWAGGER_12 = new DocumentationType("swagger", "1.2");

    public static final DocumentationType SWAGGER_2 = new DocumentationType("swagger", "2.0");

    public static final DocumentationType SPRING_WEB = new DocumentationType("spring-web", "1.0");

......

}
所以我们可以这样向容器中创建一个docket
@Bean

public Docket docket(){

    return new Docket(DocumentationType.SWAGGER_2);

}
此时改配置信息,调用docket的函数即可。
比如修改swagger的api信息,我们需要更改ApiInfo
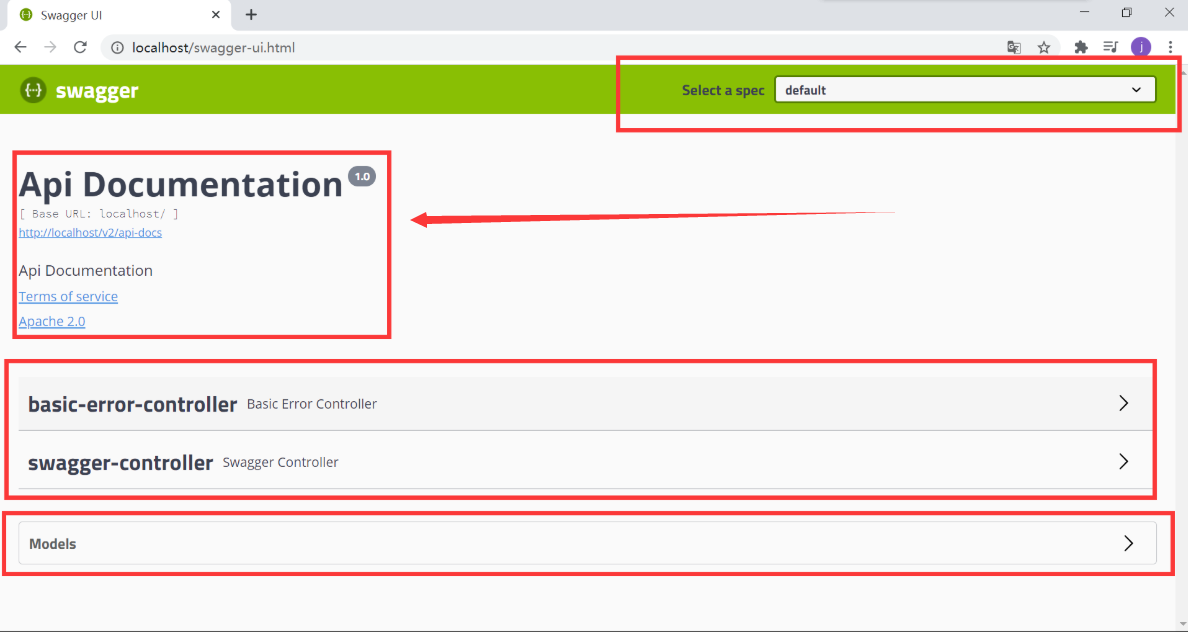
相关源码
public Docket(DocumentationType documentationType) {

    this.apiInfo = ApiInfo.DEFAULT; //api描述

    this.groupName = "default";

    this.enabled = true;

    this.genericsNamingStrategy = new DefaultGenericTypeNamingStrategy();

    this.applyDefaultResponseMessages = true;

    this.host = "";

    this.pathMapping = Optional.absent();

    this.apiSelector = ApiSelector.DEFAULT;

    this.enableUrlTemplating = false;

    this.vendorExtensions = Lists.newArrayList();

    this.documentationType = documentationType;

}

//默认的apiInfo

static {

    DEFAULT = new ApiInfo("Api Documentation",

                          "Api Documentation",

                          "1.0", "urn:tos",

                          DEFAULT_CONTACT,

                          "Apache 2.0",

                          "http://www.apache.org/licenses/LICENSE-2.0",

                          new ArrayList());

}

//作者信息

public static final Contact DEFAULT_CONTACT = new Contact("", "", "");
这时候为我们自己的docket注入咱们自己的apiInfo即可
@Bean

public Docket docket(){

return new Docket(DocumentationType.SWAGGER_2).apiInfo(getApiInfo());

}

private static ApiInfo getApiInfo(){

return new ApiInfo("KJ Api文件",

"swagger测试",

"1.0",

"https://blog.csdn.net/KJ_Study",

new Contact("KJ", "https://blog.csdn.net/KJ_Study", "qi1638629056@163.com"),

"Apache 2.0",

"http://www.apache.org/licenses/LICENSE-2.0",

new ArrayList());

}
结果如下(其实这个基本没任何效率上的作用)

2、配置扫描接口
有一个方法Docket.select()
@Bean

public Docket docket(){

    return new Docket(DocumentationType.SWAGGER_2).apiInfo(getApiInfo())

            .select()

            .build();

}
只能build两个方法apis与paths
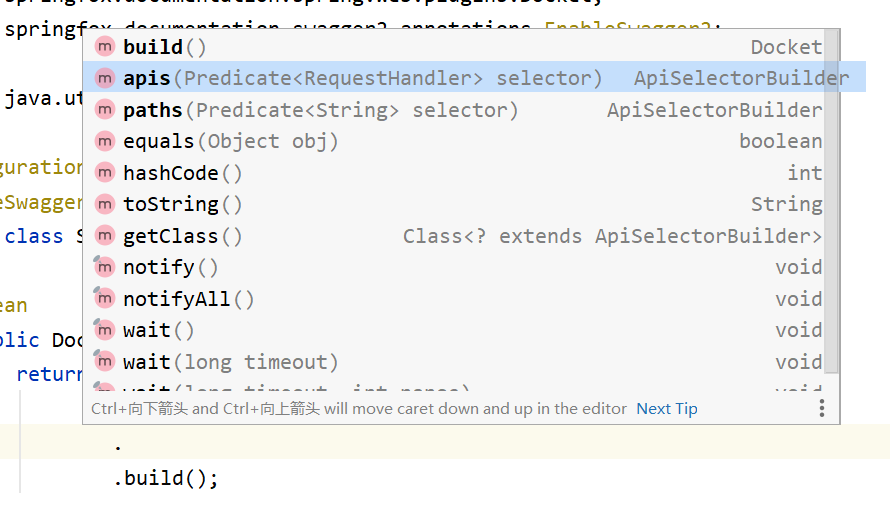
配置扫描目标
有扫描全部any,一个都不扫描none,基于包扫描basePackage,通过方法注解扫描(扫描有这个注解的方法,可以自己加入GetMapper.class的参数),通过类注解扫描
用的多的还是basePackage
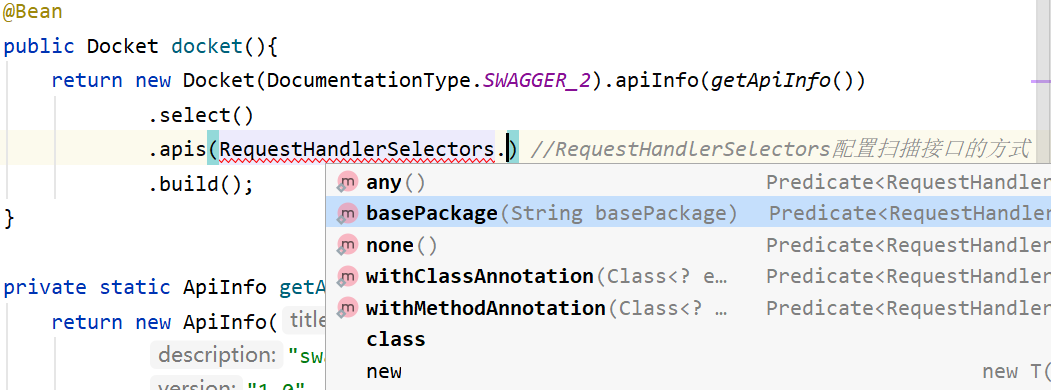
我们指定一个扫描包
@Bean

public Docket docket(){

    return new Docket(DocumentationType.SWAGGER_2).apiInfo(getApiInfo())

        .select()

        .apis(RequestHandlerSelectors.basePackage("com.kj.controller")) //RequestHandlerSelectors配置扫描接口的方式

        .build();

}
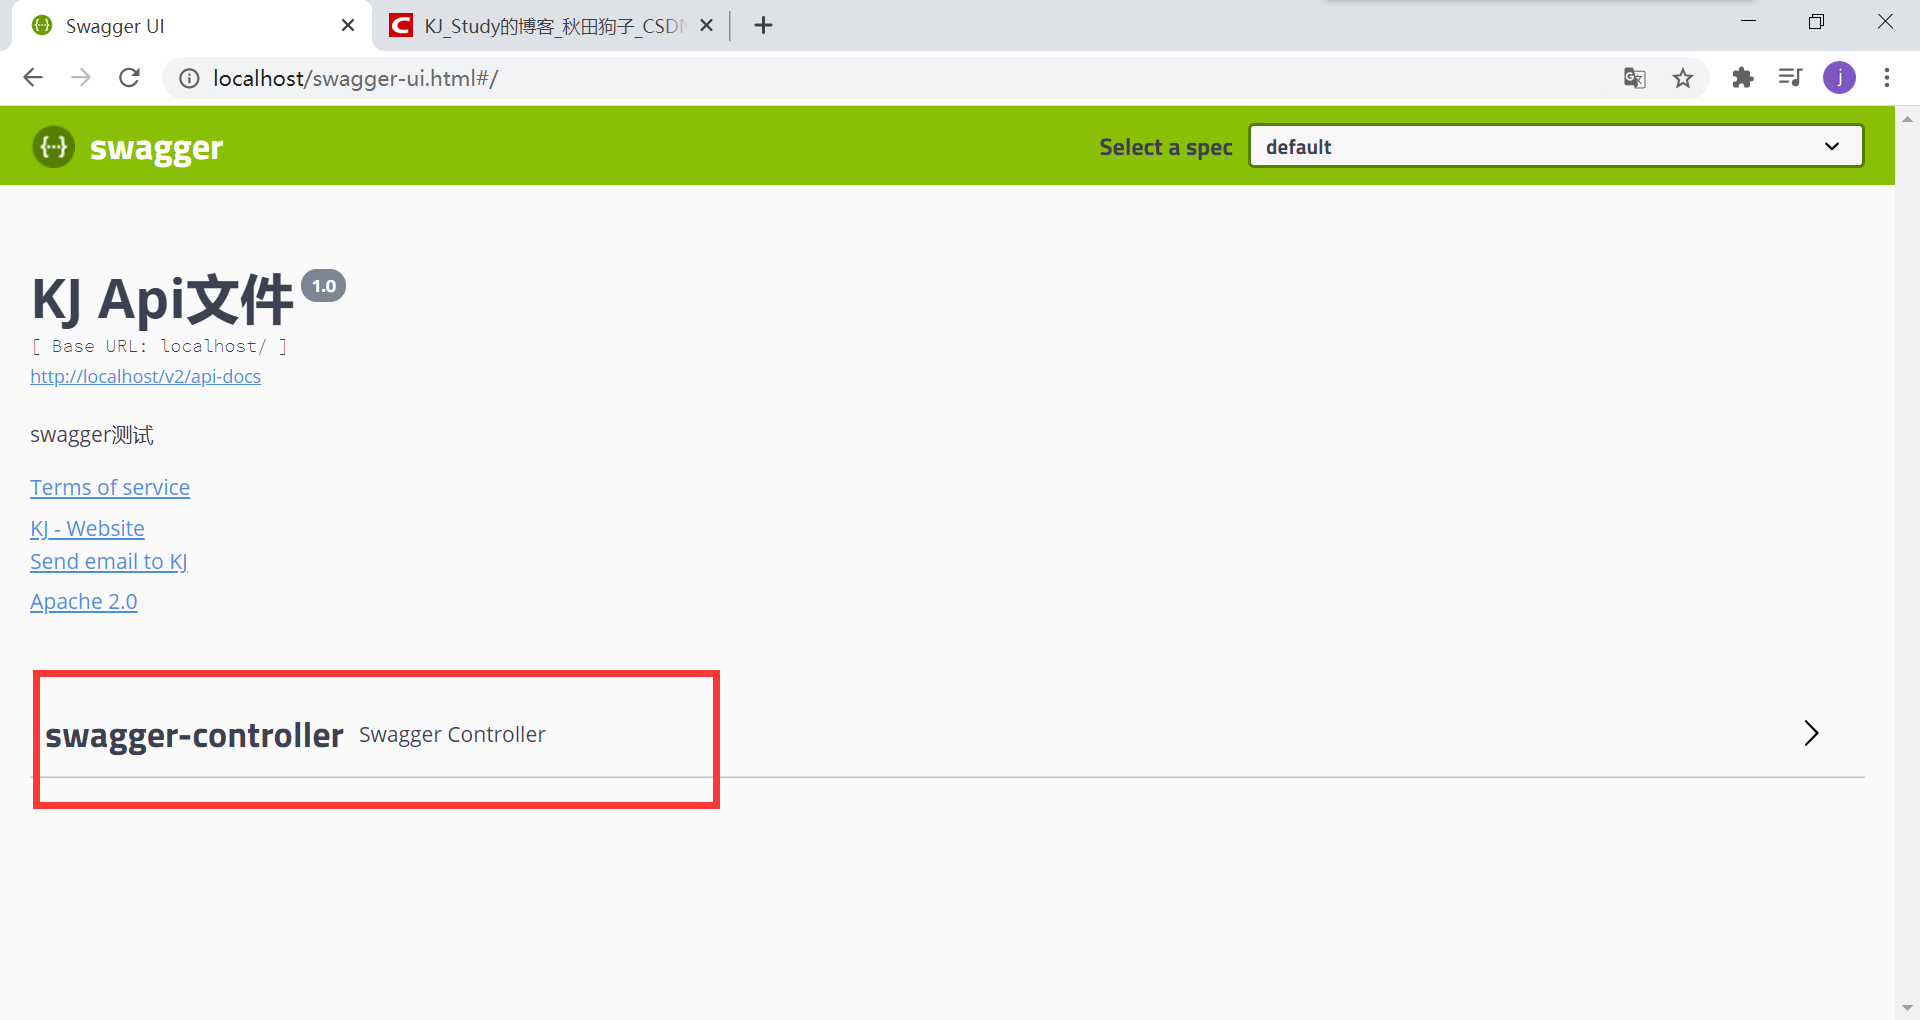
结果
3、过滤路径
扫描带有/kj/ url的api,我们只有一个/hello请求,所以不会有任何api
@Bean

public Docket docket(){

return new Docket(DocumentationType.SWAGGER_2).apiInfo(getApiInfo())

    .select()

    .apis(RequestHandlerSelectors.basePackage("com.kj.controller"))

    .paths(PathSelectors.ant("/kj/**"))

    .build();

}
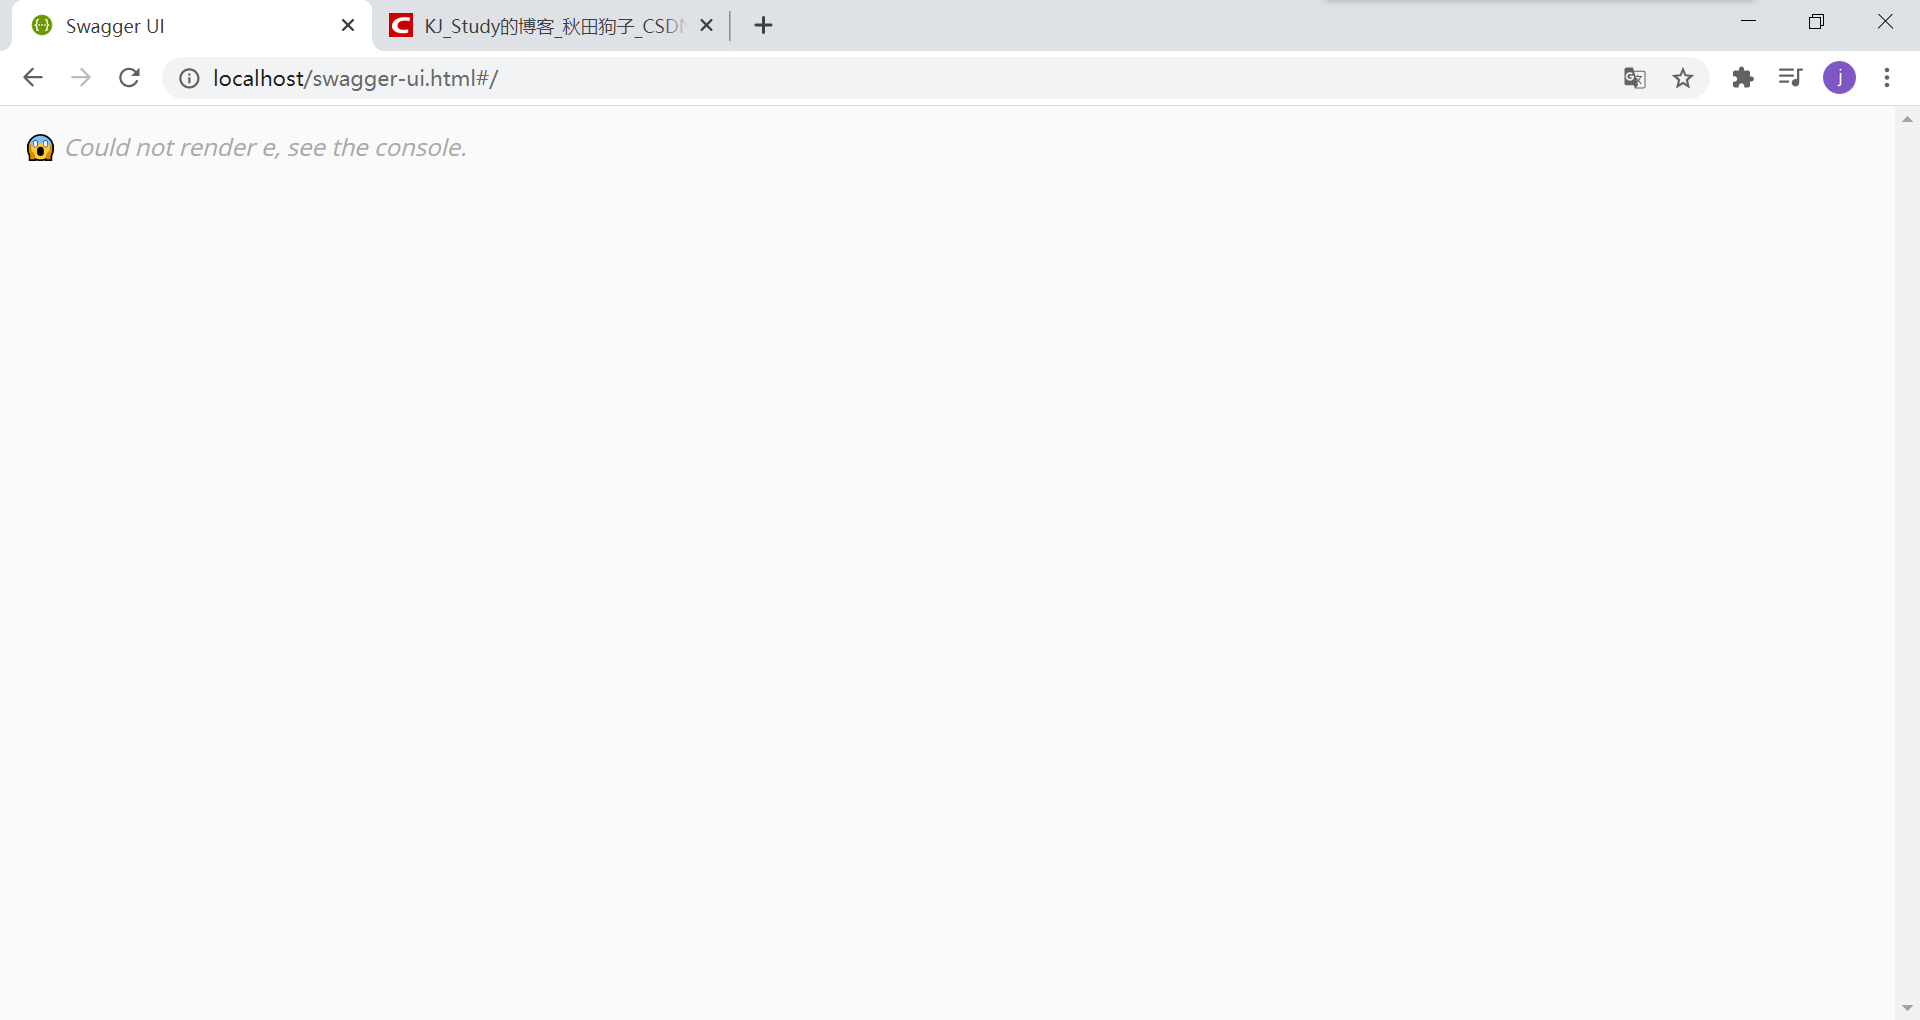
4、配置是否启用swagger
将docket的enabled属性改为false即可
//docket的部分源码

public Docket(DocumentationType documentationType) {

    this.apiInfo = ApiInfo.DEFAULT;

    this.groupName = "default";

    this.enabled = true; //是否使用swagger

    this.genericsNamingStrategy = new DefaultGenericTypeNamingStrategy();

    this.applyDefaultResponseMessages = true;

    this.host = "";

    this.pathMapping = Optional.absent();

    this.apiSelector = ApiSelector.DEFAULT;

    this.enableUrlTemplating = false;

    this.vendorExtensions = Lists.newArrayList();

    this.documentationType = documentationType;

}

public Docket enable(boolean externallyConfiguredFlag) {

    this.enabled = externallyConfiguredFlag;

    return this;

}
所以我们enable一下
@Bean

public Docket docket(){

    return new Docket(DocumentationType.SWAGGER_2).apiInfo(getApiInfo())

            .select()

            .apis(RequestHandlerSelectors.basePackage("com.kj.controller")) //RequestHandlerSelectors配置扫描接口的方式

            .build()

            .enable(false);

}
实际使用:我们通过外部的环境来判断是否调用swagger
@Bean

public Docket docket(Environment environment){

    //设置显示要调用swagger的环境,可以有多个值

    Profiles profiles = Profiles.of("dev");

    //判断当前的环境与指定的是否一样

    boolean flag = environment.acceptsProfiles(profiles);

    return new Docket(DocumentationType.SWAGGER_2).apiInfo(getApiInfo())

            .select()

            .apis(RequestHandlerSelectors.basePackage("com.kj.controller")) //RequestHandlerSelectors配置扫描接口的方式

            .build()

            .enable(flag);

}
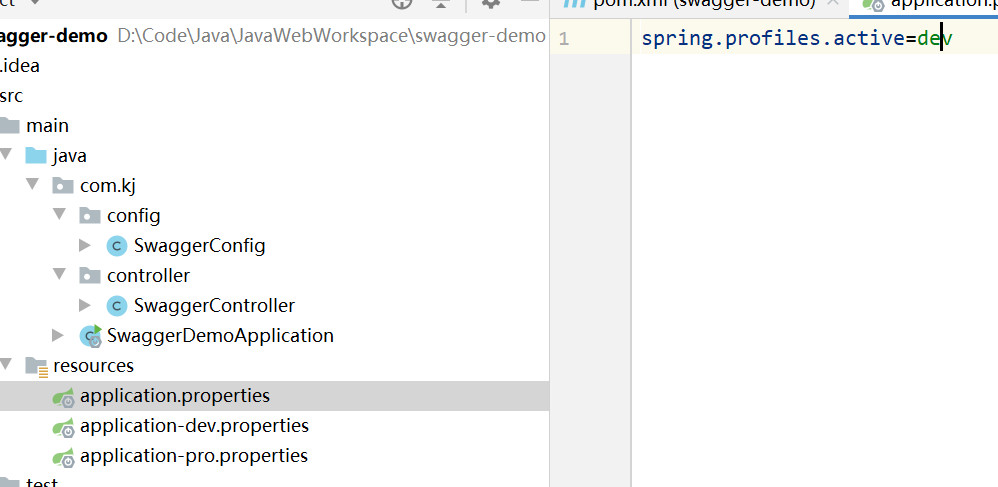
我们有多个配置文件,一个用于开发,一个用于部署
5、配置api文档的分组
主要的是groupName
public Docket(DocumentationType documentationType) {

    this.apiInfo = ApiInfo.DEFAULT;

    this.groupName = "default";

    this.enabled = true;

    this.genericsNamingStrategy = new DefaultGenericTypeNamingStrategy();

    this.applyDefaultResponseMessages = true;

    this.host = "";

    this.pathMapping = Optional.absent();

    this.apiSelector = ApiSelector.DEFAULT;

    this.enableUrlTemplating = false;

    this.vendorExtensions = Lists.newArrayList();

    this.documentationType = documentationType;

}
@Bean

public Docket docket(Environment environment){

    Profiles profiles = Profiles.of("dev");

    boolean flag = environment.acceptsProfiles(profiles);

    return new Docket(DocumentationType.SWAGGER_2).apiInfo(getApiInfo())

            .select()

            .apis(RequestHandlerSelectors.basePackage("com.kj.controller"))

            .build()

            .enable(flag)

            .groupName("KJ");

}
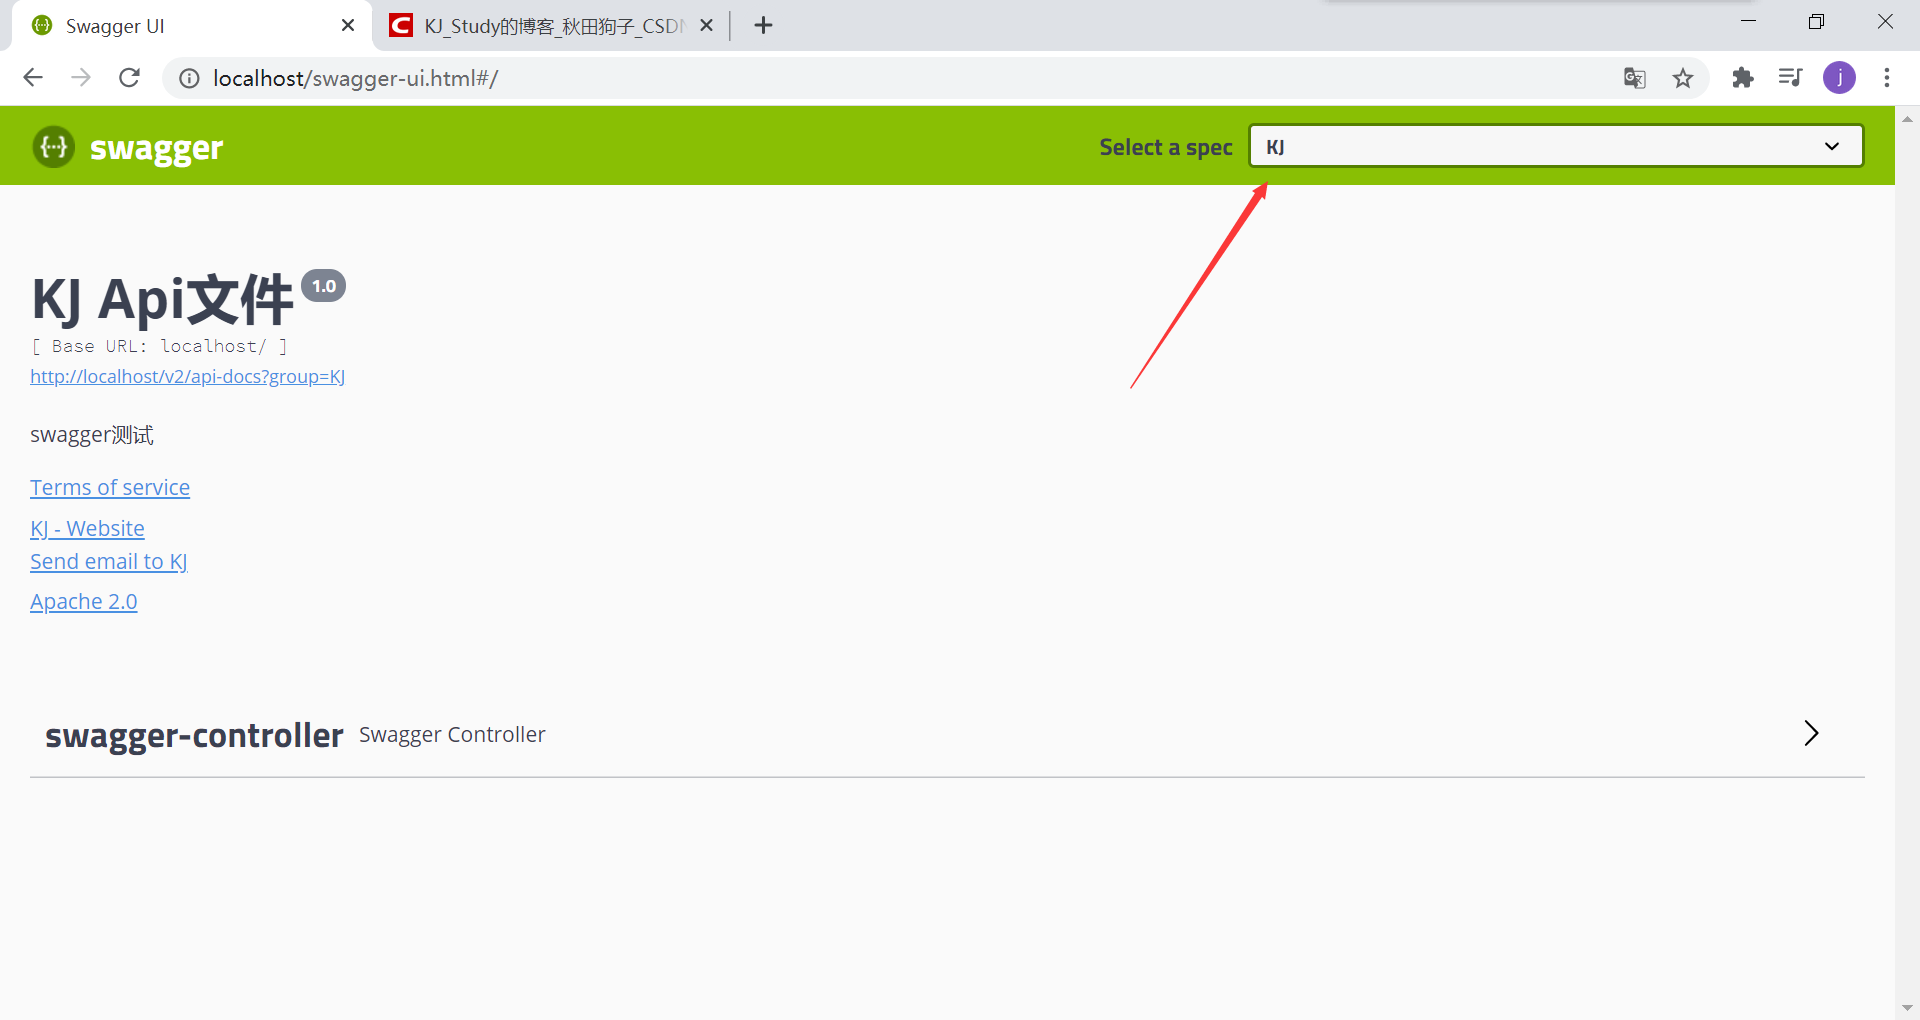
我们可以看到一个docket一个分组。要想要多个我们再创建几个docket即可。
注意组名不能相同,如果相同spring会报bug并结束进程
@Bean

public Docket docket1() {

    return new Docket(DocumentationType.SWAGGER_2).apiInfo(getApiInfo())

        .groupName("A");

}

@Bean

public Docket docket2() {

    return new Docket(DocumentationType.SWAGGER_2).apiInfo(getApiInfo())

        .groupName("B");

}

@Bean

public Docket docket3() {

    return new Docket(DocumentationType.SWAGGER_2).apiInfo(getApiInfo())

        .groupName("C");

}
不同后端开发人员选择自己的组,就可以只看到自己的api

6、实体类配置
只要返回值中存在,就会被swagger扫描
编写一个pojo
package com.kj.pojo;

public class User {

    private String username;

    private String password;

}
编写一个方法
@RestController

public class SwaggerController {

    @RequestMapping("/hello")

    public String hello(){

        return "hello";

    }

    @PostMapping("/user")

    public User user(){

        return new User();

    }

}
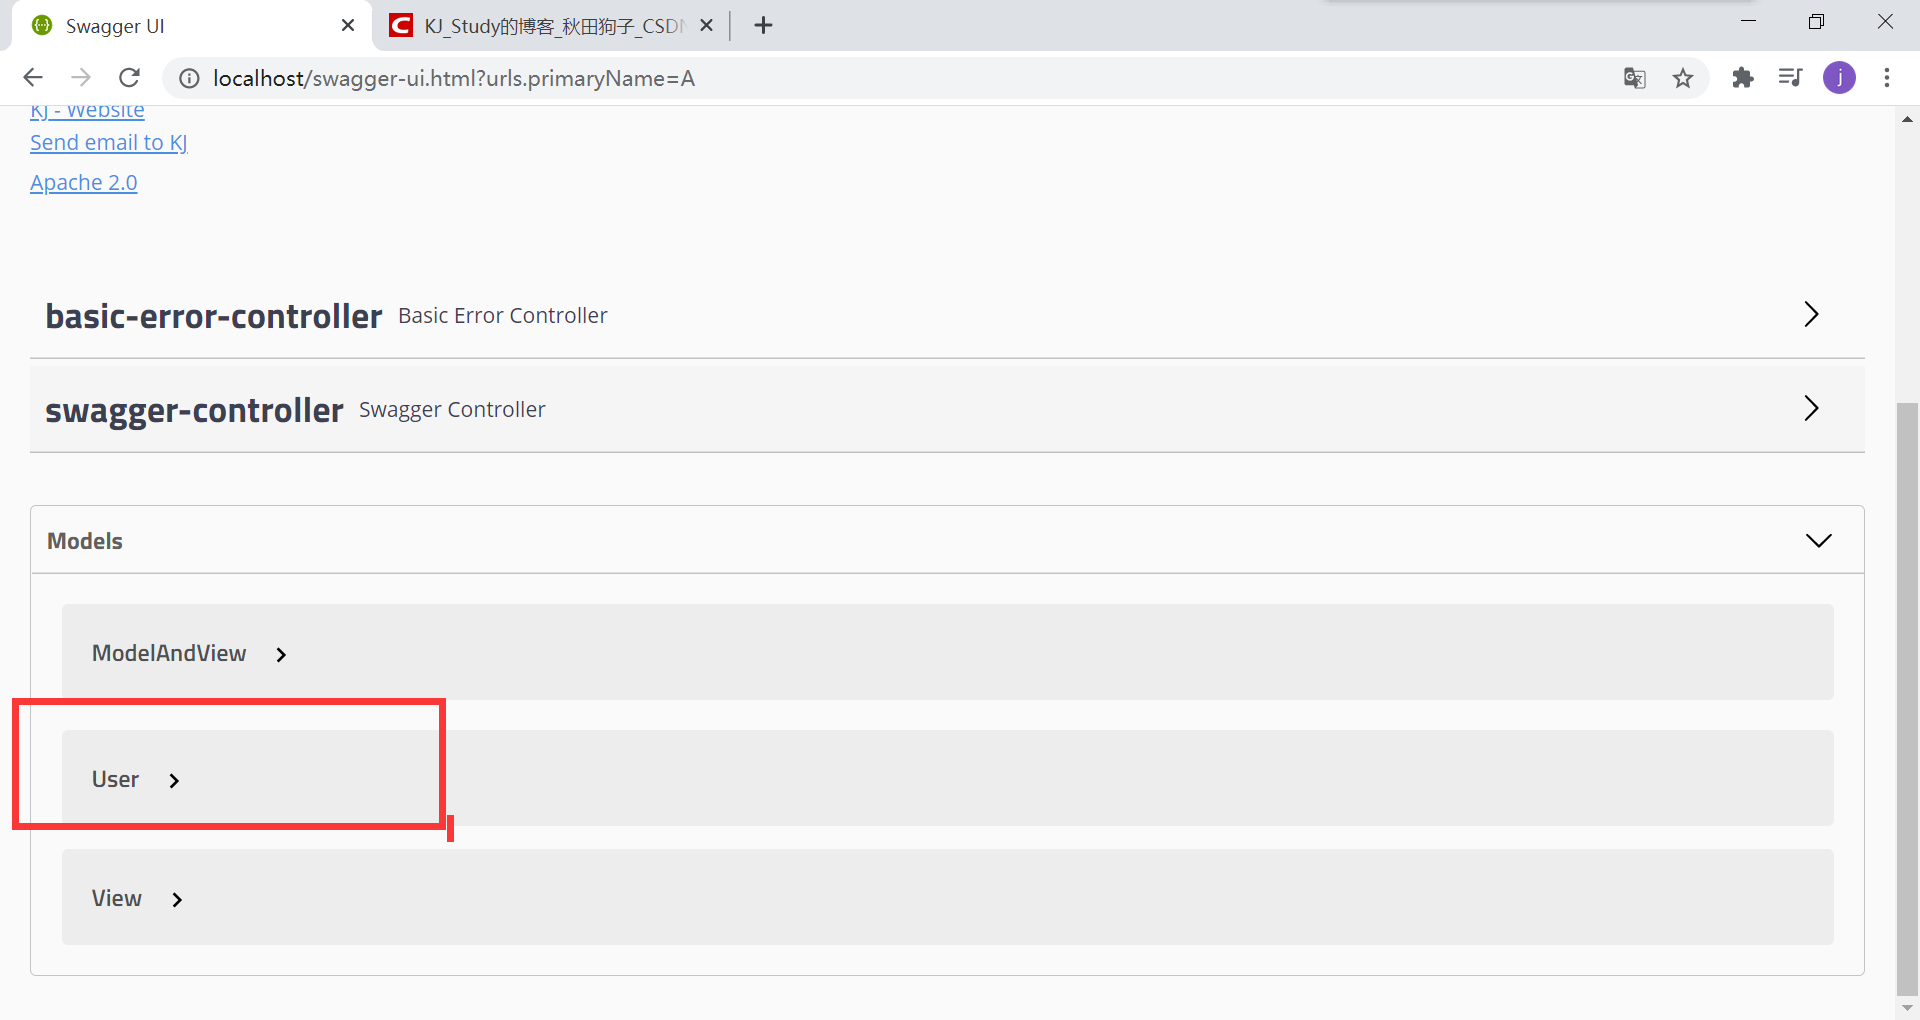
我们也可以在实体类加上注注释(在显示时,只显示注解配置的内容),显不显示与这个注解无关
package com.kj.pojo;

import io.swagger.annotations.ApiModel;

import io.swagger.annotations.ApiModelProperty;

@ApiModel("实体类")

public class User {

    @ApiModelProperty("用户名")

    public String username;

    @ApiModelProperty("密码")

    private String password;

}
可以看到私有方法是看不到的
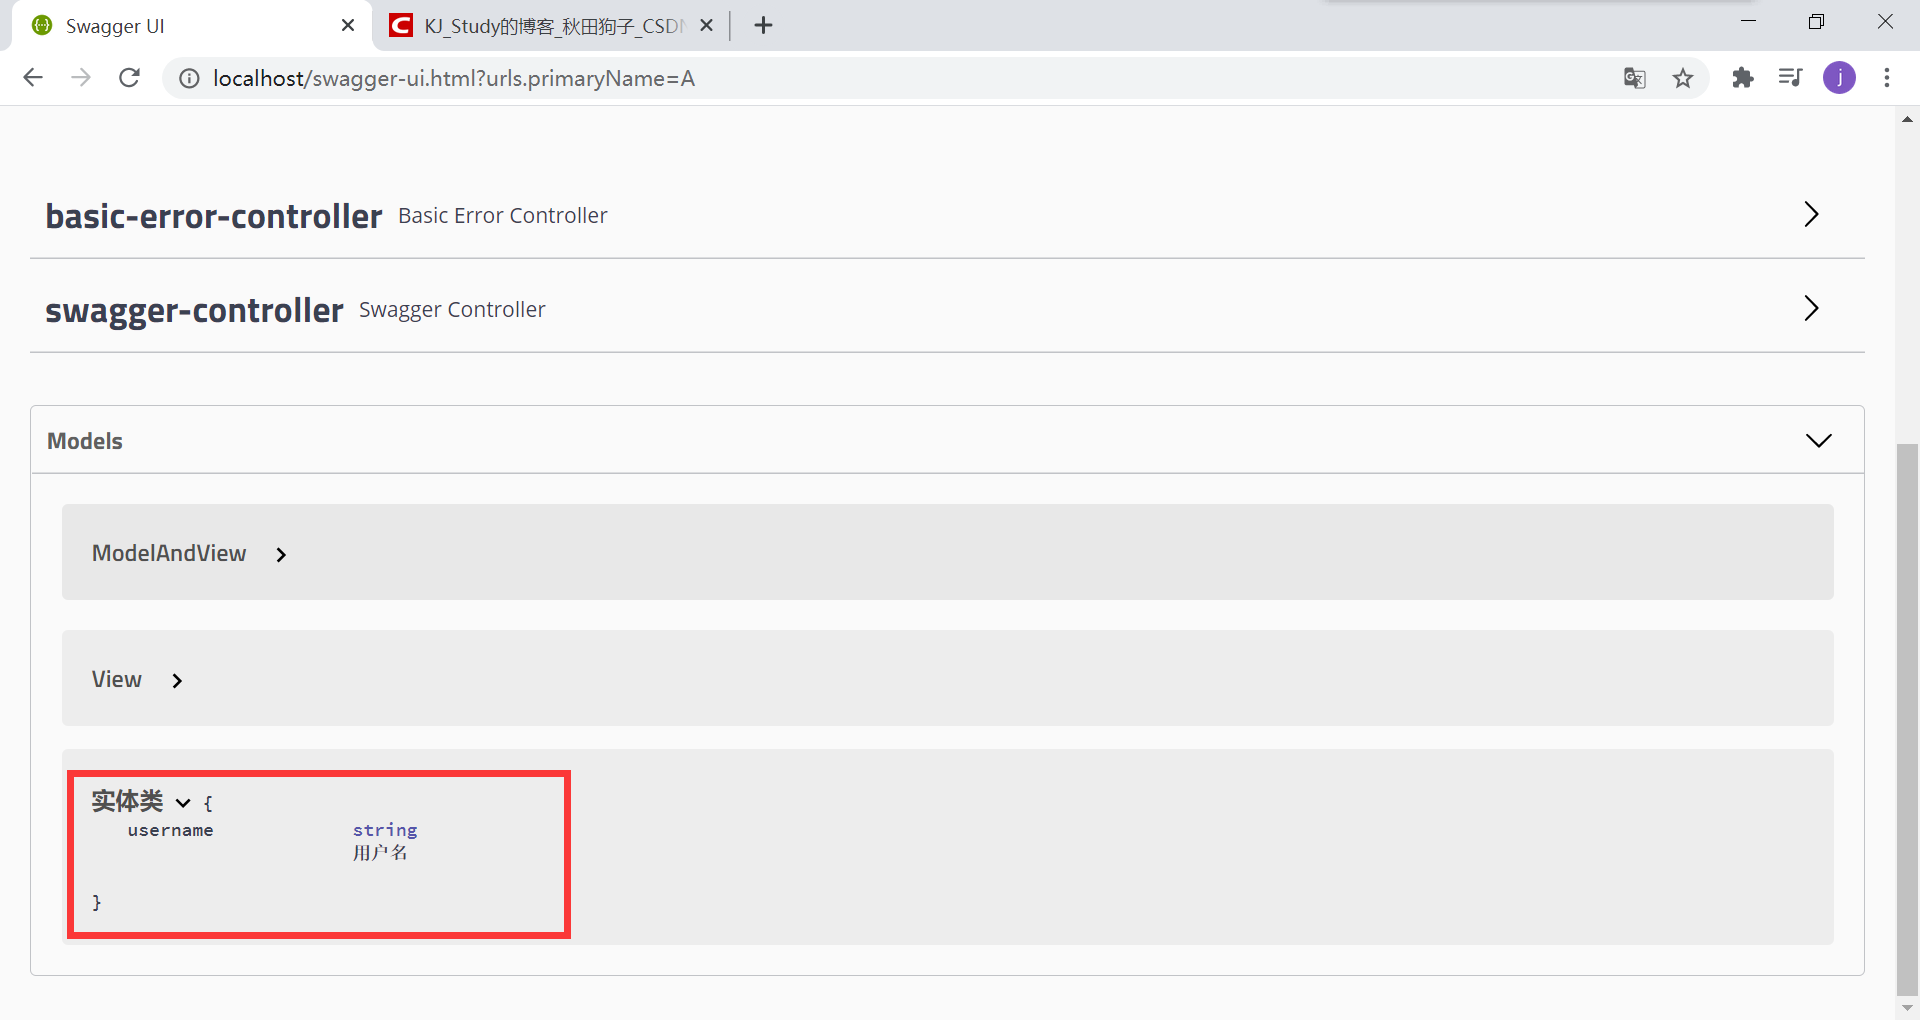
同样我们也可以给方法加注释,或者给参数加注释
@RestController

public class SwaggerController {

    @ApiOperation("哈喽方法")

    @RequestMapping("/hello")

    public String hello(){

        return "hello";

    }

    @PostMapping("/user")

    public User user(){

        return new User();

    }

    @GetMapping("/hello2")

    public String hello2(@ApiParam("用户名") String name){

        return "hello";

    }

}

四、发送请求
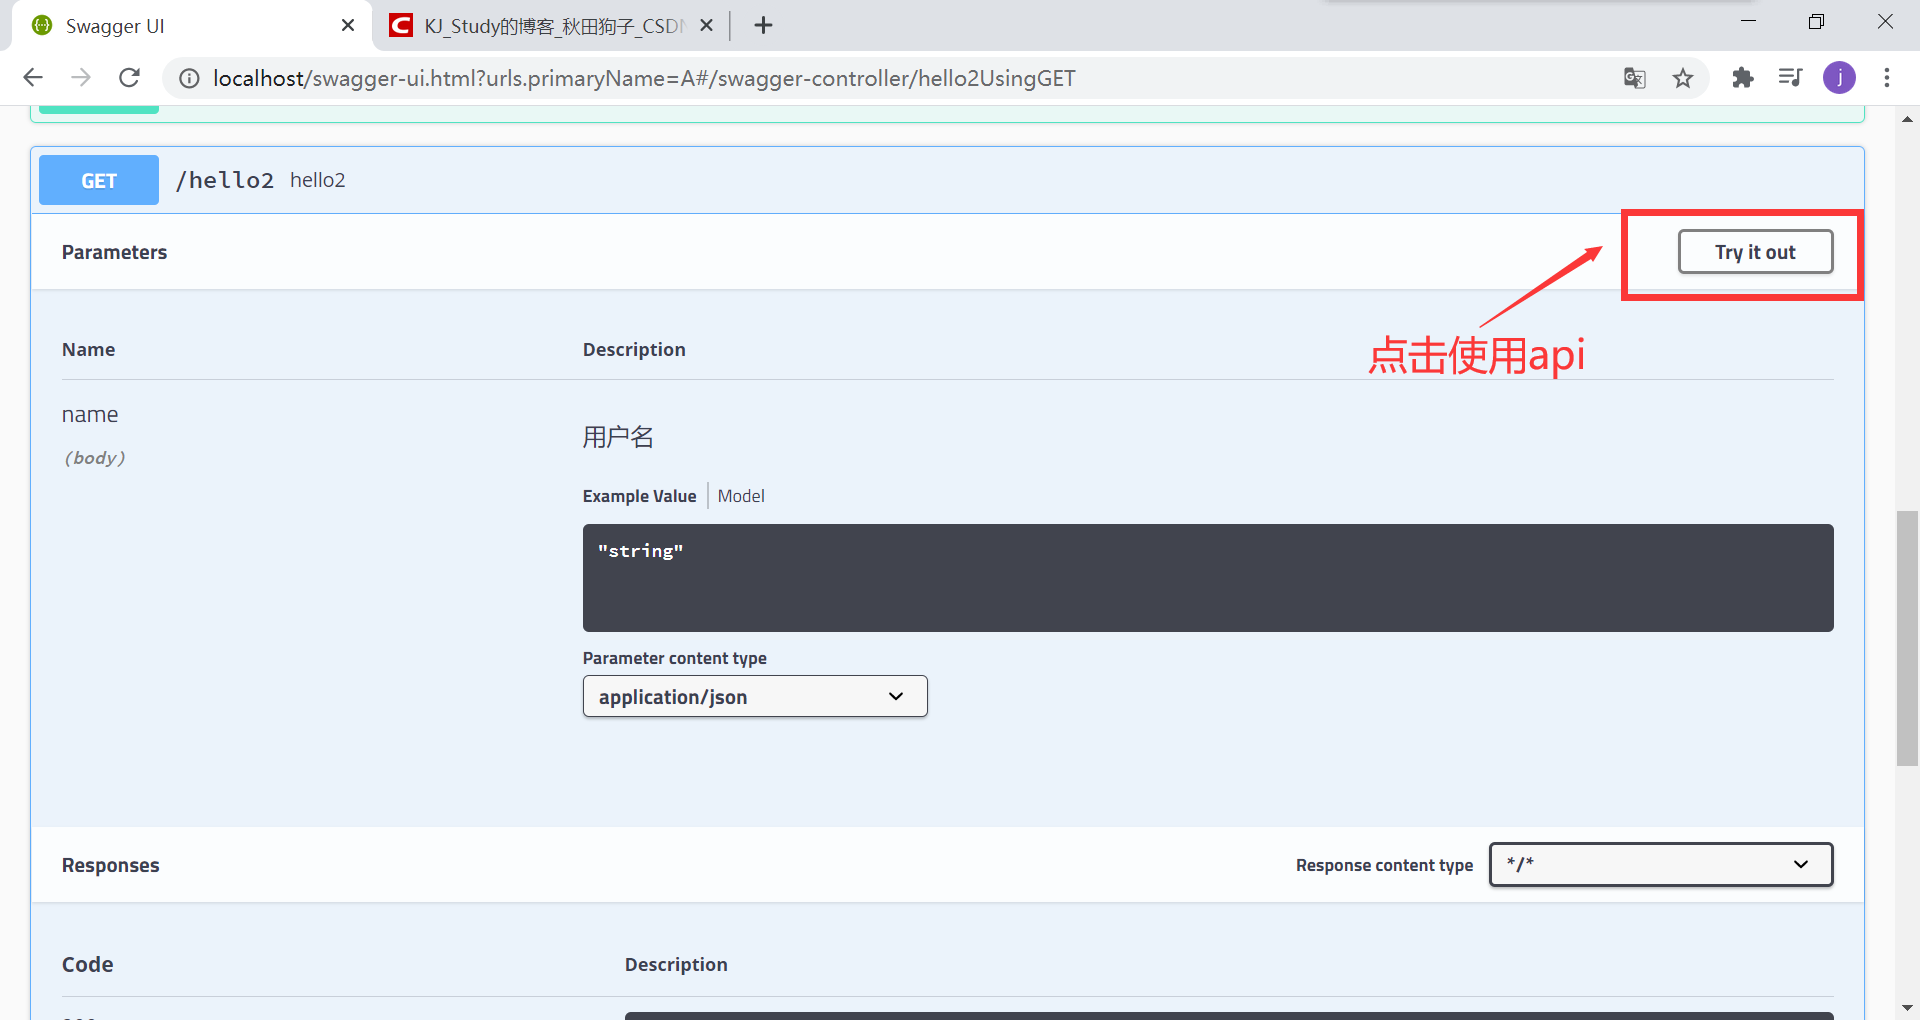
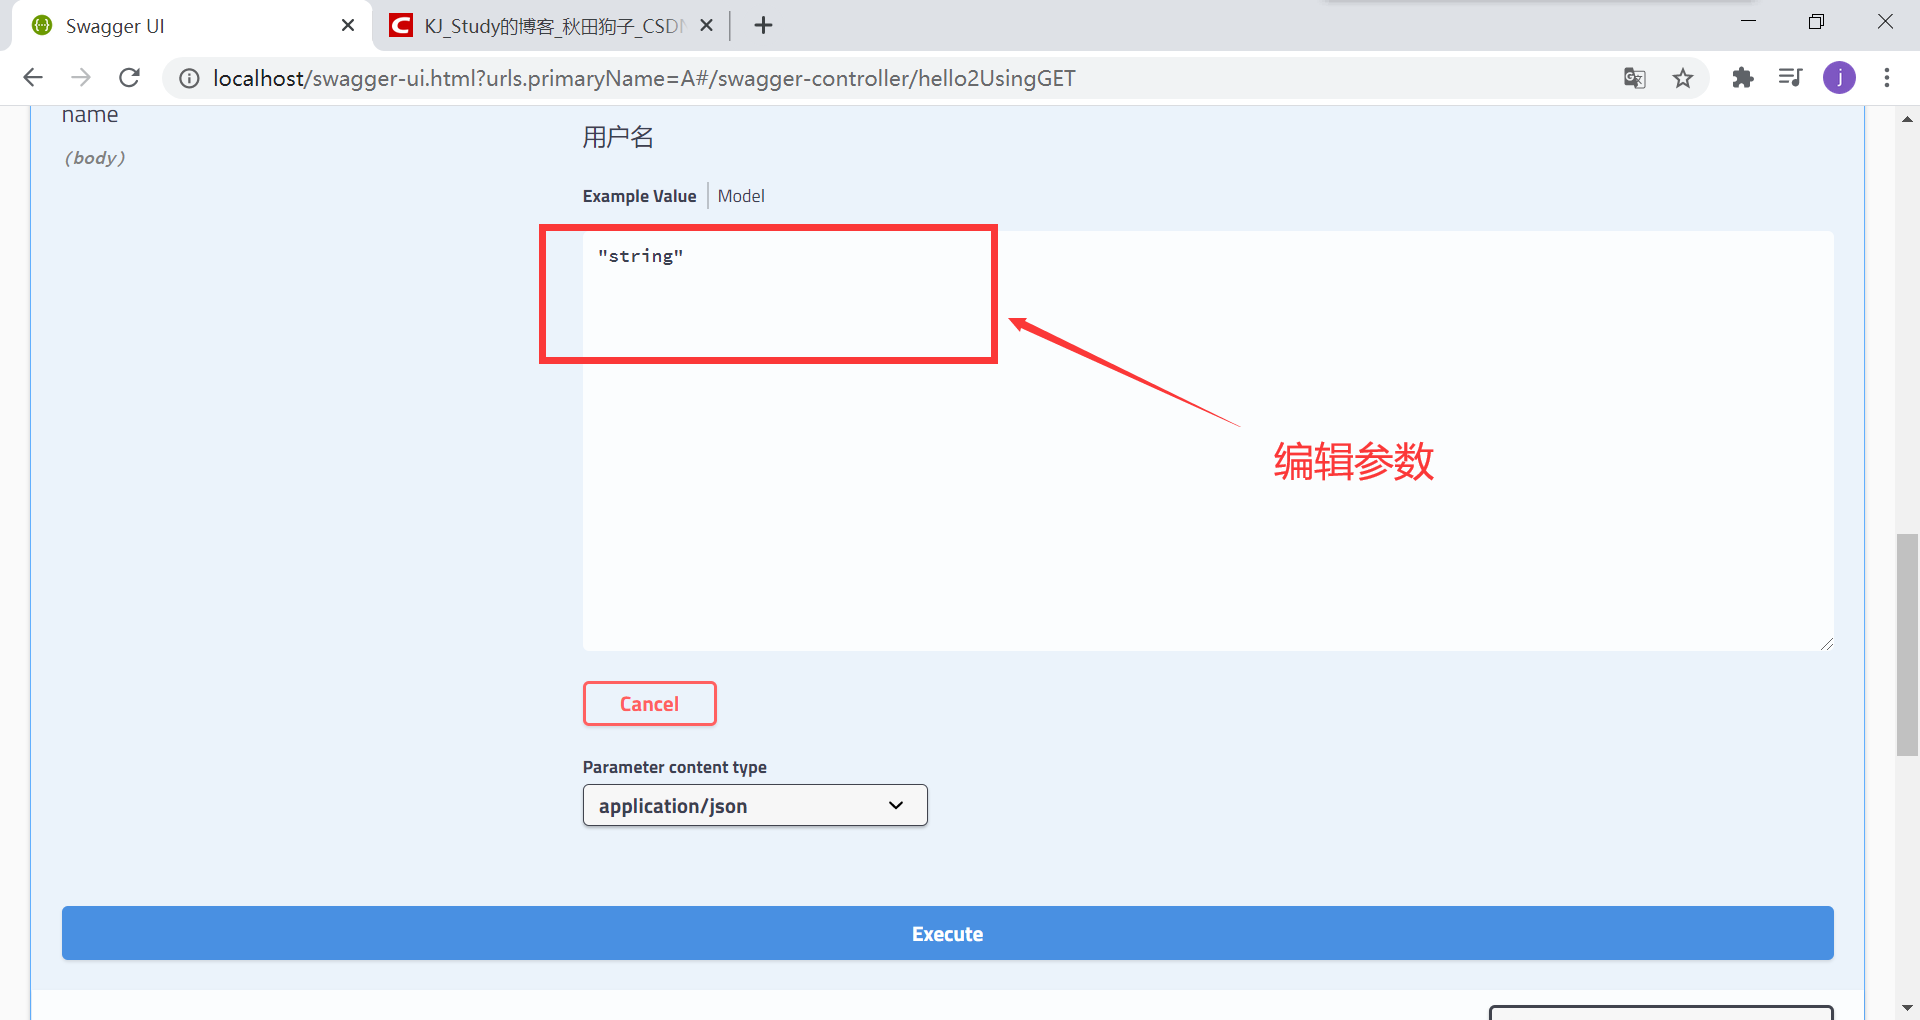
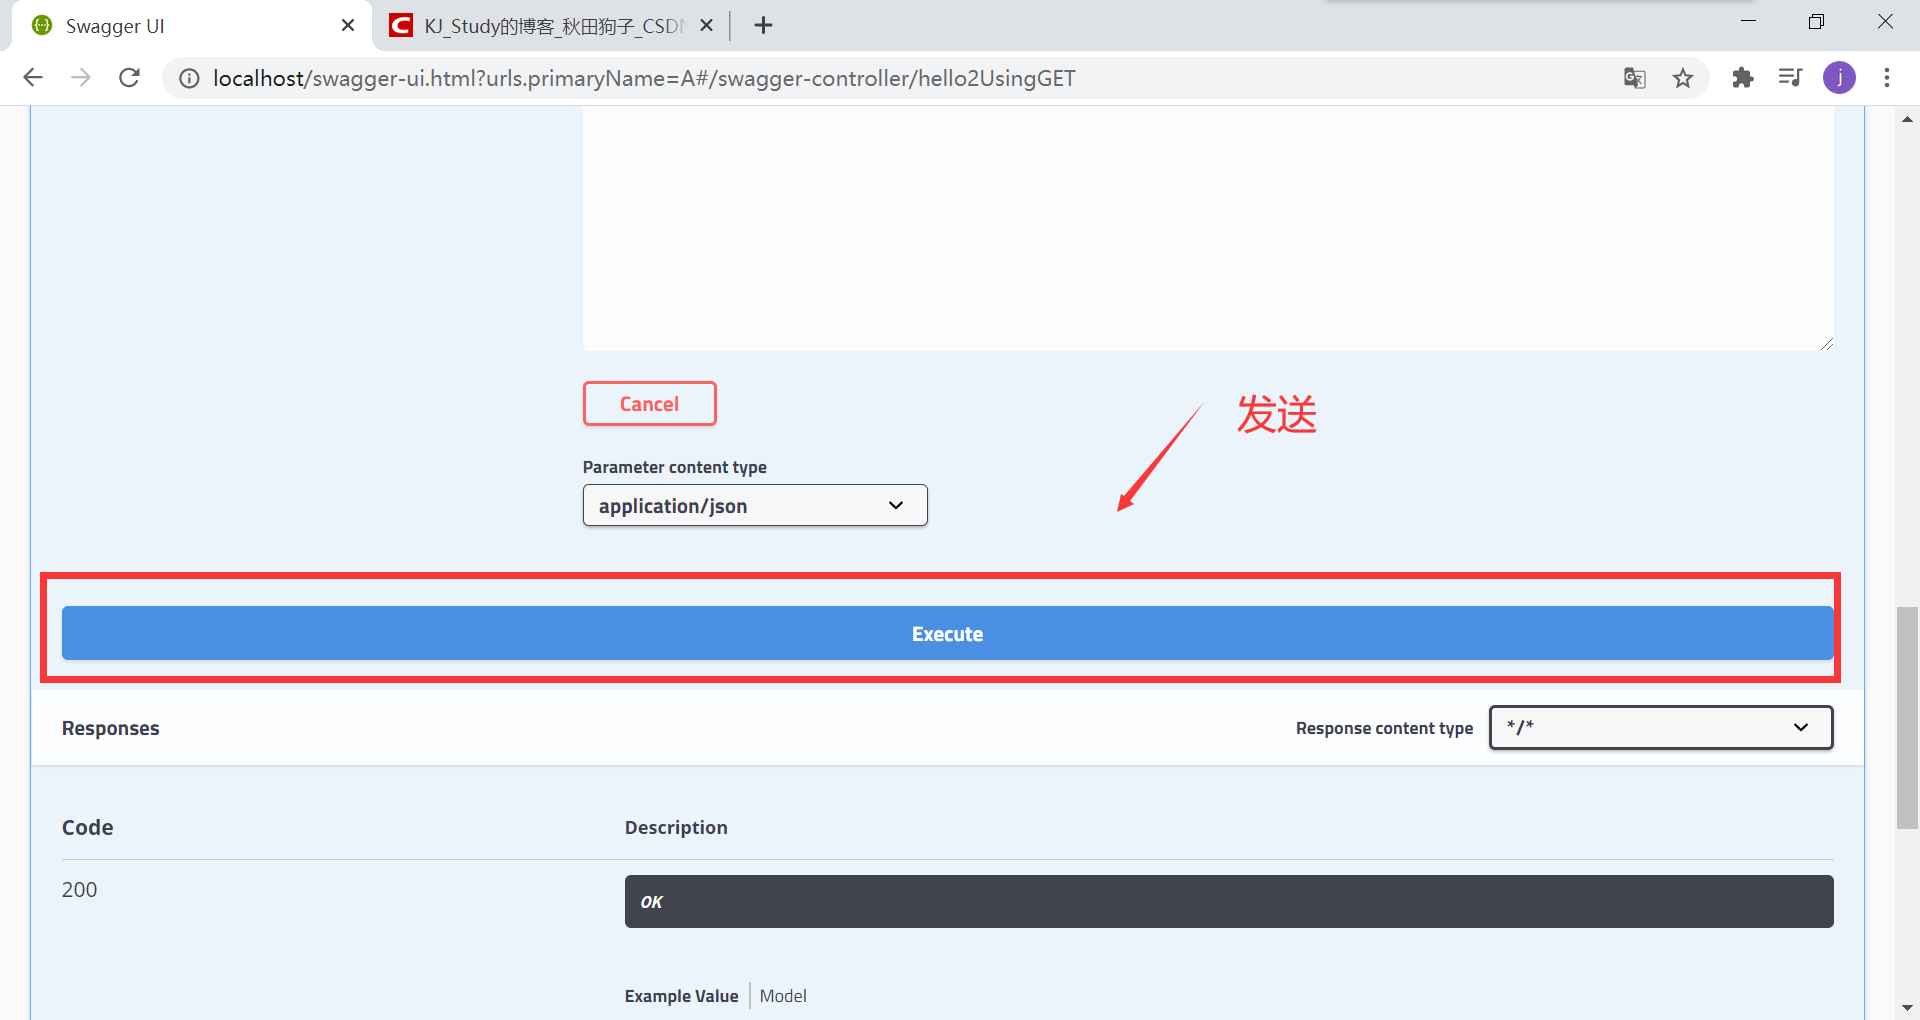
下面就可以看到结果了
Swagger配置与使用的更多相关文章
- 一、Swagger配置
一.Swagger配置 1.注解不显示 SwaggerConfig文件下 //c.IncludeXmlComments(GetXmlCommentsPath()): 内下面添加: c.Inclu ...
- Spring Boot项目简单上手+swagger配置+项目发布(可能是史上最详细的)
Spring Boot项目简单上手+swagger配置 1.项目实践 项目结构图 项目整体分为四部分:1.source code 2.sql-mapper 3.application.properti ...
- swagger配置
1.pom.xml <!--swagger2--> <dependency> <groupId>io.springfox</groupId> <a ...
- swagger 配置- ssm
swagger 配置 - ssm swagger 是一个用来看接口的工具,具体效果如下,这里用的是swagger2 1.porm.xml <dependency> <groupId& ...
- 尝试从零开始构建我的商城 (二) :使用JWT保护我们的信息安全,完善Swagger配置
前言 GitHub地址 https://github.com/yingpanwang/MyShop/tree/dev_jwt 此文对应分支 dev_jwt 此文目的 上一篇文章中,我们使用Abp vN ...
- webapi Swagger 配置 services.BuildServiceProvider() 报警 ASP0000 问题处理
问题起源 网上的常见配置 Swagger 配置 在Startup类的 ConfigureServices 使用 services.BuildServiceProvider() ,其中有段代码如下: v ...
- 《Asp.Net Core3 + Vue3入坑教程》-Net Core项目搭建与Swagger配置步骤
简介 <Asp.Net Core3 + Vue3入坑教程> 此教程仅适合新手入门或者前后端分离尝试者.可以根据图文一步一步进操作编码也可以选择直接查看源码.每一篇文章都有对应的源码 教程后 ...
- SpringBoot初探之Swagger配置
Swagger是一个用于描述和测试restful接口的工具,只要在定义restful接口时增加一些类和方法的描述注解,通过很简单的配置就可以得到一个展示接口定义页面,也可以在页面上设置参数提交测试接口 ...
- swagger配置和简单使用
说明:本地环境idea + maven3.5 + springboot2.0.0 + springfox-swagger2 2.8.0 + springfox-swagger-ui 2.8.0 + ...
- .net core web api swagger 配置笔记
参考网址: --配置步骤见如下链接https://docs.microsoft.com/zh-cn/aspnet/core/tutorials/web-api-help-pages-using-swa ...
随机推荐
- 从零搭建Spring Boot脚手架(7):Elasticsearch应该独立服务
1. Spring Data Elasticsearch Spring Data Elasticsearch是Spring Data项目的子项目,提供了Elasticsearch与Spring的集成. ...
- 吴恩达Machine Learning学习笔记(四)--BP神经网络
解决复杂非线性问题 BP神经网络 模型表示 theta->weights sigmoid->activation function input_layer->hidden_layer ...
- java 常用类-StringBuffer-StringBuilder
二.StringBuffer类&StringBuilder类 2.1 简介 java.lang.StringBuffer.StringBuilder代表可变的字符序列,可以对字符 串内容进行增 ...
- 一键生成数据库文档,堪称数据库界的Swagger,有点厉害
最近部门订单业务调整,收拢其他业务线的下单入口,做个统一大订单平台.需要梳理各业务线的数据表,但每个业务线库都有近百张和订单相关的表,挨个表一个一个字段的弄脑瓜子嗡嗡的. 为了不重复 CV 操作,抱着 ...
- springboot项目整合rabbitMq涉及消息的发送确认,消息的消费确认机制,延时队列的实现
1.引入maven依赖 <dependency> <groupId>org.springframework.boot</groupId> <artifactI ...
- 基础篇:深入解析JAVA泛型和Type类型体系
目录 1 JAVA的Type类型体系 2 泛型的概念 3 泛型类和泛型方法的示例 4 类型擦除 5 参数化类型ParameterizedType 6 泛型的继承 7 泛型变量TypeVariable ...
- opencv中namedWindow( )函数
转自:https://blog.csdn.net/fanjiule/article/details/81606596 第一步,功能说明:namedWindow()的功能就是新建一个显示窗口.可以指定窗 ...
- LCD显示器缺陷自动化检测方案
很牛的测试 参考: 1.https://www.radiantvisionsystems.com/ 2.https://www.radiantvisionsystems.com/node/275 LC ...
- Spring Boot第七弹,别再问我拦截器如何配置了!!!
持续原创输出,点击上方蓝字关注我吧 前言 上篇文章讲了Spring Boot的WEB开发基础内容,相信读者朋友们已经有了初步的了解,知道如何写一个接口. 今天这篇文章来介绍一下拦截器在Spring B ...
- shell脚本中,关于if,以及条件判断
#!/bin/sh SYSTEM=`uname -s` #获取操作系统类型 if [ $SYSTEM = "Linux" ] ; then #如果是linux的话打印linux字符 ...