
部署gitlab-01
Gitlab Server 部署
1、环境配置
关闭防火墙、SELinux
开启邮件服务
systemctl start  postfix

systemctl enable postfix
#ps:不开去邮箱可以不期待,不是必须操作
2、部署 Gitlab
1、安装 gitlab 依赖包
centos7:

 ~]# yum install -y curl openssh-server openssh-clients postfix cronie policycoreutils-python

# gitlab-ce 10.x.x以后的版本需要依赖policycoreutils-python

centos8:

 ~]# yum install -y curl openssh-server openssh-clients postfix cronie  policycoreutils-python-utils
2、添加官方源
~]# curl https://packages.gitlab.com/install/repositories/gitlab/gitlab-ce/script.rpm.sh | sudo bash
因为官方源太慢,可以使用国内清华yum源,配置如下
~]# vim /etc/yum.repos.d/gitlab-ce.repo

[gitlab-ce]

name=Gitlab CE Repository

baseurl=https://mirrors.tuna.tsinghua.edu.cn/gitlab-ce/yum/el$releasever/

gpgcheck=0

enabled=1
3、安装 Gitlab
 ~]# yum -y install gitlab-ce                    # 自动安装最新版

 ~]# yum -y install gitlab-ce-x.x.x	     # 安装指定版本Gitlab
4、配置 Gitlab
1、查看Gitlab版本
]# head -1 /opt/gitlab/version-manifest.txt

gitlab-ce 13.8.4
[root@node1 gitlab]# pwd

/opt/gitlab

[root@node1 gitlab]# ll

总用量 2580

drwxr-xr-x  2 root root     153 2月  14 21:02 bin

-rw-r--r--  1 root root  192450 2月  11 18:36 dependency_licenses.json

drwxr-xr-x 14 root root     168 2月  14 21:02 embedded

drwxr-xr-x  2 root root      32 2月  14 21:02 etc

drwxr-xr-x  2 root root       6 2月  11 18:37 init

-rw-r--r--  1 root root 2391185 2月  11 18:36 LICENSE

drwxr-xr-x  2 root root     306 2月  14 21:02 licenses

drwxr-xr-x  2 root root    8192 2月  14 21:02 LICENSES

drwxr-xr-x  2 root root       6 2月  11 18:37 service

drwxr-xr-x  2 root root       6 2月  11 18:37 sv

-rw-r--r--  1 root root   31942 2月  11 18:37 version-manifest.json

-rw-r--r--  1 root root   12135 2月  11 18:37 version-manifest.txt      #依赖包位置
2、Gitlab 配置登录链接
#设置登录链接

[root@qfedu.com ~]# vim /etc/gitlab/gitlab.rb

***

## GitLab URL

##! URL on which GitLab will be reachable.

##! For more details on configuring external_url see:

##! https://docs.gitlab.com/omnibus/settings/configuration.html#configuring-the-external-url-for-gitlab

# 没有域名,可以设置为本机IP地址
32 external_url 'http://192.168.1.1' #也可以加端口
***
[root@node1 gitlab]# grep "^external_url" /etc/gitlab/gitlab.rb
external_url 'http://192.168.1.1' #绑定监听的域名或IP
3、初始化 Gitlab
第一次使用配置时间较长
 ~]# gitlab-ctl reconfigure
......
Running handlers:
Running handlers complete
Chef Infra Client finished, 578/1549 resources updated in 02 minutes 57 seconds
Notes:
It seems you haven't specified an initial root password while configuring the GitLab instance.
On your first visit to your GitLab instance, you will be presented with a screen to set a
password for the default admin account with username `root`.
gitlab Reconfigured!
4、启动 Gitlab 服务
[root@node1 gitlab]# gitlab-ctl start

ok: run: alertmanager: (pid 14192) 65s

ok: run: gitaly: (pid 14079) 67s

ok: run: gitlab-exporter: (pid 14089) 67s

ok: run: gitlab-workhorse: (pid 14049) 68s

ok: run: grafana: (pid 14211) 64s

ok: run: logrotate: (pid 13583) 153s

ok: run: nginx: (pid 13560) 160s

ok: run: node-exporter: (pid 14064) 68s

ok: run: postgres-exporter: (pid 14203) 64s

ok: run: postgresql: (pid 13272) 215s

ok: run: prometheus: (pid 14174) 66s

ok: run: puma: (pid 13459) 178s

ok: run: redis: (pid 13101) 227s

ok: run: redis-exporter: (pid 14091) 66s

ok: run: sidekiq: (pid 13487) 172s
[root@node1 gitlab]# lsof -i:80 #查看git
COMMAND PID USER FD TYPE DEVICE SIZE/OFF NODE NAME
nginx 13560 root 7u IPv4 64606 0t0 TCP *:http (LISTEN)
nginx 13561 gitlab-www 7u IPv4 64606 0t0 TCP *:http (LISTEN)
nginx 13562 gitlab-www 7u IPv4 64606 0t0 TCP *:http (LISTEN)
nginx 13563 gitlab-www 7u IPv4 64606 0t0 TCP *:http (LISTEN)
nginx 13564 gitlab-www 7u IPv4 64606 0t0 TCP *:http (LISTEN)
5、Gitlab 的使用
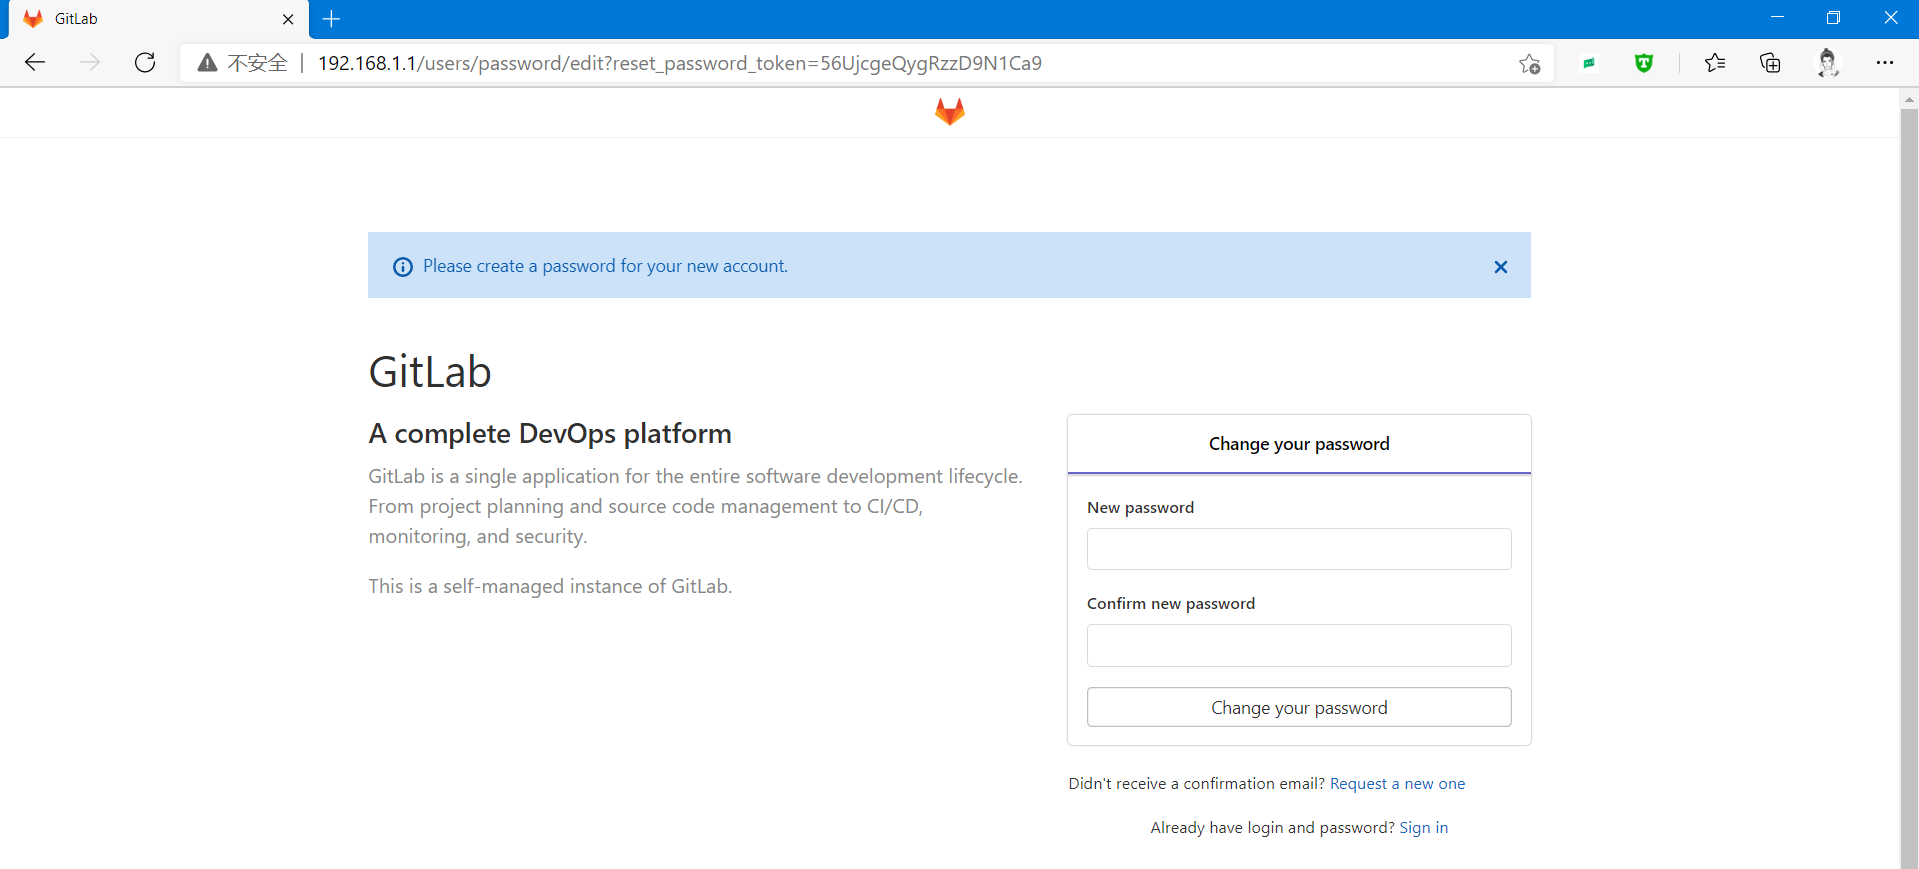
在浏览器中输入 http://192.168.1.1,然后 change password: ,并使用root用户登录 即可 (后续动作根据提示操作)
5.1、Gitlab 命令行修改密码
~]# gitlab-rails console production

irb(main):001:0>user = User.where(id: 1).first      # id为1的是超级管理员

irb(main):002:0>user.password = 'yourpassword'      # 密码必须至少8个字符

irb(main):003:0>user.save!                          # 如没有问题 返回true

exit                                                 # 退出
5.2、Gitlab服务管理
~]# gitlab-ctl start                      # 启动所有 gitlab 组件;

~]# gitlab-ctl stop                       # 停止所有 gitlab 组件;

~]# gitlab-ctl restart                    # 重启所有 gitlab 组件;

~]# gitlab-ctl status                     # 查看服务状态;

~]# gitlab-ctl reconfigure                # 初始化服务;

~]# vim /etc/gitlab/gitlab.rb             # 修改默认的配置文件;

~]# gitlab-ctl tail                       # 查看日志;
部署gitlab-01的更多相关文章
- omnibus方式部署gitlab
omnibus方式部署gitlab Posted on 2015 年 1 月 10 日 4233 Views 这几天折腾搭建git服务器,选择了比较流行的gitlab,一开始就直奔一键安装脚本去了 ...
- Windows 下 docker 部署 gitlab ci
一.安装 1. 安装 docker Docker下载 注意:Windows 10 家庭版获取 之前的版本不能直接安装 Docker ,而是需要去安装 Docker Toolbox 我这里安装的是 Do ...
- [转]Centos 7 安装部署 GitLab 服务器
Centos 7 安装部署 GitLab 服务器 转自:https://www.jianshu.com/p/79bfded68899 文前说明 作为码农中的一员,需要不断的学习,我工作之余将一些分析总 ...
- Docker-compose部署gitlab中文版
目录 Docker-compose部署gitlab 1.安装Docker 2.安装Docker-compose 3.安装Gitlab Docker-compose部署gitlab 1.安装Docker ...
- 从零开始一步一步搭建Ubuntu Server服务器、修改数据源、安装Docker、配置镜像加速器、Compose部署Gitlab服务
场景 最终目的是使用Docker Compose部署一个Gitlab服务. 效果 注: 博客: https://blog.csdn.net/badao_liumang_qizhi关注公众号 霸道的程序 ...
- Ubuntu系统下容器化部署gitlab
容器化部署gitlab 获取镜像文件 1. 下载镜像文件 docker pull beginor/gitlab-ce:-ce. 2. 创建GitLab 的配置 (etc) . 日志 (log) .数据 ...
- 一、CentOS 7安装部署GitLab服务器
一.CentOS 7安装部署GitLab服务器 1.安装依赖软件 yum -y install policycoreutils policycoreutils-python openssh-serve ...
- 在 CentOS 上部署 GitLab (自托管的Git项目仓库)
参考资料https://github.com/mattias-ohlsson/gitlab-installer/blob/master/gitlab-install-el6.sh 环境准备OS: Ce ...
- 使用Docker快速部署Gitlab
使用Docker部署Gitlab 1. 下载gitlab镜像 docker pull gitlab/gitlab-ce 2. 运行gitlab实例 GITLAB_HOME=`pwd`/data/git ...
- 3.Docker Compose 部署 GitLab
什么是 GitLab GitLab 是利用 Ruby on Rails 一个开源的版本管理系统,实现一个自托管的 Git 项目仓库,可通过 Web 界面进行访问公开的或者私人项目.它拥有与 Githu ...
随机推荐
- Android事件分发机制三:事件分发工作流程
前言 很高兴遇见你~ 本文是事件分发系列的第三篇. 在前两篇文章中,Android事件分发机制一:事件是如何到达activity的? 分析了事件分发的真正起点:viewRootImpl,Activit ...
- 【Android】报错 Please ensure Hyper-V is disabled in Windows Features, or refer to the Intel HAXM 的解决方案
参考文章 实测华为锐龙本(adm yes)安装Android avd虚拟机教程 环境 Android Studio 3.6; Windows 1909; AMD Ryzen 4800U with Ra ...
- 开源AwaitableCompletionSource,用于取代TaskCompletionSource
1 TaskCompletionSource介绍 TaskCompletionSource提供创建未绑定到委托的任务,任务的状态由TaskCompletionSource上的方法显式控制,以支持未来的 ...
- 标准PE头属性说明
- 如何用OKR促进跨团队协同
https://mp.weixin.qq.com/s/347dKRlez0_KJKGOkTI0AQ
- Page not found (404) 不被Django的exception中间件捕捉 中间件
Using the URLconf defined in config.urls, Django tried these URL patterns, in this order:
- C# 8.0 可空(Nullable)给ASP.NET Core带来的坑
Nullable reference types(可为空引用类型) 可为空引用类型不讲武德 C#8.0 引入了"可为空引用类型"和"不可为空引用类型",使我们能 ...
- PIGS_POJ1149
PIGS Time Limit: 1000MS Memory Limit: 10000K Total Submissions: 20253 Accepted: 9252 Description ...
- Kepware软件基本操作及使用Java Utgard实现OPC通信
一.环境搭建(基于win10 64位专业版) 1.Kepware 的下载.安装及使用 https://www.cnblogs.com/ioufev/p/9366877.html 2.重要:OPC 和 ...
- 用RabbitMQ了好几年之后,我总结出来5点RabbitMQ的使用心得
大概从 2013 年开始,我就开始了自己和 RabbitMQ 的接触,到现在已经有七年多了. 在这七年中,既有一些对 RabbitMQ 的深度体验,更有无数的血泪史. 而根据我这么多年的使用经验,我将 ...