
Tensorflow object detection API ——环境搭建与测试
1、开发环境搭建
①、安装Anaconda
建议选择 Anaconda3-5.0.1 版本,已经集成大多数库,并将其作为默认python版本(3.6.3),配置好环境变量(Anaconda安装则已经配好)。也可以直接安装python,安装各种包比较麻烦,因此直接装了Anaconda集成环境。
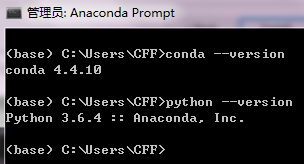
安装完Anaconda后,打开Anaconda Prompt,逐个输入conda --version和python --version,出现下图所示内容则安装成功。
②、安装TensorFlow
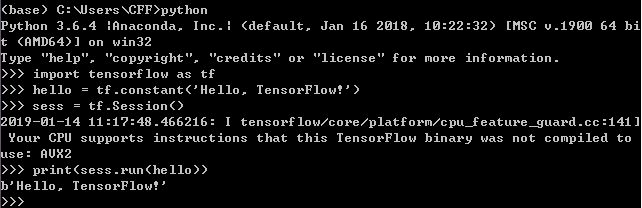
如果是初学者,我们安装cpu版本的tensorflow足够使用。安装TensorFlow-cpu很简单,打开Anaconda Prompt,输入pip install tensorflow。稍等一会就安装成功。通过输入以下代码,检测是否安装成功。
python
import tensorflow as tf
hello = tf.constant('Hello, TensorFlow!')
sess = tf.Session()
print(sess.run(hello))
如果输出如下图所示,则安装成功。
如果输入import tensorflow as tf出现如下警告:
FutureWarning: Conversion of the second argument of issubdtype from `float` to `np.floating` is deprecated. In future, it will be treated as `np.float64 == np.dtype(float).type`.from ._conv import register_converters as _register_converters。则需要打开Anaconda Prompt,输入pip install h5py==2.8.0rc1解决。
如果输入 sess = tf.Session()出现Your CPU supports instructions that this TensorFlow binary was not compiled to use: AVX AVX2,则表明TensorFlow版本太低了,需要打开Anaconda Prompt,输入pip install --upgrade tensorflow解决。
③、下载Tensorflow object detection API模型,从https://github.com/tensorflow/models下载。解压文件到磁盘指定目录,例如C:\Users\CFF\Desktop,重命名为models(此包内包括各种内容,我们所用到的object_detection文件夹在C:\Users\CFF\Desktop\models\research文件夹下)
④、Protobuf 编译。从https://github.com/google/protobuf/releases下载windows版的工具,如protoc-3.6.1-win32.zip,解压到C:\Users\CFF\Desktop,生成:bin, include两个文件夹。打开Anaconda Prompt,cd C:\Users\CFF\Desktop\models\research ,输入C:\Users\CFF\Desktop\bin\protoc ,编译结果如下说明可以开始编译。

Protobuf 编译,用protoc可执行文件编译目录object_detection/protos下的proto文件,生成Python文件。如:C:\Users\CFF\Desktop\bin\protoc object_detection/protos/*.proto --python_out=.。如何出现object_detection/protos/*.proto目录没有发现,可以将*号改成对应的文件逐个编译,生成对应的Python文件。
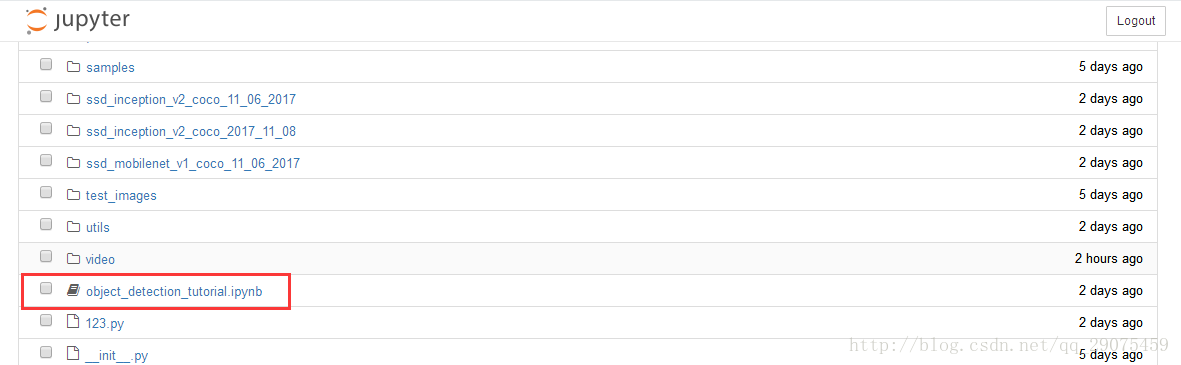
⑤、测试。打开Anaconda Prompt,cd C:\Users\CFF\Desktop\models\research目录,输入jupyter notebook,跳转到网页界面。
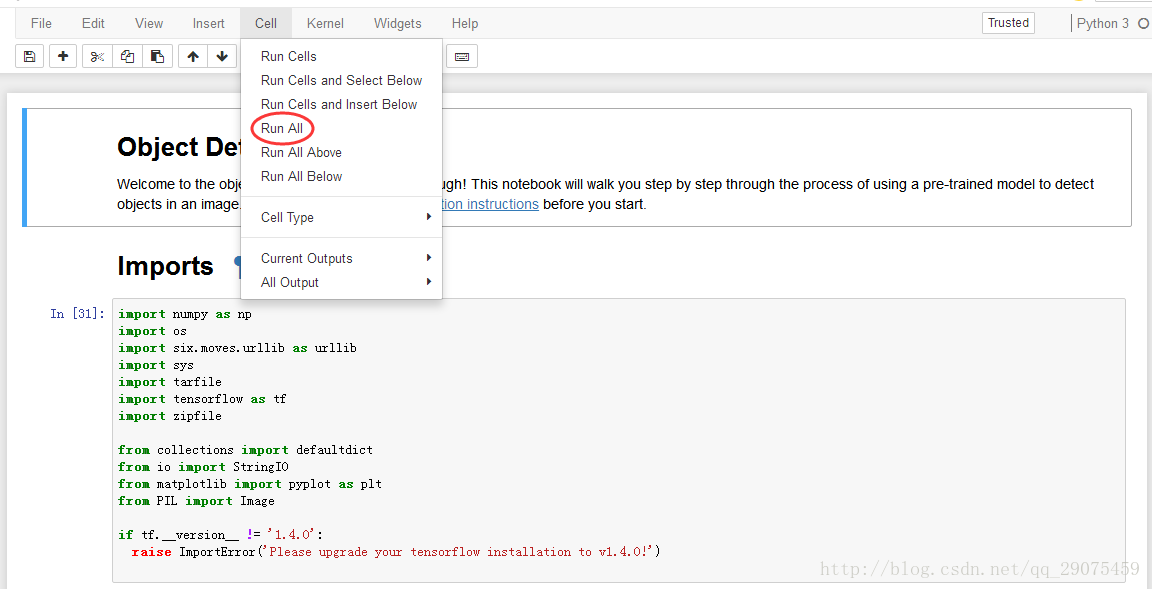
在cell中选择runAll,正常的话稍等一会儿就会有结果:
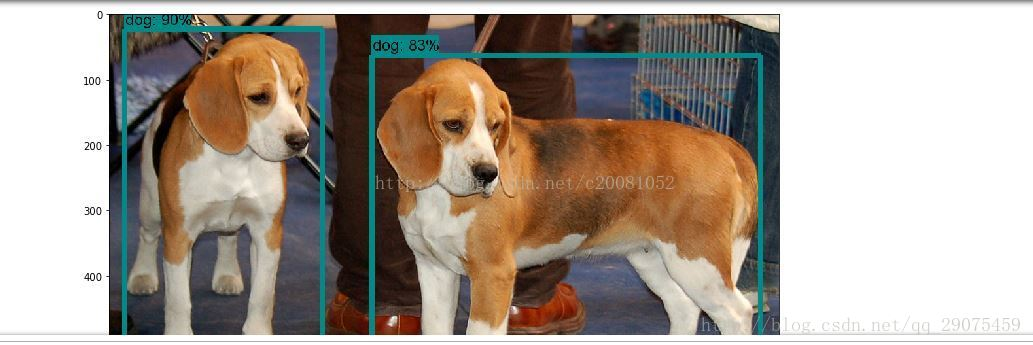
到此,已经成功完成了环境搭建与测试。
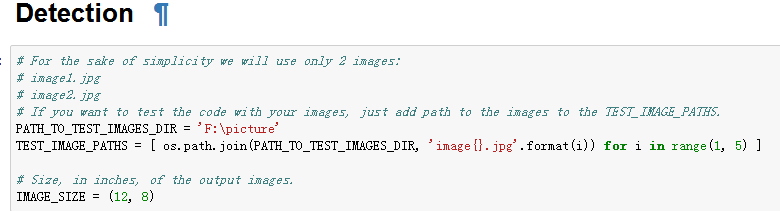
⑥、用来测试自己的图片,改变PATH_TO_TEST_IMAGES_DIR 的路径,我的如下所示。测试图片命名为image1.jpg image2.jpg... 相应的数量for i in range(1, 3)也要根据自己的图片数量进行改变。
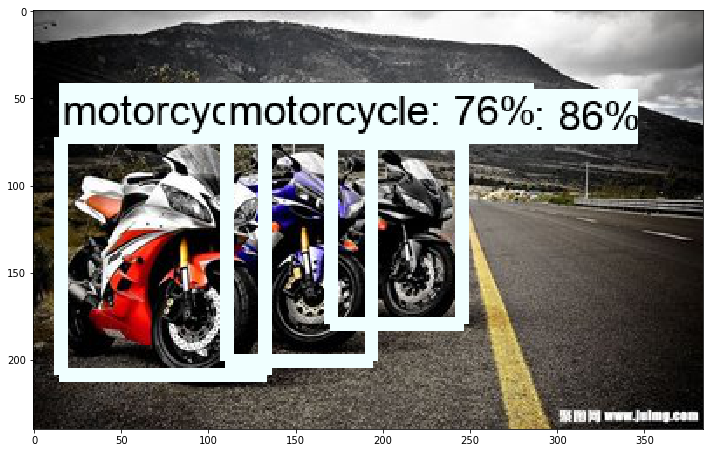
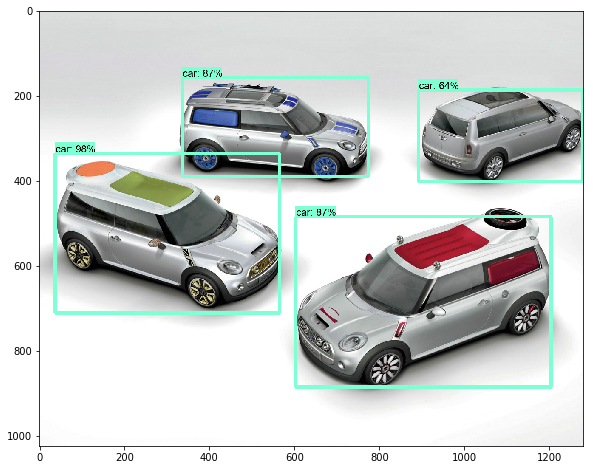
运行后,输出结果如下:
Tensorflow object detection API ——环境搭建与测试的更多相关文章
- 使用Tensorflow object detection API——环境搭建与测试
[软件环境搭建] 操作系统:windows 10 64位 内存:8G CPU:I7-6700 Tensorflow: 1.4 Python:3.5 Anaconda3 (64-bit) 以上环境搭建请 ...
- TensorFlow Object Detection API(Windows下测试)
"Speed/accuracy trade-offs for modern convolutional object detectors." Huang J, Rathod V, ...
- Tensorflow object detection API(1)---环境搭建与测试
参考: https://blog.csdn.net/dy_guox/article/details/79081499 https://blog.csdn.net/u010103202/article/ ...
- Tensorflow object detection API 搭建物体识别模型(二)
二.数据准备 1)下载图片 图片来源于ImageNet中的鲤鱼分类,下载地址:https://pan.baidu.com/s/1Ry0ywIXVInGxeHi3uu608g 提取码: wib3 在桌面 ...
- Tensorflow object detection API 搭建属于自己的物体识别模型
一.下载Tensorflow object detection API工程源码 网址:https://github.com/tensorflow/models,可通过Git下载,打开Git Bash, ...
- Tensorflow object detection API 搭建物体识别模型(四)
四.模型测试 1)下载文件 在已经阅读并且实践过前3篇文章的情况下,读者会有一些文件夹.因为每个读者的实际操作不同,则文件夹中的内容不同.为了保持本篇文章的独立性,制作了可以独立运行的文件夹目标检测. ...
- Tensorflow object detection API 搭建物体识别模型(三)
三.模型训练 1)错误一: 在桌面的目标检测文件夹中打开cmd,即在路径中输入cmd后按Enter键运行.在cmd中运行命令: python /your_path/models-master/rese ...
- Tensorflow object detection API 搭建物体识别模型(一)
一.开发环境 1)python3.5 2)tensorflow1.12.0 3)Tensorflow object detection API :https://github.com/tensorfl ...
- 谷歌开源的TensorFlow Object Detection API视频物体识别系统实现(一)[超详细教程] ubuntu16.04版本
谷歌宣布开源其内部使用的 TensorFlow Object Detection API 物体识别系统.本教程针对ubuntu16.04系统,快速搭建环境以及实现视频物体识别系统功能. 本节首先介绍安 ...
随机推荐
- __x__(17)0906第三天__块元素block_内联元素inline_行内块元素inline-block
1. 块元素block 独占一行的元素 一般使用块元素包含内联元素,用作页面布局 <a> 标签可以包含任何除了a标签以外的元素 <p> 标签不能包含块元素 h1... ...h ...
- ajax 传递中文字符参数 问题
使用ajax 传递中文字符串时, 服务端会接收不到预期的 中文字符. 此时,需要对 js中的中文字符参数进行 编码, 到达服务端后, 再为其解码 即可. 前端: var url = '....'; ...
- | 线段树-地平线horizon
[题目描述]:在地平线上有n个建筑物.每个建筑物在地平线上可以看成一个下边界和地平线重合的矩形.每个建筑物有三个描述(Li ,Ri,Hi),分别表示该建筑物的左边界,右边界,高度.输出输出这些建筑物在 ...
- 电子产品使用感受之——为什么我把Apple Watch S2 升级到了 S4?
2019.03.14 更新 最近在手表上安装了“摩拜单车”的APP,这绝对是一款使用体验加分的APP. 我每天上下班都要骑摩拜单车,但是每次掏出手机,首先FACE ID解锁屏幕,然后从上往下滑屏幕来触 ...
- day01 python入门之路
Python之路,Day1 - Python基础1 本节内容 Python介绍 发展史 Python 2 or 3? 安装 Hello World程序 变量 用户输入 模块初识 .pyc是个什么鬼 ...
- stm32通用定时器详解
在stm32的开发中我们经常会用到定时器,因此在学习stm32的过程中定时器是必须要学的,而定时主要又分为三大类分别为: 高级控制定时器(TIM1与TIM8) 通用定时器(TIM2~TIM5) 基本定 ...
- 2018-2019-2 网络对抗技术 20165336 Exp3 免杀原理与实践
2018-2019-2 网络对抗技术 20165336 Exp3 免杀原理与实践 1.基础问题回答 (1)杀软是如何检测出恶意代码的? 根据计算机病毒课程知道了每个病毒都有其对应的特征码,杀软是根据这 ...
- windy数
windy数指的是相邻两位差至少为2的数.问区间[a,b]中有多少个windy数 调了半个多小时,不过调出来之后对数位dp理解大大加深 #include<iostream> #includ ...
- JSTL将number类型转化为String类型
<c:set var="lm1"> <c:out value="${lm}" /> </c:set>
- JQuery实现一个轮播图
1.HTML <div class="banner"> <div class="b_main"> <div class=" ...