Asp.net Core Jwt简单使用
.net 默认新建Api项目不需要额外从Nuget添加Microsoft.AspNetCore.Authentication.JwtBearer
appsettings.json
{

  "Logging": {

    "LogLevel": {

      "Default": "Information",

      "Microsoft": "Warning",

      "Microsoft.Hosting.Lifetime": "Information"

    }

  },

  "AllowedHosts": "*",

  "Authentication": {

    //私钥必须16位

    "SecretKey": "YpdCP1VHoWkNawmb",

    //谁签发的(发布者)

    "issuer": "issuer",

    //签发给谁(持有者)

    "audience": "audience"

  }

}
AuthController,具体登录实现可参考我以前文章Identity用户管理入门五(登录、注销)
using Microsoft.AspNetCore.Authorization;

using Microsoft.AspNetCore.Mvc;

using Microsoft.Extensions.Configuration;

using Microsoft.IdentityModel.Tokens;

using System;

using System.IdentityModel.Tokens.Jwt;

using System.Security.Claims;

using System.Text;

namespace Shop.WebHost.Controllers

{

    [Route("auth")]

    [ApiController]

    public class AuthController : ControllerBase

    {

        private readonly IConfiguration _configuration;

        public AuthController(IConfiguration configuration)

        {

            _configuration = configuration;

        }

        // GET: api/<AuthController>

        [AllowAnonymous]

        [HttpPost("Login")]

        public ActionResult Login([FromForm] UserDto loginUser)

        {

            //模拟登陆用户提交数据

            //以下假设登陆验证通过

            // JWT主要由三部分组成:HEADER.PAYLOAD.SIGNATURE

            // HEADER,加密算法和签名的类型,加密算法是HmacSha256

            const string signingAlgorithm = SecurityAlgorithms.HmacSha256;

            //Payload,如用户名,角色等信息,过期日期等,因为是未加密的,所以不建议存放敏感信息。

            var claims = new[]

            {

                new Claim(JwtRegisteredClaimNames.Sub, "user_id"), //红色字体为登录后获取的实际用户ID
                //用户角色
                new Claim(ClaimTypes.Role,"Admin"), //红色字体为用户登录后获取的实际用户角色
            };
            //Signiture从配置文件获取私钥

            var secretByte = Encoding.UTF8.GetBytes(_configuration["Authentication:SecretKey"]);

            //使用非对称算法对私钥进行加密

            var signingKey = new SymmetricSecurityKey(secretByte);

            //使用HmacSha256验证非对称加密后的私钥

            var signingCredentials = new SigningCredentials(signingKey, signingAlgorithm);

            //创建Jwt Token

            var token = new JwtSecurityToken(

                //谁发布的token

                issuer: _configuration["Authentication:issuer"],

                //发布给谁

                audience: _configuration["Authentication:audience"],

                //Payload

                claims,

                //发布时间

                notBefore: DateTime.UtcNow,

                //有效期s

                expires: DateTime.UtcNow.AddDays(1),

                //数字签名

                signingCredentials

                );

            return Ok(new JwtSecurityTokenHandler().WriteToken(token));

        }

    }

    public class UserDto

    {

        public string UserName { get; set; }

        public string Password { get; set; }

    }

}
Startup.cs
using Microsoft.AspNetCore.Authentication.JwtBearer;

using Microsoft.AspNetCore.Builder;

using Microsoft.AspNetCore.Hosting;

using Microsoft.Extensions.Configuration;

using Microsoft.Extensions.DependencyInjection;

using Microsoft.Extensions.Hosting;

using Microsoft.IdentityModel.Tokens;

using Microsoft.OpenApi.Models;

using System.Text;

namespace Shop.WebHost

{

    public class Startup

    {

        public Startup(IConfiguration configuration)

        {

            Configuration = configuration;

        }

        public IConfiguration Configuration { get; }

        public void ConfigureServices(IServiceCollection services)

        {

            //Jwt认证服务

            //AddAuthentication注册认证服务

            //JwtBearerDefaults.AuthenticationScheme身份认证类型

            services.AddAuthentication(JwtBearerDefaults.AuthenticationScheme)

                //Jwt身份认证

                .AddJwtBearer(option =>

                {

                    //从配置文件读取私钥

                    var secretByte= Encoding.UTF8.GetBytes(Configuration["Authentication:SecretKey"]);

                    //身份认证参数

                    option.TokenValidationParameters = new TokenValidationParameters()

                    {

                        //验证发布者

                        ValidateIssuer = true,

                        ValidIssuer = Configuration["Authentication:issuer"],

                        //验证持有者

                        ValidateAudience = true,

                        ValidAudience = Configuration["Authentication:audience"],

                        //验证是否过期

                        ValidateLifetime = true,

                        //加密私钥

                        IssuerSigningKey = new SymmetricSecurityKey(secretByte)

                    };

                });

            services.AddControllers();

            services.AddSwaggerGen(c =>

            {

                c.SwaggerDoc("v1", new OpenApiInfo { Title = "Shop.WebHost", Version = "v1" });

            });

        }

        public void Configure(IApplicationBuilder app, IWebHostEnvironment env)

        {

            if (env.IsDevelopment())

            {

                app.UseDeveloperExceptionPage();

                app.UseSwagger();

                app.UseSwaggerUI(c => c.SwaggerEndpoint("/swagger/v1/swagger.json", "Shop.WebHost v1"));

            }

            app.UseHttpsRedirection();

            //你在哪

            app.UseRouting();

            //你是谁

            app.UseAuthentication();

            //你可以干什么

            app.UseAuthorization();

            app.UseEndpoints(endpoints =>

            {

                endpoints.MapControllers();

            });

        }

    }

}
在控制器方法中增加【Authorize】即可未登录用户不能访问
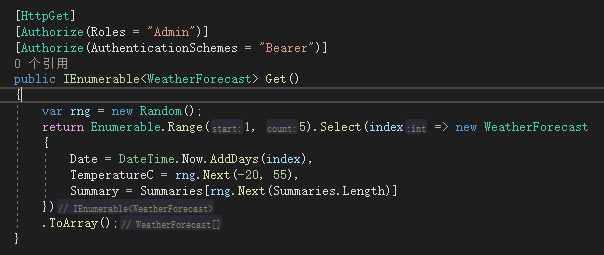
控制用户组访问[Authorize(Roles = "Admin")]
// 由于我们没有将身份验证中间件配置为自动运行并创建身份,
// 因此在授权时必须选择要使用的中间件。
// 选择要授权的中间件的最简单方法是使用ActiveAuthenticationSchemes属性
[Authorize(AuthenticationSchemes = "Bearer")]
访问方式在header中增加(具体格式是Authorization:Bearer+空格+具体Token)
Authorization:Bearer eyJhbGciOiJIUzI1NiIsInR5cCI6IkpXVCJ9.eyJzdWIiOiJ1c2VyX2lkIiwibmJmIjoxNjA3MzI1NzkxLCJleHAiOjE2MDc0MTIxOTEsImlzcyI6Imlzc3VlciIsImF1ZCI6ImF1ZGllbmNlIn0.ZEN3m7XP8u-u9CNkVf1tfeznqh1SuK7Y0wD1bq9rSfQ
获取当前登录用户ID
startup.cs增加HttpContextAccessor服务并注入HttpContext的访问器对象IHttpContextAccessor来获取当前的HttpContext
services.AddHttpContextAccessor();
private readonly IHttpContextAccessor _httpContextAccessor;

public AuthController(IHttpContextAccessor httpContextAccessor)

{

    _httpContextAccessor = httpContextAccessor;

}
增加获取当前用户ID方法
[HttpGet(nameof(GetCurrUserIdAsync))]

public async Task<string> GetCurrUserIdAsync()

{

    var auth = await _httpContextAccessor.HttpContext!.AuthenticateAsync();//获取登录用户的AuthenticateResult

    if (!auth.Succeeded) return null;

    var userCli = auth.Principal?.Claims.FirstOrDefault(c => c.Type == ClaimTypes.NameIdentifier); //在声明集合中获取ClaimTypes.NameIdentifier 的值就是用户ID

    if (userCli == null || string.IsNullOrEmpty(userCli.Value))

    {

        return null;

    }

    return userCli.Value;

}
或者使用
return _httpContextAccessor.HttpContext.User.FindFirst(ClaimTypes.NameIdentifier).Value;
查询出当前用户ID就可以根据Identity用户管理入门二(显示用户列表)显示用户详情
Asp.net Core Jwt简单使用的更多相关文章
- ASP.NET Core CORS 简单使用
CORS 全称"跨域资源共享"(Cross-origin resource sharing). 跨域就是不同域之间进行数据访问,比如 a.sample.com 访问 b.sampl ...
- ASP.NET Core 项目简单实现身份验证及鉴权
ASP.NET Core 身份验证及鉴权 目录 项目准备 身份验证 定义基本类型和接口 编写验证处理器 实现用户身份验证 权限鉴定 思路 编写过滤器类及相关接口 实现属性注入 实现用户权限鉴定 测试 ...
- CZGL.Auth: ASP.NET Core Jwt角色授权快速配置库
CZGL.Auth CZGL.Auth 是一个基于 Jwt 实现的快速角色授权库,ASP.Net Core 的 Identity 默认的授权是 Cookie.而 Jwt 授权只提供了基础实现和接口,需 ...
- ASP.NET Core - JWT认证实现
一.JWT结构 JWT介绍就太多了,这里主要关注下Jwt的结构. Jwt中包含三个部分:Header(头部).Payload(负载).Signature(签名) Header:描述 JWT 的元数据的 ...
- 使用SignalR ASP.NET Core来简单实现一个后台实时推送数据给Echarts展示图表的功能
什么是 SignalR ASP.NET Core ASP.NET Core SignalR 是一种开放源代码库,可简化将实时 web 功能添加到应用程序的功能. 实时 web 功能使服务器端代码可以立 ...
- Asp.Net Core中简单使用日志组件log4net
本文将简单介绍在.NET 6中使用log4net的方法,具体见下文范例. 1.首先新建一个ASP.NET Core空项目 2.通过Nuget包管理器安装下面两个包 log4net Microsoft. ...
- C# ASP.NET MVC/WebApi 或者 ASP.NET CORE 最简单高效的跨域设置
概述 前面写了一篇:<C# ASP.NET WebApi 跨域设置>的文章,主要针对 ASP.NET WebApi 项目. 今天遇到 ASP.NET MVC 项目也需要设置跨域,否则浏览器 ...
- 基于Asp.Net Core的简单社区项目源代码开源
2019年3月27号 更新版本 本项目基于 ASP.NET CORE 3.0+EF CORE 3.0开发 使用vs2019 +sqlserver 2017(数据库脚本最低支持sql server 20 ...
- 部署ASP.NET Core最简单的办法,使用IIS部署ASP.NET Core应用
本文迁移自Panda666原博客,原发布时间:2021年3月28日.写原文的时候.NET的最新版本是5.0,现在7的preview出来了,时间真快啊.抽空再写个在Windows Server Core ...
随机推荐
- DC-7 靶机渗透测试
DC-7 渗透测试 冲冲冲,好好学习 .对管道符的理解加深了好多.最后提权时,遇到了点麻烦.想不懂一条命令为啥能执行生效,耗了一整天才算解决掉. 操作机:kali 172.66.66.129 靶机:D ...
- 【水】Dev-c++黑暗模式教程
前言 大家有没有觉得盯着Dev-c++那个白花花的背景盯久了之后会觉得眼睛不舒服-- 本人今天就来给大家带来一个黑暗模式的Dev-c++,可以让眼睛没那么难受(本人亲测有效) 效果如下图(猛男警告): ...
- Java面向对象13——抽象类
抽象类 package oop.demon01.demon08; //abstract 抽象类: 类 extends: 类---单继承 (接口可以多继承) public abstract c ...
- Salesforce Integration 概览(六) UI Update Based on Data Changes(UI自动更新基于数据变更)
Salesforce用户界面必须由于Salesforce数据的更改而自动更新.这个场景其实在我所经历的项目中用到的不是特别多,因为客户可能直接点击刷新按钮就直接看到了最新的数据,而不是那种一直不刷新然 ...
- JavaGUI画笔工具的使用
JavaGUI画笔工具的使用 package GUI; import java.awt.*; public class TestPaint { public static void main(Stri ...
- Java-Stream流方法学习及总结
1 前言 Stream是一个来自数据源的元素队列并支持聚合操作,其中具有以下特性: Stream只负责计算,不存储任何元素,元素是特定类型的对象,形成一个队列 数据源可以实集合.数组.I/O chan ...
- springboot打包问题
pom.xml <build> <plugins> <plugin> <groupId>org.springframework.boot</gro ...
- kali2020更换JDK&&安装burpsuite pro
写在前面 之前因为安装maven把JDK换成了1.8.0_261,尝试诸多方法依然打不开自带的burp,正好在做CTF做不出来 QAQ,一气之下打算安个破解版burp. 安装 0x00 更换JDK 使 ...
- XSS之防御与绕过
很久之前的随笔讲过XSS的编码绕过的一些内容 本次侧重整理一下常见的防御思路,顺便补充一些针对性的绕过思路以及关于XSS个人想到的一些有趣的事情 开篇之前,先看一下XSS介绍(包括mXSS.uXSS. ...
- 从零开始实现简单 RPC 框架 3:配置总线 URL
URL 的定义 URL 对于大部分程序猿来说都是很熟悉的,其全称是 Uniform Resource Locator (统一资源定位器).它是互联网的统一资源定位标志,也就是指网络地址. 一个标准的 ...