
Ubuntu 18.04 安装配置LAMP
--作者:飞翔的小胖猪
--创建时间:2021年5月29日
--修改时间:2021年5月29日
一、准备
1.1 环境
- 操作系统:Ubuntu 18.04
- 网页引擎:Apache
- php版本:7.4
- 数据库:Mariadb
1.2 软件地址
- 操作系统: https://mirrors.tuna.tsinghua.edu.cn/ubuntu-releases/bionic/ubuntu-18.04.5-live-server-amd64.iso
- php: 使用apt安装
- Apache: 使用apt安装。
- Mariadb: 使用apt安装。
1.3 apt源
清华大学镜像配置帮助:https://mirrors.tuna.tsinghua.edu.cn/help/ubuntu/
清华大学源


# 默认注释了源码镜像以提高 apt update 速度,如有需要可自行取消注释

deb https://mirrors.tuna.tsinghua.edu.cn/ubuntu/ bionic main restricted universe multiverse

# deb-src https://mirrors.tuna.tsinghua.edu.cn/ubuntu/ bionic main restricted universe multiverse

deb https://mirrors.tuna.tsinghua.edu.cn/ubuntu/ bionic-updates main restricted universe multiverse

# deb-src https://mirrors.tuna.tsinghua.edu.cn/ubuntu/ bionic-updates main restricted universe multiverse

deb https://mirrors.tuna.tsinghua.edu.cn/ubuntu/ bionic-backports main restricted universe multiverse

# deb-src https://mirrors.tuna.tsinghua.edu.cn/ubuntu/ bionic-backports main restricted universe multiverse

deb https://mirrors.tuna.tsinghua.edu.cn/ubuntu/ bionic-security main restricted universe multiverse

# deb-src https://mirrors.tuna.tsinghua.edu.cn/ubuntu/ bionic-security main restricted universe multiverse

# 预发布软件源,不建议启用

# deb https://mirrors.tuna.tsinghua.edu.cn/ubuntu/ bionic-proposed main restricted universe multiverse

# deb-src https://mirrors.tuna.tsinghua.edu.cn/ubuntu/ bionic-proposed main restricted universe multiverse
1.4 配置apt
1.备份原有的apt配置文件
# cp -rp /etc/apt/source.list /etc/apt/source.list_bak
2.修改apt配置文件
# vim /etc/apt/source.list

# 默认注释了源码镜像以提高 apt update 速度,如有需要可自行取消注释

deb https://mirrors.tuna.tsinghua.edu.cn/ubuntu/ bionic main restricted universe multiverse

# deb-src https://mirrors.tuna.tsinghua.edu.cn/ubuntu/ bionic main restricted universe multiverse

deb https://mirrors.tuna.tsinghua.edu.cn/ubuntu/ bionic-updates main restricted universe multiverse

# deb-src https://mirrors.tuna.tsinghua.edu.cn/ubuntu/ bionic-updates main restricted universe multiverse

deb https://mirrors.tuna.tsinghua.edu.cn/ubuntu/ bionic-backports main restricted universe multiverse

# deb-src https://mirrors.tuna.tsinghua.edu.cn/ubuntu/ bionic-backports main restricted universe multiverse

deb https://mirrors.tuna.tsinghua.edu.cn/ubuntu/ bionic-security main restricted universe multiverse

# deb-src https://mirrors.tuna.tsinghua.edu.cn/ubuntu/ bionic-security main restricted universe multiverse

# 预发布软件源,不建议启用

# deb https://mirrors.tuna.tsinghua.edu.cn/ubuntu/ bionic-proposed main restricted universe multiverse

# deb-src https://mirrors.tuna.tsinghua.edu.cn/ubuntu/ bionic-proposed main restricted universe multiverse
3.更新apt源
# add-apt-repository ppa:ondrej/php
# apt clean all

# apt-get update

# echo $?
二、安装Aapche(A)
2.1 前提条件
- 操作系统已经安装完成。
- 操作系统网络配置完成,能够正常访问到互联网。
- apt源配置已完成。
2.2 安装软件
安装apache2软件、启动并设置开机自启动,检查结果应该是running。
# apt-get install apache2 apache2-dev -y

# systemctl restart apache2

# systemctl enable  apache2

# systemctl status  apache2
2.3 检查
手动创建一个index.html文件,在本机上请求该网页确认显示为手动添加的内容。检查结果应该能正常访问到到手动添加的网页内容。
# echo 'test_apache2' > /var/www/html/index.html

# curl x.x.x.x
三、安装Mariadb(M)
3.1 前提条件
- 操作系统已经安装完成。
- 操作系统网络配置完成,能够正常访问到互联网。
- apt源配置已完成。
3.2 安装软件
安装mariadb软件,同时设置数据库软件开机自启动。
# apt-get install mariadb*  -y

# systemctl  status mariadb

# systemctl  enable mariadb

# mysql_secure_installation

Enter current password for root (enter for none):     直接回车

Set root password? [Y/n] y

Remove anonymous users? [Y/n] y

Remove test database and access to it? [Y/n] y

Reload privilege tables now? [Y/n]

# mysql -uroot -p你的密
四、安装PHP(P)
4.1 前提条件
- 操作系统已经安装完成。
- 操作系统网络配置完成,能够正常访问到互联网。
- apt源配置已完成。
4.2 安装软件
安装php软件前需要安装其依赖的软件。
1.安装依赖软件
# apt-get install build-essential pkg-config libxml2-dev libxpm-dev libssl-dev sqlite3 libsqlite3-dev libbz2-dev libgmp3-dev libzip-dev libfreetype6-dev libjpeg-dev freetype2-demos libonig-dev libedit-dev libreadline-dev libpng-dev libxslt1-dev libcurl4 libcurl4-openssl-dev -y
2.安装php软件
下载并安装php软件。
简易安装,只安装少量的模块。
# apt-get install  php7.4 php7.4-fpm  php7.4-gd php7.4-mbstring  php7.4-mysql php7.4-xml php7.4-curl libapache2-mod-php7.4 -y
# php -v
apt源中所有php模块安装。使用apt-get list 命令获取到php7.4的所有模块名,并生成软件安装命令。
# apt list | grep -i php7.4- | awk -F '/' '{sum=sum" "$1};END{print "apt-get install -y php7.4 " sum}'

下面这条语句请根据第一步的命令所得,复制并执行,文档中只是做个展示,由于太长就没有全部展示出来。

# apt-get install -y  php7.4 libphp7.4-embed .......... php7.4-zstd

五、测试LAMP环境
5.1 准备mariadb测试数据
创建测试数据库,创建一个测试用户。
# mysql -uroot

MariaDB [(none)]> create database test_db;

MariaDB [(none)]> grant all on test_db.* to test_user@'127.0.0.1' identified by 'Csuser_12345#';

MariaDB [(none)]> flush privileges;
5.2 准备php测试数据
在apache目录下创建一个index.php文件,用作测试。
# cd /var/www/html/

# vim index.php

<?php

$servername = "127.0.0.1";

$username = "test_user";

$password = "Csuser_12345#";

// 创建连接

$conn = new mysqli($servername, $username, $password);

// 检测连接

if ($conn->connect_error) {

    die("连接失败: " . $conn->connect_error);

}

echo "连接成功";

//关闭连接

$conn->close();

?>
5.3 测试
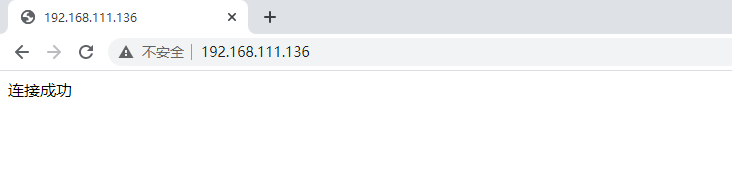
使用web浏览器测试是否成功。如果提示连接成功表示apche能够识别php,同时php能够正常与myql数据库进行交互。
Ubuntu 18.04 安装配置LAMP的更多相关文章
- Ubuntu 18.04安装配置Apache Ant
Ubuntu 18.04安装配置Apache Ant 文章目录 Ubuntu 18.04安装配置Apache Ant 下载 执行以下命令 `/etc/profile`中配置环境变量 载入配置 测试 执 ...
- Ubuntu 18.04 安装配置 go 语言
Ubuntu 18.04 安装配置 go 语言 1.下载 下载 jdk 到 Downloands 文件夹下 cd 进入 /usr/local, 创建 go 文件夹, 然后 cd 进这个文件夹 cd / ...
- Ubuntu 18.04 安装配置 MySQL 5.7
Ubuntu 18.04 安装 mysql 的过程中,竟然没有让你输入秘密?!(之前在 Ubuntu 14.04 下,安装过程中会询问密码),这导致安装完 mysql 初始秘密不知道的问题. $ su ...
- Ubuntu 18.04安装配置pure-ftpd解决中文乱码问题
之前用的是vsftpd配置ftp服务器,前面用的挺好,没什么问题,但是后面接收设备上传的文件夹时发现了一个大坑,当设备上传的文件夹名字中包含中文时,在Linux上显示的是乱码...各种转码都不行,折腾 ...
- Ubuntu 18.04 安装配置 java jdk
1.下载 下载 jdk 到 Downloands 文件夹下 cd 进入 /usr/local, 创建 jdk 文件夹, 然后 cd 进这个文件夹 cd /usr/local sudo mkdir jd ...
- Ubuntu 18.04安装Samba服务器及配置
Ubuntu 18.04安装Samba服务器及配置 局域网下使用samba服务在Linux系统与Windows系统直接共享文件是一项很方便的操作.以Ubuntu为例配置samba服务,Linux服务器 ...
- Ubuntu 18.04 安装MySQL
最近在写东西的时候,需要用到MySQL,在网上查了一下,都说Ubuntu18.04不能安装MySQL5.7.22, 总觉的不可能,所以自己就研究了一下,然后分享给大家 工具/原料 VMware W ...
- Ubuntu 18.04 安装博通(Broadcom)无线网卡驱动
目录 Ubuntu 18.04 安装博通(Broadcom)无线网卡驱动 Package gcc is not configured yet. 解决办法 history history | grep ...
- Ubuntu 18.04 安装部署Net Core、Nginx全过程
Ubuntu 18.04 安装部署Net Core.Nginx全过程 环境配置 Ubuntu 18.04 ,Nginx,.Net Core 2.1, Let's Encrypt 更新系统 sudo a ...
随机推荐
- C++构造函数语义学(二)(基于C++对象模型)
带有虚函数的情况. 下面情况编译器也会在需要的时候为其合成. 1.如果一个类自己声明为虚函数. 1 #include<iostream> 2 using namespace std; 3 ...
- DQL语句总结
6.DQL语句总结 select ... from ... where ... group by ... having ... order by ... limit .... 执行顺序? 1,from ...
- 关于new Date总结及注意事项
记录关于 new Date() 的一些常用方法及问题 new Date()基本方法: 创建一个日期对象的几种方法 注意: 由于浏览器差异和不一致性,强烈建议不要使用Date构造函数(和Date.par ...
- 了解promise、promise对象
Promise 是异步编程的一种解决方案,比传统的解决方案--回调函数和事件--更合理和更强大.它由社区最早提出和实现,ES6 将其写进了语言标准,统一了用法,原生提供了Promise对象. 所谓Pr ...
- 函数的参数python教程
一:函数 什么是函数? 函数就类似于工具 提前定义之后可以反复使用 代码冗余 结构清晰 修改繁杂等问题 二:函数的语法结构 def 函数名(参数1,参数2) '''函数注释''' 函数体代码 retu ...
- K8s QoS Pod资源服务质量控制
Kubernetes 中如果一个 Node 节点上的 Pod 占用资源过多并且不断飙升导致 Node 节点资源不足,可能会导致为了保证节点可用,将容器被杀掉.在遇见这种情况时候,我们希望先杀掉那些不太 ...
- Hbase 项目
需求分析 1) 微博内容的浏览,数据库表设计 2) 用户社交体现:关注用户,取关用户 3) 拉取关注的人的微博内容 表结构 代码实现 1) 创建命名空间以及表名的定义 2) 创建微博内容表 3) 创 ...
- 计算机电子书 2017 BiliDrive 备份
下载方式 根据你的操作系统下载不同的 BiliDrive 二进制. 执行: bilidrive download <link> 链接 文档 链接 斯坦福 cs224d 深度学习与自然语言处 ...
- Maven 项目报出警告:Warning:java: source value 1.5 is obsolete and will be removed in a future release
感谢原文作者:Hxinguan 原文链接:https://www.cnblogs.com/Hxinguan/p/6132446.html 问题: 1.创建maven项目的时候,jdk版本是1.5版本, ...
- web项目获取全路径、端口、项目名等
感谢大佬:https://blog.csdn.net/u010180031/article/details/52369537 request.getSchema(),返回的是当前连接使用的协议,一般应 ...