.NET C#使用微信公众号登录网站
适用于:本文适用于有一定微信开发基础的用户
引言:
花了300大洋申请了微信公众平台后,发现不能使用微信公众号登录网站(非微信打开)获得微信帐号。仔细研究后才发现还要再花300大洋申请微信开放平台才能接入网站的登录。于是做为屌丝程序员的我想到了自己做一个登录接口。
工具和环境:
1. VS2013 .net4.0 C# MVC4.0 Razor
2.插件
A. Microsoft.AspNet.SignalR;时时获取后台数据
B.Gma.QrCodeNet.Encoding;文本生成二维码
实现的目标
1. 在电脑上打开网站登录页,提示用户使用微信扫描登录确认。
2.用户通过微信扫描确认后,电脑自动收到确认信息跳转到网站主页。
原理分析
1.SignalR是一个神奇的工具,能从浏览器A发送信息到服务器,服务器自动推送消息到指定的浏览器B。那么我的计划是用电脑的浏览器打开登录页,生成一个二维码(内容为带有微信公众平台网页用户受权的网址),用微信的描码功能打开这个网站。将获取的微信用户OPENID通过SignalR发送到电脑浏览器,实现登录功能
实现过程
1.微信公从平台的注册和权限(略过...)
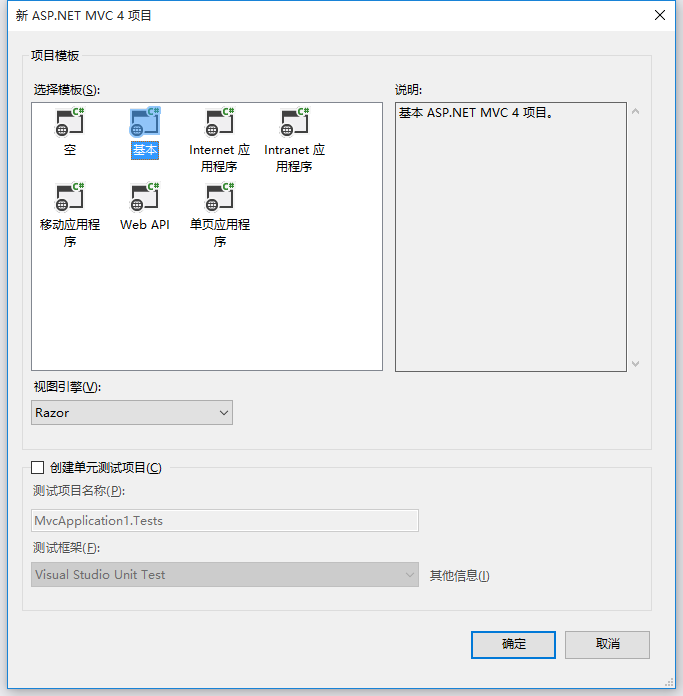
2.VS2013中新建MVC网站,我用的环境为.NET4.0 C# MVC4.0 Razor引擎(个人习惯)。
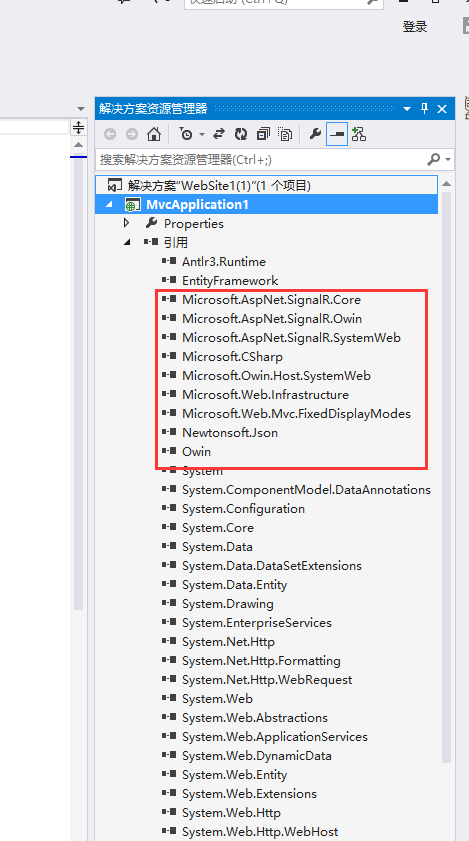
3.安装 SignalR
VS2013 点击工具 ==> 库程序包管理器 ==> 程序包管理控制台
输入以下命令:
Install-Package Microsoft.AspNet.SignalR -Version 1.1.4
.net4.0 Mvc4环境下建议安装1.1.4高版本安装不上
安装 SingnalR成功
设置SignalR

var config = new Microsoft.AspNet.SignalR.HubConfiguration();
config.EnableCrossDomain = true;
RouteTable.Routes.MapHubs(config);
新建一个类 PushHub.cs
|
1
2
3
4
5
6
7
8
9
10
11
12
13
14
15
16
17
18
19
20
21
22
23
24
25
26
27
28
29
30
31
32
33
34
35
36
37
38
39
40
41
42
43
44
45
46
47
48
49
50
|
using Microsoft.AspNet.SignalR; using Microsoft.AspNet.SignalR.Hubs; using System; using System.Collections.Generic; using System.Linq; using System.Web; namespace WD.C.Utility { /// <summary> /// 标注Single javascription要连接的名称 /// </summary> [HubName("pushHub")] public class PushHub : Hub { /// <summary> /// 临时保存请求的用户 /// </summary> static Dictionary<string, string> rlist = new Dictionary<string, string>(); /// <summary> /// 登录请求的用户;打开Login页执行本方法,用于记录浏览器连接的ID /// </summary> public void ruserConnected() { if (!rlist.ContainsKey(Context.ConnectionId)) rlist.Add(Context.ConnectionId, string.Empty); //Client方式表示对指定ID的浏览器发送GetUserId方法,浏览器通过javascrip方法GetUserId(string)得到后台发来的Context.ConnectionId Clients.Client(Context.ConnectionId).GetUserId(Context.ConnectionId); } /// <summary> /// 实际登录的用户 /// </summary> /// <param name="ruser">请求的用户ID</param> /// <param name="logUserID">微信OPENID</param> public void logUserConnected(string ruser, string logUserID) { if (rlist.ContainsKey(ruser)) { rlist.Remove(ruser); //Client方式表示对指定ID的浏览器发送GetUserId方法,浏览器通过javascrip方法userLoginSuccessful(bool,string)得到后台发来的登录成功,和微信OPENID Clients.Client(ruser).userLoginSuccessful(true, logUserID); } } } } |
新建一个MVC控制器"LoginController.cs",这个不会看别的教程;
|
1
2
3
4
5
6
7
8
9
10
11
12
13
14
15
16
17
18
19
20
21
22
23
24
25
26
27
28
29
30
31
32
33
34
35
36
37
38
39
40
41
42
43
44
45
46
47
48
49
50
51
52
53
54
55
56
|
using System; using System.Collections.Generic; using System.Linq; using System.Web; using System.Web.Mvc; namespace WD.C.Controllers { public class LoginController : Controller { // // GET: /Login/ /// <summary> /// 登录主页,电脑端打开 /// </summary> /// <returns></returns> public ActionResult Index() { *1.URL用于生成二维码给微信扫描 *2.格式参考微信公从平台帮助 * https://open.weixin.qq.com/connect/oauth2/authorize?appid=APPID&redirect_uri=REDIRECT_URI&response_type=code&scope=SCOPE&state=STATE#wechat_redirect 若提示“该链接无法访问”,请检查参数是否填写错误,是否拥有scope参数对应的授权作用域权限。 *3.REDIRECT_URI内容为返回地址,需要开发者需要先到公众平台官网中的“开发 - 接口权限 - 网页服务 - 网页帐号 - 网页授权获取用户基本信息”的配置选项中,修改授权回调域名 *4.REDIRECT_URI应回调到WxLog页并进行URLEncode编码,如: redirect_uri=GetURLEncode("http://你的网站/Login/WxLog?ruser="); ruser为PushHub中的Context.ConnectionId到View中配置 * */ ViewBag.Url = string.Format("https://open.weixin.qq.com/connect/oauth2/authorize?appid={0}&redirect_uri={1}&response_type=code&scope=snsapi_base&state={2}#wechat_redirect", B.Helper.AppID, GetURLEncode("http://你的网站/Login/WxLog?ruser="), Guid.NewGuid()); return View(); } /// <summary> /// 登录确认页,微信端打开 /// </summary> /// <param name="ruser"></param> /// <returns></returns> public ActionResult WxLog(string ruser) { //使用微信登录 if (!string.IsNullOrEmpty(code)) { string loguser= B.Helper.GetOpenIDByCode(code); Session["LogUserID"] =loguser; ViewBag.LogUserID = loguser; } ViewBag.ruser = ruser; return View(); } } } |
控制器 "QRController.cs"用于文本生成二维码
|
1
2
3
4
5
6
7
8
9
10
11
12
13
14
15
16
17
18
19
20
21
22
23
24
25
26
27
28
29
30
31
32
33
34
35
36
37
38
39
40
41
42
43
44
45
46
47
48
49
50
51
52
53
54
55
56
57
58
59
|
using System; using System.Collections.Generic; using System.Linq; using System.Web; using System.Web.Mvc; namespace WD.C.Controllers { public class QRController : Controller { // // GET: /QR/ public ActionResult Index() { return View(); } /// <summary> /// 获得2维码图片 /// </summary> /// <param name="str"></param> /// <returns></returns> public ActionResult GetQRCodeImg(string str) { using (var ms = new System.IO.MemoryStream()) { string stringtest = str; GetQRCode(stringtest, ms); Response.ContentType = "image/Png"; Response.OutputStream.Write(ms.GetBuffer(), 0, (int)ms.Length); System.Drawing.Bitmap img = new System.Drawing.Bitmap(100, 100); img.Save(ms, System.Drawing.Imaging.ImageFormat.Jpeg); Response.End(); return File(ms.ToArray(), @"image/jpeg"); } } private static bool GetQRCode(string strContent, System.IO.MemoryStream ms) { Gma.QrCodeNet.Encoding.ErrorCorrectionLevel Ecl = Gma.QrCodeNet.Encoding.ErrorCorrectionLevel.M; //误差校正水平 string Content = strContent;//待编码内容 Gma.QrCodeNet.Encoding.Windows.Render.QuietZoneModules QuietZones = Gma.QrCodeNet.Encoding.Windows.Render.QuietZoneModules.Two; //空白区域 int ModuleSize = 12;//大小 var encoder = new Gma.QrCodeNet.Encoding.QrEncoder(Ecl); Gma.QrCodeNet.Encoding.QrCode qr; if (encoder.TryEncode(Content, out qr))//对内容进行编码,并保存生成的矩阵 { var render = new Gma.QrCodeNet.Encoding.Windows.Render.GraphicsRenderer(new Gma.QrCodeNet.Encoding.Windows.Render.FixedModuleSize(ModuleSize, QuietZones)); render.WriteToStream(qr.Matrix, System.Drawing.Imaging.ImageFormat.Png, ms); } else { return false; } return true; } } } |
视图 开启SignalR
var chat = $.connection.pushHub;
$.connection.hub.start().done(function () {
chat.server.ruserConnected();
});
$.connection.pushHub对应

chat.server.ruserConnected();对应

表示调用"pushHub"运行后执行 runserConnected方法,在临时表中增加当前浏览器的ConnectionID
|
1
2
3
4
5
6
|
chat.client.getUserId = function (ruserid) { //二维码生成的文本 $("#loga").attr("src", "@ViewBag.Url" + ruserid); } |

表示台后数据
收到数据后返回到游览器
|
1
2
3
4
5
6
7
8
9
|
chat.client.userLoginSuccessful = function (r, userid) { if (r) { $.post("/Login/AddSession/", { userid: userid }, function (r2) { if (r2) { location.href = "/Home/"; } }) } }; |
用户通过微信登录后

接收微信OpenID
$.post("/Login/AddSession/", { userid: userid }, function (r2) {
if (r2) {
location.href = "/Home/";
}
})
执行 Post到后台增加登录信息,成功后转到/Home/主页
|
1
2
3
4
5
6
7
8
9
10
|
/// <summary> /// 保存微信确认登录后返回的OPENID,做为网站的Session["LogUserID"] /// </summary> /// <param name="userid"></param> /// <returns></returns> public JsonResult AddSession(string userid) { Session["LogUserID"] = userid; return Json(true); } |
Login/WxLog.cshtml 本页在微信上打开
|
1
2
3
4
5
6
7
8
9
10
11
12
13
14
15
16
17
18
19
20
21
22
23
24
25
26
27
28
29
30
31
32
33
34
35
36
37
38
39
40
41
42
43
44
45
46
47
48
49
50
51
52
53
54
55
56
57
58
59
|
@{ ViewBag.Title = "WxLog"; } <script src="~/Scripts/jquery.signalR-1.1.4.min.js"></script> <script src="~/signalr/hubs"></script> <script> $(function () { //连接SignalR pushHab var chat = $.connection.pushHub; //启动 $.connection.hub.start().done(); $("#btnLog").click(function () { //登录,发送信息到服务器 chat.server.logUserConnected("@ViewBag.ruser","@ViewBag.LogUserID"); }); }); </script> <h2>WxLog</h2> <a href="#" id="btnLog">登录</a> @{ ViewBag.Title = "Index"; } @Scripts.Render("~/bundles/jquery") <script src="~/Scripts/jquery.signalR-1.1.4.min.js"></script> <script src="~/signalr/hubs"></script> <script type='text/javascript'> $(function () { var chat = $.connection.pushHub; $.connection.hub.start().done(function () { chat.server.ruserConnected(); }); chat.client.getUserId = function (ruserid) { $("#loga").attr("src", "@ViewBag.Url" + ruserid); } chat.client.userLoginSuccessful = function (r, userid) { if (r) { location.href = "/Home/"; }) } }; }); </script> <header> <a href="~/Home/" class="iconfont backIcon"><</a> <h1>用户登录</h1> </header> <div style="height:1rem;"></div> 请使用微信登录扫描以下二维码生产图片 <div> <img id="loga" src="#" width="90%" /> </div> |

GetOpenIDByCode(code)方法
参考 https://mp.weixin.qq.com/wiki?t=resource/res_main&id=mp1421140842&token=&lang=zh_CN
对于已关注公众号的用户,如果用户从公众号的会话或者自定义菜单进入本公众号的网页授权页,即使是scope为snsapi_userinfo,也是静默授权,用户无感知。
具体而言,网页授权流程分为四步:
1、引导用户进入授权页面同意授权,获取code
2、通过code换取网页授权access_token(与基础支持中的access_token不同)
3、如果需要,开发者可以刷新网页授权access_token,避免过期
4、通过网页授权access_token和openid获取用户基本信息(支持UnionID机制)
|
1
2
3
4
5
6
7
8
9
10
11
|
public static string GetOpenIDByCode(string code) { string url =string.Format( "https://api.weixin.qq.com/sns/oauth2/access_token?appid={0}&secret={1}&code={2}&grant_type=authorization_code",AppID,AppSecret, code); using (System.Net.WebClient client = new System.Net.WebClient()) { string tempstr= client.DownloadString( url); var regex= new Regex(@"\""openid\"":\""[^\""]+?\"",", RegexOptions.IgnoreCase); string tempstr2= regex.Match(tempstr).Value; return tempstr2.Substring(10, tempstr2.Length - 12); } } |
以上就是本文的全部内容,希望对大家的学习有所帮助,也希望大家多多支持脚本之家。
.NET C#使用微信公众号登录网站的更多相关文章
- 【问题】解决在微信公众号里面网站无法访问:oops something went wrong:(
最近在用一个第三方微信公众平台托管工具连接微信公众平台时,发现一个问题——在微信里面的官网网站链接没法在微信里面打开(无论是手机端还是PC端),会出现Oops! Something went wron ...
- 解决微信公众号授权登录和开放平台微信第三方应用授权登录获取到的用户Openid关联问题
开发背景: 最近一段时间一直在做关于微信方面的网站应用开发,这段时间也收获的不少关于微信开发方面的开发技能,接触的比较多的主要有微信公众号和微信网站app第三方登录授权,以及微信会员卡,优惠券和扫描二 ...
- 微信公众号与APP微信第三方登录账号打通
一个项目同时开发了APP和微信服务号,需要做到APP和微信服务号的账号互通同步,也就是说一个账号在2个地方都可以用,当然这个前提是保证你公司自己的服务器的数据库用的是同一套. 为保证用户数据的唯一性, ...
- 微信小程序与微信公众号同一用户登录问题
微信小程序与微信公众号同一用户登录问题 最近在做微信小程序与微信公众号登录合并的接口.整理相关资料以及个人认识的心得写了这篇文章与大家一起分享. 首先,简单说下我遇到的问题是我们的程序调用微信小程序得 ...
- python爬取微信公众号
爬取策略 1.需要安装python selenium模块包,通过selenium中的webdriver驱动浏览器获取Cookie的方法.来达到登录的效果 pip3 install selenium c ...
- Java 扫描微信公众号二维码,关注并自动登录网站
https://blog.csdn.net/qq_42851002/article/details/81327770 场景:用户扫描微信公众号的二维码,关注后自动登录网站,若已关注则直接登录. 逻辑: ...
- 微信授权登录-微信公众号和PC端网站
https://blog.csdn.net/qq_34664239/article/details/79107529 一.微信公众号授权登录——微信公众平台 微信授权登录,并调用后台接口,获取用户信息 ...
- java 扫描微信公众号二维码,关注并登录逻辑
场景:户扫描微信公众号的二维码,关注后自动登录网站,若已关注则直接登录. 逻辑: 系统生成带参数的临时二维码:参数 scene_str 自定义为唯一值(可以是uuid),临时二维码的生成方式参照官方接 ...
- 第三方网站不能调用微信公众平台里的图片了 显示"此图片来自微信公众号平台未经允许不可引用"
下午ytkah在自己小博客搜索时看到有几篇文章图片显示不了,再访问一些网站时发现有些图片无法显示出来,显示"此图片来自微信公众号平台未经允许不可引用",如下图所示,这个应该是最近微 ...
随机推荐
- HDU5716, HDU5745【dp+bitset】
DP+bitset HDU5716 dp[i][j] = dp[i-1][j-1] && (s[i] in set[j]); 第二维压bitset #include <bits ...
- MyBatis——调用存储过程
原文:http://www.cnblogs.com/xdp-gacl/p/4270352.html 一.提出需求 查询得到男性或女性的数量, 如果传入的是0就女性否则是男性 二.准备数据库表和存储过程 ...
- Javascript 弱类型:除法结果是小数
由于javascript是弱类型,只有一种var类型,所以在运算时不会自动强制转换,所以计算的结果是多少就是多少,但java中的17/10的结果就是1(强类型与弱类型)比如:console.log(M ...
- python的变量传递
python中变量都被视为对象的引用.python函数调用传递参数的时候,不允许程序员选择传值还是传引用,python参数传递采用的都是“传对象引用”的方式. 这种方式相当于传值和传引用的结合 ...
- (转)TCP、UDP、IP协议
原文地址:http://blog.chinaunix.net/uid-26833883-id-3627644.html 互连网早期的时候,主机间的互连使用的是NCP协议.这种协议本身有很多缺陷,如 ...
- NDK与JNI
什么是NDK(android native develop kits) :android 本地开发工具集,可以把c/c++编译成一个linux下可以执行的二进制文件 java代码里面就可以通过jni ...
- CollectionFramework
- shell如何在指定文件的指定位置后面添加内容
最近工作中遇到一个问题,想在某个文件的指定位置后面添加一个标志位,要求在shell脚本里实现. 问题说明: 想在sys_config.fex文本的某个字符串后面添加一个flag 例如:sys_conf ...
- 能源项目xml文件 -- app-context.xml
<?xml version="1.0" encoding="UTF-8"?> <beans xmlns="http://www.sp ...
- java集合框架之java HashMap代码解析
java集合框架之java HashMap代码解析 文章Java集合框架综述后,具体集合类的代码,首先以既熟悉又陌生的HashMap开始. 源自http://www.codeceo.com/arti ...