jQuery插件ImgAreaSelect 实例讲解一(头像上传预览和裁剪功能)
上一节随笔中,我们已经知道了关于jQuery插件ImgAreaSelect基本的知识;那么现在看一下实例:
首先,要知道我们应该实现什么功能?
(1)图片能够实现上传预览功能
(2)拖拽裁剪图片,使其能够显示裁剪后的区域
(3)显示要裁剪区域的坐标
其次,该如何引用该插件呢?
那就具体看一下吧!
第一步:先将样式和文件包引入(根据你自己的位置引入)
<!--引入imgareaselect的css样式-->

<link rel="stylesheet" type="text/css" href="../jquery.imgareaselect-0.9.10/css/imgareaselect-default.css" />

<!--引入jquery包-->

<script type="text/javascript" src="../jquery-1.11.2.min.js"></script>

<!--引入imgareaselect的js文件-->

<script type="text/javascript" src="../jquery.imgareaselect-0.9.10/scripts/jquery.imgareaselect.pack.js"></script>
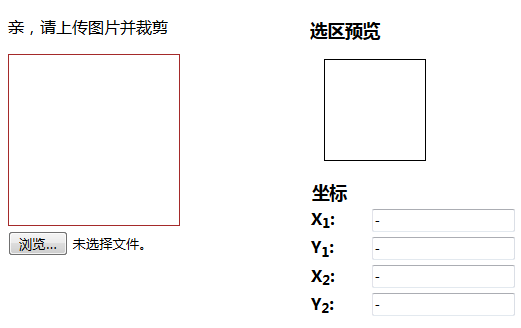
第二步:先用div布局样式,如下图所示
<body>

    <div style="float:left; width:300px;">

        <p>亲,请上传图片并裁剪</p>

        <div style="width:300px; height:300px;float: left;">

        	<!--原图-->

          <img id="uploadPreview"/>

           <input id="uploadImage" type="file" name="photoimage" class="fimg1" onchange="PreviewImage();" />  <!--//对这个按钮加一个事件-->

        </div>

    </div>

	  <div style="float:left; width:300px;">

        <p style="font-size:110%; font-weight:bold; padding-left:0.1em;">

       选区预览

        </p>

        <div style="margin:0 1em; width:100px; height:100px;border: 1px solid black;">

            <div id="preview" style="width:100px; height:100px; overflow:hidden;">

            	<!--裁剪后的图片-->

                <img id="tp" style="width:200px; height:200px;">

            </div>

        </div>

        <!--做一个表格用来放选取图片的坐标-->

        <table style="margin-top:1em;">

            <thead>

            <tr>

            <th colspan="2" style="font-size:110%; font-weight:bold; text-align:left; padding-left: 0.1em;"> 坐标</th>

            </tr>

            </thead>

            <tbody>

            <tr>

            <td style="width:10%;"><b>X<sub>1</sub>:</b></td>

            <td style="width:30%;"><input type="text" id="x1" value="-" /></td>

            </tr>

            <tr>

            <td><b>Y<sub>1</sub>:</b></td>

            <td><input type="text" id="y1" value="-" /></td>

            </tr>

            <tr>

            <td><b>X<sub>2</sub>:</b></td>

            <td><input type="text" id="x2" value="-" /></td>

            </tr>

            <tr>

            <td><b>Y<sub>2</sub>:</b></td>

            <td><input type="text" id="y2" value="-" /></td>

            </tr>

            </tbody>

        </table>

        </div>

     </div>

	</body>
css样式:
	<style>

		 #uploadPreview

			{

		    width: 170px;

		    height: 170px;

		    background-position: center center;

		    background-size: cover;

		    border: 1px solid brown;

		    -webkit-box-shadow: 0 0 0px 0px rgba(0, 0, 0, 0);

		    display: inline-block;

		    }

		</style>
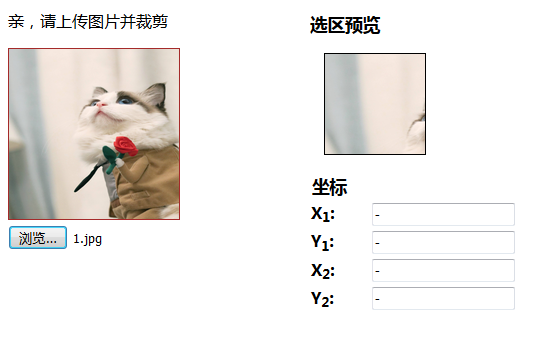
第三步:实现图片的上传预览效果
思路:通过input 将图片的 src传给第一个img,然后再将第一个img的src传给第二个img的src
<script>

//通过input将图片路径传给第一个img

$("#uploadImage").on("change", function(){

    // 得到一个参考文件列表

    var files = !!this.files ? this.files : [];

    // 如果没有选择任何文件,或者没有文件读到就返回

    if (!files.length || !window.FileReader) return;

    // 只有进行选择的文件是一个形象

    if (/^image/.test( files[0].type)){

        // 创建一个新的FileReader的实例

        var reader = new FileReader();

        // 读取本地文件作为一个DataURL

        reader.readAsDataURL(files[0]);

        // 当加载时,图像数据设置为背景的div

        reader.onloadend = function(){

        	//给第一个img添加路径

   		$("#uploadPreview").attr("src",this.result);

   		  //给第二个img添加路径

   		 $("#tp").attr("src",this.result);

   		 //开启裁剪功能

		$('#uploadPreview ').imgAreaSelect( {handles:true, fadeSpeed:200, onSelectEnd : preview});

        }

    }

});

</script>
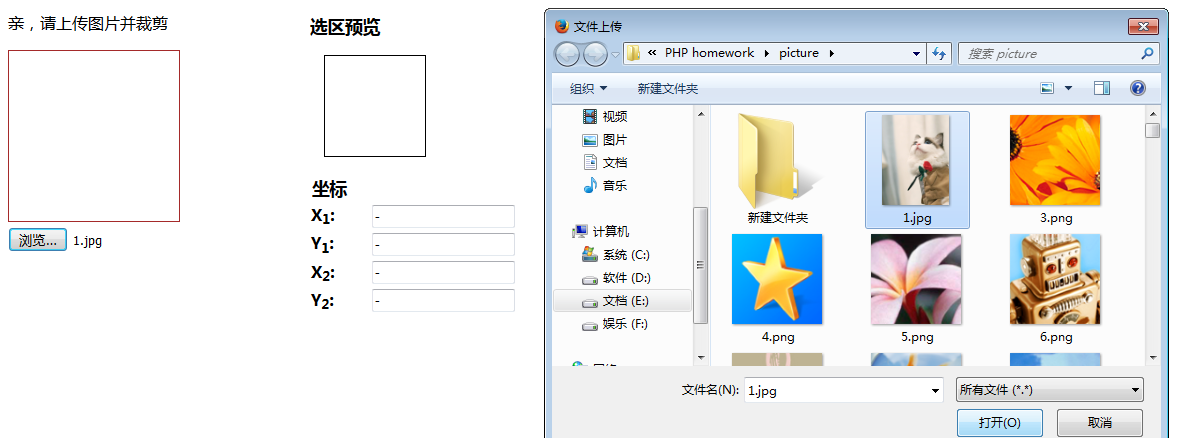
这样,就能够实现如下效果:
点击浏览
点击选择 :
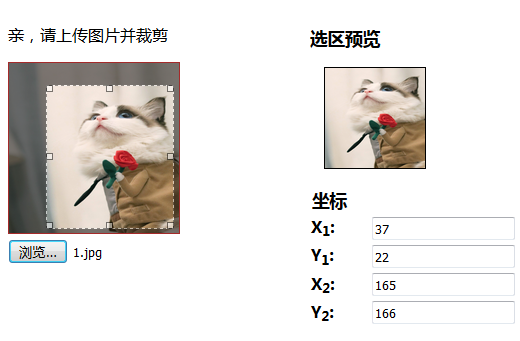
第四步:实现区域选择功能
<script>

 function preview(img, selection)

    {

        if(!selection.width || !selection.height)   //判断选取区域不为空

            return;

            //分别取高宽比率

        var scaleX = 100 / selection.width;

        var scaleY = 100 / selection.height;

        var img = new Image();

        //传路径

        img.src = document.getElementById('uploadPreview').src;

        //给裁剪的图片定义高和宽

       $('#preview img').css( {

            width : Math.round(scaleX * 170),   //170为第一个img的宽,不然截取的图片会有所缺失,可以自己试试

            height: Math.round(scaleY * 170),  //170为第一个img的高

            marginLeft: -Math.round(scaleX * selection.x1),

            marginTop: -Math.round(scaleY * selection.y1)

       });

       //显示坐标

        $('#x1').val(selection.x1);

        $('#y1').val(selection.y1);

        $('#x2').val(selection.x2);

        $('#y2').val(selection.y2);

    }

  </script>
这样就可以实现如下效果啦~~~
到这一步就可以实现头像的上传以及裁剪功能了,当然后期还要将路径添加到数据库就更完美了~~~~
(------------------------------------------------------------------------此处应有分割线----------------------------------------------------------------------)
如果你只想实现简单的图片裁剪功能,那么可以看看下面代码,此处不做注释了~~~
当然,如果上边的代码看不太明白,也可以参照下面的这个进行修改,将图片上传预览功能添加上即可哈~~~~
效果图:(对比图片就可以知道,下面这个就只是少了浏览功能,其他完全一样)
<!DOCTYPE html>
<html>
<head>
<meta charset="UTF-8">
<title></title>
<!--在HTML头部加入:-->
<link rel="stylesheet" type="text/css" href="../jquery.imgareaselect-0.9.10/css/imgareaselect-default.css" />
<script type="text/javascript" src="../jquery-1.11.2.min.js"></script>
<script type="text/javascript" src="../jquery.imgareaselect-0.9.10/scripts/jquery.imgareaselect.pack.js"></script>
<script type="text/javascript">
$(document).ready(function() {
$('#photo').imgAreaSelect( {handles:true, fadeSpeed:200, onSelectEnd : preview});
});
// 如果加上aspectRatio: '1:1',$('#photo').imgAreaSelect( {aspectRatio: '1:1',handles:true, fadeSpeed:200, onSelectEnd : preview});则选取区域固定为正方形。
function preview(img, selection)
{
//等同于var scaleX = 100 / (selection.width || 1)
//先对||前面的进行布尔运算,如果结果是true(即width存在且不是0),就使用width,否则使用||后的变量1
//也就是先检查 selection.width 有没有值,有的话就用 100 / 该值再付给 scaleX,没的话就用 100 / 1 来赋值;
if(!selection.width || !selection.height)
return;
var scaleX = 100 / selection.width;
var scaleY = 100 / selection.height;
//设置裁剪后图片的宽高
$('#preview img').css( {
width : Math.round(scaleX * 200),
height: Math.round(scaleY * 200),
marginLeft: -Math.round(scaleX * selection.x1),
marginTop: -Math.round(scaleY * selection.y1)
}); $('#x1').val(selection.x1);
$('#y1').val(selection.y1);
$('#x2').val(selection.x2);
$('#y2').val(selection.y2);
$('w').val(selection.width);
$('h').val(selection.height); }
</script>
</head>
<body>
<div>
<!--选取的图片-->
<div style="float:left; width:70%;">
<p>
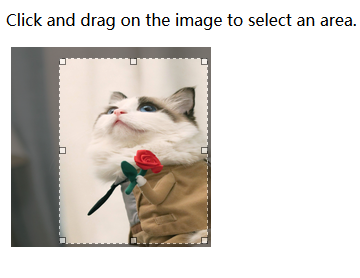
Click and drag on the image to select an area.
</p>
<div style="margin:0 0.3em; width:200px; height:200px;">
<img id="photo" src="./images/1.jpg" style="width:200px; height:200px;"/>
</div>
</div>
<!--截取的图片-->
<div style="float:left; width:30%;">
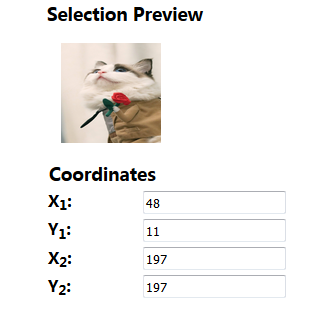
<p style="font-size:110%; font-weight:bold; padding-left:0.1em;">
Selection Preview
</p>
<div style="margin:0 1em; width:100px; height:100px;">
<div id="preview" style="width:100px; height:100px; overflow:hidden;">
<img src="./images/1.jpg" style="width:200px; height:200px;">
</div>
</div>
<table style="margin-top:1em;">
<thead>
<tr>
<th colspan="2" style="font-size:110%; font-weight:bold; text-align:left; padding-left: 0.1em;"> Coordinates</th>
</tr>
</thead>
<tbody>
<tr>
<td style="width:10%;"><b>X<sub>1</sub>:</b></td>
<td style="width:30%;"><input type="text" id="x1" value="-" /></td>
</tr>
<tr>
<td><b>Y<sub>1</sub>:</b></td>
<td><input type="text" id="y1" value="-" /></td>
</tr>
<tr>
<td><b>X<sub>2</sub>:</b></td>
<td><input type="text" id="x2" value="-" /></td>
</tr>
<tr>
<td><b>Y<sub>2</sub>:</b></td>
<td><input type="text" id="y2" value="-" /></td>
</tr>
</tbody>
</table>
</div>
</div>
</body>
</html>
未完待续,明天还有一个小例子~~~
it's a good day today, hope your Mrs Right is companying with you and the same as the next 520~~~if not, please insist that your Mrs Right is on the way, and maybe on next 520, you will be one of the former~~~~
转载请标明本博客地址 http://www.cnblogs.com/chenguanai/p/6883401.html#3697090
jQuery插件ImgAreaSelect 实例讲解一(头像上传预览和裁剪功能)的更多相关文章
- jQuery插件ImgAreaSelect 实例讲解二
在上一篇随笔http://www.cnblogs.com/chenguanai/p/6883401.html中,已经了解了头像的上传预览和裁剪功能:那么这次就再看一下imgareaselect的裁剪功 ...
- 使用jquery插件uploadfive、jcrop实现头像上传
1.html页面部分代码:(实现选着图片时,jcrop能够刷新图片) <script type="text/javascript"> $(function(){ $(& ...
- php头像上传预览
php头像上传带预览: 说道上传图片,大家并不陌生,不过,在以后开发的项目中,可能并不会让你使用提交刷新页面式的上传图片,比如上传头像,按照常理,肯定是在相册选择照片之后,确认上传,而肯定不会通过fo ...
- php部分--头像上传预览
前台页面显示 <style type="text/css"> #yl{ width:200px; height:300px; background-image:url( ...
- input file图片上传预览
两种方法,方法一: js代码: //头像上传预览 $("#up").change(function() { var $file = $(this); var fileObj = $ ...
- input file图片上传预览效果
两种方法,方法一: js代码: //头像上传预览 $("#up").change(function() { var $file = $(this); var fileObj = $ ...
- 基于bootstrap的上传插件fileinput实现ajax异步上传功能(支持多文件上传预览拖拽)
首先需要导入一些js和css文件 ? 1 2 3 4 5 6 <link href="__PUBLIC__/CSS/bootstrap.css" rel="exte ...
- 上传预览图片的插件jquery-fileupload
上传预览图片的插件jquery-fileupload github地址:https://github.com/blueimp/jQuery-File-Upload 中文文档:http://www.jq ...
- Jquery图片上传预览效果
uploadPreview.js jQuery.fn.extend({ uploadPreview: function (opts) { var _self = this, _this = $(thi ...
随机推荐
- WPF之路二: button添加背景图片点击后图片闪烁问题
在为button添加背景图片的时候,点击后发现图片闪烁,我们仔细观察,其实Button不仅仅只是在点击后会闪烁,在其通过点击或按Tab键获得焦点后都会闪烁,而通过点击其他按钮或通过按Tab键让Butt ...
- 使用VS2015将解决方案同步更新到Github上
如今开源已经是一种趋势与潮流了,今天就来谈一谈如何将利用VS将我们的解决方案同步更新到Github上. 第一步:登录自己的Github账号(没有的自行注册). 我的Github登录后的界面: 第二步: ...
- z-index用法总结
一.定义: z-index 只适用于元素有定位的情况,表示层级 数值越大 层级越高 展示的位置越靠前. 二.用法: 1.同级关系: z-index值较大的元素将叠加在z-index值较小的元素之上 ( ...
- C# treeview 使用笔记
treeView默认 展开 treeView1.ExpandAll(); treeview判断点击节点: private void treeView1_AfterSelect(object sende ...
- css3 新属性
一 选择器1 兄弟选择器 0 以第一个选择器开始,往后找满足条件的兄弟节点 class~class() <-- lorem+数字 -tab --> 可以输出默认文字2 属性选择器 标签[a ...
- div模拟输入框input/textarea
//html<!--填写信息--> <div class="info-wrap"> <form class="formToCheck&quo ...
- ue4构建光照失败问题与解决
不知从哪天开始,我的ue4.13就突然无法成功构建光照了, 症状为:虽然swarm连接到了100%,然而之后就卡住一动不动,一看看log是连接tcp什么agent什么失败的. 虽然把所有物体都设置成非 ...
- Jquery遍历数组之$().each()方法和$.each()方法
前几天面试碰到了一个笔试问题:用jquery变了数组. 总结一下用jquery遍历数组的两种方法: 一.$().each()方法 <head><meta http-equiv=&qu ...
- 2017-4-24 WinForm开发基础、窗体的属性CenterScreen
WinForm中文名称: Windows窗体,是·Net开发平台中对Windows Form的一种称谓. 客户端应用程序:C/S 客户端很重要的特点:可以操作用户电脑上的文件 窗体属性:窗体种类: + ...
- html字体问题
正如咱们在上一章中解说的那样,HTML元素使页面规划者能够对文档的构造进行符号.HTML标准列出了浏览器应该怎么显现这些元素的攻略.例如,您能够合理地保证强元素的内容将显现粗体.此外,您能够非常信赖大 ...