cenos7配置confluence+mysql5.6
一.准备阶段
我的环境为 腾讯云镜像centos7.4 ,centos 内置 mariadb 需要先删除
#检查是否安装了 mariadb

rpm -qa |grep mariadb

#删除mariadb

rpm -e --nodeps mariadb-libs

#进入/home 将安装包下载或上传的这个位置

cd /home
二.配置mysql
#使用wget 下载yum源的rpm包

 wget -c http://repo.mysql.com/mysql-community-release-el7-5.noarch.rpm

#安装rpm

sudo rpm -ivh mysql-community-release-el7-.noarch.rpm

#更新源

yum update

#安装 MySQL

yum install mysql-server

#启动服务

systemctl start mysqld.service
三.运行 MySQL 安全配置
#启动MySQL

systemctl start mysqld

#运行MySQL安全配置

mysql_secure_installation
NOTE: RUNNING ALL PARTS OF THIS SCRIPT IS RECOMMENDED FOR ALL MySQL

      SERVERS IN PRODUCTION USE!  PLEASE READ EACH STEP CAREFULLY!

In order to log into MySQL to secure it, we'll need the current

password for the root user.  If you've just installed MySQL, and

you haven't set the root password yet, the password will be blank,

so you should just press enter here.

Enter current password for root (enter for none):   #输入默认密码(默认为空,可直接回车)

ERROR  (): Access denied for user 'root'@'localhost' (using password: YES)

Enter current password for root (enter for none):

OK, successfully used password, moving on...

Setting the root password ensures that nobody can log into the MySQL

root user without the proper authorisation.

Set root password? [Y/n] y    #是否设置新密码 Y 设置

New password:                     #输入两次

Re-enter new password:

Password updated successfully!

Reloading privilege tables..

 ... Success!

By default, a MySQL installation has an anonymous user, allowing anyone

to log into MySQL without having to have a user account created for

them.  This is intended only for testing, and to make the installation

go a bit smoother.  You should remove them before moving into a

production environment.

Remove anonymous users? [Y/n] y       #是否删除匿名账户 Y

 ... Success!

Normally, root should only be allowed to connect from 'localhost'.  This

ensures that someone cannot guess at the root password from the network.

Disallow root login remotely? [Y/n] n  #不允许root账户远程登陆吗?

 ... skipping.

By default, MySQL comes with a database named 'test' that anyone can

access.  This is also intended only for testing, and should be removed

before moving into a production environment.

Remove test database and access to it? [Y/n] Y   #是否测试默认数据库

 - Dropping test database...

ERROR  (HY000) at line : Can't drop database 'test'; database doesn't exist

 ... Failed!  Not critical, keep moving...

 - Removing privileges on test database...

 ... Success!

Reloading the privilege tables will ensure that all changes made so far

will take effect immediately.

Reload privilege tables now? [Y/n] Y #重新加载权限表

 ... Success!

All done!  If you've completed all of the above steps, your MySQL

installation should now be secure.

Thanks for using MySQL!

Cleaning up...
四.安装JDK
#检查 是否安装了Java

#查看版本

java -version

#查看是否安装了 Java

rpm -qa |grep java

下载Java

官网 :http://www.oracle.com/technetwork/java/javase/overview/index.html

ftp 上传至 /home
#解压至/opt目录

tar zxvf jdk-10.0.2_linux-x64_bin.tar.gz -C  /opt/

#修改环境变量

vim /etc/profile

#在最下添加

export JAVA_HOME=/opt/jdk-10.0.

export PATH=$JAVA_HOME/bin:$PATH

export CLASSPATH=.:$JAVA_HOME/lib/dt.jar:$JAVA_HOME/lib/tools.jar:$CLASSPATH

#生效配置

source /etc/profile

#验证环境

java -version
五.安装confluence 官网:https://www.atlassian.com/software/confluence
wget -c https://product-downloads.atlassian.com/software/confluence/downloads/atlassian-confluence-6.10.2-x64.bin
#赋予权限

chmod +x atlassian-confluence-6.10.-x64.bin

#安装confluence

./atlassian-confluence-6.10.-x64.bin
#安装过程

Unpacking JRE ...

Starting Installer ...

This will install Confluence 6.10. on your computer.

OK [o, Enter], Cancel [c]  #是否安装

o

Click Next to continue, or Cancel to exit Setup.

Choose the appropriate installation or upgrade option.

Please choose one of the following:   # 安装方式

Express Install (uses default settings) [],

Custom Install (recommended for advanced users) [, Enter],

Upgrade an existing Confluence installation []

See where Confluence will be installed and the settings that will be used.

Installation Directory: /opt/atlassian/confluence

Home Directory: /var/atlassian/application-data/confluence

HTTP Port:

RMI Port:

Install as service: Yes       #安装端口  是否安装

Install [i, Enter], Exit [e]

i

Extracting files ...

Please wait a few moments while we configure Confluence.

Installation of Confluence 6.10. is complete

Start Confluence now?

Yes [y, Enter], No [n]          # 开始安装

y

Please wait a few moments while Confluence starts up.

Launching Confluence ...

Installation of Confluence 6.10. is complete

Your installation of Confluence 6.10. is now ready and can be accessed via

your browser.

Confluence 6.10. can be accessed at http://localhost:8090

Finishing installation ...  #安装完成
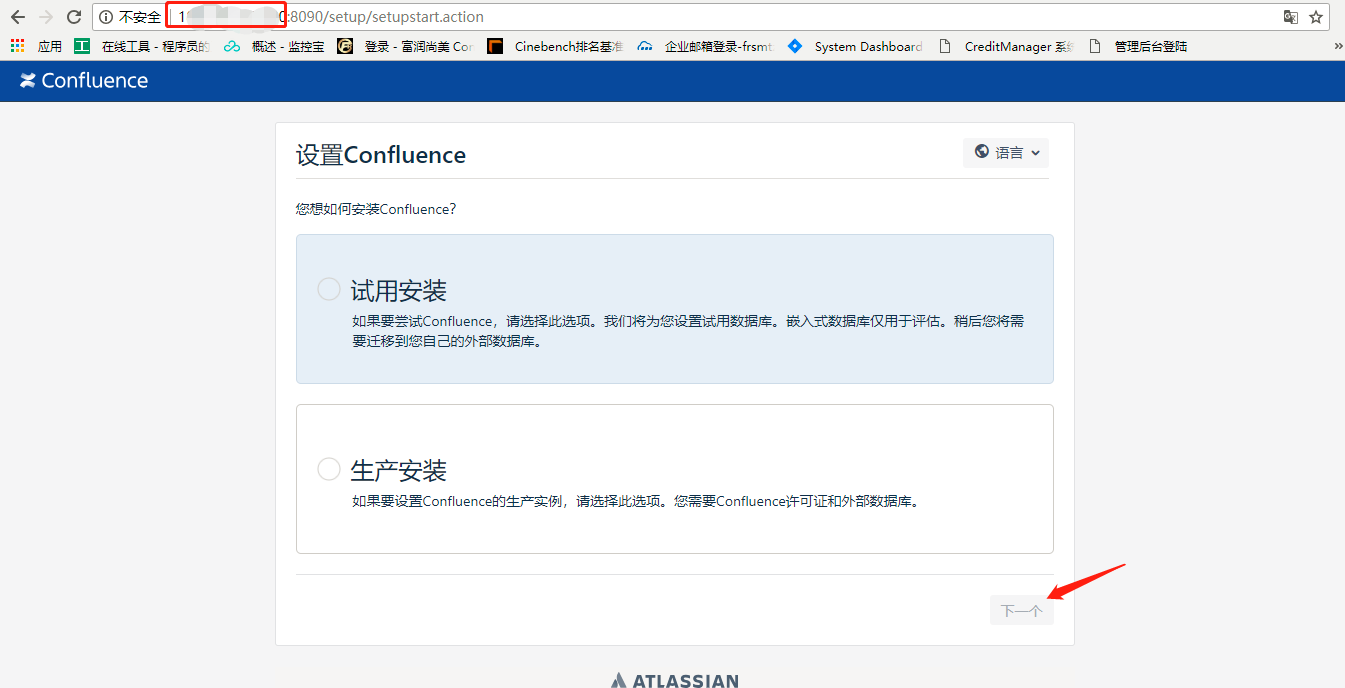
安装完成 ,开始配置confluence  confluence 安装成功自动启动

1.输入ip:8090 或 网址:8090,选择安装方式 我这里选择生产安装,下一步
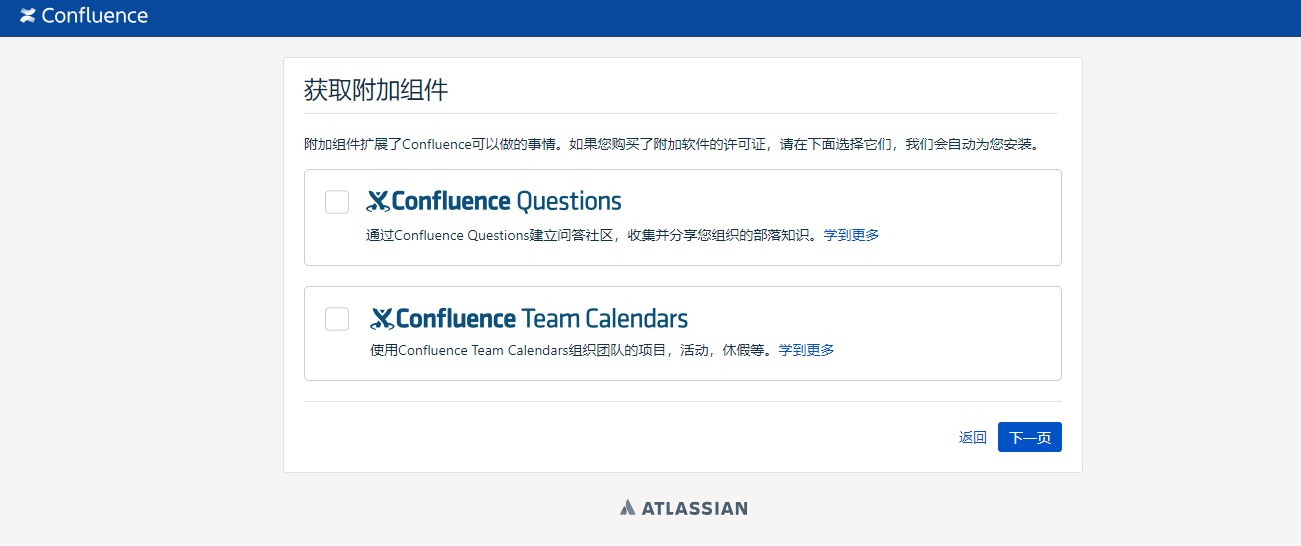
2.选择附加组件 ,因为我没有购买附加软件的许可证 所以我直接下一步
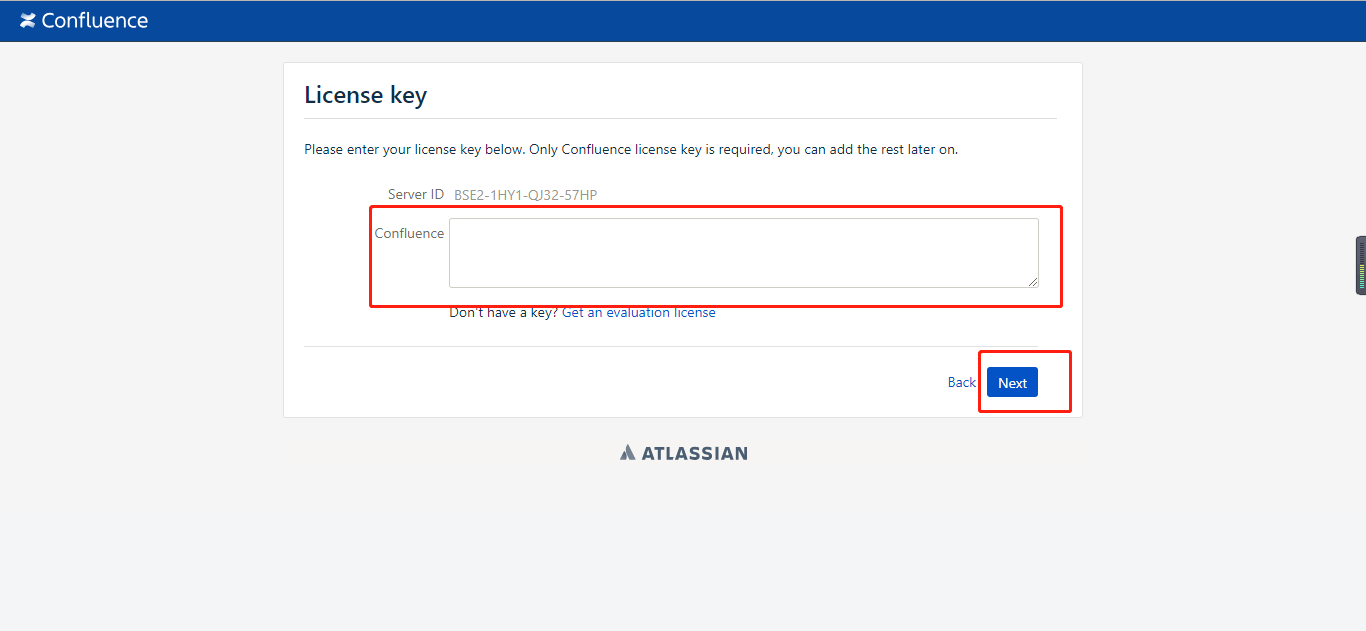
3.输入许可证,下一步
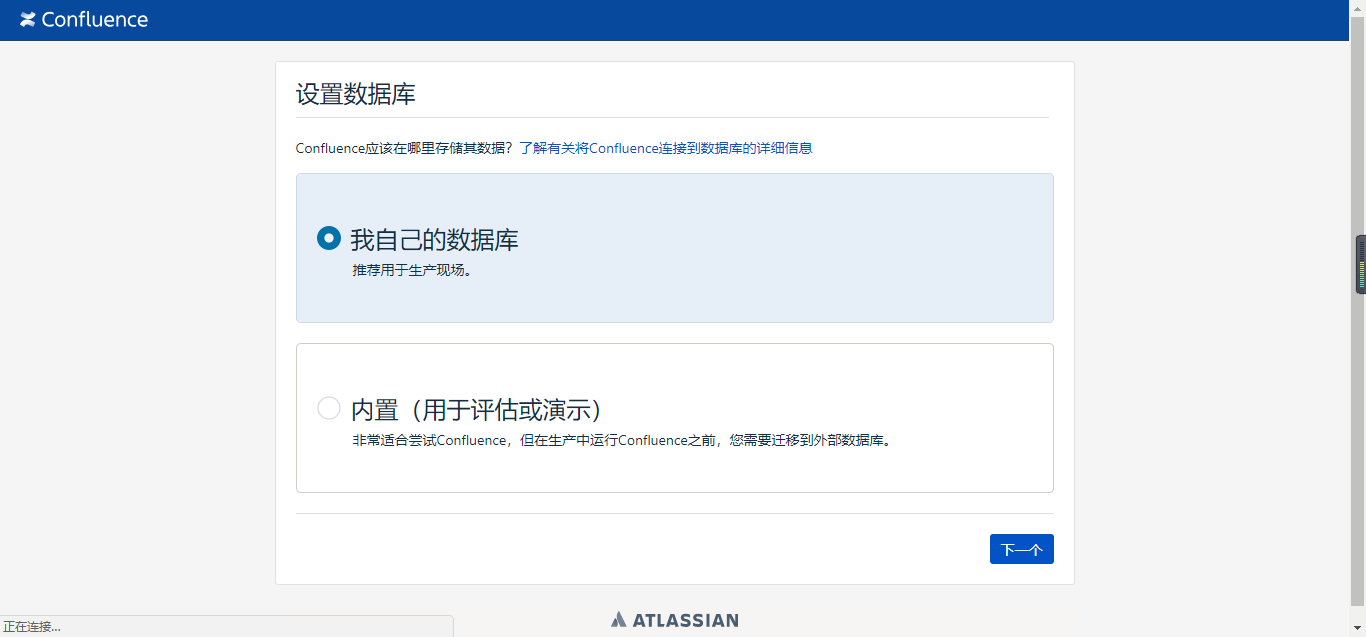
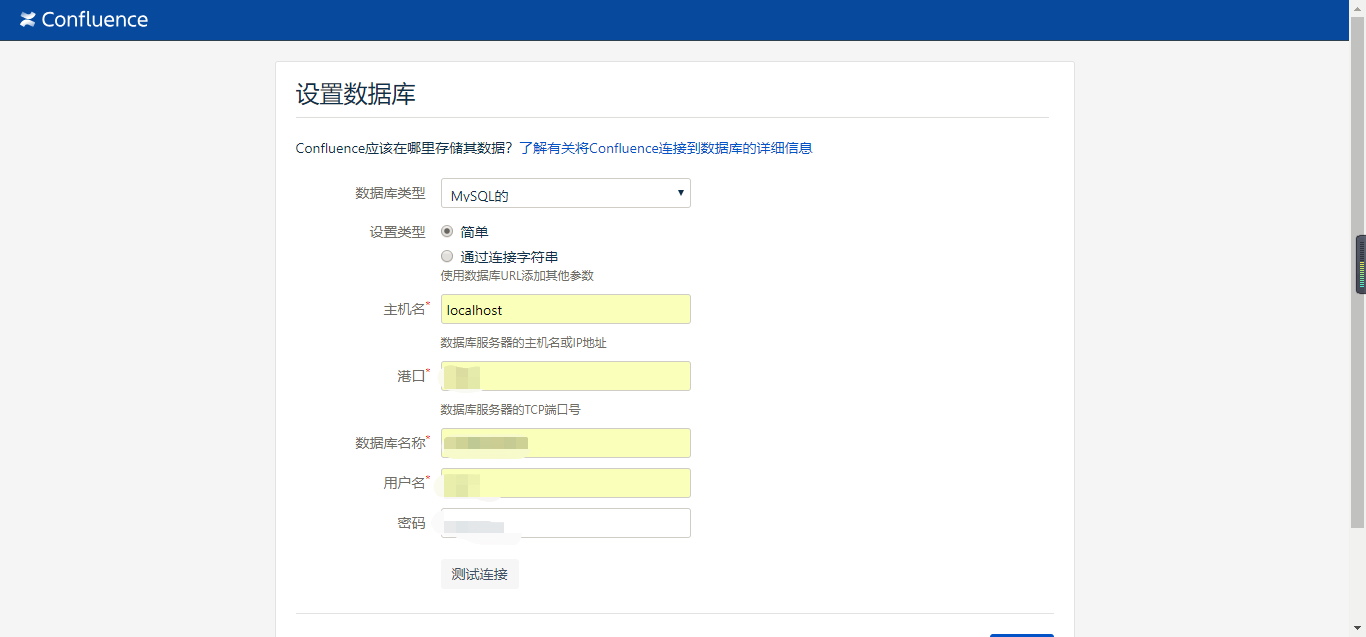
4.设置数据库 ,我用的是我刚才配置的MySQL 数据库 所以我选择我自己的数据库
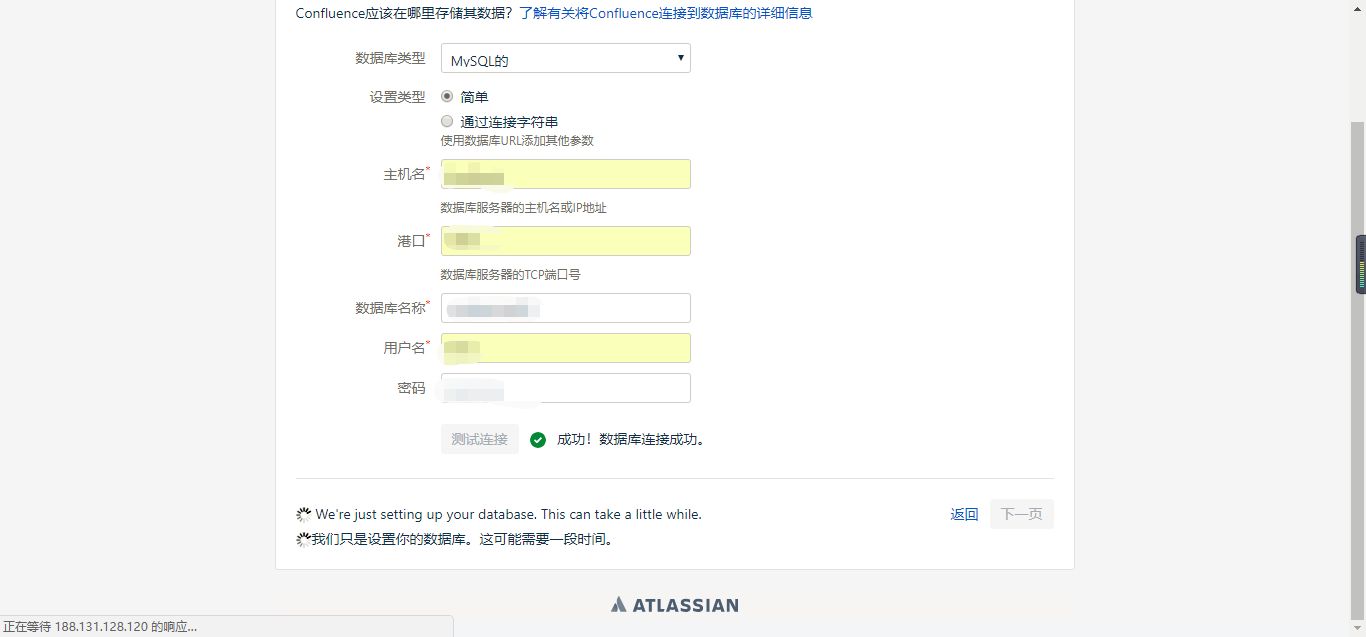
5.设置数据库,这里需要下载个插件 根据提示做就可以了 ,然后测试连接 正确配置后 点击下一步 开始自动配置数据库 或者参考官方文档 链接地址https://confluence.atlassian.com/doc/database-configuration-159764.html
开始自动配置数据库,如果在这里报错 ,服务挂掉了,可以试试 重启下 服务 然后删除为confluence创建的数据库 ,在重建的同名的数据库 然后在访问confluence
配置完成就可以进入confluence了 ,如果遇到什么问题,请在评论区留言,互相交流

小提示:我在linux下配置confluence连接MySQL数据库时,在连接数据库成功点击下一步进行设置数据库时总是失败,后来发现 我的linux系统里没有swap分区 ,然后我新建了一个交换分区 问题就神奇的解决了
cenos7配置confluence+mysql5.6的更多相关文章
- MySQL安装 MySQL5.7.10免安装版配置,mysql5.7.10免安装版
MySQL5.7.10免安装版配置,mysql5.7.10免安装版 最新版的 Mysql 不提供图形界面的安装了, 下载下来是一个压缩包的形式, 那么我们如何来使用它呢, 让它为我们工作呢? 环境: ...
- 2016/07/07 apmserv5.2.6 Apache启动失败,请检查相关配置。MySQL5.1已启动。
因为要用PHP做一个程序,在本机上配PHP环境,下了个APMServ5.26,安装很简单,不再多说,装好后,启动,提示错误,具体是:“Apache启动失败,请检查相关配置.√MySQL5.1已启动”, ...
- Centos7 安装配置Apache+Mysql5.7+PHP7.0+phpmyadmin
Centos7 下安装配置Apache+Mysql5.7+PHP7.0+phpmyadmin 搭建LAMP =========================================Apach ...
- VC++2010配置使用MySQL5.6
0.前提 安装后的文件概览 编译器: VC++2010 MySQL版本:MySQL5.6.19 for win64 Connector版本:connector c++ 1.1.3 在VS2010 ...
- 配置 Confluence 6 安全的最佳实践
让一个系统能够变得更加坚固的最好办法是将系统独立出来.请参考你公司的安全管理策略和相关人员来找到你公司应该采用何种安全策略.这里有很多事情需要我们考虑,例如考虑如何安装我们的操作系统,应用服务器,数据 ...
- Windows下Mysql主从配置(Mysql5.5)
主数据库IP:192.168.3.169从数据库IP:192.168.3.34 主数据库配置my.inin: 在[mysqld]下添加配置数据:server-id=1 #配一个唯一的ID编号, ...
- Ubuntu 14.04 配置confluence破解
1. 配置java环境,请参展我的另一篇博客 http://www.cnblogs.com/youran-he/p/8607155.html 2. 下载文件 https://pan.baidu.com ...
- MySQL SSL配置(mysql5.7和mysql5.6)
专题一:mysql5.7上开启并配置ssl [root@mysqlmaster01 bin]# ./mysql_ssl_rsa_setup --datadir=/data/mysql_data1/ - ...
- Apache启动失败,请检查相关配置。MySQL5.1已启动成功
解决办法 一: 把左下角的SSL钩上了,如果你没有用证书,就把那个去掉,有的朋友去掉就可以了.也可能再装了证书钩上SSL也可以用了. 二: 看了说的把SSL勾掉的办法,也解决不了.后来就去查卡巴,也没 ...
随机推荐
- element-ui的el-table的表头与列不对齐
最好加到全局样式中: body .el-table th.gutter{ display: table-cell!important; }
- 开启Linux服务器vnc远程服务详细步骤
1.安装rpm包 ,如果没有这个包,请提前下载好,然后输入命令安装 yum localinstall /usr/local/tigervnc-server-1.1.0-24.el6.x86_64 ...
- 吴裕雄 Bootstrap 前端框架开发——Bootstrap 排版:标题
<!DOCTYPE html> <html> <head> <meta charset="utf-8"> <title> ...
- CODE 大全网站整站源码分享(带数据库)
CODE 大全是一个偏向于 JavaEE.JavaWeb,WEB 前端,HTML5,数据库,系统运维,编程技术开发的纯个人学习.交流性质的技术博客,一个很不错的网站,现在我免费分享给大家.对 java ...
- Java基础 -4.2
Switch分支语句 switch是一个开关语句,它主要是根据内容来进行判断的,需要注意的是switch中可以判断的只能够是数据(int.char.枚举.String)而不能够使用逻辑判断 publi ...
- vim锁定,不能动
在vim中 ctrl+s是锁屏命令, ctrl+q是解锁
- 【PAT甲级】1007 Maximum Subsequence Sum (25 分)
题意: 给出一个整数K(K<=10000),输入K个整数.输出最大区间和,空格,区间起点的数值,空格,区间终点的数值.如果有相同的最大区间和,输出靠前的.如果K个数全部为负,最大区间和输出0,区 ...
- 「Luogu P2468 [SDOI2010]粟粟的书架」
这道题分为两个部分 Part1 前置芝士 前缀和(后缀和,二维前缀和):可以预处理一下数据. 二分查找:可以在较短的时间内找出答案. 具体做法 可以发现\(R,C\)不大,只有\(200\),于是可以 ...
- Django 学习 之 模板(html)与配置静态文件
一.模板(html) 1.模板语法之变量:语法为 {{ }} 在 Django 模板中遍历复杂数据结构的关键是句点字符, 语法:{{ var_name }} var_name 是一个变量名称,需要和 ...
- C. Book Reading 求在[1,n]中的数中,能整除m的数 的个位的和
C. Book Reading time limit per test 1 second memory limit per test 256 megabytes input standard inpu ...