教你如何用Docker快速搭建深度学习环境
本教程搭建集 Tensorflow、Keras、Coffe、PyTorch 等深度学习框架于一身的环境,及jupyter。
本教程使用nvidia-docker启动实例,通过本教程可以从一个全新的Ubuntu系统快速搭建出GPU深度学习环境。
一、安装依赖环境
1. 使用国内镜像加速安装
https://mirrors.tuna.tsinghua.edu.cn/help/ubuntu/
此处默认环境:ubuntu16.04LTS
sudo mv /etc/apt/sources.list /etc/apt/sources.list.old

sudo vim /etc/apt/sources.list
然后将下面的内容写入该文件:
需要注意的是:不同版本的ubuntu镜像源不一样,可以在清华镜像源查询
# 默认注释了源码镜像以提高 apt update 速度,如有需要可自行取消注释

deb https://mirrors.tuna.tsinghua.edu.cn/ubuntu/ xenial main restricted universe multiverse

# deb-src https://mirrors.tuna.tsinghua.edu.cn/ubuntu/ xenial main restricted universe multiverse

deb https://mirrors.tuna.tsinghua.edu.cn/ubuntu/ xenial-updates main restricted universe multiverse

# deb-src https://mirrors.tuna.tsinghua.edu.cn/ubuntu/ xenial-updates main restricted universe multiverse

deb https://mirrors.tuna.tsinghua.edu.cn/ubuntu/ xenial-backports main restricted universe multiverse

# deb-src https://mirrors.tuna.tsinghua.edu.cn/ubuntu/ xenial-backports main restricted universe multiverse

deb https://mirrors.tuna.tsinghua.edu.cn/ubuntu/ xenial-security main restricted universe multiverse

# deb-src https://mirrors.tuna.tsinghua.edu.cn/ubuntu/ xenial-security main restricted universe multiverse

# 预发布软件源,不建议启用

# deb https://mirrors.tuna.tsinghua.edu.cn/ubuntu/ xenial-proposed main restricted universe multiverse

# deb-src https://mirrors.tuna.tsinghua.edu.cn/ubuntu/ xenial-proposed main restricted universe multiverse
Tuna Mirrors
使镜像源生效
sudo apt-get update
2. 安装 NVIDIA GPU 驱动
sudo add-apt-repository ppa:graphics-drivers/ppa

sudo apt-get update

sudo apt-get install nvidia- nvidia-prime
查看是否安装成功
watch nvidia-smi # 该命令可查看GPU使用情况
3. 安装 Docker
https://mirrors.tuna.tsinghua.edu.cn/help/docker-ce/
以ubuntu16.04LTS为例
curl -fsSL https://download.docker.com/linux/ubuntu/gpg | sudo apt-key add -

sudo add-apt-repository \

   "deb [arch=amd64] https://mirrors.tuna.tsinghua.edu.cn/docker-ce/linux/ubuntu \

   $(lsb_release -cs) \

   stable"

sudo apt-get update

sudo apt-get install docker-ce
查看是否安装成功
docker -v
将当前用户加入到docker用户组(这样在执行docker命令的时候就不会出现Permission Denied了)
sudo usermod -aG docker ${YOUR_NAME_HERE}
4. 安装 Nvidia-docker
https://github.com/NVIDIA/nvidia-docker
curl -s -L https://nvidia.github.io/nvidia-docker/gpgkey | \

  sudo apt-key add -

distribution=$(. /etc/os-release;echo $ID$VERSION_ID)

curl -s -L https://nvidia.github.io/nvidia-docker/$distribution/nvidia-docker.list | \

  sudo tee /etc/apt/sources.list.d/nvidia-docker.list

sudo apt-get update

sudo apt-get install -y nvidia-docker2

sudo pkill -SIGHUP dockerd
这里的最后一步会重启docker,并载入nvidia-docker的配置
查看是否安装成功
nvidia-docker -v
二、拉取镜像并启动
1. 拉取镜像
这里我们使用了deepo镜像:https://hub.docker.com/r/ufoym/deepo/
其下的 ufoym/deepo:all-py36-jupyter,该镜像收集了大部分深度学习框架,运行在GPU环境,以及配有jupyter。
docker pull ufoym/deepo:all-py36-jupyter
2. 启动镜像
默认配置(不推荐)
nvidia-docker run -it -p : ufoym/deepo:all-py36-jupyter jupyter notebook --no-browser --ip=0.0.0.0 --allow-root --NotebookApp.token= --notebook-dir='/root'
外部挂载配置(挂载外部目录,方便移动数据,不推荐)
# 这里使用了-v选项用于挂载外部目录

nvidia-docker run -it -p : --ipc=host -v /data:/data ufoym/deepo:all-py36-jupyter jupyter notebook --no-browser --ip=0.0.0.0 --allow-root --NotebookApp.token= --notebook-dir='/data'
博主推荐:后台运行并挂载外部目录(需要注意的地方是要把参数-it改成-i,否则无法运行在后台)
nohup nvidia-docker run -i -p : --ipc=host -v /data:/data ufoym/deepo:all-jupyter-py36 jupyter notebook --no-browser --ip=0.0.0.0 --allow-root --NotebookApp.token= --notebook-dir='/data' &
参数说明
-v /data:/data:左边是外部路径,右边是内部路径,例如我的文件放在/home/ubuntu/data下,需要挂载到docker内部的路径是/data,则参数配置应该是-v /home/ubuntu/data:/data--notebook-dir:jupyter工作目录的默认路径,推荐与上面的docker内部数据路径相同,即/data-p 8888:8888:左边是外部端口,右边是docker镜像端口。如果想将jupyter应用挂载在8080端口,只需修改参数-p 8080:8888即可--NotebookApp.token:进入jupyter的密码,这里设置的是空
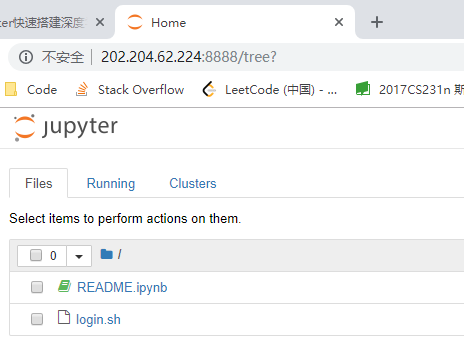
三、 成功启动
四、其他
1. import tensorflow时遇到Future Warning解决方案
错误如下:
FutureWarning: Conversion of the second argument of issubdtype from `float` to `np.floating` is deprecated. In future, it will be treated as `np.float64 == np.dtype(float).type`.

  from ._conv import register_converters as _register_converters
解决方案:
进入jupyter terminal并输入
pip install --upgrade numpy

pip install --upgrade h5py
问题解决。
2. 进入docker shell,以便使用装有deeplearning环境的python交互式命令行
docker exec -it $(docker ps | awk '{print $1}' | sed -n '2p') bash
可以把这一段代码用alias链接后方便使用,在~/.profile下添加这一行:
alias pysh="docker exec -it $(docker ps | awk '{print $1}' | sed -n '2p') bash"
让配置生效
source ~/.profile
再次输入pysh就可以快速进入docker shell
教你如何用Docker快速搭建深度学习环境的更多相关文章
- 一文教您如何通过 Docker 快速搭建各种测试环境(Mysql, Redis, Elasticsearch, MongoDB) | 建议收藏
欢迎关注个人微信公众号: 小哈学Java, 文末分享阿里 P8 高级架构师吐血总结的 <Java 核心知识整理&面试.pdf>资源链接!! 个人网站: https://www.ex ...
- Docker-教你如何通过 Docker 快速搭建各种测试环境
今天给大家分享的主题是,如何通过 Docker 快速搭建各种测试环境,本文列举的,也是作者在工作中经常用到的,其中包括 MySQL.Redis.Elasticsearch.MongoDB 安装步骤,通 ...
- 基于Ubuntu+Python+Tensorflow+Jupyter notebook搭建深度学习环境
基于Ubuntu+Python+Tensorflow+Jupyter notebook搭建深度学习环境 前言一.环境准备环境介绍软件下载VMware下安装UbuntuUbuntu下Anaconda的安 ...
- 五分钟用Docker快速搭建Go开发环境
挺早以前在我写过一篇用 `Docker`搭建LNMP开发环境的文章:[用Docker搭建Laravel开发环境](http://mp.weixin.qq.com/s?__biz=MzUzNTY5MzU ...
- 使用Docker快速搭建PHP开发环境
最近有个同事找过来,希望我对在很早之前写的一个PHP网站上增加一些功能,当时开发使用xampp构建的本地开发环境,但是现在我的笔记本电脑已经更新,没有当时的开发环境.本着尽量不往电脑上装无用软件的原则 ...
- Docker 快速搭建 MySQL8 开发环境
使用 Docker 快速搭建一个 MySQL8 开发环境 步骤 获取镜像 docker pull mysql:8 启动容器,密码 123456,映射 3306 端口 docker run --name ...
- ubuntu18.04下搭建深度学习环境anaconda2+ cuda9.0+cudnn7.0.5+tensorflow1.7【原创】【学习笔记】
PC:ubuntu18.04.i5.七彩虹GTX1060显卡.固态硬盘.机械硬盘 作者:庄泽彬(欢迎转载,请注明作者) 说明:记录在ubuntu18.04环境下搭建深度学习的环境,之前安装了cuda9 ...
- ubuntu16.04+七彩虹GTX1060的NVIDIA驱动+Cuda8.0+cudnn5.1+tensorflow+keras搭建深度学习环境【学习笔记】【原创】
平台信息:PC:ubuntu16.04.i5.七彩虹GTX1060显卡 作者:庄泽彬(欢迎转载,请注明作者) 说明:参考了网上的一堆的资料搭建了深度学习的开发环境,下班在宿舍折腾了好几个晚上才搞定,写 ...
- centos7 手把手从零搭建深度学习环境 (以TensorFlow2.0为例)
目录 一. 搭建一套自己的深度学习平台 二. 安装系统 三. 安装NVIDA组件 四. 安装深度学习框架 TensorFlow 五. 配置远程访问 六. 验收 七. 福利(救命稻草
随机推荐
- Openresty最佳案例 | 第8篇:RBAC介绍、sql和redis模块工具类
转载请标明出处: http://blog.csdn.net/forezp/article/details/78616738 本文出自方志朋的博客 RBAC介绍 RBAC(Role-Based Acce ...
- window与MAC,多台机器ssh免密码登录同一台机器执行某个脚本,
参考:https://zhidao.baidu.com/question/586579720.html A B C三台机器上以当前用户运行如下命令生成本主机的公钥和私钥文件: 1 ssh-keygen ...
- ABAP术语-Fiscal Year
Fiscal Year 原文:http://www.cnblogs.com/qiangsheng/archive/2008/02/02/1062109.html Generally a period ...
- tomcat端口占用后的解决办法【亲测有效】
https://www.cnblogs.com/zhangtan/p/5856573.html 检测正在使用的端口 这里就以win7为例进行讲解. 首先打开cmd,打开的方法很简单,在开始菜单中直 ...
- pyqt 多窗口跳转
今天在做pyqt5的多页面跳转时遇到问题,一点击button按钮,程序会崩溃.在网上查了下,应该是当窗口A调用窗口B的时候,两个窗口不能是同一类型.我写的时候把A.B同时写成了QWidget.把窗口B ...
- labview初始学习过程中遇到串口读取框红蓝色交替闪烁的处理
labview工程的程序框图VISA串口读取框红蓝交替闪烁,前面板接收数据错乱,或者是接受不了,这是你不小心设置了断点.
- ESP32 学习笔记 - 环境搭建
打开终端 输入命令 sudo apt-get install gcc git wget make libncurses-dev flex bison gperf python python-seria ...
- Kubernetes-深入分析集群安全机制(3.6)
集群的安全性主要考虑以下几个方面: 容器与所在宿主机的隔离: 限制容器给基础设施及其他容器带来消极影响的能力: 最小权限原则--合理限制所有组件的权限,确保组件只执行它被授权的行为,通过限制单个组件的 ...
- UVA 1593 Alignment of Code(紫书习题5-1 字符串流)
You are working in a team that writes Incredibly Customizable Programming Codewriter (ICPC) which is ...
- dijkstra算法学习
dijkstra算法学习 一.最短路径 单源最短路径:计算源点到其他各顶点的最短路径的长度 全局最短路径:图中任意两点的最短路径 Dijkstra.Bellman-Ford.SPFA求单源最短路径 F ...