C++ GUI Qt4编程(13)-6.2preferencedialog
1. 主要介绍了QStackedLayout、QListWidget、QDialogButtonBox的简单用法。
2. QStackedLayout:
要使某个特定的子窗口部件可见,可以用setCurrentIndex()函数调用页号来实现。
使用indexOf()可以获取子窗口部件的页号。
3. 创建此对话框的简单步骤:
1) 建立一个QListWidget和一个QStackedWidget,并添加到QGridLayout布局中。
2) 在QListWidget中用addItem(),添加新的项目(或者说是新列表?)。
3) 在QStackedWidget中,新建QWisget类的分页,并用自窗口部件和布局来填充分页。
4) 在QGridLayout中添加QDialogButtonBox按钮。
5) 将列表窗口部件的currentRowChanged(int)信号和分组窗口部件的setCurrentIndex(int)
槽连接起来。实现单击列表,在分组窗口中显示对应的信息。
6) 把列表框的currentRow属性值设为0。
4. 使用QTabWidget会比此方法更简单。
5. preferencedialog.cpp
/**/
#include "preferencedialog.h" #include <QListWidget>
#include <QStackedLayout>
#include <QGridLayout>
#include <QLabel>
#include <QVBoxLayout>
#include <QPushButton>
#include <QDialogButtonBox> PreferenceDialog::PreferenceDialog(QWidget *parent)
: QWidget(parent)
{
createAppearancePage();
createWebBrowserPage();
createMailAndNewsPage();
createAdvancedPage(); buttonBox = new QDialogButtonBox(QDialogButtonBox::Ok |
QDialogButtonBox::Cancel); listWidget = new QListWidget;
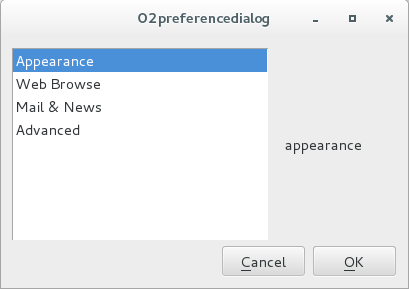
listWidget->addItem(tr("Appearance"));
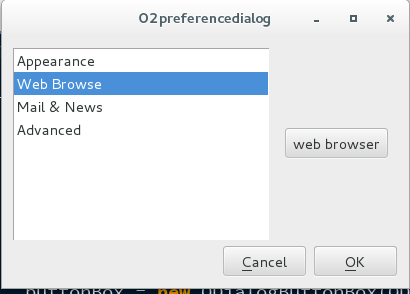
listWidget->addItem(tr("Web Browse"));
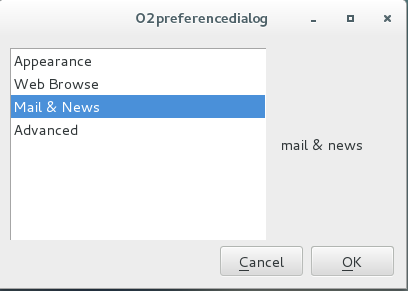
listWidget->addItem(tr("Mail & News"));
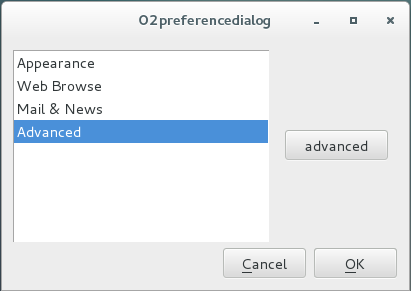
listWidget->addItem(tr("Advanced")); stackedLayout = new QStackedLayout;
stackedLayout->addWidget(appearancePage);
stackedLayout->addWidget(webBrowserPage);
stackedLayout->addWidget(mailAndNewsPage);
stackedLayout->addWidget(advancedPage); connect(listWidget, SIGNAL(currentRowChanged(int)),
stackedLayout, SLOT(setCurrentIndex(int))); QGridLayout *mainLayout = new QGridLayout;
mainLayout->addWidget(listWidget, , );
mainLayout->addLayout(stackedLayout, , );
mainLayout->addWidget(buttonBox, , , , ); setLayout(mainLayout); listWidget->setCurrentRow(); /*设置起始页*/
} void PreferenceDialog::createAppearancePage()
{
appearancePage = new QWidget; QLabel *appearanceLabel = new QLabel(tr("appearance"));
QVBoxLayout *layout = new QVBoxLayout;
layout->addWidget(appearanceLabel); appearancePage->setLayout(layout);
} void PreferenceDialog::createWebBrowserPage()
{
webBrowserPage = new QWidget; QPushButton *webBrowserButton = new QPushButton(tr("web browser"));
QVBoxLayout *layout = new QVBoxLayout;
layout->addWidget(webBrowserButton); webBrowserPage->setLayout(layout);
} void PreferenceDialog::createMailAndNewsPage()
{
mailAndNewsPage = new QWidget; QLabel *mailAndNewsLabel = new QLabel(tr("mail & news"));
QVBoxLayout *layout = new QVBoxLayout;
layout->addWidget(mailAndNewsLabel); mailAndNewsPage->setLayout(layout);
} void PreferenceDialog::createAdvancedPage()
{
advancedPage = new QWidget; QPushButton *advancedButton = new QPushButton(tr("advanced"));
QVBoxLayout *layout = new QVBoxLayout;
layout->addWidget(advancedButton); advancedPage->setLayout(layout);
}
6. preferencedialog.h
 /**/

 #ifndef PREFERENCEDIALOG_H

 #define PREFERENCEDIALOG_H

 #include <QWidget>

 class QListWidget;

 class QStackedLayout;

 class QDialogButtonBox;

 class PreferenceDialog : public QWidget

 {

     Q_OBJECT

 public:

     PreferenceDialog(QWidget *parent = );

 private:

     QListWidget *listWidget;

     QStackedLayout *stackedLayout;

     QWidget *appearancePage;

     QWidget *webBrowserPage;

     QWidget *mailAndNewsPage;

     QWidget *advancedPage;

     QDialogButtonBox *buttonBox;

     void createAppearancePage();

     void createWebBrowserPage();

     void createMailAndNewsPage();

     void createAdvancedPage();

 };

 #endif    /*PREFERENCEDIALOG_H*/
7. main.cpp
 /**/

 #include <QApplication>

 #include "preferencedialog.h"

 int main(int argc, char *argv[])

 {

     QApplication app(argc, argv);

     PreferenceDialog dialog;

     dialog.show();

     return app.exec();

 }
8. 效果
C++ GUI Qt4编程(13)-6.2preferencedialog的更多相关文章
- C++ GUI Qt4编程(10)-3.4spreadsheet
1. C++ GUI Qt4编程第三章,增加spreadsheet. 2. spreadsheet.h /**/ #ifndef SPREADSHEET_H #define SPREADSHEET_H ...
- C++ GUI Qt4编程(09)-3.3spreadsheet-toolbar
1. C++ GUI Qt4编程第三章,增加工具栏.状态栏和快捷键. 2. mainwindow.h /**/ #ifndef MAINWINDOW_H #define MAINWINDOW_H #i ...
- C++ GUI Qt4编程(08)-3.2spreadsheet-resource
1. C++ GUI Qt4编程第三章,图片使用资源机制法. 2. 步骤: 2-1. 在resource文件夹下,新建images文件,存放图片. 2-2. 新建spreadsheet.qrc文件,并 ...
- C++ GUI Qt4编程(07)-3.1menu
1. C++ GUI Qt4编程第三章,添加menu菜单. 2. mainwindow.h #ifndef MAINWINDOW_H #define MAINWINDOW_H #include < ...
- C++ GUI Qt4编程(03)-1.3layout
1. 根据C++ GUI Qt4编程(第二版)整理2. 系统:centos7: Qt版本:5.5.13. 程序:layout.cpp #include <QApplication> #i ...
- C++ GUI Qt4编程(02)-1.2quit
1. 根据C++ GUI Qt4编程(第二版)整理2. 系统:centos7: Qt版本:5.5.13. 程序:quit.cpp #include <QApplication> #inc ...
- C++ GUI Qt4编程(01)-1.1Hello Qt
1. 根据C++ GUI Qt4编程(第二版)整理2. 系统:centos7: Qt版本:5.5.13. 程序:hello.cpp #include <QApplication> #in ...
- C++ GUI Qt4编程-创建自定义窗口部件
C++ GUI Qt4编程-创建自定义窗口部件 Qtqt4 通过Qt窗口部件进行子类化或者直接对QWidget进行子类化,就可以创建自定义窗口部件,下面示范两种方式,并且也会说明如何把自定义窗口部 ...
- C++ GUI Qt4 编程 (第二版)
[加拿大]JasminBlanchette [英]MarkSummerfield . 电子工业 2008. 前几天的问题多是因为版本不兼容的问题. QT本身Q4 Q5就有版本问题,然后集成到VS08 ...
随机推荐
- JSP内置对象与servlet对应关系
隐式对象 说明 out 转译后对应JspWriter对象,其内部关联一个PringWriter对象 request 转译后对应HttpServletRequest/ServletRequest对象 r ...
- mac安装nose,command not found:nosetests
mac通过pip install nose失败,看了一下是权限的问题,重新用sudo pip install nose安装,安装成功. 但是执行nosetests时,提示command not fou ...
- Java IO流的回顾与梳理(必记必会必写)
- 编写高质量代码改善C#程序的157个建议——建议52:及时释放资源
建议52:及时释放资源 垃圾回收机制自动为我们隐式地回收了资源(垃圾回收器会自动调用终结器),那我们为什么要主动释放资源呢? private void buttonOpen_Click(object ...
- 编写高质量代码改善C#程序的157个建议——建议36:使用FCL中的委托声明
建议36:使用FCL中的委托声明 FCL中存在3类这样的委托声明,它们分别是:Action.Func.Predicate.尤其是在它们的泛型版本出来以后,已经能够满足我们在实际编码过程中的大部分需求. ...
- LibreOJ 6283 数列分块入门 7(区间加区间乘区间求和)
题解:这道题要打一个乘标记一个加标记,两个标记的优先级是乘法高,所以在乘的时候要将加标记同时乘上一个c,当然,对于每个非完整块一定要记得暴力重构整个块,把加标记和乘标记都初始化. 代码如下: #inc ...
- Unity Ioc框架简单例子
IOC:英文全称:Inversion of Control,中文名称:控制反转,它还有个名字叫依赖注入(Dependency Injection).作用:将各层的对象以松耦合的方式组织在一起,解耦,各 ...
- 安装两个XAMPP或者更新XAMPP时, PHP版本还是旧版本的问题
转载自 : http://blog.csdn.net/everything1209/article/details/53466725 原文 : 问题:我电脑有原先有一个wamp,但是PHP版本为5.5 ...
- 异常:已捕获: "Error creating context 'spring.root': 未将对象引用设置到对象的实例。" (System.Configuration.ConfigurationErrorsException) 捕获到一个 System.Configuration.ConfigurationErrorsException: "Error creating context 'sp
查看所指定name的context是否注册成功,以后用此容器来获取其中的object. 常见的使用方式: Application_Start中使用ContextRegistry.GetContext( ...
- 百度UEditor富文本编辑器去除自动追加p标签
本篇文章还原了我在遇到这个问题时的解决过程: 找到ueditor.all.js文件,搜索 me.addInputRule(function(root){ 或者直接搜索 //进入编辑器的li要套p标签 ...