
SpringCloud系列十二:手动创建Feign
1. 回顾
上文讲解了自定义Feign。但是在某些场景下,前文自定义Feign的方式满足不了需求,此时可使用Feign Builder API手动创建Feign。
本文围绕以下场景,为大家讲解如何手动创建Feign。
- 用户微服务的接口需要登录后才能调用,并且对于相同的API,不同角色的用户有不同的行为。
- 让电影微服务中的同一个Feign接口,使用不同的账号登录,并调用用户微服务的接口。
2. 修改用户微服务
> 复制项目 microservice-provider-user,将 ArtifactId 修改为 microservice-provider-user-with-auth
> 添加Spring Security依赖
<dependency>

   <groupId>org.springframework.boot</groupId>

   <artifactId>spring-boot-starter-security</artifactId>

</dependency>
> 创建 Spring Security的配置类
package com.itmuch.cloud.microserviceprovideruserwithauth.security;

import org.springframework.security.core.GrantedAuthority;

import org.springframework.security.core.authority.SimpleGrantedAuthority;

import org.springframework.security.core.userdetails.UserDetails;

import java.util.ArrayList;

import java.util.Collection;

public class SecurityUser implements UserDetails {

    private static final long serialVersoinUID = 1L;

    private Long id;

    private String username;

    private String password;

    private String role;

    public SecurityUser() {

    }

    public SecurityUser(String username, String password, String role) {

        this.username = username;

        this.password = password;

        this.role = role;

    }

    @Override

    public Collection<? extends GrantedAuthority> getAuthorities() {

        Collection<GrantedAuthority> authorities = new ArrayList<GrantedAuthority>();

        SimpleGrantedAuthority authority = new SimpleGrantedAuthority(this.role);

        authorities.add(authority);

        return authorities;

    }

    @Override

    public String getPassword() {

        return password;

    }

    @Override

    public String getUsername() {

        return username;

    }

    @Override

    public boolean isAccountNonExpired() {

        return true;

    }

    @Override

    public boolean isAccountNonLocked() {

        return true;

    }

    @Override

    public boolean isCredentialsNonExpired() {

        return true;

    }

    @Override

    public boolean isEnabled() {

        return true;

    }

    public Long getId() {

        return id;

    }

    public void setId(Long id) {

        this.id = id;

    }

    public void setUsername(String username) {

        this.username = username;

    }

    public void setPassword(String password) {

        this.password = password;

    }

    public String getRole() {

        return role;

    }

    public void setRole(String role) {

        this.role = role;

    }

}
package com.itmuch.cloud.microserviceprovideruserwithauth.security;

import org.springframework.security.core.userdetails.UserDetails;

import org.springframework.security.core.userdetails.UserDetailsService;

import org.springframework.security.core.userdetails.UsernameNotFoundException;

import org.springframework.stereotype.Component;

@Component

public class CustomUserDetailsService implements UserDetailsService {

    /**

     * 模拟两个账户

     * ① 账号是user,密码是password1,角色是user-role

     * ② 账号时候admin,密码是password1,角色是admin-role

     * @param username

     *                  用户名

     * @return

     *

     * @throws UsernameNotFoundException

     */

    @Override

    public UserDetails loadUserByUsername(String username) throws UsernameNotFoundException {

        if ("user".equals(username)) {

            return new SecurityUser("user", "password1", "user-role");

        } else if ("admin".equals(username)) {

            return new SecurityUser("admin", "password2", "admin-role");

        } else {

            return null;

        }

    }

}
package com.itmuch.cloud.microserviceprovideruserwithauth.security;

import org.springframework.beans.factory.annotation.Autowired;

import org.springframework.context.annotation.Bean;

import org.springframework.context.annotation.Configuration;

import org.springframework.security.config.annotation.authentication.builders.AuthenticationManagerBuilder;

import org.springframework.security.config.annotation.method.configuration.EnableGlobalMethodSecurity;

import org.springframework.security.config.annotation.web.builders.HttpSecurity;

import org.springframework.security.config.annotation.web.configuration.EnableWebSecurity;

import org.springframework.security.config.annotation.web.configuration.WebSecurityConfigurerAdapter;

import org.springframework.security.crypto.password.NoOpPasswordEncoder;

import org.springframework.security.crypto.password.PasswordEncoder;

@Configuration

@EnableWebSecurity

@EnableGlobalMethodSecurity(prePostEnabled = true)

public class WebSecurityConfig extends WebSecurityConfigurerAdapter {

    @Autowired

    private CustomUserDetailsService userDetailsService;

    @Override

    protected void configure(HttpSecurity http) throws Exception {

        // 所有的请求,都需要经过HTTP basic认证

        http

            .authorizeRequests()

                .anyRequest().authenticated()

                .and()

                .httpBasic();

    }

    @Bean

    public PasswordEncoder passwordEncoder() {

        // 明文编码器。这个一个不做任何操作的密码编码器,是Spring提供给我们做明文测试的

        return NoOpPasswordEncoder.getInstance();

    }

    @Override

    protected void configure(AuthenticationManagerBuilder auth) throws Exception {

        auth.userDetailsService(this.userDetailsService).passwordEncoder(this.passwordEncoder());

    }

}
> 修改Controller,在其中打印当前登录的用户信息
package com.itmuch.cloud.microserviceprovideruserwithauth.controller;

import com.itmuch.cloud.microserviceprovideruserwithauth.dao.UserRepository;

import com.itmuch.cloud.microserviceprovideruserwithauth.pojo.User;

import org.slf4j.Logger;

import org.slf4j.LoggerFactory;

import org.springframework.beans.factory.annotation.Autowired;

import org.springframework.security.core.GrantedAuthority;

import org.springframework.security.core.context.SecurityContextHolder;

import org.springframework.security.core.userdetails.UserDetails;

import org.springframework.web.bind.annotation.GetMapping;

import org.springframework.web.bind.annotation.PathVariable;

import org.springframework.web.bind.annotation.RestController;

import java.util.Collection;

@RestController

public class UserController {

    private static final Logger LOGGER = LoggerFactory.getLogger(UserController.class);

    @Autowired

    private UserRepository userRepository;

    @GetMapping("/{id}")

    public User findById(@PathVariable Long id) {

        Object principal = SecurityContextHolder.getContext().getAuthentication().getPrincipal();

        if (principal instanceof UserDetails) {

            UserDetails user = (UserDetails) principal;

            Collection<? extends GrantedAuthority> collections = user.getAuthorities();

            for (GrantedAuthority ga: collections) {

                // 打印当前登录用户的信息

                UserController.LOGGER.info("当前用户是{}, 角色是{}", user.getUsername(), ga.getAuthority());

            }

        } else {

            UserController.LOGGER.warn("ε=(´ο`*)))唉,出现问题了");

        }

        User findOne = userRepository.findById(id).get();

        return findOne;

    }

}
> 启动 microservice-discovery-eureka
> 启动 microservice-provider-user-with-auth
> 访问 http://localhost:8000/1,弹出登录对话框
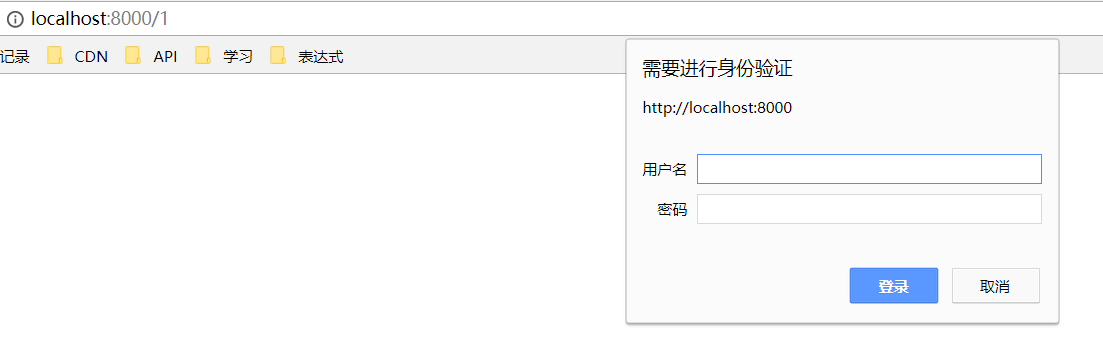
> 使用 user/password1 登录,可在控制台看到如下日志

> 使用 admin/password2 登录,可在控制台看到如下日志

3. 修改电影微服务
> 复制项目 microservice-consumer-movie-feign,将 ArtifactId 修改为 microservice-consumer-movie-feign-manual
> 去掉Feign接口 UserFeignClient上的@FeignClient注解
package com.itmuch.cloud.microserviceconsumermoviefeignmanual.feign;

import com.itmuch.cloud.microserviceconsumermoviefeignmanual.pojo.User;

import org.springframework.web.bind.annotation.GetMapping;

import org.springframework.web.bind.annotation.PathVariable;

public interface UserFeignClient {

    @GetMapping(value = "/{id}")

    User findById(@PathVariable("id") Long id);

}
> 去掉启动类上的 @EnableFeignClients 注解
package com.itmuch.cloud.microserviceconsumermoviefeignmanual;

import org.springframework.boot.SpringApplication;

import org.springframework.boot.autoconfigure.SpringBootApplication;

import org.springframework.cloud.client.discovery.EnableDiscoveryClient;

import org.springframework.cloud.openfeign.EnableFeignClients;

import org.springframework.context.annotation.Bean;

import org.springframework.web.client.RestTemplate;

@SpringBootApplication

@EnableDiscoveryClient

public class MicroserviceConsumerMovieFeignManualApplication {

    public static void main(String[] args) {

        SpringApplication.run(MicroserviceConsumerMovieFeignManualApplication.class, args);

    }

}
> 修改 Controller
package com.itmuch.cloud.microserviceconsumermoviefeignmanual.controller;

import com.itmuch.cloud.microserviceconsumermoviefeignmanual.feign.UserFeignClient;

import com.itmuch.cloud.microserviceconsumermoviefeignmanual.pojo.User;

import feign.Client;

import feign.Contract;

import feign.Feign;

import feign.auth.BasicAuthRequestInterceptor;

import feign.codec.Decoder;

import feign.codec.Encoder;

import org.springframework.cloud.openfeign.FeignClientsConfiguration;

import org.springframework.context.annotation.Import;

import org.springframework.web.bind.annotation.GetMapping;

import org.springframework.web.bind.annotation.PathVariable;

import org.springframework.web.bind.annotation.RestController;

@Import(FeignClientsConfiguration.class) // Spring Cloud为Feign默认提供的配置类

@RestController

public class MovieController {

    private UserFeignClient userUserFeignClient;

    private UserFeignClient adminUserFeignClient;

    public MovieController(Decoder decoder, Encoder encoder, Client client, Contract contract) {

        this.userUserFeignClient = Feign.builder().client(client).encoder(encoder).decoder(decoder).contract(contract)

                .requestInterceptor(new BasicAuthRequestInterceptor("user", "password1"))

                .target(UserFeignClient.class, "http://microservice-provider-user/");

        this.adminUserFeignClient = Feign.builder().client(client).encoder(encoder).decoder(decoder).contract(contract)

                .requestInterceptor(new BasicAuthRequestInterceptor("admin", "password2"))

                .target(UserFeignClient.class, "http://microservice-provider-user/");

    }

    @GetMapping("/user-user/{id}")

    public User findByIdUser(@PathVariable Long id) {

        return this.userUserFeignClient.findById(id);

    }

    @GetMapping("/user-admin/{id}")

    public User findByIdAdmin(@PathVariable Long id) {

        return this.adminUserFeignClient.findById(id);

    }

}
> 启动 microservice-discovery-eureka
> 启动 microservice-provider-user-with-auth
> 启动 microservice-consumer-movie-feign-manual
> 访问 http://localhost:8010/user-user/1,可正常获取结果,并且在用户微服务控制台打印如下日志

> 访问 http://localhost:8010/user-admin/1,可正常获取结果,并且在用户微服务控制台打印如下日志

4. 总结
由测试不难发现,手动创建Feign的方式更加灵活。
下文将讲解Feign对集成的支持、对压缩的支持、日志、构造多参数请求等。敬请期待~~~
5. 参考
周立 --- 《Spring Cloud与Docker微服务架构与实战》
SpringCloud系列十二:手动创建Feign的更多相关文章
- SpringCloud系列十二:SpringCloudSleuth(SpringCloudSleuth 简介、SpringCloudSleuth 基本配置、数据采集)
声明:本文来源于MLDN培训视频的课堂笔记,写在这里只是为了方便查阅. 1.概念:SpringCloudSleuth 2.具体内容 Sleuth 是一种提供的跟踪服务,也就是说利用 sleuth 技术 ...
- Web 前端开发精华文章推荐(jQuery、HTML5、CSS3)【系列十二】
2012年12月12日,[<Web 前端开发人员和设计师必读文章>系列十二]和大家见面了.梦想天空博客关注 前端开发 技术,分享各种增强网站用户体验的 jQuery 插件,展示前沿的 HT ...
- SQL Server 2008空间数据应用系列十二:Bing Maps中呈现GeoRSS订阅的空间数据
原文:SQL Server 2008空间数据应用系列十二:Bing Maps中呈现GeoRSS订阅的空间数据 友情提示,您阅读本篇博文的先决条件如下: 1.本文示例基于Microsoft SQL Se ...
- Alamofire源码解读系列(十二)之请求(Request)
本篇是Alamofire中的请求抽象层的讲解 前言 在Alamofire中,围绕着Request,设计了很多额外的特性,这也恰恰表明,Request是所有请求的基础部分和发起点.这无疑给我们一个Req ...
- struts2官方 中文教程 系列十二:控制标签
介绍 struts2有一些控制语句的标签,本教程中我们将讨论如何使用 if 和iterator 标签.更多的控制标签可以参见 tags reference. 到此我们新建一个struts2 web 项 ...
- 爬虫系列(十二) selenium的基本使用
一.selenium 简介 随着网络技术的发展,目前大部分网站都采用动态加载技术,常见的有 JavaScript 动态渲染和 Ajax 动态加载 对于爬取这些网站,一般有两种思路: 分析 Ajax 请 ...
- 学习ASP.NET Core Razor 编程系列十二——在页面中增加校验
学习ASP.NET Core Razor 编程系列目录 学习ASP.NET Core Razor 编程系列一 学习ASP.NET Core Razor 编程系列二——添加一个实体 学习ASP.NET ...
- 跟我学SpringCloud | 第十二篇:Spring Cloud Gateway初探
SpringCloud系列教程 | 第十二篇:Spring Cloud Gateway初探 Springboot: 2.1.6.RELEASE SpringCloud: Greenwich.SR1 如 ...
- Alamofire源码解读系列(十二)之时间轴(Timeline)
本篇带来Alamofire中关于Timeline的一些思路 前言 Timeline翻译后的意思是时间轴,可以表示一个事件从开始到结束的时间节点.时间轴的概念能够应用在很多地方,比如说微博的主页就是一个 ...
随机推荐
- 洛谷——P3913 车的攻击
P3913 车的攻击 题目描述 N \times NN×N 的国际象棋棋盘上有KK 个车,第ii个车位于第R_iRi行,第C_iCi 列.求至少被一个车攻击的格子数量. 车可以攻击所有同一行或者同 ...
- NVL NVL2 COALESCE NULLIF decode
NVL(EXPR1,EXPR2)NVL2(EXPR1,EXPR2,EXPR3)NULLIF(EXPR1,EXPR2)COALESCE(EXPR1,,..,EXPRn)decode --------NV ...
- 生成随机位数的UUID
1,生成UUID package com.jeeplus.common.utils; import java.util.UUID; /** * 生成唯一的UUID * * @author songya ...
- 键盘事件OnKeyListener
1.效果图:就是在文本框中输入A,则显示A,输入B,则显示B.... (1)activity_main.xml <?xml version="1.0" encoding=&q ...
- 地图投影与ArcGIS坐标系转换
1. 通常GIS项目涉及到的坐标系 (1)面向局部区域的大比例尺二维平面:高斯投影(横轴墨卡托) 说明:在市一级的小范围区域的GIS系统,比如规划局.国土局.建设局的系统,大都使用高斯投影,以便与地方 ...
- js数据加载完成的方法
1.document.onreadystatechange(页面加载完成的方法)配合document.readyState(获取加载状态)使用 document.onreadystatechange= ...
- 关于 modelNameLike 查询无数据
---恢复内容开始--- 1.今天在测试的时候发现 model中的name不能模糊查询. ModelQuery modelQuery = repositoryService.createModelQu ...
- Widows 注册表 HKEY_CLASSES_ROOT
Widows 注册表 HKEY_CLASSES_ROOT在此关键字之下,可以看到有一个CLSID关键字.在CLSID关键字之下列有系统中安装的所有组件的CLSID.注册表CLSID是一个具有如下格式的 ...
- 常用EXE文件反编译工具【转】
http://www.cnblogs.com/happyday56/p/3740108.html PE Explorer V1.99 R5 绿色汉化特别版_强大的可视化汉化集成工具 功能极为强大的可视 ...
- java的poi技术读取Excel[2003-2007,2010]
这篇blog主要是讲述java中poi读取excel,而excel的版本包括:2003-2007和2010两个版本, 即excel的后缀名为:xls和xlsx. 读取excel和MySQL相关: ja ...