在Spring Boot中使用 @ConfigurationProperties 注解, @EnableConfigurationProperties
但 Spring Boot 提供了另一种方式 ,能够根据类型校验和管理application中的bean。 这里会介绍如何使用@ConfigurationProperties。
继续使用mail做例子。配置放在mail.properties文件中。属性必须命名规范才能绑定成功。举例:
1 protocol and PROTOCOL will be bind to protocol field of a bean
2 smtp-auth , smtp_auth , smtpAuth will be bind to smtpAuth field of a bean
3 smtp.auth will be bind to … hmm to smtp.auth field of a bean!
Spring Boot 使用一些松的规则来绑定属性到@ConfigurationProperties bean 并且支持分层结构(hierarchical structure)。
开始创建一个@ConfigurationProperties bean:

package com.dxz.property;

import org.springframework.boot.context.properties.ConfigurationProperties;

@ConfigurationProperties(locations = "classpath:mail.properties", ignoreUnknownFields = false, prefix = "mail")

public class MailProperties {

    private String host;

    private int port;

    private String from;

    private String username;

    private String password;

    private Smtp smtp;

    // ... getters and setters

    public String getHost() {

        return host;

    }

    public void setHost(String host) {

        this.host = host;

    }

    public int getPort() {

        return port;

    }

    public void setPort(int port) {

        this.port = port;

    }

    public String getFrom() {

        return from;

    }

    public void setFrom(String from) {

        this.from = from;

    }

    public String getUsername() {

        return username;

    }

    public void setUsername(String username) {

        this.username = username;

    }

    public String getPassword() {

        return password;

    }

    public void setPassword(String password) {

        this.password = password;

    }

    public Smtp getSmtp() {

        return smtp;

    }

    public void setSmtp(Smtp smtp) {

        this.smtp = smtp;

    }

    @Override

    public String toString() {

        return "MailProperties [host=" + host + ", port=" + port + ", from=" + from + ", username=" + username

                + ", password=" + password + ", smtp=" + smtp + "]";

    }

    public static class Smtp {

        private boolean auth;

        private boolean starttlsEnable;

        public boolean isAuth() {

            return auth;

        }

        public void setAuth(boolean auth) {

            this.auth = auth;

        }

        public boolean isStarttlsEnable() {

            return starttlsEnable;

        }

        public void setStarttlsEnable(boolean starttlsEnable) {

            this.starttlsEnable = starttlsEnable;

        }

    }

}
如下属性中创建 ( mail.properties ):
mail.host=localhost

mail.port=25

mail.smtp.auth=false

mail.smtp.starttls-enable=false

mail.from=me@localhost

mail.username=duan

mail.password=duan123456
上例中我们用@ConfigurationProperties注解就可以绑定属性了。ignoreUnknownFields = false告诉Spring Boot在有属性不能匹配到声明的域的时候抛出异常。开发的时候很方便! prefix 用来选择哪个属性的prefix名字来绑定。
请注意setters 和 getters 需要在@ConfigurationProperties bean中创建! 与@Value注解相反。
我们需要用属性来配置 application。 有至少两种方式来创建@ConfigurationProperties。即可以搭配@Configuration 注解来提供 @Beans 也可以单独使用并注入 @Configuration bean。
方案1:定义spring的一个实体bean装载配置文件信息,其它要使用配置信息是注入该实体bean
package com.dxz.property3;

import org.springframework.boot.context.properties.ConfigurationProperties;

import org.springframework.stereotype.Component;

@Component

@ConfigurationProperties(locations = "classpath:mail.properties", ignoreUnknownFields = false, prefix = "mail")

public class MailProperties {

    private String host;

    private int port;

    private String from;

    private String username;

    private String password;

    private Smtp smtp;

    // ... getters and setters

    public String getHost() {

        return host;

    }

    public void setHost(String host) {

        this.host = host;

    }

    public int getPort() {

        return port;

    }

    public void setPort(int port) {

        this.port = port;

    }

    public String getFrom() {

        return from;

    }

    public void setFrom(String from) {

        this.from = from;

    }

    public String getUsername() {

        return username;

    }

    public void setUsername(String username) {

        this.username = username;

    }

    public String getPassword() {

        return password;

    }

    public void setPassword(String password) {

        this.password = password;

    }

    public Smtp getSmtp() {

        return smtp;

    }

    public void setSmtp(Smtp smtp) {

        this.smtp = smtp;

    }

    @Override

    public String toString() {

        return "MailProperties [host=" + host + ", port=" + port + ", from=" + from + ", username=" + username

                + ", password=" + password + ", smtp=" + smtp + "]";

    }

    public static class Smtp {

        private boolean auth;

        private boolean starttlsEnable;

        public boolean isAuth() {

            return auth;

        }

        public void setAuth(boolean auth) {

            this.auth = auth;

        }

        public boolean isStarttlsEnable() {

            return starttlsEnable;

        }

        public void setStarttlsEnable(boolean starttlsEnable) {

            this.starttlsEnable = starttlsEnable;

        }

    }

}
启动及测试类:
package com.dxz.property3;

import org.springframework.beans.factory.annotation.Autowired;

import org.springframework.boot.autoconfigure.SpringBootApplication;

import org.springframework.boot.builder.SpringApplicationBuilder;

import org.springframework.web.bind.annotation.RequestMapping;

import org.springframework.web.bind.annotation.RequestMethod;

import org.springframework.web.bind.annotation.ResponseBody;

import org.springframework.web.bind.annotation.RestController;

@RestController

@SpringBootApplication

//@EnableConfigurationProperties(MailProperties.class)

public class TestProperty3 {

    @Autowired

    private MailProperties mailProperties;

    @RequestMapping(value = "/hello", method = RequestMethod.GET)

    @ResponseBody

    public String hello() {

        System.out.println("mailProperties" + mailProperties);

        return "hello world";

    }

    public static void main(String[] args) {

        //SpringApplication.run(TestProperty1.class, args);

        new SpringApplicationBuilder(TestProperty3.class).web(true).run(args);

    }

}
结果:
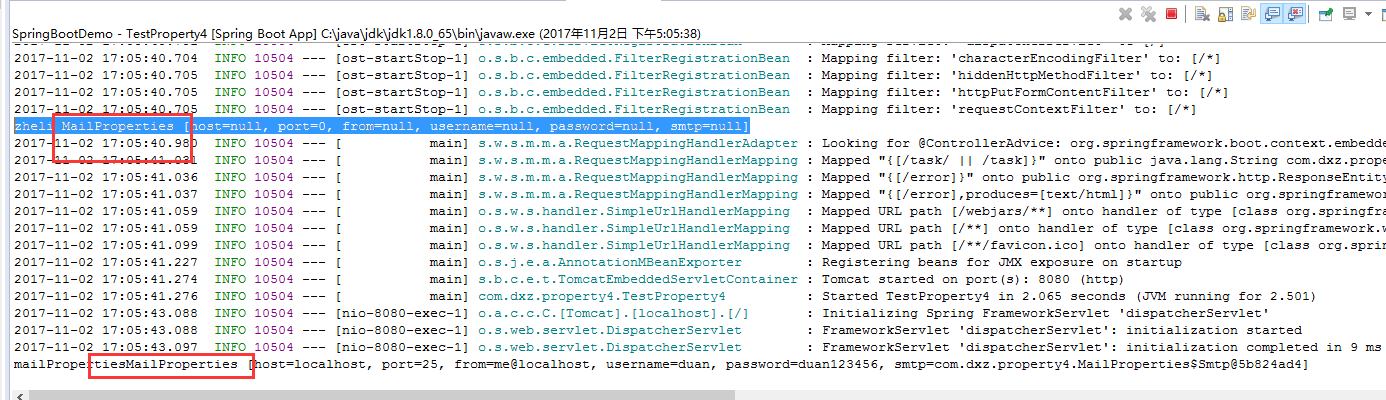
mailPropertiesMailProperties [host=localhost, port=25, from=me@localhost, username=duan, password=duan123456, smtp=com.dxz.property3.MailProperties$Smtp@37cebacb]
方案2:@Bean+@ConfigurationProperties
我们还可以把@ConfigurationProperties还可以直接定义在@bean的注解上,这是bean实体类就不用@Component和@ConfigurationProperties了
package com.dxz.property4;

public class MailProperties {

    private String host;

    private int port;

    private String from;

    private String username;

    private String password;

    private Smtp smtp;

    // ... getters and setters

    public String getHost() {

        return host;

    }

    public void setHost(String host) {

        this.host = host;

    }

    public int getPort() {

        return port;

    }

    public void setPort(int port) {

        this.port = port;

    }

    public String getFrom() {

        return from;

    }

    public void setFrom(String from) {

        this.from = from;

    }

    public String getUsername() {

        return username;

    }

    public void setUsername(String username) {

        this.username = username;

    }

    public String getPassword() {

        return password;

    }

    public void setPassword(String password) {

        this.password = password;

    }

    public Smtp getSmtp() {

        return smtp;

    }

    public void setSmtp(Smtp smtp) {

        this.smtp = smtp;

    }

    @Override

    public String toString() {

        return "MailProperties [host=" + host + ", port=" + port + ", from=" + from + ", username=" + username

                + ", password=" + password + ", smtp=" + smtp + "]";

    }

    public static class Smtp {

        private boolean auth;

        private boolean starttlsEnable;

        public boolean isAuth() {

            return auth;

        }

        public void setAuth(boolean auth) {

            this.auth = auth;

        }

        public boolean isStarttlsEnable() {

            return starttlsEnable;

        }

        public void setStarttlsEnable(boolean starttlsEnable) {

            this.starttlsEnable = starttlsEnable;

        }

    }

}
配置类(启动类)
package com.dxz.property4;

import org.springframework.boot.autoconfigure.SpringBootApplication;

import org.springframework.boot.builder.SpringApplicationBuilder;

import org.springframework.boot.context.properties.ConfigurationProperties;

import org.springframework.context.annotation.Bean;

@SpringBootApplication

public class TestProperty4 {

    @Bean

    @ConfigurationProperties(locations = "classpath:mail.properties", prefix = "mail")

    public MailProperties mailProperties(){

        MailProperties mp = new MailProperties();

        System.out.println("zheli " + mp);

        return mp;

    }

    public static void main(String[] args) {

        //SpringApplication.run(TestProperty1.class, args);

        new SpringApplicationBuilder(TestProperty4.class).web(true).run(args);

    }

}
测试类:
package com.dxz.property4;

import org.springframework.beans.factory.annotation.Autowired;

import org.springframework.web.bind.annotation.RequestMapping;

import org.springframework.web.bind.annotation.RestController;

@RestController

@RequestMapping("/task")

public class TaskController {

@Autowired

MailProperties mailProperties;

@RequestMapping(value = {"/",""})

public String hellTask(){

    System.out.println("mailProperties" +mailProperties);

    return "hello task !!";

}

}
结果:
方案3:@ConfigurationProperties + @EnableConfigurationProperties
我们和上面例子一样注解属性,然后用 Spring的@Autowire来注入 mail configuration bean:
package com.dxz.property;

import org.springframework.boot.context.properties.ConfigurationProperties;

@ConfigurationProperties(locations = "classpath:mail.properties", ignoreUnknownFields = false, prefix = "mail")

public class MailProperties {

    private String host;

    private int port;

    private String from;

    private String username;

    private String password;

    private Smtp smtp;

    // ... getters and setters

    public String getHost() {

        return host;

    }

    public void setHost(String host) {

        this.host = host;

    }

    public int getPort() {

        return port;

    }

    public void setPort(int port) {

        this.port = port;

    }

    public String getFrom() {

        return from;

    }

    public void setFrom(String from) {

        this.from = from;

    }

    public String getUsername() {

        return username;

    }

    public void setUsername(String username) {

        this.username = username;

    }

    public String getPassword() {

        return password;

    }

    public void setPassword(String password) {

        this.password = password;

    }

    public Smtp getSmtp() {

        return smtp;

    }

    public void setSmtp(Smtp smtp) {

        this.smtp = smtp;

    }

    @Override

    public String toString() {

        return "MailProperties [host=" + host + ", port=" + port + ", from=" + from + ", username=" + username

                + ", password=" + password + ", smtp=" + smtp + "]";

    }

    public static class Smtp {

        private boolean auth;

        private boolean starttlsEnable;

        public boolean isAuth() {

            return auth;

        }

        public void setAuth(boolean auth) {

            this.auth = auth;

        }

        public boolean isStarttlsEnable() {

            return starttlsEnable;

        }

        public void setStarttlsEnable(boolean starttlsEnable) {

            this.starttlsEnable = starttlsEnable;

        }

    }

}
启动类及测试类:
package com.dxz.property;

import org.springframework.beans.factory.annotation.Autowired;

import org.springframework.boot.autoconfigure.SpringBootApplication;

import org.springframework.boot.builder.SpringApplicationBuilder;

import org.springframework.boot.context.properties.EnableConfigurationProperties;

import org.springframework.web.bind.annotation.RequestMapping;

import org.springframework.web.bind.annotation.RequestMethod;

import org.springframework.web.bind.annotation.ResponseBody;

import org.springframework.web.bind.annotation.RestController;

@RestController

@SpringBootApplication

@EnableConfigurationProperties(MailProperties.class)

public class TestProperty1 {

    @Autowired

    private MailProperties mailProperties;

    @RequestMapping(value = "/hello", method = RequestMethod.GET)

    @ResponseBody

    public String hello() {

        System.out.println("mailProperties" + mailProperties);

        return "hello world";

    }

    public static void main(String[] args) {

        //SpringApplication.run(TestProperty1.class, args);

        new SpringApplicationBuilder(TestProperty1.class).web(true).run(args);

    }

}
结果:

请注意@EnableConfigurationProperties注解。该注解是用来开启对@ConfigurationProperties注解配置Bean的支持。也就是@EnableConfigurationProperties注解告诉Spring Boot 能支持@ConfigurationProperties。如果不指定会看到如下异常:
Caused by: org.springframework.beans.factory.NoSuchBeanDefinitionException: No qualifying bean of type [com.dxz.property.MailProperties] found for dependency: expected at least 1 bean which qualifies as autowire candidate for this dependency. Dependency annotations: {@org.springframework.beans.factory.annotation.Autowired(required=true)}
注意: 还有其他办法 (Spring Boot 总是有其他办法!) 让@ConfigurationProperties beans 被添加 – 用@Configuration或者 @Component注解, 这样就可以在 component scan时候被发现了。
总结:
@ConfigurationProperties很方便使用。 比用@Value注解好吗? 在特定的方案中是的,这只是一个选择问题。
看下Spring Boot的文档有更多的关于typesafe configuration 属性
转自原文:https://www.cnblogs.com/duanxz/p/4520571.html
在Spring Boot中使用 @ConfigurationProperties 注解, @EnableConfigurationProperties的更多相关文章
- 在Spring Boot中使用 @ConfigurationProperties 注解
但 Spring Boot 提供了另一种方式 ,能够根据类型校验和管理application中的bean. 这里会介绍如何使用@ConfigurationProperties.继续使用mail做例子. ...
- Spring Boot 中使用 @ConfigurationProperties 注解
@ConfigurationProperties 主要作用:绑定 application.properties 中的属性 例如: @Configuration public class DataSou ...
- 在Spring Boot中使用 @ConfigurationProperties 注解 (二十六)
@ConfigurationProperties主要作用:就是绑定application.properties中的属性 java代码 @Configuration public class DataS ...
- 利用 Spring Boot 中的 @ConfigurationProperties,优雅绑定配置参数
使用 @Value("${property}") 注释注入配置属性有时会很麻烦,尤其是当你使用多个属性或你的数据是分层的时候. Spring Boot 引入了一个可替换的方案 -- ...
- Spring Boot中使用MyBatis注解配置详解(1)
之前在Spring Boot中整合MyBatis时,采用了注解的配置方式,相信很多人还是比较喜欢这种优雅的方式的,也收到不少读者朋友的反馈和问题,主要集中于针对各种场景下注解如何使用,下面就对几种常见 ...
- 如何优雅地在 Spring Boot 中使用自定义注解,AOP 切面统一打印出入参日志 | 修订版
欢迎关注个人微信公众号: 小哈学Java, 文末分享阿里 P8 资深架构师吐血总结的 <Java 核心知识整理&面试.pdf>资源链接!! 个人网站: https://www.ex ...
- Spring Boot 中使用 @Transactional 注解配置事务管理
事务管理是应用系统开发中必不可少的一部分.Spring 为事务管理提供了丰富的功能支持.Spring 事务管理分为编程式和声明式的两种方式.编程式事务指的是通过编码方式实现事务:声明式事务基于 AOP ...
- Spring Boot中使用@Transactional注解配置事务管理
事务管理是应用系统开发中必不可少的一部分.Spring 为事务管理提供了丰富的功能支持.Spring 事务管理分为编程式和声明式的两种方式.编程式事务指的是通过编码方式实现事务:声明式事务基于 AOP ...
- Spring boot中相关的注解
一.相关类中使用的注解 @RestController:REST风格的控制器 @RequestMapping:配置URL和方法之间的映射 @SpringBootApplication:应用程序入口类 ...
随机推荐
- html5-Input类型
<html xmlns="http://www.w3.org/1999/xhtml"> <head> <title>html5-Input类型& ...
- Java类型信息
一.引言 最近在阅读<Java编程思想>,学习一下java类型信息,现在做一下总结.Java如何让我们在运行时识别对象和类的信息的.主要有两种方式:一种是传统的“RTTI”,它假定我们在编 ...
- bash 变量
本地变量: 变量赋值:name=value 变量引用:${name} , $name "":变量名会替换为其值 '':变量名不会替换为其值 查看变量: set 撤销变量:unse ...
- Google Protocol Buffer在vs2010下配置
1.从这里下载protobuf-2.6.1.tar.gz到桌面,并解压,解压后的文件夹为protobuf-2.6.1.(我的桌面为C:\Users\mcl\Desktop) 2 .进入文件夹proto ...
- shell中的变量a=100, 什么时候作整数使用, 什么时候作字符串使用呢?
shell中的变量a=100, 什么时候作整数使用, 什么时候作字符串使用呢? 这确实是一个困扰很久的一个问题? how it can be an issue? 事实上, 在shell中, 你可以认为 ...
- C# winfrom 当前程序内存读取和控制
https://zhidao.baidu.com/question/31914620.html https://www.cnblogs.com/xcsn/p/4678322.html Process ...
- 题解——Codeforces Round #508 (Div. 2) T1 (模拟)
依照题意暴力模拟即可A掉 #include <cstdio> #include <algorithm> #include <cstring> #include &l ...
- 题解——洛谷P3275 [SCOI2011]糖果
一道条件非常多的差分约束 把\( a < b \)转化为\( a-b \le -1\)就可做了 \( a>b \)的情况同理 若有负环则无解输出-1 注意本题中要求每个人都有糖果 所以假设 ...
- jdk1.8和tomcat9.0、maven3.5.0配置教程
一.jdk环境变量 JAVA_HOME :C:\Program Files\Java\jdk1.8.0_77(这个是你安装JDK时的路径,按照实际情况改成你自己的目录) CLASSPATH: .; ...
- Pandas 基础(2) - Dataframe 基础
上一节我们已经对 Dataframe 的概念做了一个简单的介绍, 这一节将具体看下它的一些基本用法: 首先, 准备一个 excel 文件, 大致内容如下, 并保存成 .csv 格式. 然后, 在 ju ...