[React] 08 - Tutorial: evolution of code-behind
有了七篇基础学习,了解相关的知识体系,之后便是系统地再来一次。
[React] 01 - Intro: javaScript library for building user interfaces
[React] 02 - Intro: react component and Design pattern
[React] 03 - Intro: react.js in twelve demos
[React] 04 - Intro: MongoDB becomes popular
[React] 05 - Route: connect with ExpressJS 【Nodejs + Express + MongoDB 基础篇】
[React] 06 - Route: koa makes your life easier
[React] 07 - Flux: react communicates with mongodb
From [React] 08, based on React JS Tutorials.
运行起来
1.Installs webpack globally on your system, that makes it available in terminal window.
npm i webpack -g
2.运行代码:
$ webpack-dev-server --content-base src
3.UI效果:数据绑定

client.js文件的进化
(1). render()返回值的思考
client.js
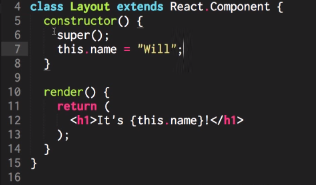
如果需返回多个东东,则使用<div>标签。
(2). Layout独立出来
client.js

import Layout from "./components/Layout";

const app = document.getElementById('app');  // html的app在哪里?

ReactDOM.render(<Layout/>, app);              // ----> 参见[对比1],第一个参数是组件内容,第二个是挂载位置
react会根据标签制定的位置来动态改变html内容。
index.html

<!DOCTYPE html>

<html>

  <head>

    <meta charset="utf-8">

    <title>React Tutorials</title>

    <!-- change this up! http://www.bootstrapcdn.com/bootswatch/ -->

    <link href="https://maxcdn.bootstrapcdn.com/bootswatch/3.3.6/cosmo/bootstrap.min.css" type="text/css" rel="stylesheet"/>

  </head>

  <body>

    <div id="app"></div>    // <---- 实际上成了一个变量,也即是react会根据标签制定的位置来动态改变

    <script src="client.min.js"></script>

  </body>

</html>
这里是 [对比1]:
ReactDOM.render(

  <div>

    <input type="text" value={value}/>        // 注意单标签一定要闭合“/”,否则会报错

    <button>{buttonName}</button>             // 在{}中插入变量

  </div>,

  document.getElementById("container")

)
(3). Louyout --> Header --> Title
将Header和Footer作为组件单独实现,也就是【复合组件】。
Layout.js

 render() {

    return (

      <div>

        <Header changeTitle={this.changeTitle.bind(this)} title={this.state.title} />

        <Footer />

      </div>

    );

  }
当然,Header也可以进一步地独立出来。
Header.js

import React from "react";

import Title from "./Header/Title";

export default class Header extends React.Component {

  handleChange(e) {

    const title = e.target.value;

    this.props.changeTitle(title);

  }

  render() {

    return (

      <div>

        <Title title={this.props.title} />

        <input value={this.props.title} onChange={this.handleChange.bind(this)} />

      </div>

    );

  }

}
Header中的标签Title的实现处。
Title.js

export default class Title extends React.Component {

  render() {

    return (

      <h1>{this.props.title}</h1>

    );

  }

}
执行流程
Header.js

import React from "react";

import Title from "./Header/Title";

export default class Header extends React.Component {

  handleChange(e) {        // e就是指:event

    // (1) 获得新的input数据

    const title = e.target.value;

    // (2) 然后改变title数据

    this.props.changeTitle(title);        // 第二步:在逻辑上,虚拟DOM需要改变title, according to input

    // (3) 之后命令layout渲染

  }

  render() {

    // input中的onChange作为listener,触发上面的handleChange()

    return (

      <div>

        <Title title={this.props.title} />

        <input value={this.props.title} onChange={this.handleChange.bind(this)} />        // 第一步:监听事件获得input改变
      </div>
    );
  }
改变title实际干活的地方,如下。
Layout.js

import React  from "react";

import Footer from "./Footer";

import Header from "./Header";

export default class Layout extends React.Component {

  constructor() {

    super();

    this.state = {

      title: "Welcome",

    };

  }

  changeTitle(title) {

    this.setState({title});

  }

  render() {

    return (

      <div>

        <Header changeTitle={this.changeTitle.bind(this)} title={this.state.title} />  // 将函数指针作为参数传给header子组件

        <Footer />

      </div>

    );

  }

}
可见,这里其实透露出的是一种“分离”的思想。
[React] 08 - Tutorial: evolution of code-behind的更多相关文章
- [React] 10 - Tutorial: router
Ref: REACT JS TUTORIAL #6 - React Router & Intro to Single Page Apps with React JS Ref: REACT JS ...
- React-Native(二):React Native开发工具vs code配置
从网上翻阅了一些开发react-native的开发工具时,发现其实可选的工具还是比较多的Sublime Text,WebStrom,Atom+Nuclide,vs code 等.因为我用.net生态环 ...
- [React] 09 - Tutorial: components
jsx变为js的过程:http://babeljs.io/repl/ youtube: https://www.youtube.com/channel/UCA-Jkgr40A9kl5vsIqg-BIg ...
- React.js Tutorial: React Component Lifecycle
Introduction about React component lifecycle. 1 Lifecycle A React component in browser can be any of ...
- [Full-stack] 快速上手开发 - React
故事背景 [1] 博客笔记结合<React快速上手开发>再次系统地.全面地走一遍. [2] React JS Tutorials:包含了JS --> React --> Red ...
- [Code::Blocks] Install wxWidgets & openCV
The open source, cross platform, free C++ IDE. Code::Blocks is a free C++ IDE built to meet the most ...
- 本人SW知识体系导航 - Programming menu
将感悟心得记于此,重启程序员模式. js, py, c++, java, php 融汇之全栈系列 [Full-stack] 快速上手开发 - React [Full-stack] 状态管理技巧 - R ...
- React调试——visual studio code
原文链接:Using React in Visual Studio Code 原文链接:Live edit and debug your React apps directly from VS Cod ...
- [React Native] Installing and Linking Modules with Native Code in React Native
Learn to install JavaScript modules that include native code. Some React Native modules include nati ...
随机推荐
- unity中HideFlags的利用
HideFlags主要用于控制物体在hierarchy,Inspector视图的显示销毁等的bit mask~ None:默认情况,正常可见对象~ API: HideInHierarchy:在Hier ...
- C# Request 获取Url
1.获取页面,HttpContext.Current.Request也是Request //获取当前页面url string myurl = System.Web.HttpContext.Curren ...
- C++泛型编程(2)--通过排序和查找元素理解迭代器
许多C++开源库(stl,opencv,ros和blas等)都使用了大量的泛型编程的思想,如果不理解这些思想,将很难看懂代码,而<泛型编程与STL>一书对理解泛型编程思想非常的有帮助,这里 ...
- python测试开发django-48.xadmin上传图片django-stdimage
前言 django通过自带的ImageField可以实现图片上传,如果想在列表页面也显示图片缩略图的话,可以用django-stdimage插件来实现 django-stdimage django-s ...
- 阿里ARouter使用及源码解析(一)
在app的开发中,页面之间的相互跳转是最基本常用的功能.在Android中的跳转一般通过显式intent和隐式intent两种方式实现的,而Android的原生跳转方式会存在一些缺点: 显式inten ...
- java多线程有哪些实际的应用场景?
多线程使用的主要目的在于: 1.吞吐量:你做WEB,容器帮你做了多线程,但是他只能帮你做请求层面的.简单的说,可能就是一个请求一个线程.或多个请求一个线程.如果是单线程,那同时只能处理一个用户的请求. ...
- Android架构初探
#一 背景点评美团合并之后,业务需要整合,我们部门的几条业务需要往美团平台迁移,为了降低迁移成本,开发和维护成本,以及将来可能要做的单元测试,需要对架构进行相应的调整.之前的代码都堆在Activity ...
- hive行转列
一.问题 hive如何将 a ,, b , c 转化成为: a a a b b c 二.原始数据 cat row_column.txt a ,, b , c 三.解决方案 3.1 遍历每一列 3.1. ...
- 使用Github添加标签
Github为我们提供了在页面上进行编辑发行版本的方式,如下图所示: 在Github上为项目打tag可在release页面,选择创建新tag并按下图所示填写即可.删除tag也同理.
- 【编码题篇】收集整理来自网络上的一些常见的 经典前端、H5面试题 Web前端开发面试题
编写一个方法 求一个字符串的字节长度假设:一个英文字符占用一个字节,一个中文字符占用两个字节 function GetBytes(str){ var len = str.length; var byt ...