SpringBoot入门学习(三)
基于第二讲,这一讲我们主要讲解包含以下内容
- springBoot添加对freemarker的支持
- 使用@RestController处理ajax请求
- 使用@PathVariable注解获取url参数
- 使用@RequestParam注解获取请求参数
(一)springBoot添加对freemarker的支持
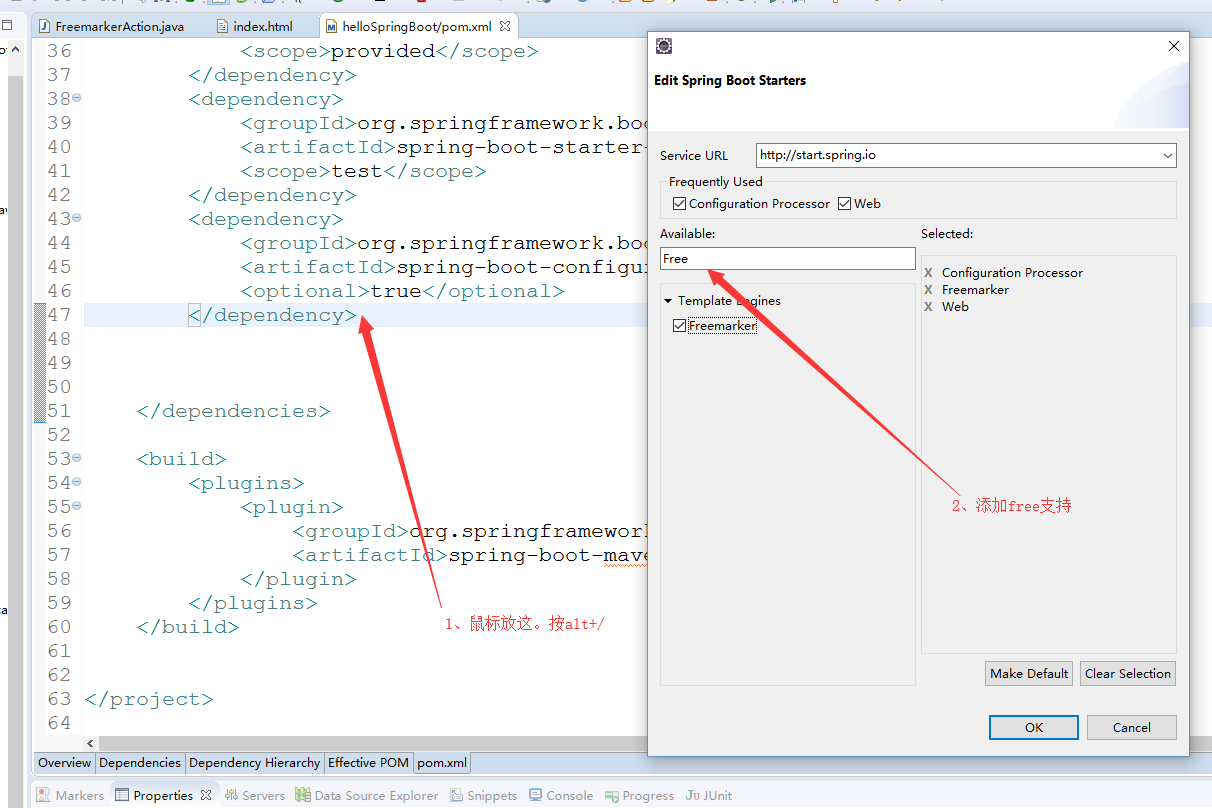
(1)首先要使用freemarker,我们需要添加对freemarker的支持,需要在pom.xml中添加依赖,操作如下
(2)编写FreemarkerAction,返回数据视图
package com.example.demo;

import org.springframework.stereotype.Controller;

import org.springframework.web.bind.annotation.RequestMapping;

import org.springframework.web.servlet.ModelAndView;

@Controller

@RequestMapping("/freemarker")

public class FreemarkerAction {

    @RequestMapping("/say")

    public ModelAndView say() {

        ModelAndView modelAndView = new ModelAndView();

        modelAndView.addObject("msg", "hello freemarker");

        modelAndView.setViewName("index");

        return modelAndView;

    }

}
(3)在templates目录下新建index.html,更改名为index.ftl,这个是Freemarker的格式要求,内容如下
<!DOCTYPE html>

<html>

<head>

<meta charset="UTF-8">

<title>Insert title here</title>

</head>

<body>

msg show :${msg}

</body>

</html>
(3)重启服务,访问http://localhost:8888/hello/freemarker/say,结果如下

(二)使用@RestController处理ajax请求
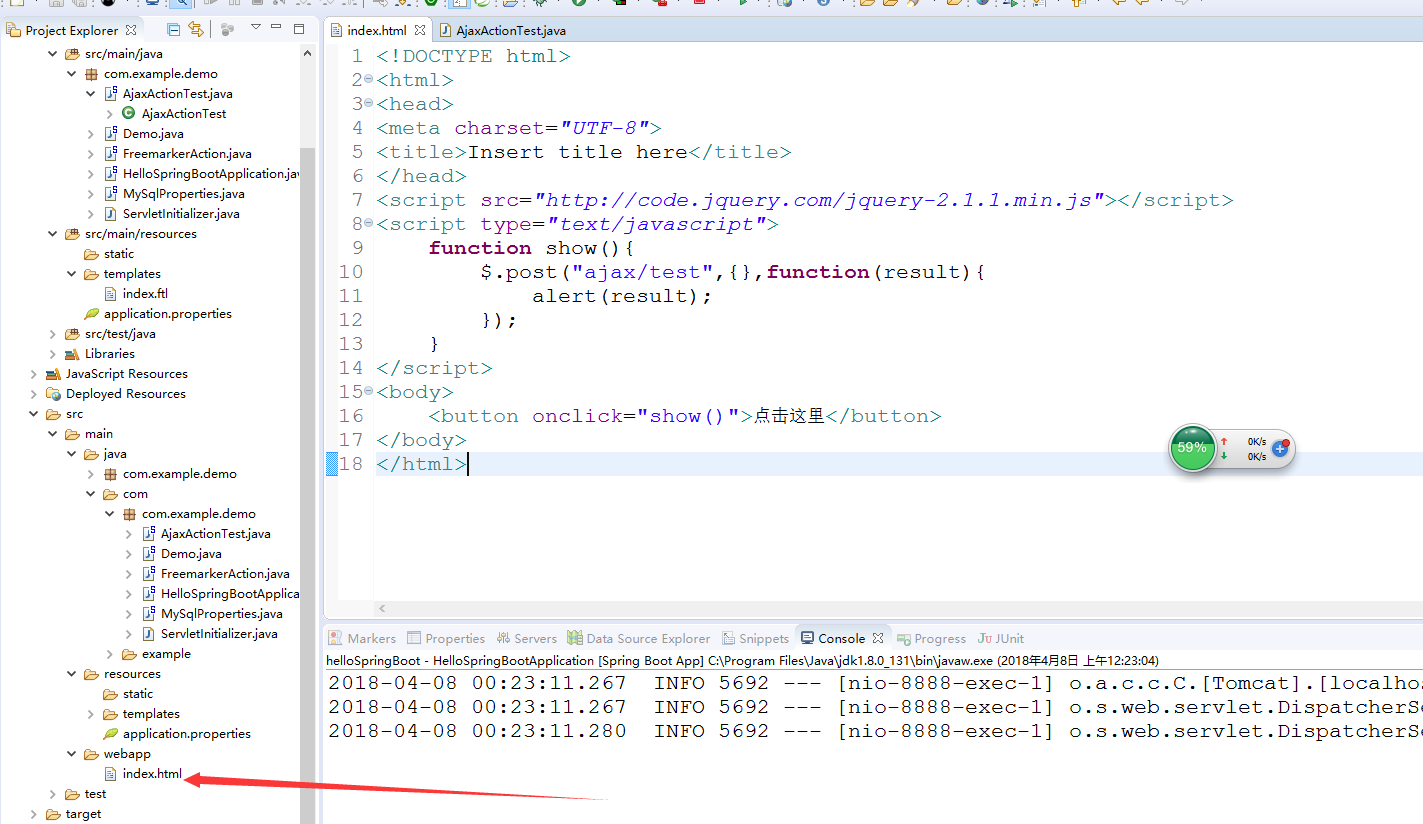
(1)在webapp目录下新增index.html,同时引用的是官网的jquery-2.1.1.min.js,内容如下
<!DOCTYPE html>

<html>

<head>

<meta charset="UTF-8">

<title>Insert title here</title>

</head>

<script src="http://code.jquery.com/jquery-2.1.1.min.js"></script>

<script type="text/javascript">

    function show(){

        $.post("ajax/test",{},function(result){

            alert(result);

        });

    }

</script>

<body>

    <button onclick="show()">点击这里</button>

</body>

</html>
(2)新增AjaxActionTest。内容如下:
package com.example.demo;

import org.springframework.web.bind.annotation.RequestMapping;

import org.springframework.web.bind.annotation.RestController;

@RestController

@RequestMapping("/ajax")

public class AjaxActionTest {

    @RequestMapping("/test")

    public String test() {

        return "{'name':'李四','age':'24'}";

    }

}
(3)重启服务。浏览器访问:http://localhost:8888/hello/

(三)使用@PathVariable注解获取url参数
(1)在类FreemarkerAction类中,新增方法say2,如下:
package com.example.demo;

import org.springframework.stereotype.Controller;

import org.springframework.web.bind.annotation.PathVariable;

import org.springframework.web.bind.annotation.RequestMapping;

import org.springframework.web.servlet.ModelAndView;

@Controller

@RequestMapping("/freemarker")

public class FreemarkerAction {

    @RequestMapping("/say")

    public ModelAndView say() {

        ModelAndView modelAndView = new ModelAndView();

        modelAndView.addObject("msg", "hello freemarker");

        modelAndView.setViewName("index");

        return modelAndView;

    }

    @RequestMapping("/{msg}")

    public ModelAndView say2(@PathVariable("msg") String msg) {

        ModelAndView modelAndView = new ModelAndView();

        modelAndView.addObject("msg", msg);

        modelAndView.setViewName("index");

        return modelAndView;

    }

}
(1)浏览器访问:http://localhost:8888/hello/freemarker/hellorestful,结果如下图:这种风格类似于restful的支持

(四)使用@RequestParam注解获取请求参数
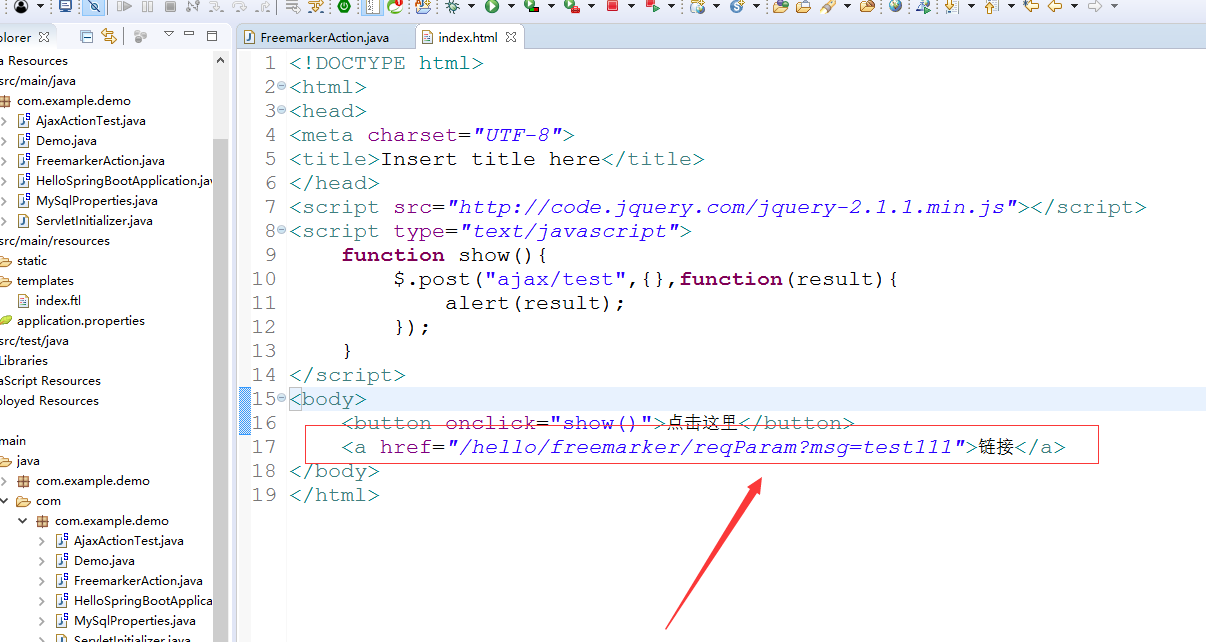
(1)在index.html中新增一个链接,如下图
(2)在FreemarkerAction新增方法 say3
package com.example.demo;

import org.springframework.stereotype.Controller;

import org.springframework.web.bind.annotation.PathVariable;

import org.springframework.web.bind.annotation.RequestMapping;

import org.springframework.web.bind.annotation.RequestParam;

import org.springframework.web.servlet.ModelAndView;

@Controller

@RequestMapping("/freemarker")

public class FreemarkerAction {

    @RequestMapping("/say")

    public ModelAndView say() {

        ModelAndView modelAndView = new ModelAndView();

        modelAndView.addObject("msg", "hello freemarker");

        modelAndView.setViewName("index");

        return modelAndView;

    }

    @RequestMapping("/{msg}")

    public ModelAndView say2(@PathVariable("msg") String msg) {

        ModelAndView modelAndView = new ModelAndView();

        modelAndView.addObject("msg", msg);

        modelAndView.setViewName("index");

        return modelAndView;

    }

    @RequestMapping("/reqParam")

    public ModelAndView say3(@RequestParam(value="msg",required=false) String msg) {

        ModelAndView modelAndView = new ModelAndView();

        modelAndView.addObject("msg", msg);

        modelAndView.setViewName("index");

        return modelAndView;

    }

}
(2)浏览器上访问http://localhost:8888/hello/ 点击链接 ,结果如下

SpringBoot入门学习(三)的更多相关文章
- SpringBoot入门(三)——入口类解析
本文来自网易云社区 上一篇介绍了起步依赖,这篇我们先来看下SpringBoot项目是如何启动的. 入口类 再次观察工程的Maven配置文件,可以看到工程的默认打包方式是jar格式的. <pack ...
- SCARA——OpenGL入门学习三
OpenGL入门学习[三] 在第二课中,我们学习了如何绘制几何图形,但大家如果多写几个程序,就会发现其实还是有些郁闷之处.例如:点太小,难以看清楚:直线也太细,不舒服:或者想画虚线,但不知道方法只能用 ...
- SpringBoot入门学习看这一篇就够了
1.SpringBoot是什么? SpringBoot是一套基于Spring框架的微服务框架. 2.为什么需要SpringBoot 由于Spring是一个轻量级的企业开发框架,主要的功能就是用于整合和 ...
- 【Java】SpringBoot入门学习及基本使用
SpringBoot入门及基本使用 SpringBoot的介绍我就不多说了,核心的就是"约定大于配置",接下来直接上干货吧! 本文的实例: github-LPCloud,欢迎sta ...
- dubbo入门学习(三)-----dubbo整合springboot
springboot节省了大量的精力去配置各种bean,因此通过一个简单的demo来整合springboot与dubbo 一.创建boot-user-service-provider 本篇博文基于上篇 ...
- springboot入门学习1
springboot学习1 SpringBoot对Spring的缺点进行的改善和优化,基于约定优于配置的思想,可以让开发人员不必在配置与逻辑 业务之间进行思维的切换,全身心的投入到逻辑业务的代码编写中 ...
- SpringBoot入门学习记录(一)
最近,SpringBoot.SpringCloud.Dubbo等框架非常流行,作为Coder里的一名小学生,借着改革开放的东风,自然也是需要学习学习的,于是将学习经历记录于此,以备日后查看. 官网:h ...
- SpringBoot入门学习(一)
Spring Boot是由Pivotal团队提供的全新框架,其设计目的是用来简化新Spring应用的初始搭建以及开发过程.该框架使用了特定的方式来进行配置,从而使开发人员不再需要定义样板化的配置.用我 ...
- SpringBoot入门教程(三)通过properties实现多个数据库环境自动切换配置
前面的文章已经介绍了CentOS部署SpringBoot项目从0到1的详细过程,包括Linux安装ftp.Tomcat以及Java jdk的全部过程.这篇文章主要介绍关于springboot如何通过多 ...
随机推荐
- 85、android handler的警告Handler Class Should be Static or Leaks Occur
转载:http://www.jcodecraeer.com/a/anzhuokaifa/androidkaifa/2014/1106/1922.html 在使用Handler更新UI的时候,我是这样写 ...
- mciSendCommand 音频视频播放命令函数
//打开设备 //typedef struct { //DWORD dwCallback; //指定一个窗口句柄 //MCIDEVICEID wDeviceID; //为成功打开的文 ...
- phpcms 列表页中调用其下的所有子栏目(或特定的子栏目)的方法
phpcms 列表页中,如何调用其下的所有子栏目(或特定的子栏目),具体的写法如下,感兴趣的朋友可以参考下,希望对大家有所帮助 代码如下: {pc:get sql="select * fro ...
- CH5E01 乌龟棋【线性DP】
5E01 乌龟棋 0x5E「动态规划」练习 描述 小明过生日的时候,爸爸送给他一副乌龟棋当作礼物.乌龟棋的棋盘是一行N 个格子,每个格子上一个分数(非负整数).棋盘第1 格是唯一的起点,第N 格是终点 ...
- Myeclipse中js总是报错
1.右键选择 MyEclipse-->Exclude From Validation .2.再右键选择 MyEclipse-->Run Validation 即可.
- local unversioned, incoming add upon update问题
当update的时候遇到如下问题 svn status D C ~/workspace/test/a.c > local unversioned, incoming add upon updat ...
- (转)android mock location
android mock location 2014-01-26 我来说两句 来源:党玉涛 收藏 我要投稿 现在软件市场上有很多可以改变手机地理位置的软件,更改后打开微信就可以随意定位 ...
- Enables DNS lookups on client IP addresses
w虚拟域名访问,路由可以到达,但无输出. http://httpd.apache.org/docs/2.2/mod/core.html#hostnamelookups
- xpath-grab english name
from scrapy.spider import Spider from scrapy.crawler import CrawlerProcess import pymysql conn = pym ...
- Python爬虫实例(二)使用selenium抓取斗鱼直播平台数据
程序说明:抓取斗鱼直播平台的直播房间号及其观众人数,最后统计出某一时刻的总直播人数和总观众人数. 过程分析: 一.进入斗鱼首页http://www.douyu.com/directory/all 进入 ...