SpringBoot入门学习(三)
基于第二讲,这一讲我们主要讲解包含以下内容
- springBoot添加对freemarker的支持
- 使用@RestController处理ajax请求
- 使用@PathVariable注解获取url参数
- 使用@RequestParam注解获取请求参数
(一)springBoot添加对freemarker的支持
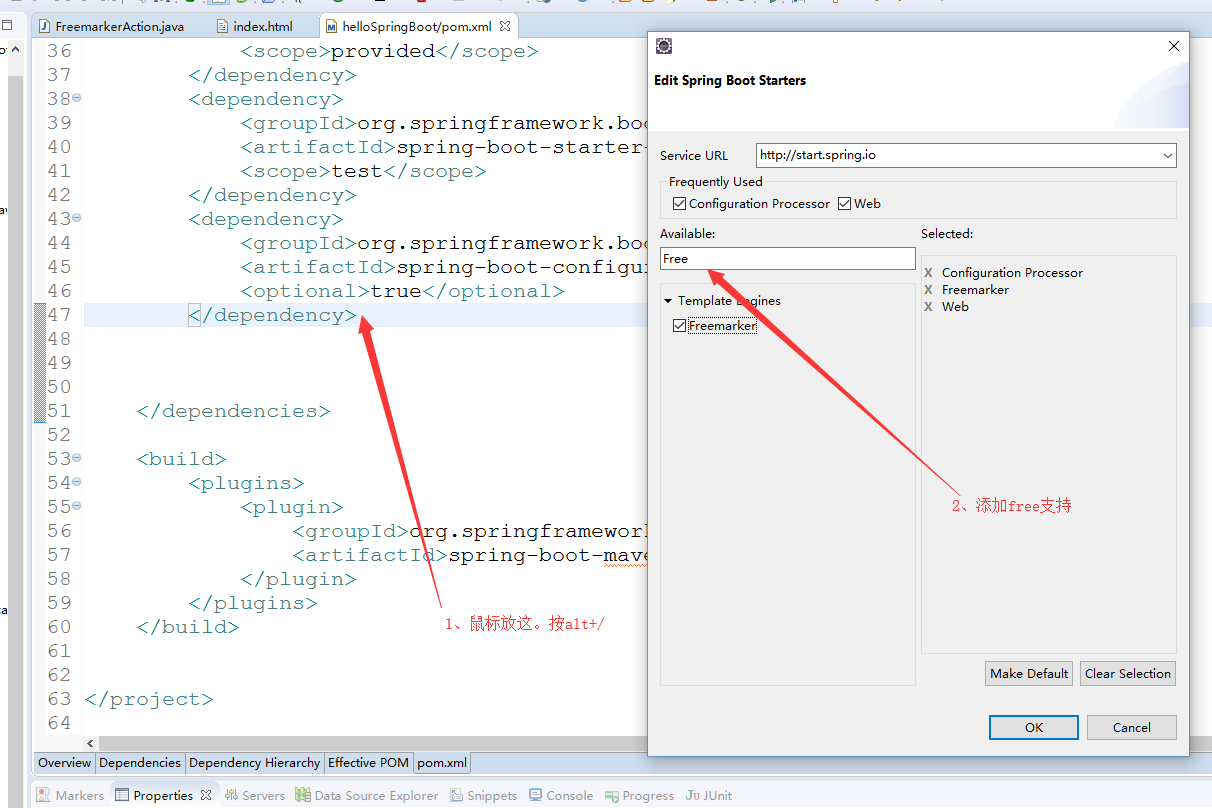
(1)首先要使用freemarker,我们需要添加对freemarker的支持,需要在pom.xml中添加依赖,操作如下
(2)编写FreemarkerAction,返回数据视图
package com.example.demo;

import org.springframework.stereotype.Controller;

import org.springframework.web.bind.annotation.RequestMapping;

import org.springframework.web.servlet.ModelAndView;

@Controller

@RequestMapping("/freemarker")

public class FreemarkerAction {

    @RequestMapping("/say")

    public ModelAndView say() {

        ModelAndView modelAndView = new ModelAndView();

        modelAndView.addObject("msg", "hello freemarker");

        modelAndView.setViewName("index");

        return modelAndView;

    }

}
(3)在templates目录下新建index.html,更改名为index.ftl,这个是Freemarker的格式要求,内容如下
<!DOCTYPE html>

<html>

<head>

<meta charset="UTF-8">

<title>Insert title here</title>

</head>

<body>

msg show :${msg}

</body>

</html>
(3)重启服务,访问http://localhost:8888/hello/freemarker/say,结果如下

(二)使用@RestController处理ajax请求
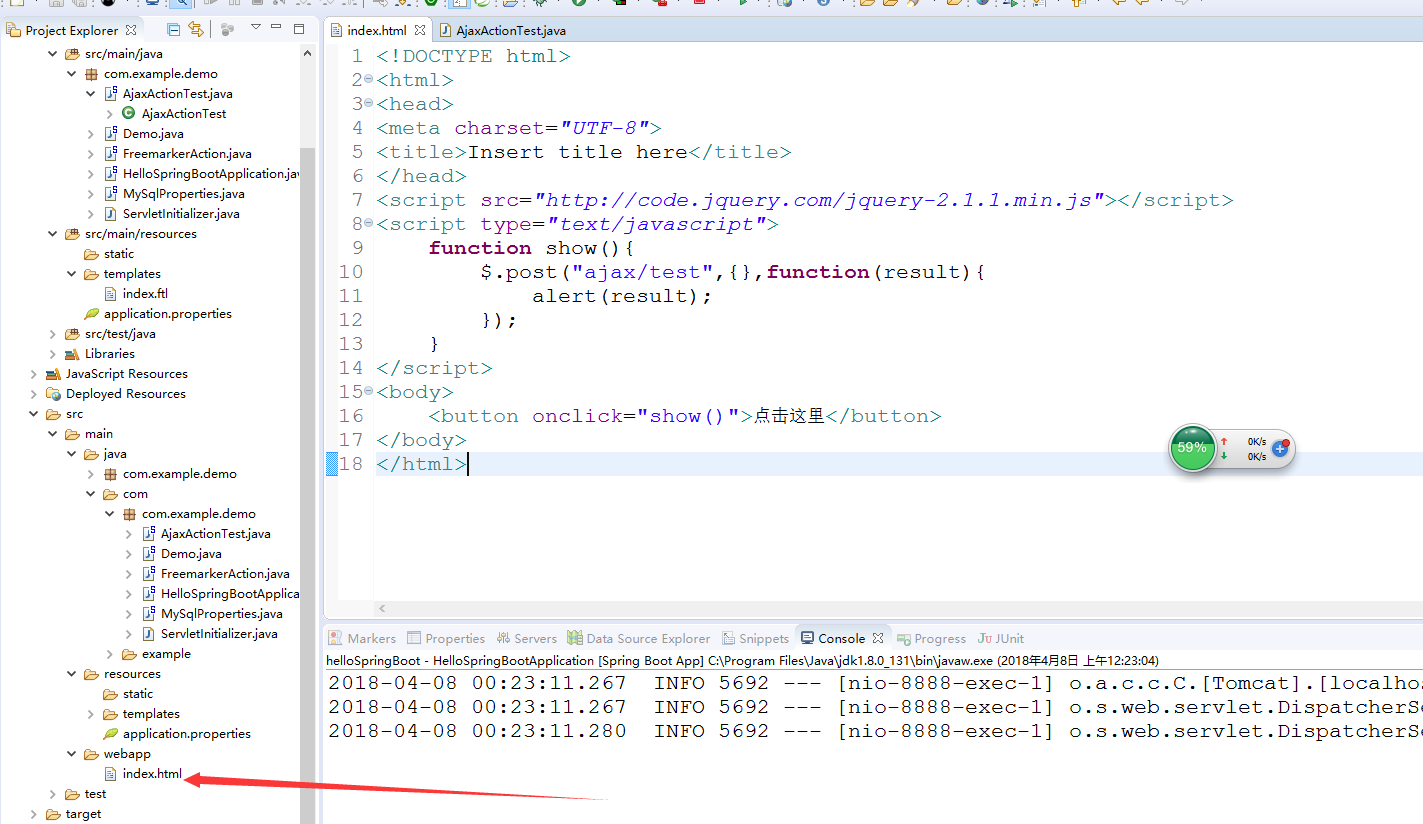
(1)在webapp目录下新增index.html,同时引用的是官网的jquery-2.1.1.min.js,内容如下
<!DOCTYPE html>

<html>

<head>

<meta charset="UTF-8">

<title>Insert title here</title>

</head>

<script src="http://code.jquery.com/jquery-2.1.1.min.js"></script>

<script type="text/javascript">

    function show(){

        $.post("ajax/test",{},function(result){

            alert(result);

        });

    }

</script>

<body>

    <button onclick="show()">点击这里</button>

</body>

</html>
(2)新增AjaxActionTest。内容如下:
package com.example.demo;

import org.springframework.web.bind.annotation.RequestMapping;

import org.springframework.web.bind.annotation.RestController;

@RestController

@RequestMapping("/ajax")

public class AjaxActionTest {

    @RequestMapping("/test")

    public String test() {

        return "{'name':'李四','age':'24'}";

    }

}
(3)重启服务。浏览器访问:http://localhost:8888/hello/

(三)使用@PathVariable注解获取url参数
(1)在类FreemarkerAction类中,新增方法say2,如下:
package com.example.demo;

import org.springframework.stereotype.Controller;

import org.springframework.web.bind.annotation.PathVariable;

import org.springframework.web.bind.annotation.RequestMapping;

import org.springframework.web.servlet.ModelAndView;

@Controller

@RequestMapping("/freemarker")

public class FreemarkerAction {

    @RequestMapping("/say")

    public ModelAndView say() {

        ModelAndView modelAndView = new ModelAndView();

        modelAndView.addObject("msg", "hello freemarker");

        modelAndView.setViewName("index");

        return modelAndView;

    }

    @RequestMapping("/{msg}")

    public ModelAndView say2(@PathVariable("msg") String msg) {

        ModelAndView modelAndView = new ModelAndView();

        modelAndView.addObject("msg", msg);

        modelAndView.setViewName("index");

        return modelAndView;

    }

}
(1)浏览器访问:http://localhost:8888/hello/freemarker/hellorestful,结果如下图:这种风格类似于restful的支持

(四)使用@RequestParam注解获取请求参数
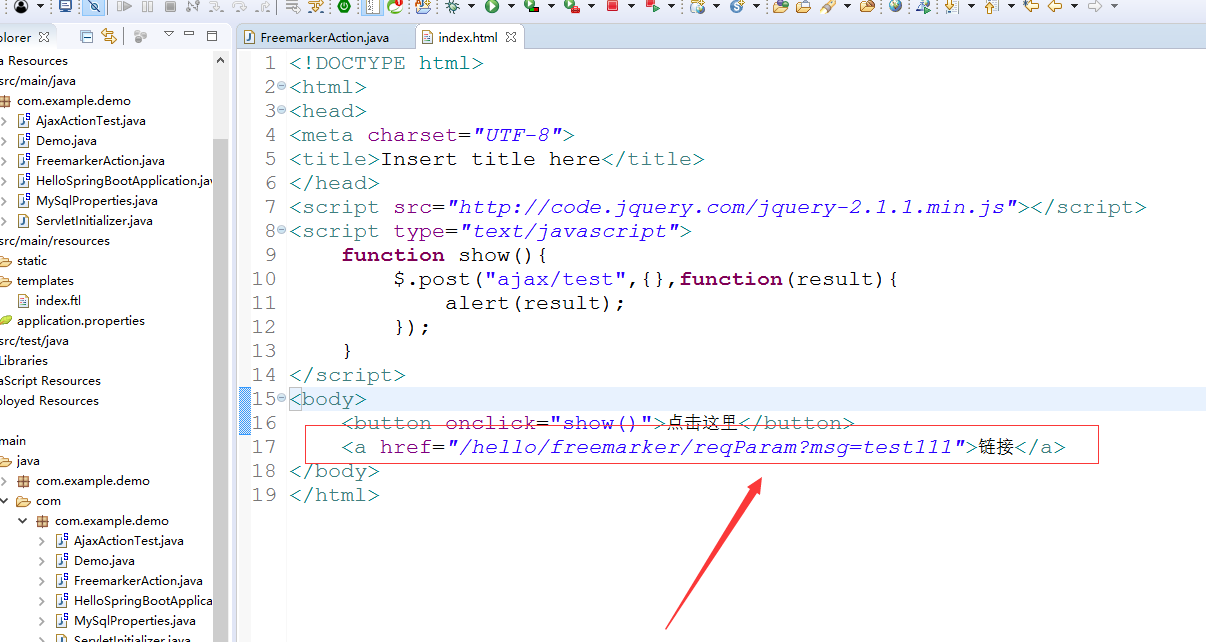
(1)在index.html中新增一个链接,如下图
(2)在FreemarkerAction新增方法 say3
package com.example.demo;

import org.springframework.stereotype.Controller;

import org.springframework.web.bind.annotation.PathVariable;

import org.springframework.web.bind.annotation.RequestMapping;

import org.springframework.web.bind.annotation.RequestParam;

import org.springframework.web.servlet.ModelAndView;

@Controller

@RequestMapping("/freemarker")

public class FreemarkerAction {

    @RequestMapping("/say")

    public ModelAndView say() {

        ModelAndView modelAndView = new ModelAndView();

        modelAndView.addObject("msg", "hello freemarker");

        modelAndView.setViewName("index");

        return modelAndView;

    }

    @RequestMapping("/{msg}")

    public ModelAndView say2(@PathVariable("msg") String msg) {

        ModelAndView modelAndView = new ModelAndView();

        modelAndView.addObject("msg", msg);

        modelAndView.setViewName("index");

        return modelAndView;

    }

    @RequestMapping("/reqParam")

    public ModelAndView say3(@RequestParam(value="msg",required=false) String msg) {

        ModelAndView modelAndView = new ModelAndView();

        modelAndView.addObject("msg", msg);

        modelAndView.setViewName("index");

        return modelAndView;

    }

}
(2)浏览器上访问http://localhost:8888/hello/ 点击链接 ,结果如下

SpringBoot入门学习(三)的更多相关文章
- SpringBoot入门(三)——入口类解析
本文来自网易云社区 上一篇介绍了起步依赖,这篇我们先来看下SpringBoot项目是如何启动的. 入口类 再次观察工程的Maven配置文件,可以看到工程的默认打包方式是jar格式的. <pack ...
- SCARA——OpenGL入门学习三
OpenGL入门学习[三] 在第二课中,我们学习了如何绘制几何图形,但大家如果多写几个程序,就会发现其实还是有些郁闷之处.例如:点太小,难以看清楚:直线也太细,不舒服:或者想画虚线,但不知道方法只能用 ...
- SpringBoot入门学习看这一篇就够了
1.SpringBoot是什么? SpringBoot是一套基于Spring框架的微服务框架. 2.为什么需要SpringBoot 由于Spring是一个轻量级的企业开发框架,主要的功能就是用于整合和 ...
- 【Java】SpringBoot入门学习及基本使用
SpringBoot入门及基本使用 SpringBoot的介绍我就不多说了,核心的就是"约定大于配置",接下来直接上干货吧! 本文的实例: github-LPCloud,欢迎sta ...
- dubbo入门学习(三)-----dubbo整合springboot
springboot节省了大量的精力去配置各种bean,因此通过一个简单的demo来整合springboot与dubbo 一.创建boot-user-service-provider 本篇博文基于上篇 ...
- springboot入门学习1
springboot学习1 SpringBoot对Spring的缺点进行的改善和优化,基于约定优于配置的思想,可以让开发人员不必在配置与逻辑 业务之间进行思维的切换,全身心的投入到逻辑业务的代码编写中 ...
- SpringBoot入门学习记录(一)
最近,SpringBoot.SpringCloud.Dubbo等框架非常流行,作为Coder里的一名小学生,借着改革开放的东风,自然也是需要学习学习的,于是将学习经历记录于此,以备日后查看. 官网:h ...
- SpringBoot入门学习(一)
Spring Boot是由Pivotal团队提供的全新框架,其设计目的是用来简化新Spring应用的初始搭建以及开发过程.该框架使用了特定的方式来进行配置,从而使开发人员不再需要定义样板化的配置.用我 ...
- SpringBoot入门教程(三)通过properties实现多个数据库环境自动切换配置
前面的文章已经介绍了CentOS部署SpringBoot项目从0到1的详细过程,包括Linux安装ftp.Tomcat以及Java jdk的全部过程.这篇文章主要介绍关于springboot如何通过多 ...
随机推荐
- C语言位运算+实例讲解(转)
按位或 按位与 按位异或 按位取反 左移右移 C语言位运算 有6种: &, | , ^(亦或), >(右移). 注意:参与位运算的元素必须是int型或者char型,以补码形式出现. 按位 ...
- Microsoft License Keys – Volume
VLK Product Group Product KeyOffice XP Applications P3HBK-F86Y2-374PQ-KW92R-B36VTOffice 2003 Suites ...
- linux shell 脚本使用
定义变量 fileName=text.txt 变量名称fileName,变量名称text.txt 使用变量 $fileName 用美元符号$开头,后面加变量名称,即可使用变量 使用用户输入参数 打印第 ...
- 技术宅之flappy bird 二逼鸟
师雪坤和刘阳 风靡一时的虐心小游戏<Flappy Bird>,以玩法简单.难度超高著称,不过,最近这款让全世界玩家几欲怒摔手机的游戏,被两位中国技术宅设计的"玩鸟机器人" ...
- PhoneGap在Mac环境下使用问题小结
PhoneGap在Mac环境下使用问题小结1,问题一:在执行命令phonegap run ios出现“Cordova needs ios-sim version 1.7 or greater, you ...
- DHCP服务原理
DHCP 工作原理 一.什么是DHCP? DHCP,动态主机配置协议,前身是BOOTP协议,是一个局域网的网络协议,使用UDP协议工作,常用的2个端口:67(DHCP server),68(DHCP ...
- 2017 Multi-University Training Contest - Team 4——HDU6069&&Counting Divisors
题目链接:http://acm.hdu.edu.cn/showproblem.php?pid=6069 题目意思:首先解释一下d[n]这个函数表示n有多少个因子,百度一下可以知道这个函数是一个非完全积 ...
- HTTP Transaction Delays
w客户端.服务器超载 HTTP The Definitive Guide 与建立TCP连接以及传输请求和相应报文的时间相比,事务处理的时间是很短的.除非客户端或服务器超载或正在处理复杂的动态资源,否则 ...
- Yii框架2.0的小部件
小部件是视图里的可重用单元. 小部件是在视图中使用的,但是可能需要使用控制器传给他的模型,比如在渲染表单的时候.比如一般的时间拾取器就可以直接砸视图里加入如下代码就可以: <?php use y ...
- 【chainer框架】【pytorch框架】
教程: https://bennix.github.io/ https://bennix.github.io/blog/2017/12/14/chain_basic/ https://bennix.g ...