openstack安装newton版本dashboard+cinder(六)
一、dashboard
1、安装dashboard及配置
[root@linux-node1 ~]# yum install openstack-dashboard -y   #可以装任何地方只要能连接

[root@linux-node1 ~]#  grep -n "^[a-Z]"   /etc/openstack-dashboard/local_settings

:import os

:from django.utils.translation import ugettext_lazy as _

:from openstack_dashboard import exceptions

:from openstack_dashboard.settings import HORIZON_CONFIG

:DEBUG = False

:WEBROOT = '/dashboard/'

:ALLOWED_HOSTS = ['*', 'localhost']

:OPENSTACK_API_VERSIONS = {

:OPENSTACK_KEYSTONE_DEFAULT_DOMAIN = 'default'

:LOCAL_PATH = '/tmp'

:SECRET_KEY='751890c0cef51ef6fbac'

:CACHES = {

:CACHES = {

:EMAIL_BACKEND = 'django.core.mail.backends.console.EmailBackend'

:OPENSTACK_HOST = "172.22.0.218"

:OPENSTACK_KEYSTONE_URL = "http://%s:5000/v2.0" % OPENSTACK_HOST

:OPENSTACK_KEYSTONE_DEFAULT_ROLE = "user"

:OPENSTACK_KEYSTONE_BACKEND = {

:OPENSTACK_HYPERVISOR_FEATURES = {

:OPENSTACK_CINDER_FEATURES = {

:OPENSTACK_NEUTRON_NETWORK = {

:OPENSTACK_HEAT_STACK = {

:IMAGE_CUSTOM_PROPERTY_TITLES = {

:IMAGE_RESERVED_CUSTOM_PROPERTIES = []

:API_RESULT_LIMIT =

:API_RESULT_PAGE_SIZE =

:SWIFT_FILE_TRANSFER_CHUNK_SIZE =  *

:INSTANCE_LOG_LENGTH =

:DROPDOWN_MAX_ITEMS =

: TIME_ZONE = "Asia/Shanghai"

:POLICY_FILES_PATH = '/etc/openstack-dashboard'

:LOGGING = {

:SECURITY_GROUP_RULES = {

:REST_API_REQUIRED_SETTINGS = ['OPENSTACK_HYPERVISOR_FEATURES',

:ALLOWED_PRIVATE_SUBNET_CIDR = {'ipv4': [], 'ipv6': []}

[root@linux-node1 ~]# systemctl restart httpd

[root@linux-node1 conf.d]# ls

autoindex.conf  openstack-dashboard.conf  README  userdir.conf  welcome.conf  wsgi-keystone.conf
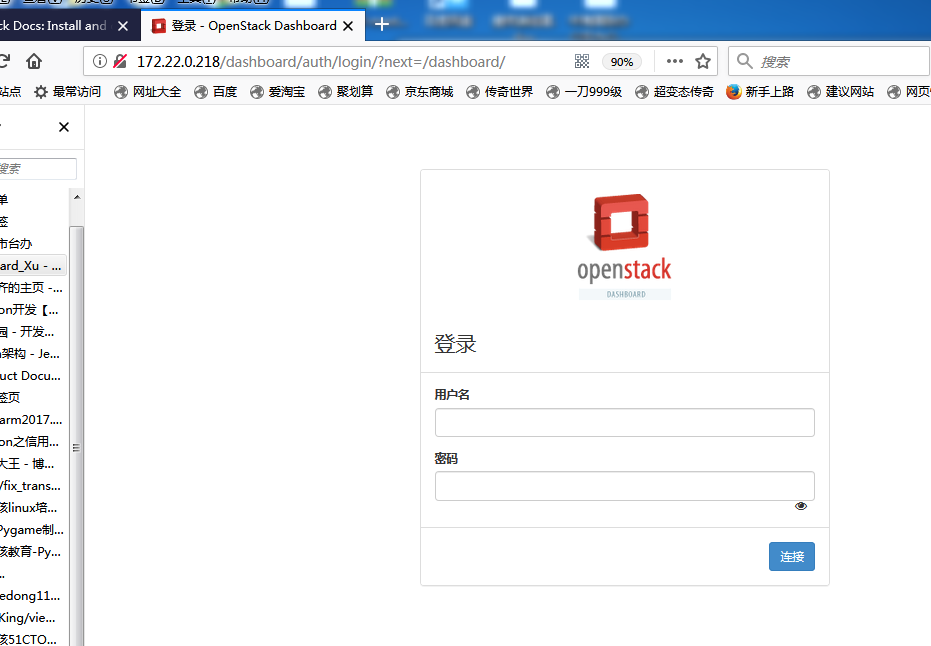
2、登录测试
二、cinder部署:
一)控制节点部署
1、安装及部署配置:
[root@linux-node1 ~]# yum install openstack-cinder

[root@linux-node1~]# vi /etc/cinder/cinder.conf

[DEFAULT]

transport_url = rabbit://openstack:RABBIT_PASS@controller

auth_strategy = keystone

my_ip = 172.22.0.218

enabled_backends = lvm

rpc_backend = rabbit

[database]

    connection = mysql+pymysql://cinder:cinder@172.22.0.218/cinder

[keystone_authtoken]

[keystone_authtoken]

auth_uri = http://172.22.0.218:5000

auth_url = http://172.22.0.218:35357

auth_plugin = password

memcached_servers = 172.22.0.218:

project_domain_id = d21d0715890447fb87f72e85dce6d4be

user_domain_id = d21d0715890447fb87f72e85dce6d4be

project_name = service

username = cinder

password = cinder

[oslo_concurrency]

lock_path = /var/lib/cinder/tmp

[oslo_messaging_rabbit]

rabbit_host = 172.22.0.218

rabbit_port =

rabbit_userid = openstack

rabbit_password = openstack

[root@linux-node1 ~]# grep -n "^[a-Z]" /etc/cinder/cinder.conf

:my_ip = 172.22.0.218

:auth_strategy = keystone

:enabled_backends = lvm

:rpc_backend = rabbit

:connection = mysql://cinder:cinder@172.22.0.218/cinder

:auth_uri = http://172.22.0.218:5000

:auth_url = http://172.22.0.218:35357

:auth_plugin = password

:memcached_servers = 172.22.0.218:

:project_domain_id = d21d0715890447fb87f72e85dce6d4be

:user_domain_id = d21d0715890447fb87f72e85dce6d4be

:project_name = service

:username = cinder

:password = cinder

:lock_path = /var/lib/cinder/tmp

:transport_url = rabbit://openstack:openstack@172.22.0.218

:rabbit_host = 172.22.0.218

:rabbit_port =

:rabbit_userid = openstack

:rabbit_password = openstack

[root@linux-node1 ~]# vi /etc/nova/nova.conf

[cinder]

os_region_name = RegionOne
2、同步数据库:
[root@linux-node1 ~]# su -s /bin/sh -c "cinder-manage db sync" cinder

检查:

[root@linux-node1 ~]# mysql -ucinder -pcinder -e "use cinder;show tables;"

+----------------------------+

| Tables_in_cinder           |

+----------------------------+

| backups                    |

| cgsnapshots                |

| clusters                   |

| consistencygroups          |

| driver_initiator_data      |

| encryption                 |

| group_snapshots            |

| group_type_projects        |

| group_type_specs           |

| group_types                |

| group_volume_type_mapping  |

| groups                     |

| image_volume_cache_entries |

| messages                   |

| migrate_version            |

| quality_of_service_specs   |

| quota_classes              |

| quota_usages               |

| quotas                     |

| reservations               |

| services                   |

| snapshot_metadata          |

| snapshots                  |

| transfers                  |

| volume_admin_metadata      |

| volume_attachment          |

| volume_glance_metadata     |

| volume_metadata            |

| volume_type_extra_specs    |

| volume_type_projects       |

| volume_types               |

| volumes                    |

| workers                    |

+----------------------------+
3、创建一个cinder用户,加入service项目,给予admin角色
[root@linux-node1 ~]# openstack user create --domain default --password-prompt cinder

Missing value auth-url required for auth plugin password

[root@linux-node1 ~]# source admin-openrc.sh

[root@linux-node1 ~]# openstack user create --domain default --password-prompt cinder

User Password:

Repeat User Password:

+---------------------+----------------------------------+

| Field               | Value                            |

+---------------------+----------------------------------+

| domain_id           | d21d0715890447fb87f72e85dce6d4be |

| enabled             | True                             |

| id                  | e86f70b51070480e877582499e946d43 |

| name                | cinder                           |

| password_expires_at | None                             |

+---------------------+----------------------------------+
4、重启nova-api服务和启动cinder服务
root@linux-node1 ~]# systemctl restart openstack-nova-api.service

[root@linux-node1 ~]# systemctl enable openstack-cinder-api.service openstack-cinder-scheduler.service

Created symlink from /etc/systemd/system/multi-user.target.wants/openstack-cinder-api.service to /usr/lib/systemd/system/openstack-cinder-api.service.

Created symlink from /etc/systemd/system/multi-user.target.wants/openstack-cinder-scheduler.service to /usr/lib/systemd/system/openstack-cinder-scheduler.service.

[root@linux-node1 ~]# systemctl start openstack-cinder-api.service openstack-cinder-scheduler.service
5、创建服务(包含V1和V2)
[root@linux-node1 ~]# openstack service create --name cinder   --description "OpenStack Block Storage" volume

+-------------+----------------------------------+

| Field       | Value                            |

+-------------+----------------------------------+

| description | OpenStack Block Storage          |

| enabled     | True                             |

| id          | b66ff1fce26541578a593ace098990ba |

| name        | cinder                           |

| type        | volume                           |

+-------------+----------------------------------+

[root@linux-node1 ~]#  openstack service create --name cinderv2   --description "OpenStack Block Storage" volumev2

+-------------+----------------------------------+

| Field       | Value                            |

+-------------+----------------------------------+

| description | OpenStack Block Storage          |

| enabled     | True                             |

| id          | 1fe87e672b714be0a278996bcce5cdf1 |

| name        | cinderv2                         |

| type        | volumev2                         |

+-------------+----------------------------------+
6、分别对V1和V2创建三个环境(admin,internal,public)的endpoint
[root@linux-node1 ~]# openstack endpoint create --region RegionOne   volume public http://172.22.0.218:8776/v1/%\(tenant_id\)s

+--------------+-------------------------------------------+

| Field        | Value                                     |

+--------------+-------------------------------------------+

| enabled      | True                                      |

| id           | 9847cc9ba7754ec0adad1539f4d00147          |

| interface    | public                                    |

| region       | RegionOne                                 |

| region_id    | RegionOne                                 |

| service_id   | b66ff1fce26541578a593ace098990ba          |

| service_name | cinder                                    |

| service_type | volume                                    |

| url          | http://172.22.0.218:8776/v1/%(tenant_id)s |

+--------------+-------------------------------------------+

[root@linux-node1 ~]# openstack endpoint create --region RegionOne   volume internal http://172.22.0.218:8776/v1/%\(tenant_id\)s

+--------------+-------------------------------------------+

| Field        | Value                                     |

+--------------+-------------------------------------------+

| enabled      | True                                      |

| id           | 889fb8a25cca4ef69f43a6555ae54e77          |

| interface    | internal                                  |

| region       | RegionOne                                 |

| region_id    | RegionOne                                 |

| service_id   | b66ff1fce26541578a593ace098990ba          |

| service_name | cinder                                    |

| service_type | volume                                    |

| url          | http://172.22.0.218:8776/v1/%(tenant_id)s |

+--------------+-------------------------------------------+

[root@linux-node1 ~]# openstack endpoint create --region RegionOne   volume admin http://172.22.0.218:8776/v1/%\(tenant_id\)s

+--------------+-------------------------------------------+

| Field        | Value                                     |

+--------------+-------------------------------------------+

| enabled      | True                                      |

| id           | 20b783947c7a4f1d949042e86c90f792          |

| interface    | admin                                     |

| region       | RegionOne                                 |

| region_id    | RegionOne                                 |

| service_id   | b66ff1fce26541578a593ace098990ba          |

| service_name | cinder                                    |

| service_type | volume                                    |

| url          | http://172.22.0.218:8776/v1/%(tenant_id)s |

+--------------+-------------------------------------------+

[root@linux-node1 ~]# openstack endpoint create --region RegionOne   volumev2 public http://172.22.0.218:8776/v2/%\(tenant_id\)s

+--------------+-------------------------------------------+

| Field        | Value                                     |

+--------------+-------------------------------------------+

| enabled      | True                                      |

| id           | df0bd47a768c4e618118c32db1dd56c0          |

| interface    | public                                    |

| region       | RegionOne                                 |

| region_id    | RegionOne                                 |

| service_id   | 1fe87e672b714be0a278996bcce5cdf1          |

| service_name | cinderv2                                  |

| service_type | volumev2                                  |

| url          | http://172.22.0.218:8776/v2/%(tenant_id)s |

+--------------+-------------------------------------------+

[root@linux-node1 ~]# openstack endpoint create --region RegionOne   volumev2 internal http://172.22.0.218:8776/v2/%\(tenant_id\)s

+--------------+-------------------------------------------+

| Field        | Value                                     |

+--------------+-------------------------------------------+

| enabled      | True                                      |

| id           | 9e3d7909a63b4c4cb2865025361330c7          |

| interface    | internal                                  |

| region       | RegionOne                                 |

| region_id    | RegionOne                                 |

| service_id   | 1fe87e672b714be0a278996bcce5cdf1          |

| service_name | cinderv2                                  |

| service_type | volumev2                                  |

| url          | http://172.22.0.218:8776/v2/%(tenant_id)s |

+--------------+-------------------------------------------+

[root@linux-node1 ~]# openstack endpoint create --region RegionOne   volumev2 admin http://172.22.0.218:8776/v2/%\(tenant_id\)s

+--------------+-------------------------------------------+

| Field        | Value                                     |

+--------------+-------------------------------------------+

| enabled      | True                                      |

| id           | 42bf5096ab4346e9b9bbd940e9cd4ad1          |

| interface    | admin                                     |

| region       | RegionOne                                 |

| region_id    | RegionOne                                 |

| service_id   | 1fe87e672b714be0a278996bcce5cdf1          |

| service_name | cinderv2                                  |

| service_type | volumev2                                  |

| url          | http://172.22.0.218:8776/v2/%(tenant_id)s |

+--------------+-------------------------------------------+
二)存储节点部署:
1、添加硬盘
[root@linux-node2 ~]# fdisk -l

Disk /dev/sda: 32.2 GB,  bytes,  sectors

Units = sectors of  *  =  bytes

Sector size (logical/physical):  bytes /  bytes

I/O size (minimum/optimal):  bytes /  bytes

Disk label type: dos

Disk identifier: 0x00066457

   Device Boot      Start         End      Blocks   Id  System

/dev/sda1   *                       Linux

/dev/sda2                    8e  Linux LVM

Disk /dev/sdb: 21.5 GB,  bytes,  sectors

Units = sectors of  *  =  bytes

Sector size (logical/physical):  bytes /  bytes

I/O size (minimum/optimal):  bytes /  bytes

Disk /dev/mapper/centos-root: 29.0 GB,  bytes,  sectors

Units = sectors of  *  =  bytes

Sector size (logical/physical):  bytes /  bytes

I/O size (minimum/optimal):  bytes /  bytes

Disk /dev/mapper/centos-swap:  MB,  bytes,  sectors

Units = sectors of  *  =  bytes

Sector size (logical/physical):  bytes /  bytes

I/O size (minimum/optimal):  bytes /  bytes

[root@linux-node2 ~]# systemctl start lvm2-lvmetad.service

创建一个pv和vg(名为cinder-volumes)

[root@linux-node2 ~]# pvcreate /dev/sdb

  Physical volume "/dev/sdb" successfully created.

[root@linux-node2 ~]# vgcreate cinder-volumes /dev/sdb

  Volume group "cinder-volumes" successfully created

修改lvm的配置文件中添加filter,只有instance可以访问

[root@linux-node2 ~]# vim /etc/lvm/lvm.conf

devices {

    filter = [ "a/sdb/", "r/.*/"]

    [root@linux-node2 ~]# systemctl enable lvm2-lvmetad.service

Created symlink from /etc/systemd/system/sysinit.target.wants/lvm2-lvmetad.service to /usr/lib/systemd/system/lvm2-lvmetad.service.

    [root@linux-node2 ~]# systemctl start lvm2-lvmetad.service
2、从控制节点拷贝配置文件修改
[root@linux-node1 ~]# scp /etc/cinder/cinder.conf 172.22.0.209:/etc/cinder/cinder.conf

[lvm]     #自己添加

volume_driver = cinder.volume.drivers.lvm.LVMVolumeDriver

volume_group = cinder-volumes

iscsi_protocol = iscsi

iscsi_helper = lioadm

[root@linux-node2 ~]# grep -n "^[a-Z]" /etc/cinder/cinder.conf

:my_ip = 172.22.0.209

:glance_api_servers = http://172.22.0.218:9292

:auth_strategy = keystone

:enabled_backends = lvm

:rpc_backend = rabbit

:connection = mysql://cinder:cinder@172.22.0.218/cinder

:auth_uri = http://172.22.0.218:5000

:auth_url = http://172.22.0.218:35357

:auth_plugin = password

:memcached_servers = 172.22.0.218:

:project_domain_id = d21d0715890447fb87f72e85dce6d4be

:user_domain_id = d21d0715890447fb87f72e85dce6d4be

:project_name = service

:username = cinder

:password = cinder

:lock_path = /var/lib/cinder/tmp

:transport_url = rabbit://openstack:openstack@172.22.0.218

:rabbit_host = 172.22.0.218

:rabbit_port =

:rabbit_userid = openstack

:rabbit_password = openstack

:volume_driver = cinder.volume.drivers.lvm.LVMVolumeDriver

:volume_group = cinder-volumes

:iscsi_protocol = iscsi

:iscsi_helper = lioadm
3、添加服务
[root@linux-node2 ~]# systemctl enable openstack-cinder-volume.service target.service

Created symlink from /etc/systemd/system/multi-user.target.wants/openstack-cinder-volume.service to /usr/lib/systemd/system/openstack-cinder-volume.service.

Created symlink from /etc/systemd/system/multi-user.target.wants/target.service to /usr/lib/systemd/system/target.service.

[root@linux-node2 ~]#

[root@linux-node2 ~]# systemctl start openstack-cinder-volume.service target.service
4、查看云硬盘服务状态(如果是虚拟机作为宿主机,时间不同步,会产生无法发现存储节点)
[root@linux-node1 ~]# source admin-openrc.sh

[root@linux-node1 ~]# openstack volume service list

[root@linux-node1 ~]# openstack volume service list

+------------------+-----------------+------+---------+-------+----------------------------+

| Binary           | Host            | Zone | Status  | State | Updated At                 |

+------------------+-----------------+------+---------+-------+----------------------------+

| cinder-scheduler | linux-node1     | nova | enabled | up    | --12T04::30.000000 |

| cinder-volume    | linux-node1     | nova | enabled | down  | --12T03::19.000000 |

| cinder-volume    | linux-node2@lvm | nova | enabled | up    | --12T04::21.000000 |

+------------------+-----------------+------+---------+-------+----------------------------+
至此可通过dashboard登录OpenStack查看云硬盘了!。
openstack安装newton版本dashboard+cinder(六)的更多相关文章
- openstack安装newton版本keyston部署(一)
一.部署环境: 两台centos7, 内存2G 控制计算节点: Hostname1: ip:172.22.0.218 计算节点及存储节点 Hostnam ...
- openstack安装newton版本neutron服务部署(四)
一.管理节点部署服务: 1.安装neutron: [root@linux-node1 ~]# yum install openstack-neutron openstack-neutron-ml2 o ...
- openstack安装newton版本Nova部署(三)
一.控制节点安装部署Nova Nova 包含API(负责接收相应外部请求,支持OpenStackAPI,EC2API):cert:负责身份认证:schedule:用于云主机调度(虚拟机创建在哪台主机上 ...
- openstack安装newton版本Glance部署(二)
一.部署Glance 1.Glance 安装 [root@linux-node1 ~]#yum install openstack-glance python-glance python-glance ...
- openstack安装newton版本创建虚拟机(五)
一.创建网络: 1.在控制节点上创建一个单一扁平网络(名字:flat),网络类型为flat,网络适共享的(share),网络提供者:physnet1,它是和eth0关联起来的 [root@linux- ...
- devstack安装openstack newton版本
准备使用devstack安装openstack N版,搞一套开发环境出来.一连整了4天,遇到各种问题,各种错误,一直到第4天下午4点多才算完成. 在这个过程中感觉到使用devstack搭建openst ...
- OpenStack Newton版本Ceph集成部署记录
2017年2月,OpenStack Ocata版本正式release,就此记录上一版本 Newton 结合Ceph Jewel版的部署实践.宿主机操作系统为CentOS 7.2 . 初级版: 192. ...
- 使用packstack安装pike版本的openstack
最近由于工作需要,需要调研安装pike版本的gnocchi.由于ceilometer与gnocchi版本的强相关性,所以需要部署一个同一版本的openstack环境,在同事的推荐下使用了packsta ...
- OpenStack Mitaka/Newton/Ocata/Pike 各版本功能贴整理
逝者如斯,刚接触OpenStack的时候还只是第9版本IceHouse.前几天也看到了刘大咖更新了博客,翻译了Mirantis博客文章<OpenStack Pike 版本中的 53 个新功能盘点 ...
随机推荐
- 华为机试 可怕的N阶乘
题目标题: 计算阶乘n!是一件可怕的事情,因为当n并不是很大时,n!将是一个很大的值.例如13! = 6227020800,已经超过了我们常用的unsigned int类型的取值范围.请设计一个程序, ...
- linux命令学习笔记(44):top命令
top命令是Linux下常用的性能分析工具,能够实时显示系统中各个进程的资源占用状况,类似于Windows的任务管 理器.下面详细介绍它的使用方法.top是一个动态显示过程,即可以通过用户按键来不断刷 ...
- 「P4994」「洛谷11月月赛」 终于结束的起点(枚举
题目背景 终于结束的起点终于写下句点终于我们告别终于我们又回到原点…… 一个个 OIer 的竞赛生涯总是从一场 NOIp 开始,大多也在一场 NOIp 中结束,好似一次次轮回在不断上演.如果这次 NO ...
- AndyQsmart ACM学习历程——ZOJ3870 Team Formation(位运算)
Description For an upcoming programming contest, Edward, the headmaster of Marjar University, is for ...
- CF 949D Curfew——贪心(思路!!!)
题目:http://codeforces.com/contest/949/problem/D 有二分答案的思路. 如果二分了一个答案,首先可知越靠中间的应该大约越容易满足,因为方便把别的房间的人聚集过 ...
- 洛谷P2014——选课
题目:https://www.luogu.org/problemnew/show/P2014 树状DP,注意枚举当前子树中选几个时的边界. 代码如下: #include<iostream> ...
- 前端PHP Session的实例
登陆例子:(请注意一定要自己敲一遍,不要CV大法) 首先上一下成果图,激起同学们写的欲望,登录页如下: 点击登陆之后如下: 说明哦了,么问题.接下来自己实现一下. 首先数据库信息: 新建一个名为 l ...
- AI-Info-Micron-Insight:在线购物算法的核心是强大的 DRAM
ylbtech-AI-Info-Micron-Insight:在线购物算法的核心是强大的 DRAM 1.返回顶部 1. 在线购物算法的核心是强大的 DRAM 网购已成为标准程序.你滚动浏览各种服装页面 ...
- ElementRef, @ViewChild & Renderer
ElementRef: In Angular2 Doc, it suggest to "avoid" using ElementRef. It access DOM directl ...
- python接口测试,第三方包xlrd和xlutils,怎么安装
第1个:xlrd的下载地址:https://pypi.python.org/pypi/xlrd/0.9.2 安装过程:下载后解压文件夹,使用cd命令行进入该文件夹后,用命令:python setup. ...