httpd安装与配置(编译安装)
httpd简介
httpd是Apache超文本传输协议(HTTP)服务器的主程序。被设计为一个独立运行的后台进程,它会建立一个处理请求的子进程或线程的池。
通常,httpd不应该被直接调用,而应该在类Unix系统中由apachectl调用,在Windows中作为服务运行。
httpd版本
主要介绍httpd的两大版本,httpd-2.2和httpd-2.4。
- CentOS6系列的版本默认提供的是httpd-2.2版本的rpm包
- CentOS7系列的版本默认提供的是httpd-2.4版本的rpm包
httpd特性
httpd有很多特性,下面分别介绍httpd2.2和httpd2.4各自的特性
httpd2.2
- 事先创建进程
- 按需维持适当的进程
- 模块化设计,核心比较小,各种功能通过模块添加(包括PHP),支持运行时配置,支持单独编译模块
- 支持多种方式的虚拟主机配置,如基于ip的虚拟主机,基于端口的虚拟主机,基于域名的虚拟主机等
- 支持https协议(通过mod_ssl模块实现)
- 支持用户认证
- 支持基于IP或域名的ACL访问控制机制
- 支持每目录的访问控制(用户访问默认主页时不需要提供用户名和密码,但是用户访问某特定目录时需要提供用户名和密码)
- 支持URL重写
- 支持MPM(Multi Path Modules,多处理模块)。用于定义httpd的工作模型(单进程、单进程多线程、多进程、多进程单线程、多进程多线程)
httpd2.4
- MPM支持运行DSO机制(Dynamic Share Object,模块的动态装/卸载机制),以模块形式按需加载
- 支持event MPM,eventMPM模块生产环境可用
- 支持异步读写
- 支持每个模块及每个目录分别使用各自的日志级别
- 每个请求相关的专业配置,使用来配置
- 增强版的表达式分析器
- 支持毫秒级的keepalive timeout
- 基于FQDN的虚拟主机不再需要NameVirtualHost指令
- 支持用户自定义变量
- 支持新的指令(AllowOverrideList)
- 降低对内存的消耗
工作模型:
- prefork:多进程模型,预先生成进程,一个请求用一个进程响应
一个主进程负责生成n个子进程,子进程也称为工作进程
每个子进程处理一个用户请求,即使没有用户请求,也会预先生成多个空闲进程,随时等待请求到达,最大不会超过1024个 - woker:基于线程工作,一个请求用一个线程响应(启动多个进程,每个进程生成多个线程)
- event:基于事件的驱动,一个进程处理多个请求
httpd2.4新增模块
- mod_proxy_fcgi:反向代理时支持apache服务器后端协议的模块
- mod_ratelimit:提供速率限制功能的模块
- mod_remoteip:基于ip的访问控制机制被改变,不再支持使用Order,Deny,Allow来做基于IP的访问控制
httpd基础
httpd自带工具
| 工具 | 功能 |
|---|---|
| htpasswd | basic认证基于文件实现时,用到的帐号密码生成工具 |
| apachectl | httpd自带的服务控制脚本,支持start,stop,restart |
| apxs | 由httpd-devel包提供的,扩展httpd使用第三方模块的工具 |
| rotatelogs | 日志滚动工具 |
| suexec | 访问某些有特殊权限配置的资源时,临时切换至指定用户运行的工具 |
| ab | apache benchmark,httpd的压力测试工具 |
rpm包安装的httpd程序环境
| 文件/目录 | 对应的功能 |
|---|---|
| /var/log/httpd/access.log | 访问日志 |
| /var/log/httpd/error_log | 错误日志 |
| /var/www/html/ | 站点文档目录 |
| /usr/lib64/httpd/modules/ | 模块文件路径 |
| /etc/httpd/conf/httpd.conf | 主配置文件 |
| /etc/httpd/conf.modules.d/*.conf | 模块配置文件 |
| /etc/httpd/conf.d/*.conf | 辅助配置文件 |
mpm:以DSO机制提供,配置文件为/etc/httpd/conf.modules.d/00-mpm.conf
编译安装httpd-2.4
除了编译安装外也可以使用yum安装,这里只是为了演示一下如何编译安装httpd
httpd有三个依赖:apr-1.4+,apr-util-1.4+,[apr-icon]
安装顺序:apr -> apr-util -> httpd
#安装开发环境

[root@lynkser ~]# yum groupinstall "Development Tools"

#添加一个服务用的用户

[root@lynkser ~]# groupadd -r apache

[root@lynkser ~]# useradd -r -g apache -M -s /bin/nologin apache

#安装前置工具

[root@lynkser ~]# yum -y install openssl-devel pcre-devel expat-devel libtool

#下载所需的源码包,各位可以各自从常用的站点下载,我这里已经下好了

[root@lynkser ~]# cd /usr/src

[root@lynkser src]# ls

apr-1.6.3.tar.bz2  apr-util-1.6.1.tar.bz2  debug  httpd-2.4.34.tar.bz2  kernels

#解压源码包

[root@lynkser src]# tar -xf apr-1.6.3.tar.bz2

[root@lynkser src]# tar -xf apr-util-1.6.1.tar.bz2

[root@lynkser src]# tar -xf httpd-2.4.34.tar.bz2

#修改一下apr的配置文件,避免出问题。

[root@lynkser src]# cd apr-1.6.3/

[root@lynkser apr-1.6.3]# vim configure

    cfgfile=${ofile}T

    trap "$RM \"$cfgfile\"; exit 1" 1 2 15

#   $RM "$cfgfile" #注释掉这一行

#编译安装apr

[root@lynkser apr-1.6.3]# ./configure --prefix=/usr/local/apr

[root@lynkser apr-1.6.3]# make && make install

#编译安装apr-util

[root@lynkser apr-1.6.3]# cd /usr/src/apr-util-1.6.1

[root@lynkser apr-util-1.6.1]# ./configure --prefix=/usr/local/apr-util --with-apr=/usr/local/apr

[root@lynkser apr-util-1.6.1]# make && make install

#编译安装httpd

[root@lynkser src]# cd /usr/src/httpd-2.4.34/

[root@lynkser httpd-2.4.34]# ./configure --prefix=/usr/local/apache \

--sysconfdir=/etc/httpd24 \

--enable-so \

--enable-ssl \

--enable-cgi \

--enable-rewrite \

--with-zlib \

--with-pcre \

--with-apr=/usr/local/apr \

--with-apr-util=/usr/local/apr-util/ \

--enable-modules=most \

--enable-mpms-shared=all \

--with-mpm=prefork

#上面整个都要输入进去,后面的列表里是我们的依赖和各种要启动和安装的模块

[root@lynkser httpd-2.4.34]# make && make install
httpd常用配置
切换使用MPM
#yum安装的情况下

[root@lynkser ~]# cd /etc/httpd/conf.modules.d

[root@lynkser conf.modules.d]# ls

00-base.conf  00-lua.conf  00-proxy.conf    01-cgi.conf

00-dav.conf   00-mpm.conf  00-systemd.conf

[root@lynkser conf.modules.d]# vim 00-mpm.conf

# Select the MPM module which should be used by uncommenting exactly

# one of the following LoadModule lines:

# prefork MPM: Implements a non-threaded, pre-forking web server

# See: http://httpd.apache.org/docs/2.4/mod/prefork.html

LoadModule mpm_prefork_module modules/mod_mpm_prefork.so

#编译安装的情况下

[root@lynkser ~]# vim /etc/httpd24/httpd.conf

# To be able to use the functionality of a module which was built as a DSO you

# have to place corresponding `LoadModule' lines at this location so the

# directives contained in it are actually available _before_ they are used.

# Statically compiled modules (those listed by `httpd -l') do not need

# to be loaded here.

#

# Example:

# LoadModule foo_module modules/mod_foo.so

#

#LoadModule mpm_event_module modules/mod_mpm_event.so

LoadModule mpm_prefork_module modules/mod_mpm_prefork.so
访问控制法则
| 法则 | 功能 |
|---|---|
| Require all granted | 允许所有主机访问 |
| Require all deny | 拒绝所有主机访问 |
| Require ip IPADDR | 授权指定来源地址的主机访问 |
| Require not ip IPADDR | 拒绝指定来源地址的主机访问 |
| Require host HOSTNAME | 授权指定来源主机名的主机访问 |
| Require not host HOSTNAME | 拒绝指定来源主机名的主机访问 |
IPADDR的类型:
- IP:192.168.1.1
- Network/mask:192.168.1.0/255.255.255.0
- Network/Length:192.168.1.0/24
- Net:192.168
HOSTNAME的类型
- FQDN:特定主机的全名
- DOMAIN:指定域名内的所有主机
http-2.4版本默认拒绝所有主机访问,安装后必须做显示授权访问
示例:
<Directory /var/www/html/www>

    <RequireAll>

        Require not ip 192.168.26.128

        Require all granted

    </RequireAll>

</Directory>
虚拟主机
虚拟主机有三类:
- 相同IP的不同端口
- 不同IP的相同端口
- 相同IP相同端口的不同域名
#设置主机名
#编译安装的情况下
[root@lynkser ~]# vim /etc/httpd24/httpd.conf
#要编辑的内容和其他操作和yum安装是相同的
#yum安装的情况下
[root@lynkser ~]# vim /etc/httpd/conf/httpd.conf
# ServerAdmin: Your address, where problems with the server should be
# e-mailed. This address appears on some server-generated pages, such
# as error documents. e.g. admin@your-domain.com
#
ServerAdmin root@localhost
#
# ServerName gives the name and port that the server uses to identify itself.
# This can often be determined automatically, but we recommend you specify
# it explicitly to prevent problems during startup.
#
# If your host doesn't have a registered DNS name, enter its IP address here.
#
ServerName www.example.com:80
#在文件最后加上如下内容:
#virtual host 1 #虚拟主机1的配置
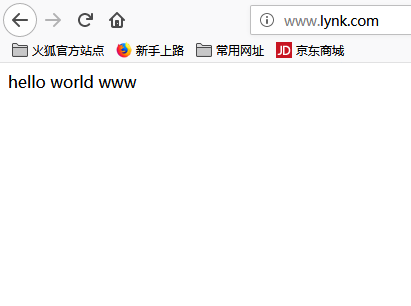
<VirtualHost 192.168.26.129:80> #写自己的IP
ServerName www.lynk.com #写自己的IP
DocumentRoot "/var/www/html/www"
ErrorLog "/var/log/httpd/www/error_log"
CustomLog "/var/log/httpd/www/access_log" combined
<Directory /var/www/html/www>
<RequireAll>
Require all granted
Require not ip 192.168.1
</RequireAll>
</Directory>
</VirtualHost>
# virtual host 2 #虚拟主机2的配置
<VirtualHost 192.168.26.129:80> #写自己的IP
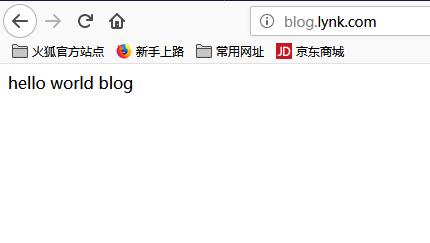
ServerName blog.lynk.com #写自己的域名
DocumentRoot "/var/www/html/blog"
ErrorLog "/var/log/httpd/blog/error_log"
CustomLog "/var/log/httpd/blog/access_log" combined
<Directory /var/www/html/blog>
<RequireAll>
Require all granted
</RequireAll>
</Directory>
</VirtualHost>
#创建网页目录并修改属主和属组
[root@lynkser var]# mkdir -p /var/www/html
[root@lynkser var]# cd /var/www/html
[root@lynkser html]# mkdir www blog
[root@lynkser html]# ll
total 0
drwxr-xr-x. 2 root root 6 Jan 16 01:34 blog
drwxr-xr-x. 2 root root 6 Jan 16 01:34 www
[root@lynkser html]# chown -R apache.apache blog
[root@lynkser html]# chown -R apache.apache www
[root@lynkser html]# ll
total 0
drwxr-xr-x. 2 apache apache 6 Jan 16 01:34 blog
drwxr-xr-x. 2 apache apache 6 Jan 16 01:34 www
#创建网页
[root@lynkser html]# echo "hello world www" > www/index.html
[root@lynkser html]# echo "hello world blog" > blog/index.html
#创建对应网页的日志目录
[root@lynkser html]# mkdir -p /var/log/httpd/{www,blog}
[root@lynkser html]# chown -R apache.apache /var/log/httpd/
[root@lynkser html]# ll /var/log/httpd/
total 0
drwxr-xr-x. 2 apache apache 6 Jan 16 01:39 blog
drwxr-xr-x. 2 apache apache 6 Jan 16 01:39 www
#添加防火墙规则
[root@lynkser ~]# firewall-cmd --add-service=http --permanent
[root@lynkser ~]# firewall-cmd --reload
#查看有没有开启防火墙的http服务允许规则
[root@lynkser ~]# firewall-cmd --list-services
#启动服务
#使用yum安装的情况下
[root@lynkser ~]# systemctl start httpd
#使用编译安装的情况下
[root@lynkser ~]# /usr/local/apache/bin/apachectl start
#查看有没有80端口
[root@lynkser ~]# ss -antl
State Recv-Q Send-Q Local Address:Port Peer Address:Port
LISTEN 0 128 *:111 *:*
LISTEN 0 128 *:22 *:*
LISTEN 0 100 127.0.0.1:25 *:*
LISTEN 0 128 :::111 :::*
LISTEN 0 128 :::80 :::*
LISTEN 0 128 :::22 :::*
LISTEN 0 100 ::1:25 :::*
在客户机上打开浏览器验证
如果没有DNS,需要修改hosts,请自行修改,不做演示
实例
需求:
- 安装配置httpd,令其可以访问已有网页index.html
- 要求来自于192.168.26.0/24的客户端可以访问网页,而其他IP的用户不可以
[root@lynkser ~]# yum install -y httpd

[root@lynkser ~]# systemctl mask iptables.service ebtables.service

Created symlink from /etc/systemd/system/iptables.service to /dev/null.

Created symlink from /etc/systemd/system/ebtables.service to /dev/null.

[root@lynkser ~]# systemctl stop iptables ebtables

[root@lynkser ~]# firewall-cmd --add-rich-rule 'rule family=ipv4 source address=192.168.26.0/24 service name=http accept' --permanent

success

[root@lynkser ~]# firewall-cmd --reload

success

[root@lynkser ~]# systemctl start httpd

[root@lynkser ~]# systemctl enable httpd

Created symlink from /etc/systemd/system/multi-user.target.wants/httpd.service to /usr/lib/systemd/system/httpd.service.
- 为站点配置SSL加密,签名证书为server30.crt,密钥为server30.key,证书授权信息为group30.crt
[root@lynkser ~]# yum install -y mod_ssl

[root@lynkser tls]# ls /etc/pki/tls/certs/ |grep server30.crt

server30.crt

[root@lynkser tls]# ls /etc/pki/tls/private/ |grep server30.key

server30.key

[root@lynkser certs]# ls /etc/pki/tls/certs/ |grep group30.crt

group30.crt

[root@lynkser tls]# vim /etc/httpd/conf.d/ssl.conf

# General setup for the virtual host, inherited from global configuration

#DocumentRoot "/var/www/html"

ServerName server30.example.com:443

#   Server Certificate Chain:

#   Point SSLCertificateChainFile at a file containing the

#   concatenation of PEM encoded CA certificates which form the

#   certificate chain for the server certificate. Alternatively

#   the referenced file can be the same as SSLCertificateFile

#   Server Certificate:

# Point SSLCertificateFile at a PEM encoded certificate.  If

# the certificate is encrypted, then you will be prompted for a

# pass phrase.  Note that a kill -HUP will prompt again.  A new

# certificate can be generated using the genkey(1) command.

SSLCertificateFile /etc/pki/tls/certs/server30.crt

#   Server Private Key:

#   If the key is not combined with the certificate, use this

#   directive to point at the key file.  Keep in mind that if

#   you've both a RSA and a DSA private key you can configure

#   both in parallel (to also allow the use of DSA ciphers, etc.)

SSLCertificateKeyFile /etc/pki/tls/private/server30.key

#   Certificate Authority (CA):

#   Set the CA certificate verification path where to find CA

#   certificates for client authentication or alternatively one

#   huge file containing all of them (file must be PEM encoded)

SSLCACertificateFile /etc/pki/tls/certs/group30.crt

[root@lynkser tls]# systemctl  restart httpd
- 为站点http://www.example.com创建一个虚拟主机
- 配置DocumentRoot为/var/www/virtual
- 将网页index置于Document下
- 确保zelda用户能够在/var/www/virtual下创建文件
[root@lynkser ~]# mkdir /var/www/virtual

[root@lynkser ~]# mv index.html /var/www/virtual/

[root@lynkser ~]# useradd zelda

[root@lynkser ~]# setfacl -m u:zelda:rwx /var/www/virtual/

[root@lynkser ~]# cp /usr/share/doc/httpd-2.4.6/httpd-vhosts.conf /etc/httpd/conf.d/

[root@lynkser ~]# vim /etc/httpd/conf.d/httpd-vhosts.conf

# VirtualHost example:

# Almost any Apache directive may go into a VirtualHost container.

# The first VirtualHost section is used for all requests that do not

# VirtualHost example:

# Almost any Apache directive may go into a VirtualHost container.

# The first VirtualHost section is used for all requests that do not

# match a ServerName or ServerAlias in any <VirtualHost> block.

#

<VirtualHost *:80>

    DocumentRoot "/var/www/html"

    ServerName server30.example.com

</VirtualHost>

<VirtualHost *:80>

    DocumentRoot "/var/www/virtual"

    ServerName www.example.com

</VirtualHost>

[root@lynkser tls]# systemctl  restart httpd
- 在server上的web服务器的DocumentRoot目录下创建一个名为private的目录,将已有的index.html文件放入这个1文件夹
- 在server上,任何人都可以浏览private的内容,但是从其他系统不能访问这个目录的内容
[root@lynkser ~]# mkdir /var/www/html/private

[root@lynkser ~]# mv index.html /var/www/html/private

<VirtualHost *:80>

    DocumentRoot "/var/www/html"

    ServerName server30.example.com

    <Directory "/var/www/html/private">

        Require ip 192.168.26.129

    </Directory>

</VirtualHost>

[root@lynkser tls]# systemctl  restart httpd
- 在server上实现动态web内容,动态内容有名为alt.example.com的虚拟主机提供
- 虚拟主机侦听端口为8909
- 动态内容使用脚本webapp.wsgi
13.客户端访问http://alt.example.com.8909时,应该收到动态生成的web页面
14.此http://alt.example.com.8909必须能被192.168.26.0/24内的所有系统访问
[root@lynkser ~]# mkdir /var/www/wsgi

[root@lynkser ~]# mv webapp.wsgi /var/www/wsgi

[root@lynkser ~]# vim /etc/httpd/conf.d/httpd-vhosts.conf

Listen 8909

<VirtualHost *:8909>

    WSGIScriptAlias / "/var/www/wsgi/webapp.wsgi"

    ServerName alt.example.com

</VirtualHost>

[root@lynkser ~]# yum install -y mod_wsgi

[root@lynkser ~]#  yum -y install policycoreutils-python

[root@lynkser ~]# semanage port -a -t http_port_t -p tcp 8909

[root@lynkser ~]# semanage port -l|grep http

http_cache_port_t              tcp      8080, 8118, 8123, 10001-10010

http_cache_port_t              udp      3130

http_port_t                    tcp      8909, 80, 81, 443, 488, 8008, 8009, 8443, 9000

pegasus_http_port_t            tcp      5988

pegasus_https_port_t           tcp      5989

[root@lynkser ~]# systemctl restart htpd

[root@lynkser ~]# firewall-cmd --add-rich-rule 'rule family=ipv4 source address=192.168.26.0/24 port protocol=tcp port=8909 accept' --permanent

success

[root@lynkser ~]# firewall-cmd --reload

success
httpd安装与配置(编译安装)的更多相关文章
- net-snmp-5.7.3配置编译安装
net-snmp-5.7.3配置编译安装 [TOC] 先看一下系统环境 o@o-pc:~/work/_snmp/net-snmp-5.7.3$ uname -a Linux o-pc 3.16.0-3 ...
- Linux内核分析(一)---linux体系简介|内核源码简介|内核配置编译安装
原文:Linux内核分析(一)---linux体系简介|内核源码简介|内核配置编译安装 Linux内核分析(一) 从本篇博文开始我将对linux内核进行学习和分析,整个过程必将十分艰辛,但我会坚持到底 ...
- Redis安装与配置Redis安装与配置
今天在使用Redis的时候遇到了一些问题,这个问题的解决,发现很多人使用Redis的时候没有一点安全意识.所以又重温了一下Redis,觉得应该写一下Redis的安全和配置. Redis安装与配置Red ...
- swoole模块的编译安装:php编译安装swoole模块的代码
本篇文章给大家带来的内容是关于swoole模块的编译安装:php编译安装swoole模块的代码,有一定的参考价值,有需要的朋友可以参考一下,希望对你有所帮助. 1.下载swoole 1 wget ht ...
- Dynamics AX 2012 R3 Demo 安装与配置 - 编译和配置 (Step 3)
在前两节中,Reinhard主要讲解了如何配置安装环境,安装数据库服务器,AOS和客户端.至此安装工作已经结束,下面Reinhard开始讲解如何编译和配置. 运行客户端后,系统弹出初始 ...
- 【嵌入式开发】 Linux Kernel 下载 配置 编译 安装 及 驱动简介
作者 : 韩曙亮 转载请出名出处 : http://blog.csdn.net/shulianghan/article/details/38636827 一. Linux 内核简介 1. 内核功能简介 ...
- 编译安装php5 解决编译安装的php加载不了gd
1. 编译安装php需要的模块: yum install libxml2-devel libxml2 curl curl-devel libpng-devel libpng openssl o ...
- Centos7:yum安装apache,编译安装php5.6,不解析php的解决方法
首先,说一下问题发生的场景: 因为懒,所以用 yum 安装 apache ,因为 centos 的源自带 php 5.4 不能符合环境要求,而不想用其他源,所以选择源码编译安装 php 5.6 安装完 ...
- mac:Go安装和配置+GoLand安装和使用之完整教程
前言 作为一个go语言程序员,觉得自己有义务为go新手开一条更简单便捷的上手之路.纵使网上教程很多,但总不尽人意.go的入门门槛还是非常低的,无论是安装还是使用. go安装 go 语言支持以下系统: ...
随机推荐
- 前端-JavaScript1-2——JavaScript建立认知
关于首篇的“ Hello world ! ”这事儿吧,挺有意思,就是学习任何的语言,我们都喜欢在屏幕上直接输出一点什么,当做最简单.最基本的案例.输出什么大家随意,但是很多人都习惯输出“hello w ...
- Kubernetes Kubelet安全认证连接Apiserver
Kubelet使用安全认证连接Apiserver,可以用Token或证书连接.配置步骤如下. 1,生成Token命令 head -c /dev/urandom | od -An -t x | tr - ...
- Python发送微信消息
针对此 需要安装itchat第三方模块 采用pip安装就可以了 pip install itchat import itchatimport time#引入时间函数进行测试time_format= ...
- Django_admin组件
1.Django_admin组件的意义 作者:Eric 微信:loveoracle11g 新建Django项目bms图书管理系统 App为book book/models.py添加表关系 from d ...
- 高阶函数map_reduce_sorted_filter
能够把函数当成参数传递的参数就是高阶函数 map map: 功能: 拿iterable的每一个元素放入func中, func的返回值放入迭代器内进行返回 参数: iterable, func 返回: ...
- 用kettle从mysql中使用存储过程读取数据写入到sqlserver数据库
1.mysql存储过程,可以实现动态表读取,满足较为复杂的业务逻辑 DROP PROCEDURE if exists p_get_car_trace; delimiter // CREATE PROC ...
- 保存数据到Excel中
调用的方法传值 Export(dt, "Cal_Report_" + DateTime.Now.ToString("yyyyMMddhhmmss") + &qu ...
- 【亲测】关于HTTP协议~
如果有一点点基本的开发者工具基础知识,我们知道:Elements是用来查看网页结构的,也就是可以看到整体的HTML语言:Console是控制台,Network是请求想相应状态. 1)一个Name就是一 ...
- MySQL 存储修改
真的坑.
- SOA和微服务的原则及对比
一.面向服务设计的原则 服务可复用:不管是否存在即时复用的机会,服务均被设计为支持潜在的可复用 服务共享一个标准契约:为了与服务提供者交互,消费者需要导入服务提供者的服务契约,这个契约可以是一个IDL ...