
Animations使用01 BrowserAnimationsModule
1 基础知识
1.1 动画
就是从一个状态过渡到另外一个状态
1.2 状态
元素本身的形状、颜色、大小等
1.3 Angular中的动画
给元素添加一个触发器,当这个触发器被触发后就会让该元素的状态发生变化,其中状态用state表示,状态之间的转变用transition表示
2 如何使用BrowserAnimationsModule
2.1 下载 animations 依赖库
cnpm install --save @angular/animations
2.2 在模块级别导入 BrowserAnimationsModule
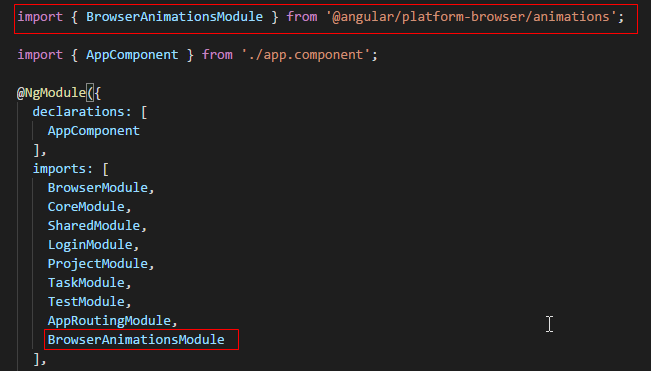
import { BrowserModule } from '@angular/platform-browser';

import { NgModule } from '@angular/core';

import { CoreModule } from './core/core.module';

import { SharedModule } from './shared/shared.module';

import { LoginModule } from './login/login.module';

import { ProjectModule } from './project/project.module';

import { TaskModule } from './task/task.module';

import { TestModule } from './test/test.module';

import { AppRoutingModule } from './app-routing.module';

import { BrowserAnimationsModule } from '@angular/platform-browser/animations';

import { AppComponent } from './app.component';

@NgModule({

  declarations: [

    AppComponent

  ],

  imports: [

    BrowserModule,

    CoreModule,

    SharedModule,

    LoginModule,

    ProjectModule,

    TaskModule,

    TestModule,

    AppRoutingModule,

    BrowserAnimationsModule

  ],

  providers: [],

  bootstrap: [AppComponent]

})

export class AppModule { }
2.2 在需要用到animations动画的组件中定义触发器trigger、状态state、过渡transition
技巧01:一个组件可以对应多个触发器,一个触发器对应多个状态,两个状态之间对应一个过渡
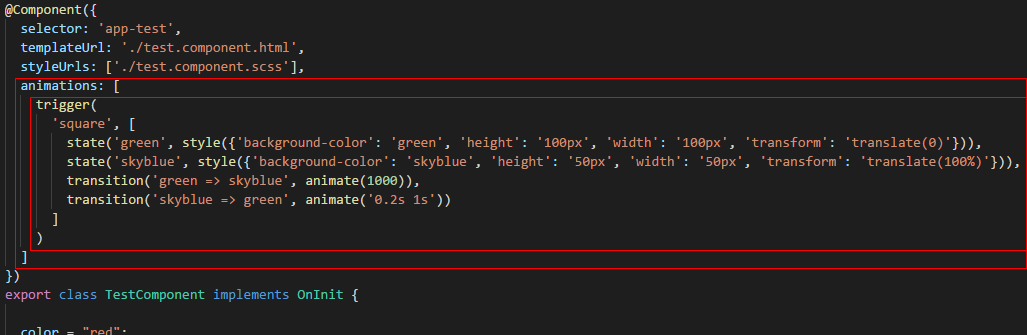
技巧01: trigger、state、style、transition、animate都是方法
技巧02:animate方法时用来控制过渡时间的,它如果之传入一个数字型的参数时表示过渡时间,如果传入一个有空格分割字符时空格前的部分表示过渡时间,空格后面的部分表示暂停时间
import { Component, OnInit } from '@angular/core';

import { MdDialog, MD_DIALOG_DATA, MdDialogRef } from '@angular/material';

import { Test02Component } from '../test02/test02.component';

import { ConfirmDialogComponent } from '../../shared/confirm-dialog/confirm-dialog.component'

import { trigger, state, transition, style, animate} from '@angular/animations';

@Component({

  selector: 'app-test',

  templateUrl: './test.component.html',

  styleUrls: ['./test.component.scss'],

  animations: [

    trigger(

      'square', [

        state('green', style({'background-color': 'green', 'height': '100px', 'width': '100px', 'transform': 'translate(0)'})),

        state('skyblue', style({'background-color': 'skyblue', 'height': '50px', 'width': '50px', 'transform': 'translate(100%)'})),

        transition('green => skyblue', animate(1000)),

        transition('skyblue => green', animate('0.2s 1s'))

      ]

    )

  ]

})

export class TestComponent implements OnInit {

  color = "red";

  squareState: string;

  constructor(

    private dialog: MdDialog

  ) { }

  ngOnInit() {}

  onChangeClick() {

    this.squareState = this.squareState === 'skyblue' ? 'green' : 'skyblue';

  }

  openNewProjectDialog() {

    const dialogRef = this.dialog.open(Test02Component, {

      height: `400px`,

      width: '400px',

      data: `hello world`

    });

    dialogRef.afterClosed().subscribe(result => console.log(result));

  }

  onClick(value: string) {

    alert(`你点击了 -> ${value}`);

  }

  onTest01() {

    this.dialog.open(ConfirmDialogComponent, {

      data: {

        title: '确认对话框',

        content:  '测试确认对话框的内容'

      }

    });

    alert('测试确认对话框');

  }

}
2.3 元素如何同触发器进行绑定

<h3>GridList</h3>

<div class="box">

  <md-grid-list cols="4">

    <md-grid-tile>

      <md-grid-tile-header>页眉</md-grid-tile-header>

      <md-icon>menu</md-icon>测试01

      <md-grid-tile-footer>页脚</md-grid-tile-footer>

    </md-grid-tile>

  </md-grid-list>

</div>

<hr />

<h3>Dialog</h3>

<div class="box">

  <button class="fab-button" md-fab type="button" (click)="openNewProjectDialog()" color="primary">

      <md-icon>add</md-icon>

  </button>

</div>

<h3>Menu</h3>

<div class="box">

  <button class="fab-button" md-fab type="button"  color="accent" [mdMenuTriggerFor]="testMenu">

      <md-icon>menu</md-icon>

  </button>

  <md-menu #testMenu="mdMenu">

    <button md-menu-item (click)="onClick('刷新按钮')">

      <md-icon>autorenew</md-icon>

      <span>刷新</span>

    </button>

    <button md-menu-item (click)="onClick('设置按钮')">

      <md-icon>settings</md-icon>

      <span>设置</span>

    </button>

  </md-menu>

</div>

<h3>Radio</h3>

<div class="box">

  <md-radio-group>

    <md-radio-button value="1">男</md-radio-button>

    <md-radio-button value="2">女</md-radio-button>

  </md-radio-group>

</div>

<h3>日期</h3>

<div class="box">

  <md-input-container class="full-width">

    <input mdInput type="text" placeholder="日期测试" [mdDatepicker]="datepicker" />

    <button type="button" mdPrefix [mdDatepickerToggle]="datepicker"></button>

  </md-input-container>

  <md-datepicker #datepicker></md-datepicker>

</div>

<h3>对话框</h3>

<div class="box">

  <button type="button" md-raised-button (click)="onTest01()">确认对话框</button>

</div>

<h3>动画</h3>

<div class="box">

  <div class="square" [@square]="squareState" (click)="onChangeClick()">

  </div>

</div>
md-grid-tile {

    background-color: skyblue;

}

.box {

    border-top: 1px solid red;

    border-bottom: 1px solid red;

}

hr {

    border: 2px solid green;

}

.square {

    height: 400px;

    width: 400px;

    background-color: skyblue;

}
CSS
2.4 效果展示
2.4.1 原始状态
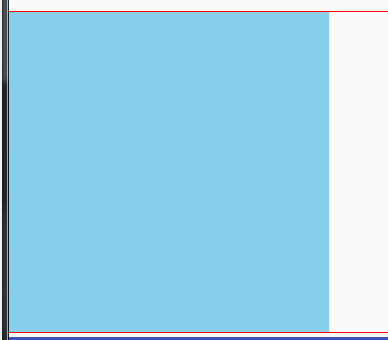
2.4.2 skyblue状态

2..4.3 green状态
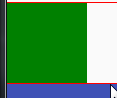
3 animate方法高级用法
animate方法除了支持暂停外还支持缓动函数和关键帧函数
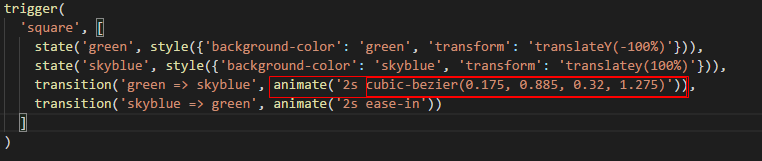
3.1 在animate方法中利用缓动函数
技巧01:不是所有的缓动函数CSS都支持,而animations动画是基于CSS的,所以animations动画不支持所有的缓动函数

代码解释:
ease-in:表示从状态1变化到状态2是刚开始时比较慢然后比较快
ease-out:表示从状态1变化到状态2刚开始时比较快然后比较慢
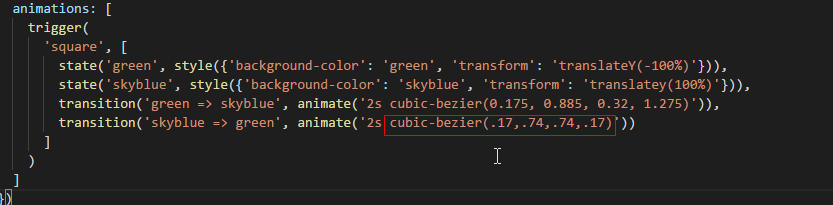
技巧01:利用欢动函数来实现ease-in和ease-out的效果
缓动函数速查表:点击前往
自定义缓存函数:点击前往
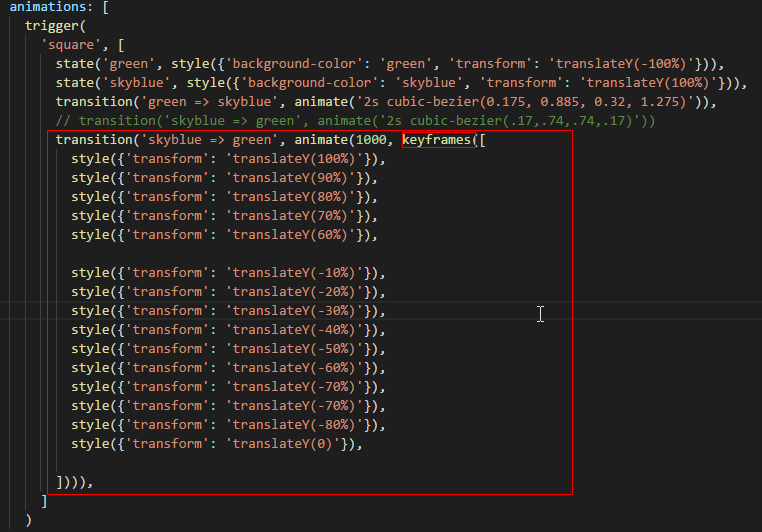
3.2 在animate方法中利用关键帧函数
帧:动画中最小单位的单幅影响画面
关键帧:物体运动或变化中的关键动作出所在的那一帧
3.2.1 导入关键帧函数

3.2.2 在animate方法中使用关键帧函数
import { Component, OnInit } from '@angular/core';

import { MdDialog, MD_DIALOG_DATA, MdDialogRef } from '@angular/material';

import { Test02Component } from '../test02/test02.component';

import { ConfirmDialogComponent } from '../../shared/confirm-dialog/confirm-dialog.component'

import { trigger, state, transition, style, animate, keyframes} from '@angular/animations';

@Component({

  selector: 'app-test',

  templateUrl: './test.component.html',

  styleUrls: ['./test.component.scss'],

  animations: [

    trigger(

      'square', [

        state('green', style({'background-color': 'green', 'transform': 'translateY(-100%)'})),

        state('skyblue', style({'background-color': 'skyblue', 'transform': 'translateY(100%)'})),

        transition('green => skyblue', animate('2s cubic-bezier(0.175, 0.885, 0.32, 1.275)')),

        // transition('skyblue => green', animate('2s cubic-bezier(.17,.74,.74,.17)'))

        transition('skyblue => green', animate(1000, keyframes([

          style({'transform': 'translateY(100%)'}),

          style({'transform': 'translateY(90%)'}),

          style({'transform': 'translateY(80%)'}),

          style({'transform': 'translateY(70%)'}),

          style({'transform': 'translateY(60%)'}),

          style({'transform': 'translateY(-10%)'}),

          style({'transform': 'translateY(-20%)'}),

          style({'transform': 'translateY(-30%)'}),

          style({'transform': 'translateY(-40%)'}),

          style({'transform': 'translateY(-50%)'}),

          style({'transform': 'translateY(-60%)'}),

          style({'transform': 'translateY(-70%)'}),

          style({'transform': 'translateY(-70%)'}),

          style({'transform': 'translateY(-80%)'}),

          style({'transform': 'translateY(0)'}),

        ]))),

      ]

    )

  ]

})

export class TestComponent implements OnInit {

  color = "red";

  squareState: string;

  constructor(

    private dialog: MdDialog

  ) { }

  ngOnInit() {}

  onChangeClick() {

    this.squareState = this.squareState === 'skyblue' ? 'green' : 'skyblue';

  }

  openNewProjectDialog() {

    const dialogRef = this.dialog.open(Test02Component, {

      height: `400px`,

      width: '400px',

      data: `hello world`

    });

    dialogRef.afterClosed().subscribe(result => console.log(result));

  }

  onClick(value: string) {

    alert(`你点击了 -> ${value}`);

  }

  onTest01() {

    this.dialog.open(ConfirmDialogComponent, {

      data: {

        title: '确认对话框',

        content:  '测试确认对话框的内容'

      }

    });

    alert('测试确认对话框');

  }

}
Animations使用01 BrowserAnimationsModule的更多相关文章
- Ionic2 App Import BrowserAnimationsModule or NoopAnimationsModule问题
在开发app的过程中遇见了动画相关方面的问题,具体如下: 解决方法是:在app.module.ts模块中引入BrowserAnimationsModule import { BrowserAnimat ...
- Angular4.0.0发布总览文章
翻译自angular.io上的关于4.0.0版本发布的文章,内容主要是介绍了4.0.0版本下的改进以及接下来还会有的其他更新,4.0.0其实已经出来好多天了,截止目前都已经到了4.0.1版本了,这也是 ...
- Angular 小试牛刀[1]:Getting Started
首先,Angular2 与 Angular1.x 版本没有多大关系,甚至可以说是两个完全不一样的框架,故 Angular 指的是 Angular2 及以上的版本.而 Angular 与 TypeScr ...
- Angular CLI 安装和使用
1.背景介绍 关于Angular版本,Angular官方已经统一命名Angular 1.x同一为Angular JS:Angular 2.x及以上统称Angular: CLI是Command Line ...
- Ant Design of Angular
1.按照官方的方法,报了这个 node_modules/rxjs/internal/types.d.ts(81,74): error TS1005: ';' expected.node_modules ...
- angular项目中使用angular-material2
Step 1: Install Angular Material and Angular CDK npm install --save @angular/material @angular/cdk n ...
- Angular6项目搭建
参照 草根专栏- ASP.NET Core + Ng6 实战:https://v.qq.com/x/page/b076702elvw.html 安装工具: Nodejs, npm 最新版, h ...
- Angular Material & Hello World
前言 Angular Material(下称Material)的组件样式至少是可以满足一般的个人开发需求(我真是毫无设计天赋),也是Angular官方推荐的组件.我们通过用这个UI库来快速实现自己的i ...
- Angular2/Ionic2集成Promact/md2.md
最近想找一套比较完整的基于Material风格的Angular2的控件库,有两个选择一个是Angular官方的Material2,但是这套库的DatePicker控件目前只能支持年月日,不支持时分秒, ...
随机推荐
- jsonpath对json数据进行分析校验做接口测试
在做接口测试的时候, 我们需要对返回的数据进行分析校验, 一般返回的都是json格式的数据, 怎么来解析校验呢? 之前有看过使用递归遍历json数据的, 然后找到了jsonpath, 可以很方便的对j ...
- Hadoop 2.x简介
Hadoop 2.0产生背景 Hadoop1.0中HDFS和MapReduce在高可用.扩展性等方面存在问题 HDFS存在的问题 NameNode单点故障,难以应用于在线场景 NameNode压力过大 ...
- Qt窗口屏幕居中显示
转自--> http://blog.chinaunix.net/uid-20718335-id-364404.html 窗口的屏幕居中显示问题,在各开发工具中原理相同,首先使用特定的方法得到显示 ...
- codevs 1299 切水果 线段树
1299 切水果 时间限制: 1 s 空间限制: 128000 KB 题目描述 Description 简单的说,一共N个水果排成一排,切M次,每次切[L,R]区间的所有水果(可能有的水果 ...
- matlab之sub2ind()函数
将下标转换为线性索引 语法 linearInd = sub2ind(matrixSize, rowSub, colSub) 说明 linearInd = sub2ind(matrixSize, row ...
- 英语发音规则---th
英语发音规则---th 一.总结 一句话总结: th发/ð/音的情况:a.在th后以字母-er结尾的单词中:b.在代词.冠词.介词.连词或副词中的字母组合th th发/θ/音的情况:a.在数词(包括基 ...
- 分享知识-快乐自己:JS 检查元素是否含有某种css样式
第一种 原生 JS: ************************************************************* 结构部分: <div> <p> ...
- PHP+MySQL百万级数据插入的优化
插入分析 MySQL中插入一个记录需要的时间由下列因素组成,其中的数字表示大约比例: 连接:(3) 发送查询给服务器:(2) 分析查询:(2) 插入记录:(1x记录大小) 插入索引:(1x索引) 关闭 ...
- Git_错误_03_ Git提交时显示用户 unknown
这是因为没有设置用户名 $ git config --global user.name "your_name" $ git config --global user.email & ...
- 实现两个窗口通信方法-postMessage
此方案可解决跨域而且跨Iframe,而且http和https之间的交互 首先来看一下基本的语法 otherWindow.postMessage(message, targetOrigin, [tran ...