02.vue-router的进阶使用
关键字:路由懒加载,全局导航守卫,组件导航守卫,redirect重定向,keep-alive,params,query
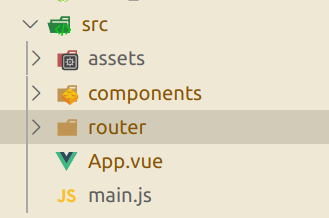
一、目录结构

二、index.js
 // 配置路由相关的信息

 import VueRouter from 'vue-router'

 import Vue from 'vue'

 // 一般加载方法

 // import Home from '../components/Home'

 // import About from '../components/About'

 // import User from '../components/User'

 // 路由懒加载方法(ES6)

 const Home = () => import('../components/Home');

 const HomeNews = () => import("../components/HomeNews");

 const HomeMessage = () => import("../components/HomeMessage");

 const About = () => import("../components/About");

 const User = () => import('../components/User');

 const Profile = () => import('../components/Profile');

 // 1.通过Vue.use(插件), 安装插件

 Vue.use(VueRouter);

 // 2.创建VueRouter对象

 const routes = [

   {

     path: '',

     // redirect重定向(到默认页面)

     // redirect: '/home'

     redirect: '/home',

     meta:{

       title: '首页'

     }

   },

   {

     path: '/home',

     component: Home,

     meta : {

       title: '首页'

     },

     children: [

       {

         path: '',

         redirect: "news",

       },

       {

         path: 'news',

         component: HomeNews,

       },

       {

         path: "message",

         component: HomeMessage,

       },

     ]

   },

   {

     path: '/about',

     component: About,

     meta: {

       title: "关于"

     }

   },

   {

     path: '/user/:userId',

     component: User,

     meta:{

       title: '用户'

     }

   },

   {

     path: '/profile',

     component: Profile,

     meta: {

       title: '档案'

     }

   }

 ];

 const router = new VueRouter({

   // 配置路由和组件之间的应用关系

   routes,

   // mode: 'history',默认是hash

   mode: 'history',

   // linkActiveClass: 'active'

   // 统一简化class-active成active

   linkActiveClass: "active"

 });

 // guard (守卫,警卫)

 // 全局导航守卫,传一个函数

 // 前置守卫(也叫前置钩子hook)

 router.beforeEach((to,from,next) => {

   // 从from路由跳到to路由

   // to就是meta的对象

   document.title = to.matched[0].meta.title;

   console.log("前置导航守卫");

   // 原先会自动执行next(),但我们现在重新创建了beforeEach,所以必须手动执行下next(),

   next()

 });

 // 全局后置钩子

 router.afterEach(()=>{

   console.log("后置导航守卫");

 });

 // 3.将router对象传入到Vue实例

 export default router
三、main.js
 import Vue from 'vue'

 import App from './App'

 import router from './router'

 Vue.config.productionTip = false;

 // 全局Vue类下定义一个实例,可全局访问

 Vue.prototype.Test001 = function () {

   console.log("Test001")

 };

 Vue.prototype.Name001 = "zwnsyw";

 new Vue({

   el: '#app',

   router,

   render: h => h(App)

 })
四、App.vue
 <template>

   <div id="app">

     <h2>我是APP组件</h2>

     <!-- tag(定义渲染成什么标签)、replace(浏览器返回按钮不可用) 、active-class(活跃时添加class类active)-->

     <!--<router-link to="/home" tag="button" replace active-class="active">首页</router-link>-->

     <!--<router-link to="/about" tag="button" replace active-class="active">关于</router-link>-->

     <!--<router-link to="/home" tag="button" replace>首页</router-link>-->

     <!--<router-link to="/about" tag="button" replace>关于</router-link>-->

 <!--    <button @click="homeClick">首页</button>-->

 <!--    <button @click="aboutClick">关于</button>-->

     <router-link to="/home" tag="button" replace>首页</router-link>

     <router-link to="/about" tag="button" replace>关于</router-link>

     <router-link v-bind:to="'/user/'+userId">用户</router-link>

 <!--    <router-link :to="{path: '/profile',query:{name: 'zwnsyw', age: 18, height: 1.88}}">档案</router-link>-->

     <button @click="profileClick">档案</button>

 <!--    保持活跃状态,不要每次都重新创建-->

 <!--    excloud是排除某些控件,让这些控件频繁的创建和销毁,两个之间不可加空格-->

     <keep-alive exclude="Profile,User">

       <router-view></router-view>

     </keep-alive>

   </div>

 </template>

 <script>

 export default {

   name: 'App',

   data(){

     return {

       userId: "lisi",

       img: 'http'

     }

   },

   methods: {

     homeClick() {

       // 通过代码的方式修改路由 vue-router

       // push => pushState

       // this.$router.push('/home')

       this.$router.replace('/home')

       console.log('homeClick');

     },

     aboutClick() {

       // this.$router.push('/about')

       this.$router.replace('/about')

       // this.$router.push('/about')

       console.log('aboutClick');

     },

     profileClick(){

       this.$router.push({

         path: '/profile',

         query: {

           name: 'kobe',

           age: '45',

           height: '1.98'

         }

       })

     }

   }

 }

 </script>

 <style>

   /*.router-link-active {*/

     /*color: #f00;*/

   /*}*/

   .active {

     color: #f00;

   }

 </style>
五、Home.vue
 <template>

   <div>

     <h2>我是首页</h2>

     <p>我是首页内容, 哈哈哈</p>

     <router-link to="/home/news">新闻</router-link>

     <router-link to="/home/message">消息</router-link>

     <router-view></router-view>

   </div>

 </template>

 <script>

   export default {

     name: "Home",

     data(){

       return{

         path: "/home/news"

       }

     },

     // 这两个函数,只有该组件被保持了状态,使用了keep-alive时,才是有效的

     // 组件活跃的时候回调

     activated() {

       this.$router.push(this.path);

       console.log("activated");

     },

     // 组件不活跃,销毁的时候回调

     deactivated(){

       console.log("deactivated");

     },

     // 组件导航守卫

     beforeRouteLeave(to , from, next){

       this.path = this.$route.path;

       next()

     },

   }

 </script>

 <style scoped>

 </style>
 <template>

   <div>

     <ul>

       <li>消息1</li>

       <li>消息2</li>

       <li>消息3</li>

       <li>消息4</li>

     </ul>

   </div>

 </template>

 <script>

   export default {

     name: "HomeMessage"

   }

 </script>

 <style scoped>

 </style>
HomeMessage
 <template>

   <div>

 <!--    ul>li{新闻$}*4-->

     <ul>

       <li>新闻1</li>

       <li>新闻2</li>

       <li>新闻3</li>

       <li>新闻4</li>

     </ul>

     <button @click="btn_test">访问自定义全局实例</button>

   </div>

 </template>

 <script>

   export default {

     name: "Homenews",

     methods:{

       btn_test(){

         console.log(this.Test001());

         console.log(this.Name001)

       }

     }

   }

 </script>

 <style scoped>

 </style>
Homenews
六、About.vue
 <template>

   <div>

     <h2>我是关于</h2>

     <p>我是关于内容, 呵呵呵</p>

   </div>

 </template>

 <script>

   export default {

     name: "About"

   }

 </script>

 <style scoped>

 </style>
七、User.vue
 <template>

   <div>

     <h2>我是用户</h2>

     <p>我是用户内容,嘿嘿嘿</p>

     <h2>{{userId}}</h2>

     <h2>{{$route.params.userId}}</h2>

   </div>

 </template>

 <script>

   export default {

     name: "User",

     computed:{

       userId(){

         // 所有的组件都继承于Vue类的原型

         // route 拿到的是当前活跃的路由对象

         // router 拿到的是index.js里面new出来的总路由对象

         return this.$route.params.userId  // parameters(参数)

       }

     }

   }

 </script>

 <style scoped>

 </style>
八、Profile.vue
 <template>

 <div>

   <h2>我是Profile组件</h2>

   <h2>{{$route.query}}</h2>

   <h2>{{$route.query.name}}</h2>

   <h2>{{$route.query.age}}</h2>

   <h2>{{$route.query.height}}</h2>

 </div>

 </template>

 <script>

   export default {

     name: "Profile"

   }

 </script>

 <style scoped>

 </style>
02.vue-router的进阶使用的更多相关文章
- 「进阶篇」Vue Router 核心原理解析
前言 此篇为进阶篇,希望读者有 Vue.js,Vue Router 的使用经验,并对 Vue.js 核心原理有简单了解: 不会大篇幅手撕源码,会贴最核心的源码,对应的官方仓库源码地址会放到超上,可以配 ...
- vue Router——进阶篇
vue Router--基础篇 1.导航守卫 正如其名,vue-router 提供的导航守卫主要用来通过跳转或取消的方式守卫导航.有多种机会植入路由导航过程中:全局的, 单个路由独享的, 或者组件级的 ...
- Vue 2.0 + Vue Router + Vuex
用 Vue.js 2.x 与相配套的 Vue Router.Vuex 搭建了一个最基本的后台管理系统的骨架. 当然先要安装 node.js(包括了 npm).vue-cli 项目结构如图所示: ass ...
- vue router 只需要这么几步
<!DOCTYPE html><html lang="en"><head> <meta charset="UTF-8" ...
- Vue.js 2.x笔记:路由Vue Router(6)
1. Vue Router简介与安装 1.1 Vue Router简介 Vue Router 是 Vue.js 官方的路由管理器.它和 Vue.js 的核心深度集成,构建单页面应用. Vue Rout ...
- Vue Router学习笔记
前端的路由:一个地址对应一个组件 Vue Router中文文档 一.路由基本使用 第1步:导入Vue Router: <script src="https://unpkg.com/vu ...
- vue router.push(),router.replace(),router.go()和router.replace后需要返回两次的问题
转载:https://www.cnblogs.com/lwwen/p/7245083.html https://blog.csdn.net/qq_15385627/article/details/83 ...
- 前端MVC Vue2学习总结(八)——Vue Router路由、Vuex状态管理、Element-UI
一.Vue Router路由 二.Vuex状态管理 三.Element-UI Element-UI是饿了么前端团队推出的一款基于Vue.js 2.0 的桌面端UI框架,手机端有对应框架是 Mint U ...
- 深入浅出的webpack4构建工具---webpack+vue+router 按需加载页面(十五)
1. 为什么需要按需加载? 对于vue单页应用来讲,我们常见的做法把页面上所有的代码都打包到一个bundle.js文件内,但是随着项目越来越大,文件越来越多的情况下,那么bundle.js文件也会越来 ...
- 深入浅出的webpack构建工具--webpack4+vue+router项目架构(十四)
阅读目录 一:vue-router是什么? 二:vue-router的实现原理 三:vue-router使用及代码配置 四:理解vue设置路由导航的两种方法. 五:理解动态路由和命名视图 六:理解嵌套 ...
随机推荐
- 使用vue实现购物车功能
页面效果图: html代码: <div class="shop-car" id='car'> <div class="count-custom" ...
- Unity2D模拟控制位移
using UnityEngine; using System.Collections; public class PlayerController : MonoBehaviour { public ...
- css概述二
四.尺寸和边框 1.尺寸属性 ①作用 设置元素的宽度和高度 ②属性 width:宽度 max-width:最大宽度 min-width:最小宽度 height:高度 max-height: min-h ...
- UVa 11529
题目大意:见刘汝佳<算法竞赛入门经典——训练指南>P173 解题思路: 先求出对于每一个点,有多少个三角形包含它,把各个点得到的数值加起来的总和除以 C[n][3] 即可得出答案.对于每一 ...
- MongoDB快速入门指南与docker-compose快体验
MongoDB快速入门指南与docker-compose快体验 MongoDB相对于RDBMS的优势 模式少 -MongoDB是一个文档数据库,其中一个集合包含不同的文档.一个文档之间的字段数,内容和 ...
- linux DRM/KMS 测试工具 modetest、kmscude、igt-gpu-tools (二)
kmscube kmscube is a little demonstration program for how to drive bare metal graphics without a c ...
- vscode格式化Vue出现的问题:单引号变双引号 格式化去掉分号
学习vue框架时,发现在使用vscode格式化vue代码时,出现单引号变成了双引号问题(导致和EsLint要求不一致),从而导致报错!!!!好坑啊!!! 解决方法如下 在文件根目录下创建 .prett ...
- MyBatis——com.mysql.cj.exceptions.InvalidConnectionAttributeException
报错信息 Loading class `com.mysql.jdbc.Driver'. This is deprecated. The new driver class is `com.mysql.c ...
- tp5插入百万条数据处理优化
<?php namespace app\index\controller; use think\Controller; use think\Db; class Charu extends Con ...
- HDFS设计思想、元数据、简单JAVAAPI操作HDFS
一. 设计思路 分布式文件系统 在Hadoop中文件系统是一个顶层的抽象. 分布式文件系统相当与对文件系统进行了一个扩展(类似于java中的接口). HDFS是分布式文件系统的一个实现,分布式文件系统 ...